
Remove, change, and fasten
Follow these general instructions for removing, changing, and fastening bands.
Make sure that you use a band that corresponds to your Apple Watch case size. You can use a band that’s designed for Apple Watch (1st generation) or Apple Watch Series 1, 2, and 3 with Apple Watch Series 4, Apple Watch Series 5, Apple Watch SE, and Apple Watch Series 6, as long as the sizes are compatible. Bands for 38mm and 40mm cases work with each other, and bands for 42mm and 44mm cases work with each other.
Most bands designed for Apple Watch Series 4, Apple Watch Series 5, Apple Watch SE, and Apple Watch Series 6 work with any previous version of Apple Watch. The Solo Loop and Braided Solo Loop bands are designed specifically for Apple Watch Series 4, Apple Watch Series 5, Apple Watch SE, and Apple Watch Series 6. Bands designed for early Apple Watch models also work with Apple Watch Series 4, Apple Watch Series 5, Apple Watch SE, and Apple Watch Series 6.
Remove and change bands
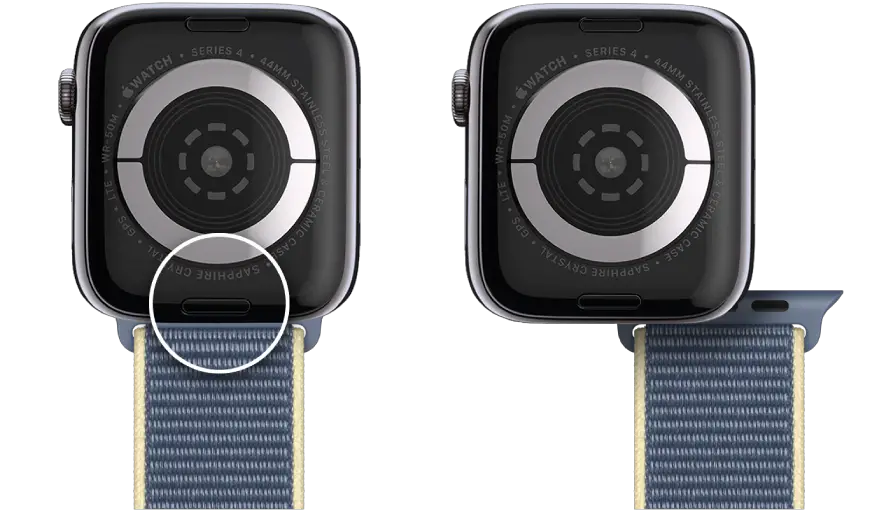
- Press the band release button on your Apple Watch.
- Slide the band across to remove it, then slide the new band in.
Never force a band into the slot. If you’re having trouble removing or inserting a band, press the band release button again.
Fasten a band
For optimal performance, your Apple Watch should fit closely on your wrist.
For best results, the back of your Apple Watch needs skin contact for features like wrist detection, haptic notifications, and the heart rate sensor. Wearing your Apple Watch with the right fit—not too tight, not too loose, and with room for your skin to breathe—keeps you comfortable and lets the sensors do their job. In addition, the sensors work only when you wear your Apple Watch on the top of your wrist.
For more information, see the Apple Support articles Wearing your Apple Watch and Change your Apple Watch band.