B0340WST2H2R-V7 Outdoor Sensor
Product Information:
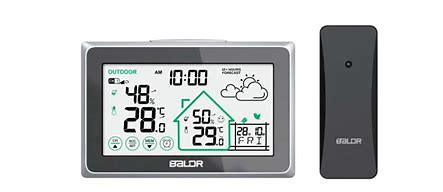
The Outdoor Sensor is a device that provides temperature and
humidity readings for outdoor conditions. It consists of a display
console and a remote sensor. The display console requires 3 AAA
batteries, while the remote sensor requires 2 AA batteries. The
device uses wireless communication to transmit data between the
display console and the remote sensor.
Product Usage Instructions:
- Power Up:
- Remove the battery door on the back of the display
console. - Insert 3 new AAA batteries into the back of the display
console, ensuring correct battery polarity. - Take out the metal stand inside the battery compartment and
screw it into the hole at the back of the main unit. - Replace the battery door.
- Remove the battery door of the remote sensor.
- Set the channel of the sensor to CH1.
- Insert 2 new AA batteries into the back of the sensor within 3
minutes.
- Remove the battery door on the back of the display
- Troubleshooting Guide:If the outdoor sensor signal is lost or showing dashes (- -) on
the display, follow these steps:- Resync the unit by pressing and holding the CH/ button for 5-6
seconds. The sensor search icon will flash while searching and
become solid when the sensor signal is received. Wait for several
minutes for the sensor to report in or for the search icon to turn
off. - If synchronization fails, bring the sensor within 10 feet of
the weather station and try the following:- Ensure that both the display console and sensor are placed at
least 3ft/0.9m away from electronics that may interfere with
wireless communication, such as computers, TVs, microwaves, and
other wireless transmitters or receivers. - Make sure the sensor is not transmitting through solid metal or
thick walls, as radio frequency sensors cannot transmit through
these barriers.
- Ensure that both the display console and sensor are placed at
- Resync the unit by pressing and holding the CH/ button for 5-6
- Outdoor Temperature and Humidity:The weather station cycles through the values of 3 channels
every 10 seconds. To exit the cycle mode, press the CH/ button. - Inaccurate Readings:If the temperature reads too high in the daytime or if indoor
and outdoor temperature/humidity do not agree, follow these
steps:- Ensure that both the display console and sensor are placed out
of direct sunlight and away from any heat sources or vents. - Allow up to two hours for the sensor to stabilize due to signal
and filtering. The indoor and outdoor temperature should agree
within 4 units, and indoor and outdoor humidity should agree within
10%.
- Ensure that both the display console and sensor are placed out
- Inaccurate Weather Forecast:The weather forecast provided by the device is an estimate or
generalization of weather changes in the next 12 to 24 hours, with
an accuracy rate of about 70-75%. It should not be relied upon as
an accurate method to predict weather. - Display Console Contrast:If the display console contrast is weak, replace the batteries
with a new set. - Incorrect Weekday:To select the correct year, press and hold the RCC/SET
button.
View Fullscreen
OUTDOOR SENSOR QUICK SET-UP GUIDE
NOTE: Prepare new and high quality alkaline batteries. Do not mix old and new batteries. Heavy duty or rechargeable batteries are not recommended.
1. POWER UP Please must follow the bellow steps to power on the device, otherwise outdoor sensor may not receive readings.
Step 1: Remove the battery door on the back of the display, insert 3 new AAA batteries in the back of the display console (please take note of the battery polarity before inserting the batteries).
Note: The display will beep once and all of the LCD segments will light up for few seconds to verify all segments are operating properly, then display indoor temperature and humidity immediately.
Step 2: Take out the metal stand inside the battery compartment and screw it into the hole at the main unit backside. Replace the battery door. Step 3: Remove the battery door of remote sensor, and set the channel of sensor to CH1, then insert 2 new AA batteries in the back of the sensor within 3 MINUTES.
Note: Make sure outside sensor and weather station main unit are at the same channel. Do not touch any buttons until the remote sensor reports in, otherwise the remote sensor searching will be terminated. When the remote sensor data has been received, all further settings can be performed. The display main unit will automatically receive remote sensor signal when sensor is powered up. The receiving status will last for max 3 minutes ( signal sensor will flash), if no signal received within 3 minutes, it will stop receiving, now you can press and hold the “CH/” Button 3 seconds to start receiving outside signal again.
2. TROUBLESHOOTING GUIDE
Problem Outdoor sensor signal is lost or showing dashes (- -) on the display
Possible Solution 1. Resync the unit. Press and hold the “CH/” button for 5-6 seconds to resynchronize. The sensor search icon will flash while searching and be solid when sensor signal is received. Please wait several minutes for the sensor to report in or the search icon to turn off. 2. If you regain connection while the sensor is mounted, great. If the the synchronization fails, bring the sensor within 10 feet of the weather station and try the bellow methods:
1) Remove the batteries of Sensor, wait 10 seconds. Then press and hold the “CH/” button for 5-6 seconds, then reinsert the batteries of sensor. (Please make sure the sensor and display console have the same channel.) 2) Factory Restart: Firstly remove all the batteries of sensor and display console. Then set the channel of Sensor to “CH1”. Reinsert the batteries of display console and press “CH/” button to choose “CH1″. Then reinsert the batteries of sensor, allow the whole set device to sit together for 30 minutes to establish a strong connection.
3. Make sure both display console and sensor are placed at least
3ft/0.9m away from electronics that may interfere with the
wireless communication, such as computers, TVs, microwaves,
other wireless transmitters or receivers, etc.
4. Make sure the sensor is not transmitting through solid metal or
thick walls. Radio Frequency (RF) Sensors cannot transmit through
metal barriers or thick walls. (Please refer REMOTE SENSOR
INSTALLATION)
Outdoor temperature ” ” cycle symbol means that weather station enter channels
and humidity always cycle mode, it will display the values of 3 channels in order every
keep cycling/how to 10 seconds.
exit the CYCLE mode
Press the “CH/” button to cancel cycle symbol.
Temperature reads too Make sure both the display console and sensor are placed out of
high in the daytime
direct sunlight and away from any heat sources or vents.
Indoor and outdoor Allow up to two hours for the sensor to stabilize due to signal
temperature
and filtering. The indoor and outdoor temperature sensor should
humidity do not agree agree within 4. And indoor and outdoor humidity sensor should
agree within 10%.
Inaccurate weather The weather forecast is an estimate or generalization of weather
forecast
changes in the next 12 to 24 hours, with an accuracy rate of about
70-75%. It is simply a tool for projecting weather conditions and is
never to be relied upon as an accurate method to predict weather.
Display console contrast Battery is low, replace a new set of batteries.
is weak
Incorrect
weekday Press and hold “RCC/SET” button to select the correct Year (year
display
range: 2000-2099).
If your BALDR weather station still can’t be worked well after trying the above
troubleshooting steps, please contact the seller on your order page or email us by
[email protected], or message us via WhatsApp: +8618664978063 for help.
