![]()
BLACK DECKER RC506 6 Cup Rice Cooker User Manual

WELCOME!
Congratulations on your purchase of the Black+Decker™ Rice Cooker. We have developed this use and care guide to ensure optimal performance and your satisfaction. Save this use and care book and register your appliance online at
www.prodprotect.com/blackanddecker.
Please Read and Save this Use and Care Book.
IMPORTANT SAFEGUARDS.
When using electrical appliances, basic safety precautions should always be followed to reduce the risk of fire, electric shock, and/or injury, including the following:
- Read all instructions.
- Do not touch hot surfaces. Use handles or knobs.
- To protect against electrical shock, do not immerse the cord, plug, or base unit in water or other liquid.
- Close supervision is necessary when any appliance is used by or near children.
- Do not operate the appliance with a damaged cord or plug, or after the appliance malfunctions or has been damaged in any manner. Contact Consumer Support at the toll-free number listed in the warranty section.
- The use of accessory attachments not recommended by this appliance the manufacturer may cause injuries.
- Do not use outdoors.
- Do not let the cord hang over the edge of the table or counter, or touch hot surfaces.
- Do not place on or near a hot gas or electric burner, or in a heated oven.
- Extreme caution must be used when moving an appliance containing hot oil or other hot liquids.
- To disconnect, press the control switch upwards (the WARM indicator light will illuminate) and then remove the plug from the outlet.
- Do not use appliances other than intended use.
- Unplug from outlet when not in use and before cleaning. Allow cooling before putting on or taking off parts.
- The appliance is not intended to be operated by means of an external timer or separate remote control system.
- Do not use this appliance on an unstable surface.
- Do not attempt to heat or cook nonfood items in this appliance.
- Children should be supervised to ensure that they do not play with the appliance
Additional Safeguards:
- To prevent damage or shock hazard, do not cook directly in the cooking base.
Cook only in the cooking bowl provided. - This appliance generates heat and escapes steam during use. Liftoff the glass lid carefully to avoid scalding, and allow water to drip into the cooking bowl.
- Never use the cooking bowl on a gas or electric cooktop or on an open flame.
- Do not cut foods directly in the cooking bowl to avoid scratching.
SAVE THESE INSTRUCTIONS.
This product is for household use only.
POLARIZED PLUG
This appliance has a polarized plug (one blade is wider than the other). To reduce the risk of electric shock, this plug is intended to fit into a polarized outlet only one way. If the plug does not fit fully into the outlet, reverse the plug. If it still does not fit, contact a qualified electrician. Do not attempt to modify the plugin anyway.
TAMPER-RESISTANT SCREW
Warning: This appliance is equipped with a tamper-resistant screw to prevent the removal of the outer cover. To reduce the risk of fire or electric shock, do not attempt to remove the outer cover. There are no user-serviceable parts inside. Repair should be done only by authorized service personnel. For service, repair, or any questions regarding your appliance, please call our Customer Service Line at 1-800-465-6070 (the US and Canada).
ELECTRICAL CORD
a) A short power-supply cord is provided to reduce the risks resulting from becoming entangled in or tripping over a longer cord.
b) Extension cords are available and may be used if care is exercised in their use.
c) If an extension cord is used:
1) The marked electrical rating of the extension cord should be at least as great as the electrical rating of the appliance;
2) If the appliance is of the grounded type, the extension cord should be a grounding-type 3-wire cord; and
3) The cord should be arranged so that it will not drape over the countertop or tabletop where it can be pulled on by children or tripped over.
Note: If the power cord is damaged, please contact the warranty department listed in these instructions.
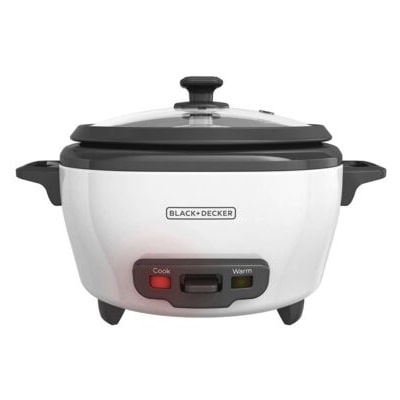
GETTING TO KNOW YOUR RICE COOKER

| 1 . Lid handle 2 . Tempered glass lid (Part# RC506-01) 3 . Cooking bowl (Part# RC506-02) 4 . Cool-touch side handles 5 . Steaming basket (Part# RC506-03) 6 . Rice measure (Part# RC514-04) |
7 . Serving spoon (Part# RC514-05) 8 . Cooking base 9 . COOK indicator light 10 . CONTROL switch 11 . WARM indicator light 12 . Steam vent 13 . Lid hanger |
Product may vary slightly from what is illustrated.
GETTING STARTED
This appliance is intended for household use only.
• Remove all packing material, any stickers, and the elastic band around the power plug.
• Go to www.prodprotect.com/blackanddecker to register your product.
• Wash all removable parts as instructed in CARE AND CLEANING.
Place the clean, dry cooking pot in the cooking base.
• Select a location where this unit is to be used. Place the unit on a stable, heat-resistant surface, free from cloth, liquids, and any other flammable materials.
Ensure that the unit has enough space all the way around and above it to allow heat to flow without damage to cabinets or walls.
IMPORTANT INFORMATION ABOUT YOUR RICE COOKER
- It is not necessary to preheat the rice cooker before use.
- The cooking bowl gets hot. When in use, always use oven mitts or potholders when touching any outer or inner surface of the appliance.
- During the first few minutes of use, you may notice smoke and a slight odor. This is caused by oil that may have been used during the manufacturing of the unit and will not impact the performance.
- Do not try to stop the rice cooker from switching to the warm mode.
- As rice cooks, steam will escape through the vent in the lid. Place the glass lid on the rice cooker so the steam vent is facing away from cabinets and walls. Do not place hand over steam vent while rice is cooking; the hot steam may burn.
- Use the plastic serving spoon (or a wooden spoon) to stir and remove the rice. Do not use metal utensils that can scratch the nonstick cooking bowl.
- Do not fill the cooking bowl higher than the highest watermarking measurement.
OPERATING YOUR RICE COOKER
- Measure desired amount of rice with the provided measuring cup and add it to the cooking bowl. The maximum amount of dry rice is 3 rice cup measures.
NOTE: When measuring uncooked rice; do not use a standard 1 cup (8 fluid oz.) measuring cup. A standard rice cup is a ¾ cup (6 fluid oz.); the same size as the provided rice measuring cup. One rice cup measure of dry rice will yield 2 standard cups of cooked rice. - Rinse the rice with water to remove any excess starch and then drain.
- For white rice, fill the cooking bowl with water to the line that matches the number of rice cups being cooked. (A) Add butter, oil, or seasonings as desired. See the cooking chart in the Helpful Hints section for additional details on water and rice measures for
different types of rice.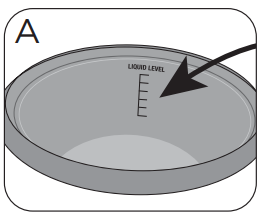
- Place the cooking pot into the cooking base and then place the lid on the pot.
- Plugin the appliance; the warm indicator light will automatically illuminate. The appliance will start heating on warm as soon as the cord is plugged into the outlet.
- Push down the control switch. The cook indicator light will illuminate and the cooking will begin.
- When the rice is ready, the control switch will flip up and turn to warm.
- For best results, allow the rice to rest on warm for 15 minutes with the lid in place. This will help further steam the rice. Always stir the rice with the serving spoon before serving.
- Unplug the appliance when not in use and always allow the rice cooker to completely cool before cleaning.

COOKING SOUPS, STEWS, AND MORE
- Add ingredients into the cooking bowl.
- Place the cooking bowl into the cooking base, then place the lid on the pot.
- Plugin the appliance; the warm indicator light will automatically illuminate. The appliance will start heating on warm as soon as the cord is plugged into the outlet.
- Push down the control switch. The cook indicator light will illuminate and the cooking will begin.
- If desired, set a kitchen timer for cooking time. Manually switch the appliance to warm when the food is ready by pushing up the control switch.
Note: The rice cooker will not switch to warm until all the liquids are boiled away. For best results, monitor cooking progress closely and do not leave the rice cooker unattended. - Unplug the appliance when not in use and always allow the rice cooker to completely cool before cleaning.
STEAMING IN THE STEAMING BASKET
- Add the cooking bowl to the cooking base and then add 3/4 cup of water into the cooking bowl; adding seasoning if desired.
- Place the foods to be steamed inside of the steaming basket and set the steaming basket inside of the cooking bowl. The water within the cooking bowl should not be touching the basket. Cover with lid and always keep id on while steaming.
- Plugin the appliance; the warm indicator light will automatically illuminate. The appliance will start heating on warm as soon as the cord is plugged into the outlet.
- Push down the control switch. The cook indicator light will illuminate and the cooking will begin.
- Steaming times vary between vegetables and other food types. Begin checking for doneness after the initial 5 minutes. See the cooking chart in the Helpful Hints section for additional details.
Note: When steaming vegetables or other foods without rice in the cooking bowl, the unit will not automatically switch to warm. - Unplug the appliance when not in use and always allow the rice cooker to completely cool before cleaning.
CLEANING AND CARE
This product contains no user-serviceable parts. Refer service to qualified service personnel.
CLEANING
Important: Never immerse the cooking base in water or other liquids.
- Always unplug the rice cooker and allow it to cool completely before cleaning.
- Wash the cooking bowl and glass lid in warm, soapy water. If food sticks to the cooking bowl, fill with warm, soapy water and allow it to soak before cleaning with a plastic scouring pad
Note: Both the cooking bowl and glass lid are dishwasher safe. - Rinse and dry thoroughly.
- Wipe the interior and exterior of the cooking base with a soft, slightly damp cloth or sponge.
Important: Never use abrasive cleaners or scouring pads to clean the cooking base, as they may damage the surfaces. - If water accidentally gets into the switch area or onto the heating plate, allow the rice cooker to dry completely before using.
STORING
Make sure that the appliance is thoroughly cool and dry. Never wrap the cord tightly around the appliance; keep it loosely coiled. Placing the lid on the upside-down for storage can help save space.
HELPFUL HINTS AND TIPS
RICE TIPS
- If rice or other foods start to boil over, remove the lid and stir for a couple of minutes. Leaving the lid off for a short period of time will allow some of the liquids to boil off and for the mixture to slightly cool. Place the lid back on the rice cooker and repeat if needed.
- Kosher salt has no impurities and dissolves faster than table salt. If using kosher salt, you may find you want to add a little more than if using table salt. About ¾ tsp . of kosher salt is recommended for each rice cup (6 fluid oz .) of uncooked rice.
- White rice can be stored in an airtight container in a cool dark place for up to one year.
- Brown rice can be stored in an airtight container in a cool dark place for up to six months. Refrigeration or freezing extends its shelf life.
- Try using broth, stock, or reconstituted bouillon in place of water for additional flavor. If you do, no additional salt may be necessary.
- Do not keep small amounts of rice in the warm cycle for extended periods of time because it can dry out the rice.
- During cooking, a thin crust may develop on the rice at the bottom of the bowl. If you do not like rice with a crust, you can easily peel it off and discard it.
- Taste/hardness will vary depending on the quality/type of rice and the length of time it is cooked. For softer, fluffier rice, add a little more water. For firmer, crunchier rice, use less water.
- For other types of grains not listed in the cooking chart, follow package directions.
ADDITIONAL USES FOR YOUR RICE COOKER
Packaged foods: condensed and ready to serve soups, pasta, and stews
- Do not fill the bowl above the largest watermarking cup level on the cooking bowl.
- For even heating, stirring occasionally.
- Always use a kitchen timer. Do not rely on the control switch on the cooker since it is not intended to be an indicator of cooking time for soups and stews.
- Use only boneless meats and poultry that are cut into cubes no larger than 1½ inches. It is not necessary to brown the meats before cooking.
- When cooking rice or pasta in the soup, add additional liquid to the recipe.
- Since most frozen vegetables cook very quickly, it is best to add them at the end of the cooking time. Stir them into the soup or stew and allow the mixture to cook for an additional 5 to 10 minutes.
- Choose recipes that will cook in 1 hour or less.
OATMEAL OR HOT CEREALS
- Steel Cut Oats work best.
- Do not fill the bowl more than halfway with liquids, as the oatmeal will expand during the cooking process.
- For even heating, stirring occasionally.
- When the oatmeal is done, the rice cooker will switch to warm.
Please note that this is for well-done oatmeal. If you prefer a different consistency, monitor the cooking process to manually switch to warm for desired results. - Choose recipes that will cook in 1 hour or less.
If desired, add seasonings and oil or butter with rice before adding water.
Allow rice to rest on warm for at least 15 minutes before serving.
| AMOUNT OF RICE | AMOUNT OF WATER | APPROX. COOKING TIME | YIELD(standard 8 oz. cups) | |||
| FOR WHITE LONG GRAIN, JASMINE, BASMATI, YELLOW, OR MEDIUM-GRAIN RICE | ||||||
| 1 rice measure | to 1 mark | 19 to 24 minutes | 1.8 cups | |||
| 2 rice measures | to 2 mark | 21 to 26 minutes | 3.5 cups | |||
| 3 rice measures | to 3 mark | 23 to 28 minutes | 5.3 cups | |||
| FOR BROWN RICE | ||||||
| 1 rice measure | 1,/2 cups | 26 to 31 minutes | 2.3 cups | |||
| 2 rice measures | 3 cups | 28 to 33 minutes | 4.5 cups | |||
For other types of grains not listed in the cooking chart, follow package directions.
CHART FOR STEAMED VEGETABLES
Steam using 1 to 1 ½ cups of water, stock, or vegetable broth (cold or room temperature).
| VEGETABLE | AMOUNT | PREPARATION | TIME | SUGGESTIONS |
| Fresh Asparagus | l/4 lb. | Wash; break off woody base where spears snap easily. | 10 to 12 minutes | Season with salt, pepper, and grated lemon peel. |
| Fresh Green Beans | l/4 lb. | Leave whole, trim end, or cut into 2-inch pieces. |
14 to 16 minutes | Season with salt, pepper, and freshly snipped dill. |
| Fresh Beets (quartered) | 1/2 lb. (about 2 medium) | Remove stem and root ends. Peel and cut into wedges. | 26 to 28 minutes | Serve with butter. |
| Fresh Broccoli | 1/2 lb. | Cut into florets. | 14 to 16 minutes | Season with salt, pepper, and grated lemon peel. |
| Brussels Sprouts | 2 cups | Cut a cross in the base of each sprout. | 24 to 26 minutes | Garnish with chopped, toasted hazelnuts. |
| Cabbage | 1/2 lb. | Cut in wedges. | 24 to 26 minutes | Garnish with crumbled, cooked bacon. |
| Carrots | 1/2 lb. | Slice. | 18 to 20 minutes |
Season with salt, pepper, and grated orange peel. |
| Cauliflower | 1/4 lb. | Cut into florets. | 22 to 25 minutes |
Garnish with buttered, toasted bread crumbs. |
| Corn | 2 ears | Cut in half. | 15 to 20 minutes |
Serve with butter and spices. |
| Snow peas or Sugar Snap Peas | l/4 lb. | Trim and leave whole. | 10 to 12 minutes | Serve with minced green onions and drizzled with soy sauce. |
| New potatoes (red) | 3 medium (about’/: lb.) | Cut in half. | 24 to 26 minutes | Toss with butter and parsley. |
| Fresh leaf spinach | 2 cups, firmly packed |
Use whole leaves. | 10 to 12 minutes | Garnish with roasted garlic and toasted pine nuts |
| Butternut squash | 2 cups | Peel and cut into 1-inch cubes. | 24 to 26 minutes | Serve with butter and spices. |
| Summer Squash (yellow squash or zucchini) |
1/2 lb. | Slice. | 14 to 16 minutes | Season with salt and garlic pepper |
| Frozen | 10 oz. to 1 lb. | Remove from bag | 16 to 18 | |
| Vegetables, including mixed vegetables such as broccoli medley, broccoli stir fry, and pepper stir fry |
and season, | minutes | ||
| Frozen peas | 1 lb. | Remove from bag. | 14 to 16 minutes | Stir in chopped, fresh mint. |
CHART FOR STEAMED FISH
Add 1 ½ cups water to the rice cooking bowl. Add 1 lemon, thickly sliced, to water.
Season fish with lemon juice and Old Bay Seasoning.
| FISH I | AMOUNT | PREPARATION | TIME | SUGGESTIONS |
| Salmon | 11 lbs. | Fillets | 24 to 26 minutes | Top with lemon slices and snipped, fresh dill. |
| Scallops | 1 lb. | Medium size | 14 to 16 minutes | Very tender; serve with tartar sauce and lemon wedges. |
| Snapper | 1 lb. | Whole, remove head and tail | 20 to 22 minutes | Drizzle with garlic, soy vinaigrette |
| Shrimp | 1 lb. (20 to 24) |
15 to 18 minutes or until shrimp turn pink | Season with seafood seasoning and lemon. | |
| Swordfish | 2 medium steaks | 15 to 17 minutes | Very tender; serve with tartar sauce and lemon wedges. |
TROUBLESHOOTING
| PROBLEM | POSSIBLE CAUSE | SOLUTION |
| Some kernels of rice do not seem fully cooked | •The rice was not allowed to finish cooking •There was not enough water in the cooking bowl. |
•Once the switch on the rice cooker automatically switches to keep warm, allow the rice to rest for 15 minutes before serving. •Add a few more tablespoons of water and cook a little longer by pushing the control switch back to cook. Check the rice again when the appliance automatically switches back to warm and has rested for 15 minutes. |
| Rice cooking bowl is not as clean as I would like. | •Starch built up on the sides and bottom of the bowl. | •Fill the bowl with hot soapy water and let stand for several minutes; then use a nylon scrubber along the sides and bottom. Rinse well. |
| Rice boils over. | •Too much rice is being cooked. •There is too much water for the amount of rice. |
•Make sure to cook no more than the maximum amount suggested in the Use and Care Manual. The amount of rice to be cooked should match the water markings on the bowl. •Add a small amount (1 Tbs.) of butter or oil to the water before cooking. |
| Rice is too dry. | •There is too much rice or not enough water. | •Use the rice measuring cup that comes with the appliance. The rice measure provided holds 3A cup (6 fluid oz.) of uncooked rice. |
| Rice is gummy. | •There is too much water or not enough rice. | •Add water to match water markings on the rice bowl. Make sure you have the correct ratio of 3A cup (6 fluid oz) rice to 1 cup watermarking. |
If additional assistance is needed, please contact our consumer service team at
1-800-465-6070.
NEED HELP?
For service, repair, or any questions regarding your appliance, please call our Customer Service Line at 1-800-465-6070. Please DO NOT return the product to the place of purchase. Also, please DO NOT mail the product back to the manufacturer, nor bring it to a service center. You may also want to consult the website listed on the cover of this pamphlet.
Warranty Information
(Applies only in the United States and Canada)
BLACK+DECKER and the BLACK+DECKER logos and product names are trademarks of The Black & Decker Corporation, used under license. All rights reserved. All other marks are Trademarks of Spectrum Brands, Inc.
Made in China.
© 2020 The Black & Decker Corporation and Spectrum Brands, Inc ., Middleton, WI 53562
27700
E/S/F
T22-5002376-D
FAQS
What does it cover?
Any defect in material or workmanship provided; however, Spectrum Brands’ liability will not exceed the purchase price of the product.
For how long?
Two years from the date of the original purchase with proof of such purchase.
What will we do to help you?
Provide you with a reasonably similar replacement product that is either new or factory refurbished.
How do you get service?
- Save your receipt as proof of date of sale.
- Visit the online service website at www.prodprotect.com/blackanddecker,or call toll-free 1-800-465-6070, for general warranty service.
- If you need parts or accessories, please call 1-800-738-0245.
How does state law relate to this warranty?
- This warranty gives you specific legal rights. You may also have other
rights that vary from state to state or province to province.
What does your warranty not cover?
- Damage from commercial use
- Damage from misuse, abuse, or neglect
- Products that have been modified in any way
- Products used or serviced outside the country of purchase
- Glass parts and other accessory items that are packed with the unit
- Shipping and handling costs associated with the replacement of the unit
- Consequential or incidental damages (Please note, however, that some states do not allow the exclusion or limitation of consequential or incidental damages, so this limitation may not apply to you .)
Are there additional warranty exclusions?
This warranty shall not be valid where it is contrary to the U.S. and other applicable laws, or where the warranty would be prohibited under any economic sanctions, export control laws, embargos, or other restrictive trade measures enforced by the United States or other applicable jurisdictions. This includes, without limitation, any warranty claims implicating parties from, or otherwise located in, Cuba, Iran, North Korea, Syria, and the disputed Crimea region.
Is it possible to make only half a cup of dry rice in this or do you need to put at least 1 cup in for it to function properly?
You can make 1/2, 3/4, 1 & 1.5 cup of uncooked rice. Any of these measurement the cooker will function properly. Important, Use the measuring cup provided. DO NOT USE OTHER CUP. The critical part is the water & rice ratio rules should be follow diligently to get good result.
Does this really cooks 8cups of raw rice?!
No. It makes 8 cups, but it’s 4 cups of raw rice.
What is the steamer insert made of and is it coated with anything?
This is the small version. It cooks at most 1 cup of rice. It has no steamer insert unless I threw it out with the box. The full size version which I also own came with a aluminum steamer insert. Just a simple pierced rack that sits about 1/2 inch above bottom.
How many adult men can the cooker provide to in one time?
Depends on how much rice they each eat. It makes two standard sized servings.
Is it auto volt? Can use either 110/220 V?
Yes. This rice cooker operates at 200 watts, 120 volts, 60 hertz, and 1.67 amps. The grill is only designed for use in a standard United States or Canadian 120 volt electrical wall outlet.
can the lid be removed while cooking rice without it turning off?
The rice cooker will remain in a warming cycle once the cooking has completed. The rice cooker will remain on until unplugged.
Removable Cooking Bowl spare? Where can one get a spare 6 cup cooking bowl please?
To place an order for parts or accessories for your Black+Decker rice cooker please contact our Consumer Service Parts Center by phone at 1-800-738-0245. We will be happy to assist you. Please refer to 42156111 when calling in.
why did i buy a 3 cup cooker for it to only be a 1.5 capacity am i missing something or should i return it?
The raw rice doubles once cooked so a 3 cup rice cooker only requires 1.5 cups of uncooked rice.
What is the ratio of water to rice for brown rice?
There is a 1:1.5 ratio of rice to water for brown rice. There will be a cooking chart in the owner’s manual, depending on the amount of service you would plan on preparing. If you need further assistance, I’d be happy to help! Please contact us at [email protected] and reference 42185819 so that we may better assist you.
8 cup cooker price is same 29 something?
This rice cooker is perfectly made to prevent spilling
How do I use my rice cooker?
Place the desired amount of rice and water in the inner cooking pan. Close the lid. Plug in the power cord. When the rice is done, the cooker will automatically switch to Keep Warm.
How do I clean my rice cooker?
Unplug your rice cooker before cleaning. Wipe the outside with a damp cloth. Never immerse your rice cooker in water or other liquid.
Use a soft-bristled brush to remove any food particles from inside the inner cooking pan and steam vent.
How do I use my rice cooker to steam vegetables?
Place 1 cup of water in the inner cooking pan, add 1 cup of vegetables, and close the lid. When done, stir and serve.
What is “regular” or “long-grain” rice? What is “short-grain” rice? What is “sweet” or “glutinous” rice? What is “basmati” or “jasmine” rice? Which kind should I use for making sushi or other Asian dishes?
There are many types of long-, short-, sweet-, glutinous-, and basmati-type rices available in various parts of the world. The type you choose depends on what you want to cook with it and how you like it cooked. For example, long-grain rices are grown in colder climates and have a higher starch content than short-grain rices, which are grown in warmer climates and have a lower starch content than long-grain rices. Short-grain rices are used for sushi because they stick together better than long-grain rices when cooked; however, they tend to be less fluffy than long-grain rices when cooked because they absorb more water during cooking than long-grain rices do. Basmati is an aromatic variety of long-grain rice that has a very distinct flavor and aroma that can be used for both savory and sweet dishes; however, it tends to be more expensive than other types of long-grain rices because it takes longer to grow (about twice as long as other varieties). Sweet rices are sticky when cooked because their starchy endosperm contains more sugar than regular white or brown rices; therefore, sweet rices must be boiled for about 20 minutes before steaming or cooking with another method because boiling helps reduce their stickiness. Glutinous rices have a high starch content similar to short-grain rices; however, unlike short-grain rices, glutinous varieties contain no amylose (a starch component) so they cannot be converted into sugars by enzymes during digestion
Why is the 6 cup cheaper than the 3 cup ?
Not sure.
Where can we get lid replacement?
Not sure!
It’s cooked 28 cup or uncooked?
You cannot cook 28 cups of rice with one use of the product.
Dose it come with a recipe book?
Yes
Any other choice of color in the black and decker?
Not sure.
The container that holds the rice, what materials is that made of?
Yes
Is the measuring cup supplied a US standard 8oz cup or smaller?
Yes. A measuring cup and a plastic stirrer.
How long will it take to cook one cup of rice?
About 20-25 minutes for white rice. Longer for brown.
Can we extra bowls for 28 cups cooker?
If you mean put in extra rice, it is not good because the cooker will run out of room and the rice will not cook properly.