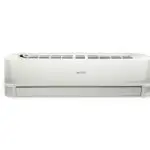
OWNER’S MANUAL

PRECAUTIONS FOR SAFETY
 |
Read the precautions in this manual carefully before operating the unit. |
 |
This appliance is filled with R32. |
■ Warning indications on the air conditioner unit
| Warning indication | Description |
 CAUTION CAUTIONBURST HAZARD Open the service valves before the operation, otherwise, there might be a burst. |
CAUTION BURST HAZARD Open the service valves before the operation, otherwise, there might be a burst. |
- Keep this manual where the operator can easily find it.
- Read the precautions in this manual carefully before operating the unit.
- This appliance is intended to be used by an expert or trained users in shops, in light industry, on farms, or for commercial use by laypersons.
- The precautions described herein are classified as DANGER, WARNING, and CAUTION. They both contain important information regarding safety. Be sure to observe all precautions without fail.
 DANGER DANGER
|
 WARNING WARNING
|
|
 CAUTION CAUTION
|
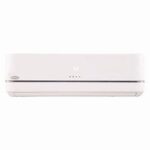
INDOOR UNIT DISPLAY

- TIMER (White)
- OPERATION (White)
- Display brightness can be adjusted, follow the procedure on !.
PREPARATION BEFORE USE
Preparing Filters
- Open the air inlet grille and remove the air filters.
- Attach the filters. (see detail in the Installation Manual).
Loading Batteries (when using wireless operation.)
- Remove the slide cover.
- Insert 2 new batteries (AAA type) following the (+) and (–) positions.

Remote Control Reset
- Remove the batteries.
- Press
 .
. - Insert the batteries.

AIRFLOW DIRECTION
| 1 | Press:  Move the louver in the desired vertical direction. Move the louver in the desired vertical direction. |
 |
| 2 | Press:  Swing the air automatically and press again to stop. Swing the air automatically and press again to stop. |
 |
| 3 | For horizontal direction, adjust manually. |  |
Note:
- Do not move the louver manually by others.
- The louver may automate positioning by some operation mode.
REMOTE CONTROL
- Infrared signal emitter
- Start/Stop button
- Mode select button (
 )
) - Temperature button (
 )
) - Fan speed button (
 )
) - Swing louver button (
 )
) - Set louver button (
 )
) - Off timer button (
 )
) - High power button (
 )
) - Economy button (
 )
) - Clear button (CLEAR)
- Check button (CHECK)

AUTOMATIC OPERATION
To automatically select cooling or fan-only operation
- Press
 : Select Auto A.
 - Press
 : Set the desired temperature. Min. 17°C, Max. 30°C
 - Press
 : Select AUTO, LOW
 LOW+
LOW+ MED
MED MED+
MED+ or HIGH
 .
.
COOLING / FAN ONLY OPERATION
- Press
 : Select Cool
 or Fan only
- Press
 : Set the desired temperature. Min. 17°C, Max. 30°C Fan Only: No temperature indication
 - Press
 : Select AUTO, LOW
 LOW+
LOW+ MED
MED MED+
MED+ or HIGH
 .
.
DRY OPERATION
For dehumidification, moderate cooling performance is controlled automatically.
1. Press  : Select Dry
 .
.
2. Press : Set the desired temperature. Min. 17°C, Max. 30°C
Note: Dry mode fan speed is set to Auto only.
Hi POWER OPERATION
To automatically control the room temperature to save energy (except in DRY and FAN ONLY mode)
Press : Start and stop the operation.
Note: Cooling operation; the set temperature will increase automatically 1 degree/ hour for 2 hours (maximum 2 degrees increase).
TIMER OPERATION
Set the timer when the air conditioner is operating.
| Setting the OFF timer | |
| 1 | Press for entering OFF timer setting. for entering OFF timer setting. |
| 2 | Press for select desired OFF timer. (0.5 – 12 hrs) for select desired OFF timer. (0.5 – 12 hrs) |
| 3 | Press for set OFF timer. for set OFF timer. |
| 4 | Press again to cancel the OFF timer. again to cancel the OFF timer. |
DISPLAY LAMP BRIGHTNESS ADJUSTMENT
To decrease the display lamp brightness or turn it off.
- Press and hold
 for 3 seconds until brightness level (
 or ) is shown on the remote control LCD then release the button.
 - Press
 Rise or Decrease
 to adjust brightness in 4 levels
Remote control LCD Operation display Brightness 
The lamp illuminates full brightness. 
100% 
The lamp illuminates at 50% brightness. 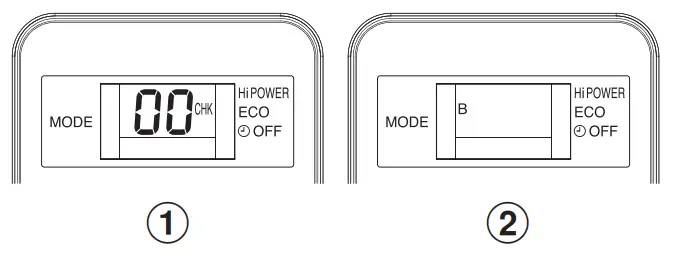
50% 
The lamp illuminates at 50% brightness and the operation lamp is turned off. 
50% 
All lamps are turned off. 
All turned off
- In the example of
 and
and , the lamp illuminates for 5 seconds before going off.
TEMPORARY OPERATION
In case of the misplaced or discharged remote control
- Pressing the RESET button, the unit can start or stop without using the remote control.
- Operation mode is set on AUTOMATIC operation, the preset temperature is 24°C and fan operation is automatic speed.

AUTO-RESTART FUNCTION SETTING
This product is designed so that, after a power failure, it can restart automatically in the same operating mode as before the power failure.
Information
The product is shipped with the Auto Restart function in the ON position.
Turn it OFF if this function is not required.
How to turn OFF the Auto Restart Function
- Press and hold the [OPERATION] button on the indoor unit for 3 seconds (3 beep sounds but the OPERATION lamp does not blink).
How to turn ON the Auto Restart Function
- Press and hold the [OPERATION] button on the indoor unit for 3 seconds (3 beep sounds and OPERATION lamp blink 5 times/sec for 5 seconds).
Note:
- In case of ON timer or OFF timer is set, AUTO RESTART OPERATION does not activate.
SELF CLEANING OPERATION (COOL AND DRY OPERATION ONLY)
To protect against bad smells caused by the humidity in the indoor unit.
1. If the  button is pressed once during “Cool” or “Dry” mode, the fan will continue to run for another 30 minutes, then it will turn off automatically. This will reduce the moisture in the indoor unit.
2. To stop the unit immediately, press the more 2 times within 30 seconds.
MAINTENANCE
![]() Firstly, turn off the circuit breaker.
Firstly, turn off the circuit breaker.
Indoor Unit and Remote Control
- Clean the indoor unit and the remote control with a wet cloth when needed.
- No benzine, thinner, polishing powder, or chemically-treated duster.
Air filters
Clean every 2 weeks.
- Open the air inlet grille.
- Remove the air filters.
- Vacuum or wash and then dry them.
- Reinstall the air filters and close the air inlet grille.
OPERATION AND PERFORMANCE
- Three-minute protection feature: To prevent the unit from being activated for 3 minutes when suddenly restarted or switched to ON.
- Some minor cracking sounds may occur when the unit operating. This is normal because the cracking sound may be caused by the expansion/ contraction of plastic.
Air conditioner operating conditions
| Temp./ Operation | Outdoor Temperature | Room Temperature |
| Cooling | 21°C ~ 43°C | 21°C ~ 32°C |
| Dry | 19°C ~ 43°C | 17°C ~ 32°C |
TROUBLESHOOTING (CHECKPOINT)
| The unit does not operate. | Cooling or Heating is abnormally low. |
| ● The power main switch is turned off. ● The circuit breaker is activated to cut off the power supply. ● Stoppage of electric current. ● ON timer is set. |
● The filters are blocked with dust. ● The temperature has been set improperly. ● The windows or doors are opened. ● The air inlet or outlet of the outdoor unit is blocked. ● The fan speed is too low. ● The operation mode is FAN or DRY. ● POWER SELECTION function is set at 75% or 50% (This function depends on the remote controller). |
REMOTE CONTROL A-B SELECTION
To separate use of remote control for each indoor unit in case of 2 air conditioner is installed nearly.
Remote Control B Setup.
- Press the RESET button on the indoor unit to turn the air conditioner ON.
- Point the remote control at the indoor unit.
- Push and hold
 the button on the Remote Control by the tip of the pencil. “00” will be shown on the display. (Picture 1)
 - Press
 during pushing.
 “B” will show on the display and “00” will disappear and the air conditioner will turn OFF. The Remote Control B is memorized. (Picture 2)
Note:
- Repeat the above step to reset Remote Control to be A.
- Remote Control A has no “A” display.
- The default setting of Remote Control from the factory is A.

AIR CONDITIONER (SPLIT TYPE)
For general public use
Indoor unit
42TSAA010, 013, 018, 025
Outdoor unit
38TSAA010, 013, 018, 025
