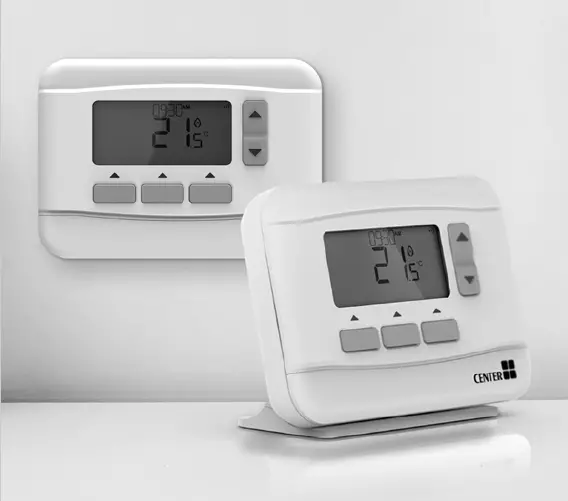
CENTER 340017 RF Wireless 7 Day Programmable Thermostats User Guide

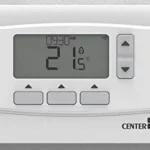
Thermostat Interface
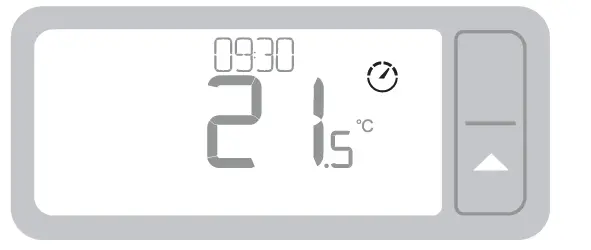
Screen and Button Overview
- Programming Menu
- Settings Menu
- Alert
- Room Temperature
- Current time
- Heat demand
- Optimization
- Low battery
- Wireless signal
- Keypad Locked
- Temperature adjust
- Right button
- Middle button
- Left button
- Schedule period
- Day
Status Icons
- Temperature Override Active: Displayed if the programmed temperature has been manually adjusted.
- Low Battery: Power has reached approximately 10% (see Changing the Batteries on page 9).
- Heat Demand: Room temperature is below setpoint – indicating there is a demand for heating (boiler activity might occur).
- Optimization Active: Only displayed if optimization has been enabled in the installer settings.
- Wireless Signal: Thermostat (Wireless only) is connected to the Receiver Box.
Menu & Navigation Icons
- Back: Return to the previous screen/menu.
- Confirm: Confirm a change or selection.
- Standby: Turns the heating on or off.
Navigating the Menu
- Press the MENU button to enter the main menu.
- Press or buttons to select a menu item – the selected item will flash.
- Press or change and advance to the next selection or press to go back to the previous selection.
Menu
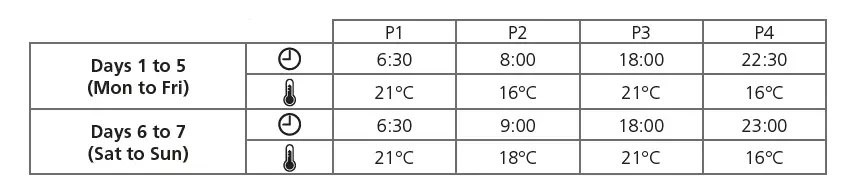
Heating Schedule
Your Thermostat comes with the following default schedule. Follow the next steps to adjust the heating schedule.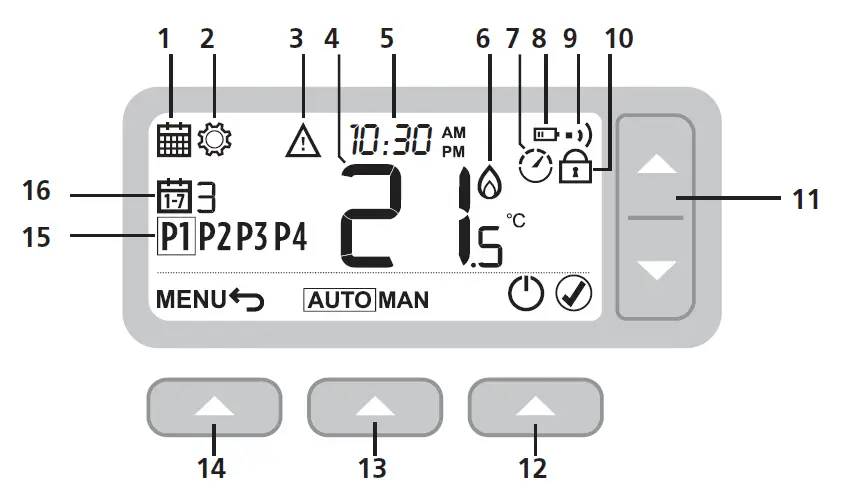
Adjusting the Schedule
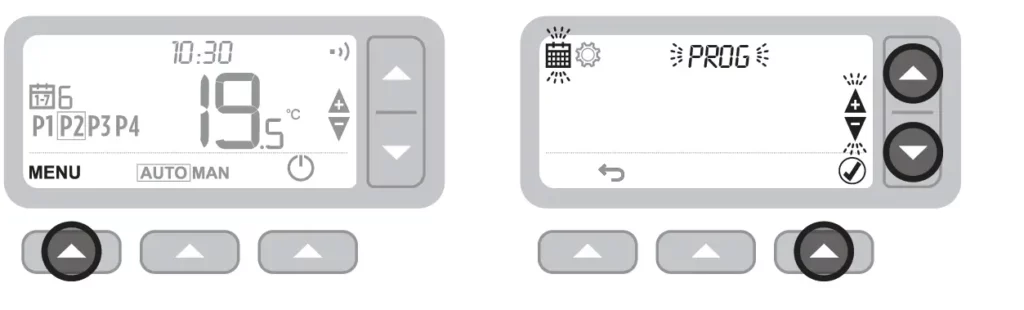
- Press MENU to enter the main menu.
- Press to select the schedule menu and press
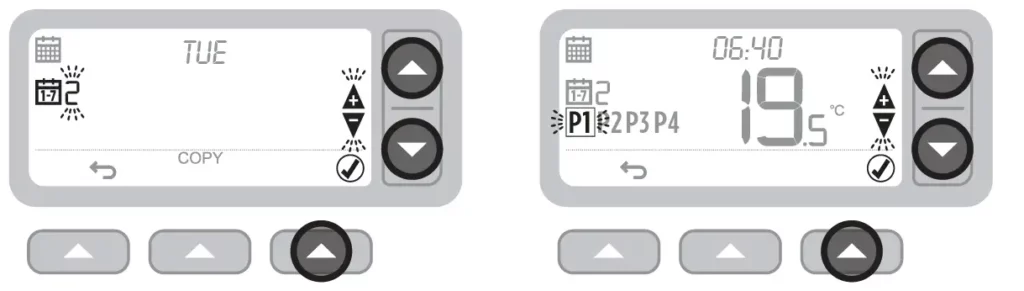
- Press or to select the day to be adjusted and press
- Press or to select the period to be adjusted and press
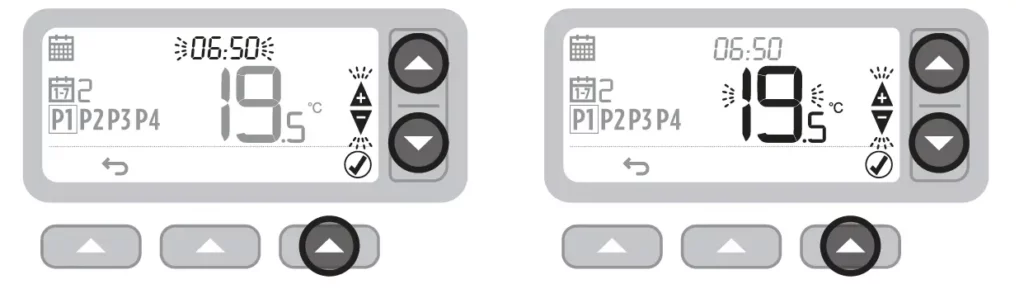
- Press to adjust the time and press
- Press or to adjust the temperature and press
- Repeat these steps to make adjustments to the remaining periods and days – or press to save changes and return to the home screen.
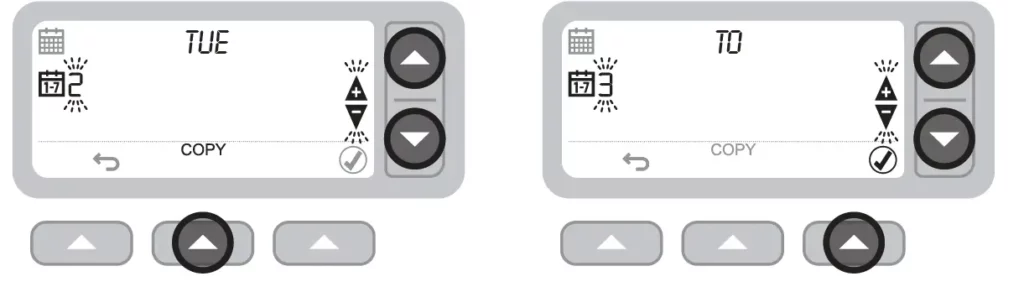
Copy Schedule
- Press or to choose the day you want to copy the schedule from and press COPY
- Press or to choose the day you want to copy the schedule to and press
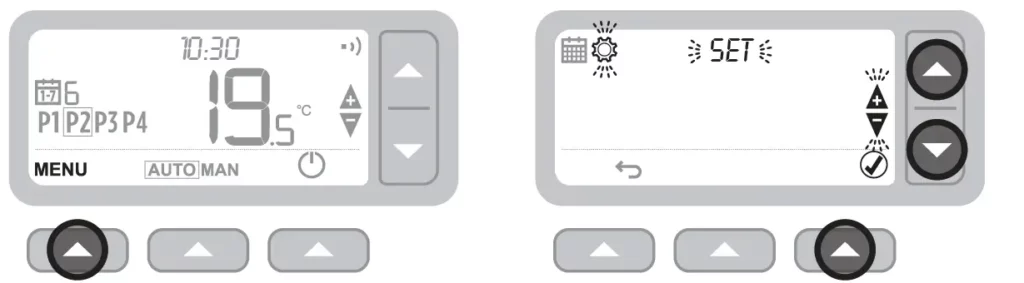
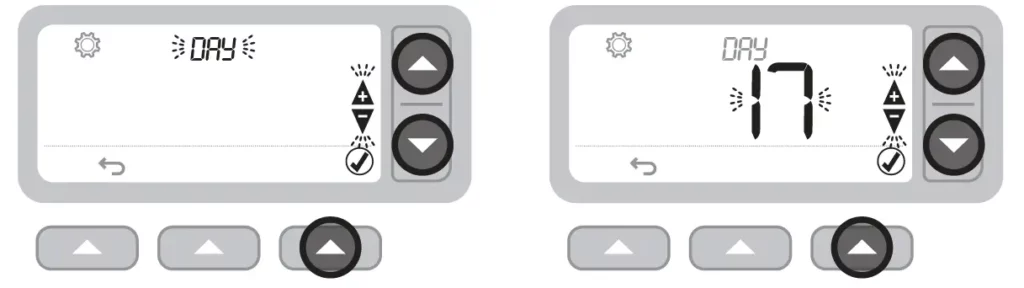
Settings (Date & Time)
- Press MENU to enter the main menu.
- Press to select the settings menu SET and press
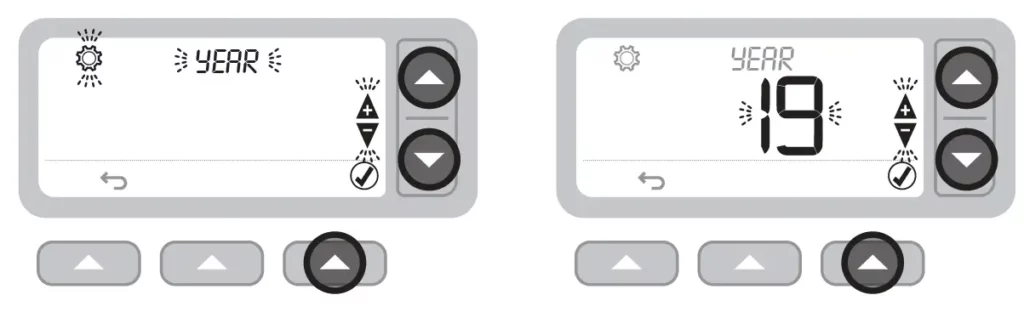
- Press o select YEAR to skip forward to MONTH
- Press to adjust the YEAR and press
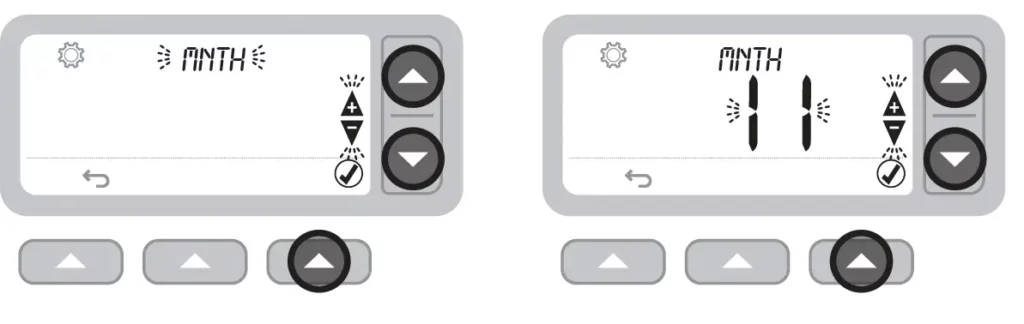
- Press to select MONTH to skip forward to DAY)
- Press to adjust the MONTH and press
- Press to select DAY to skip forward to HOUR
- Press to adjust the DAY and press
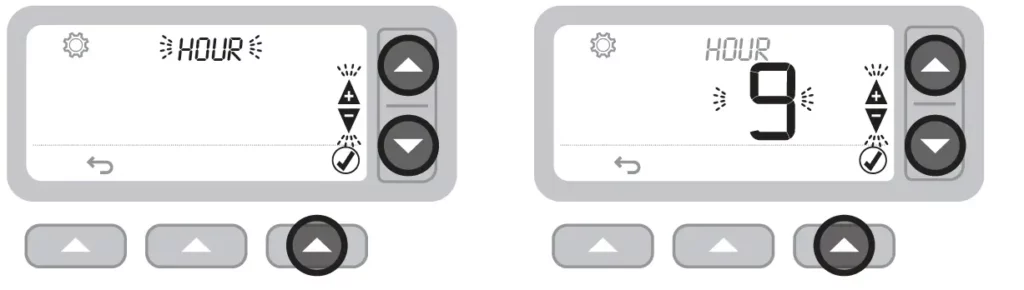
- Press to select HOUR to skip forward to MINUT
- Press to adjust the HOUR and press
- Press to exit SETTINGS and return to the home screen
- Press MINUTE and press
- Press or to adjust the MINUTE and press
Devices Modes
Automatic Operation
During normal use your Thermostat will follow the programmed schedule – indicated by the icon.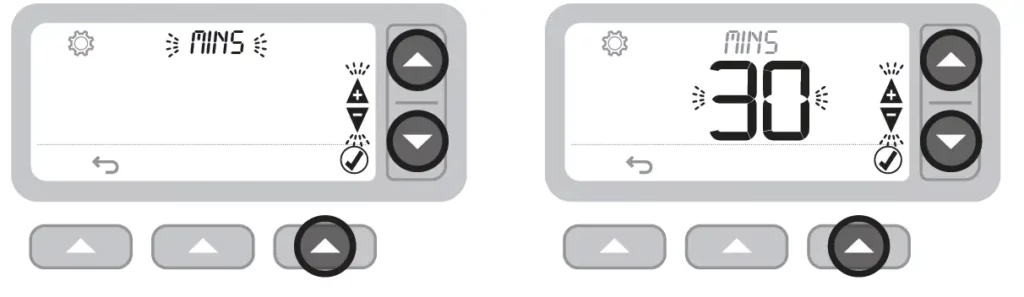
Manual Operation
The set temperature is followed permanently – indicated by the icon.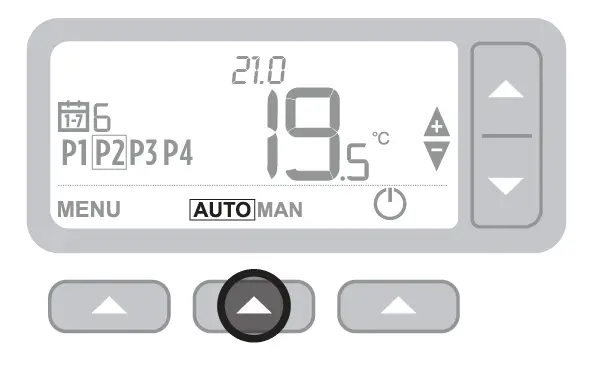
Temporary override
Press the or set the new desired temperature. The programmed schedule will resume at the next programmed setpoint.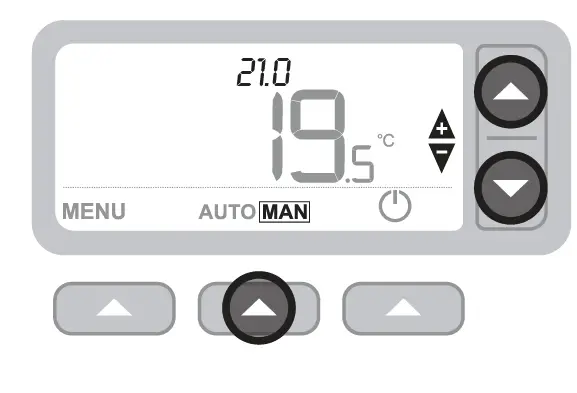
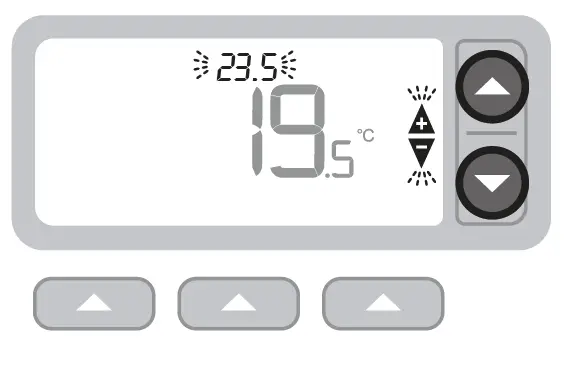
Permanent override
Press the or buttons to adjust the set temperature. This temperature is set until manually changed again.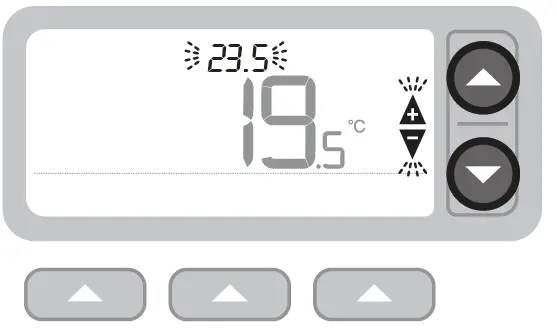
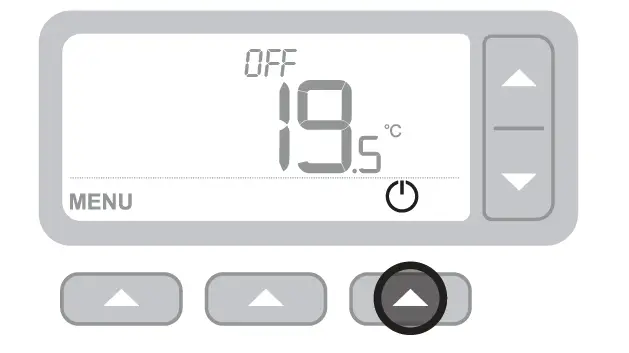
Standby mode (with frost protection)
Save energy by switching the heating off when not required – e.g. during warmer summer months, or when doors and windows are open for extended periods of time. If the temperature drops to 5°C the heating will come on to prevent the heating pipes from freezing.
- Press to switch the heating off – the display will show OFF
- Press a gain to switch the heating on – the display will show
Optimization
Your Thermostat has optimization functions that aim to save energy while maintaining suitable comfort levels. The Thermostat displays during the optimization period if set. By default optimisation is disabled, see instructions on the installation guide on how to activate it.
- Optimum Start learns how long it takes your home to reach a set temperature and then turns the heating on a bit earlier to achieve that temperature at the programmed time.
- Optimum Stop saves energy by switching off a little bit earlier than the programmed time. If your home is up to temperature, you will not notice the effect on the temperature, but you should see a difference in your fuel bill.
Changing the Batteries
The Thermostat is powered by 2 x AA batteries, although a battery icon is not shown on the display during normal use. The only time you will see the battery icon is when they become low on power.
- is displayed when battery power has reached approximately 10% – you should be prepared to change them soon.
- will flash when battery power has become critically low – you should change them immediately to make sure there is no disruption to your heating system.
- Replace with 2 new 1.5V LR6 AA Alkaline batteries only – which should last approximately 2 years depending on Thermostat use.
Please help to protect the environment by recycling old batteries in accordance with local regulations.
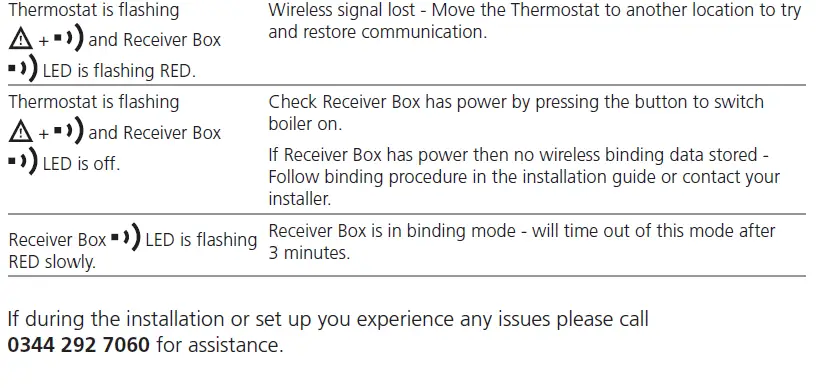
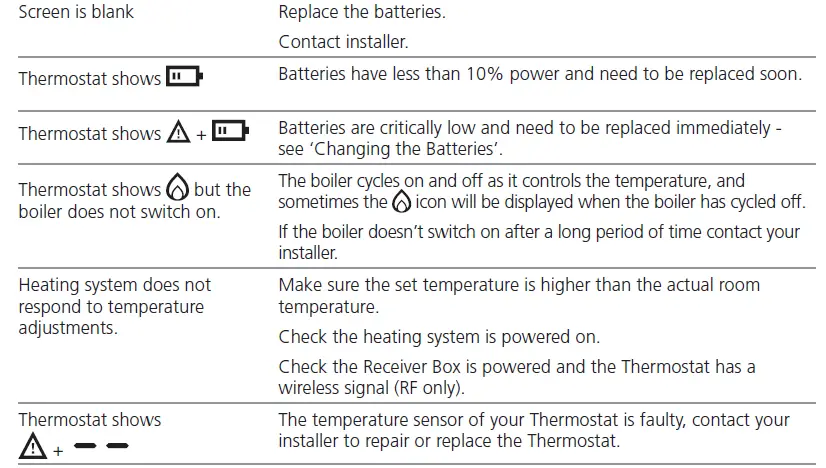
Troubleshooting
If you have difficulty with your Thermostat, try these suggestions. Most problems can be corrected quickly and easily.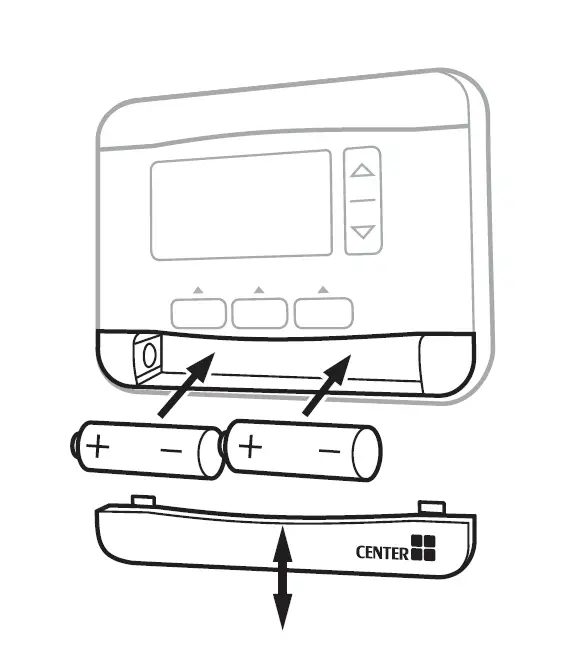
Wireless Thermostat and Receiver Box only
Documents / Resources
 |
CENTER 340017 RF Wireless 7 Day Programmable Thermostats [pdf] User Guide 340017, 340018, RF Wireless 7 Day Programmable Thermostats, 7 Day Programmable Thermostats, Programmable Thermostats, 340017, Thermostats |