
WARNING
To prevent possible SERIOUS INJURY or DEATH from a moving gate or garage door:
- ALWAYS keep remote controls out of reach of children. NEVER permit children to operate, or play with remote controls.
- Activate gate or door ONLY when it can be seen clearly, is properly adjusted and there are no obstructions to door travel.
- ALWAYS keep gate or garage door in sight until completely closed. NEVER permit anyone to cross the path of the moving gate or door.
WARNING: This product can expose you to chemicals including lead, which is known to the State of California to cause cancer or birth defects or other reproductive harm. For more information go to www.P65Warnings.ca.gov.
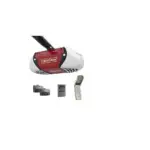
Your remote control is designed for use with garage door openers manufactured starting January 1, 1993, that have a LEARN button.
The images throughout this manual are for reference only and your product may look different.
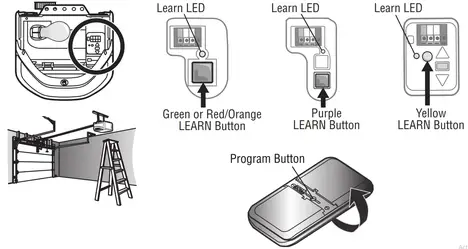
BEFORE YOU START Locate the LEARN button on the garage door opener and then locate the program button on the remote control.
IMPORTANT: The remote will activate your door or gate during programming. Be sure the door is clear of ALL obstructions. Start with the garage door closed. Make sure the garage door opener has a working light because it is a programming indicator.

PROGRAM TO GARAGE DOOR OPENERS WITH A YELLOW LEARN BUTTON
If your remote was previously programmed to another type of opener, follow the programming instructions for PROGRAM TO ALL GARAGE DOOR OPENERS
below to reprogram to a yellow LEARN button.
- Start with the garage door closed.
- Press and immediately release the yellow LEARN button. The Learn LED glows steady for 30 seconds. Within 30 seconds…
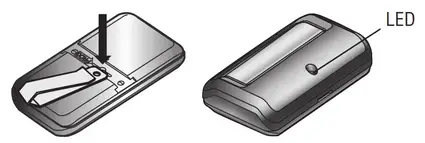
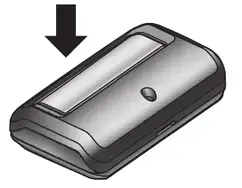
1-BUTTON REMOTE CONTROL MODEL 950EV
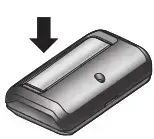
- Press and hold the button on the remote control.
- Release the button when the garage door opener lights blink or two clicks are heard.
- Test by pressing the button you just programmed. The opener activates.
PROGRAM TO ALL GARAGE DOOR OPENERS
- Press and hold the program button with the visor clip until the LED on the front of the remote control turns on.
- Press and release the remote control button the number of times that corresponds with the garage door opener type.
NOTE: Make sure the LED stops flashing between each press of the button.
| # of Presses | Garage Door Opener Type |
| 1 | Yellow LEARN Button (Security+ 2.0®) |
| 2 | Purple LEARN Button (315MHz Security+®) |
| 3 | Red/Orange LEARN Button (390MHz Security+®) |
| 4 | Green LEARN Button (390MHz Billion Code) |
- Press the program button with the visor clip until the LED on the front of the remote turns off.
- Choose from Options A, B, C, or D to complete
Option A: Program Using the Push Button Door Control
- Press and hold the light button and the push button until the push-button LED begins to blink.
- Press and hold the button on the remote until the garage door lights blink or two clicks are heard. Release the button. Programming is complete.
- Test by pressing the button you just programmed. The opener activates.
PROGRAM TO ALL GARAGE DOOR OPENERS (CONTINUED)
Option B: Program Using the Smart Control Panel 5. On the Smart Control Panel, press the MENU button.
6. Use the arrow buttons to scroll to ‘PROGRAM”. and select WI to the next screen.
7. Scroll down to ‘REMOTE.” and select
8. Press and hold the button on the remote until the garage door lights blink or two clicks are heard. Release the button. Programming is complete.
9. Test by pressing the remote control button you just programmed. The opener activates. Option C: Program Using the Multi-Function Door Control or Motion Sensing Door Control
5. On the door control. Press the LEARN button twice.
6. Press and hold the button on the remote until the garage door lights blink or two clicks are heard. Release the button. Programming is complete.
7. Test by pressing the button you just programmed. The opener activates.
Option 0: Program Using the Garage Door Opener
Option B: Program Using the Smart Control Panel
5. On the Smart Control Panel, press the MENU button.
6. Use the arrow buttons to scroll to “PROGRAM”, and select ![]() to the next screen.
to the next screen.
7. Scroll down to “REMOTE,” and select![]()
 8. Press and hold the button on the remote until the garage door lights blink or two clicks are heard. Release the button. Programming is complete.
9. Test by pressing the remote control button you just programmed. The opener activates.
Option C: Program Using the Multi-Function Door Control or Motion Sensing Door Control
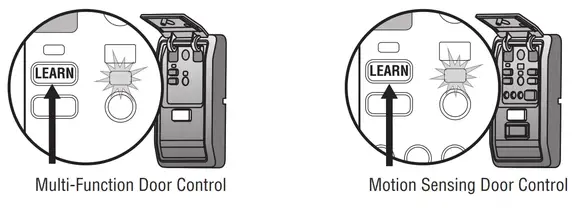 5. On the door control, press the LEARN button twice.
6. Press and hold the button on the remote until the garage door lights blink or two clicks are heard. Release the button. Programming is complete.
7. Test by pressing the button you just programmed. The opener activates.
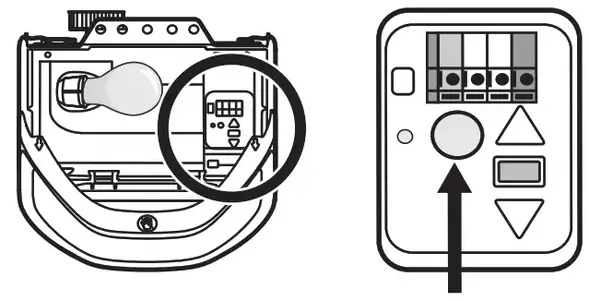
Option D: Program Using the Garage Door Opener 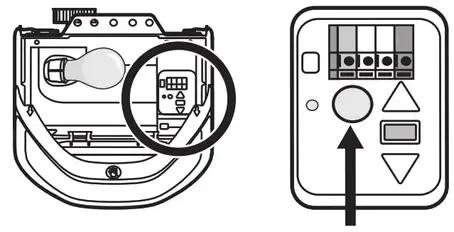
5. Press and release the LEARN button on the garage door opener. The Learn LED will light. Within 30 seconds…
6. Press and hold the remote control button until the garage door opener lights flash or two clicks are heard. Release the button. Programming is complete.
7. Test by pressing the button you just programmed. The garage door will activate.
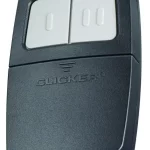
HOW TO USE THE REMOTE CONTROL
Press and hold the button until the door or other programmed device starts to move. The remote control will operate from 1 to 3 car lengths away on typical installations. Installations and conditions vary.
ERASE REMOTE CONTROL PROGRAMMING FROM THE OPENER
The following steps will erase ALL remote controls and any keyless entries from your opener.
- Press and hold the LEARN button on the garage door opener until the Learn LED turns off (approximately 6 seconds).
- Test by pressing the button on the remote control to ensure it no longer activates the opener.
- Follow programming steps to reprogram the remote control.
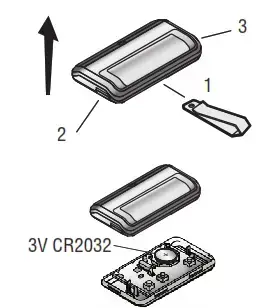
REPLACE THE REMOTE CONTROL BATTERY
WARNING
To prevent possible SERIOUS INJURY or DEATH:
- NEVER allow small children near batteries.
- If the battery is swallowed. immediately notify the doctor To reduce the risk of fire. explosion or chemical burn:
- Replace ONLY with 3V CR2032 corn batteries.
- DO NOT recharge, disassemble, heat above 212°F (100°C), or incinerate.
The lithium battery should produce power for up to 5 years. If the remote control’s LED will not flash when the button is pressed, replace the battery.
- Pry open the case with the visor clip, first in the middle (1), then at each side (2 and 3).
- Remove the old battery. Dispose of old batteries properly.
- Insert replacement batteries positive side up. Replace the batteries with only 3V CR2032 coin cell batteries.
- Replace the cover.
ONE YEAR LIMITED WARRANTY
The Chamberlain Group, Inc. warrants to the first consumer purchaser of this product that it is free from defects in materials and/or workmanship for a period of 1 year from the date of purchase.
REPLACEMENT PARTS
REPLACEMENT PARTS
| Description | Part Number |
| 3V 2032 Lithium battery | K010A0020 |
| Visor Clip | K029B0137 |
NOTICE: To comply with FCC and or Industry Canada rules (IC), adjustment or modifications of this receiver and/or transmitter are prohibited, except for changing the code setting or replacing the battery. THERE ARE NO OTHER USER-SERVICEABLE PARTS.
Tested to Comply with FCC Standards FOR HOME OR OFFICE USE. Operation is subject to the following two conditions: (1) this device may not cause harmful interference, and (2) this device must accept any interference received, including interference that may cause undesired operation.
For more information and support, go to: support.chamberlaingroup.com
© 2020, The Cahmberlain Group Inc.
114-5496-000
All Rights Reserved www.chamberlain.com