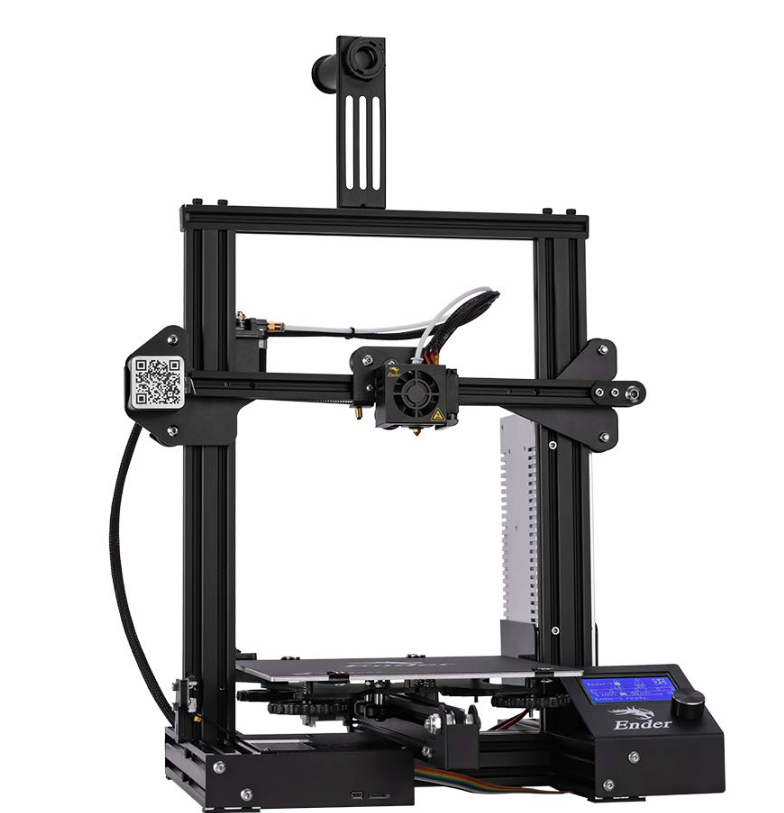
Creality Ender-3 3D Printer

Dear Consumers,
Thank you for choosing our products. For the best experience, please read the instructions before operating the Printer. Our teams will always be ready to render you the best services. Please contact us by phone number or e-mail address provided at the end when you encounter any problem with the Printer.
For a better experience in using our product, you can also learn how to use the Printer in the following ways:
View the accompanied instructions and videos in the TF Card.
Visit our official website www.creality.com to find relevant software/hardware information, contact details and operation and maintenance instructions.
A Notes
Product introduction
Spare parts
B Assemble the 3D printer
C Use the 3D printer
Start printing
Wire connection
Troubleshooting
NOTES
- Do not use the printer any way other than described herein in order to avoid personal injury or property damage.
- Do not place the printer near any heat source or flammable or explosive objects. We suggest placing it in a well-ventilated, low-dust environment.
- Do not expose the printer to violent vibration or any unstable environment, as this may cause poor print quality.
- Before using experimental or exotic filaments, we suggest using standard filaments such as ABS or PLA to calibrate and test the machine.
- Do not use any other power cable except the one supplied. Always use a grounded three-prong power outlet.
- Do not touch the nozzle or printing surface during operation as they may be hot. Keep hands away from machine while in use to avoid burns or personal injury.
- Do not wear gloves or loose clothing when operating the printer. Such cloths may become tangled in the printers moving parts leading to burns, possible bodily injury, or printer damage.
- When cleaning debris from the printer hotend, always use the provided tools. Do not touch the nozzle directly when heated. This can cause personal injury.
- Clean the printer frequently. Always turn the power off when cleaning, and wipe with a dry cloth to remove dust, adhered printing plastics or any other material off the frame, guide rails, or wheels. Use glass cleaner or isopropyl alcohol to clean the print surface before every print for consistent results.
- Children under 10 years of age should not use the printer without supervision.
- This machine is equipped with a security protection mechanism. Do not manually move the nozzle and printing platform mechanism manually while booting up, otherwise the device will automatically power off for safety.
- Users shall comply with related nation and region’s laws, regulations and ethical codes where the equipment or produced prints by it is used, and users of our product shall not use aforesaid products to print any end-use products,objects,parts or components or any other physical prints that violate the national or regional laws, regulations and ethical codes where herein referred product and produced prints by it is located.
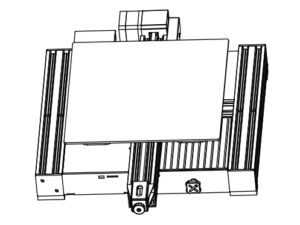
Product introduction

- XE-axis kit
- X-axis limit switch
- Print platform
- Y-axis
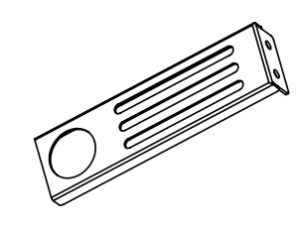
- Toolbox
- Extruded kit!
- Material rack and spool holder
- Z-axis passive block
- X-axis tensioner
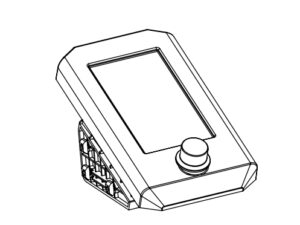
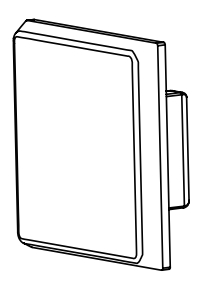
- Screen
- Knob switch
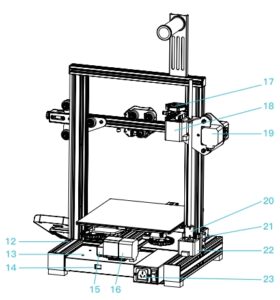
- Machine base
- Power supply
- Voltage regulator
- Y-axis limit switch
- Y-axis motor
- Indication knob!
- E-axis motor
- X-axis motor
- Coupling
- Z-axis limit switch
- Z-axis motor
- Power switch and socket

Equipment parameters
Basic Parameters
Model: Ender-3 V2
Print size: 220*220*250mm
Forming technology: FDM
Number of nozzle: 1
Layer thickness: 0.lmm-0.4mm
Nozzle diameter: Standard
X-/ axis precision: ±0.lmm
Filament: ¢1.75mm PLA
File format: STL/OBJ/AMF
Working mode: Memory card offline printing or on line printing
Compatible slicing software: 3D Creator Slicer, Repetier-Host, Cura, Simplify3D
Power specification: Input: AC 115-230V 50/60Hz Output: DC 24V
Total power: 350W
Hotbed temperature: <l00’C
Nozzle temperature: <250’C
Resume printing function: Yes
Filament sensor: No
Dual z-axis screws: No
Language switch: English
Computer operating system: Windows XP/Vista/7 /10/MAC/Linux
Print speed: <180mm/s, 30-60mm/s normally
Spare parts
- Printer base x 1
- Display kit x 1
- Extruded kit x 1

- Z-axis passive block x 1
- X-axis tensioner x 1
- Z-axis motor kit x 1
- Z-axis limit switch kit x 1

- XE axis kit x l
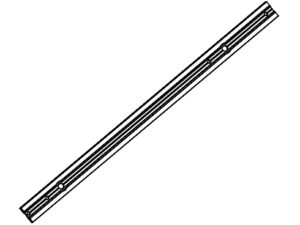
- Z-axis profile(left) x 1
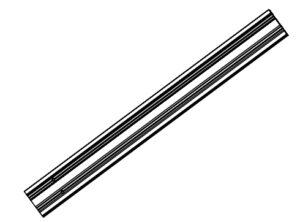
- Z-axis profile(right) x 1
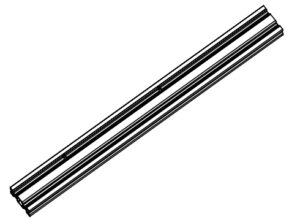
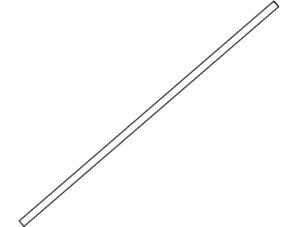
- Gantry profile x 1
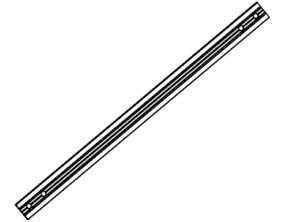
- X-axis profile x 1
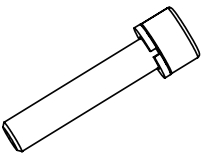
- T-type screw x 1

- Material rack
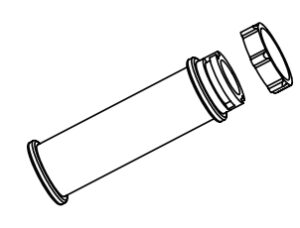
- Material pipe and nut
- 2020 profile cover x 2
- Synchronous belt x 1

- Metal blade x 1

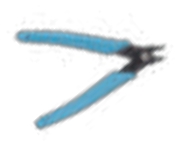
- Diagonal pliers x 1
- Cable tie x l
- Needle x l
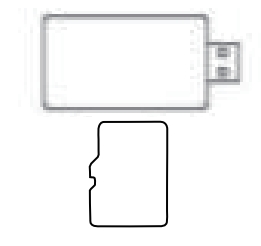
- Storage card and card reader x 1
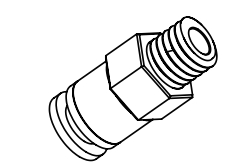
- Pneumatic joint x 2
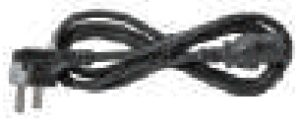
- Power cable x l
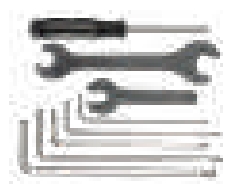
- Wrenches and screwdrivers x 1
- Blue line claw x 2

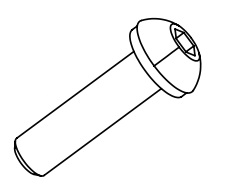
- Hexagon socket flat round head screw MSX8 x 2
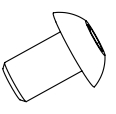
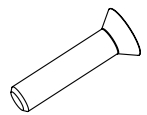
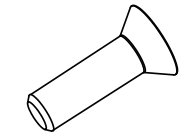
- Hexagon socket countersunk head screw M4Xl8 x 2
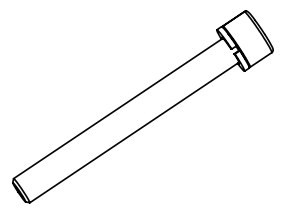
- Hexagon socket head spring washer combination screw M5X25 x 5
- MST nuts x2
- Hexagon socket head spring washer combination screw M5X45 x 5
- Hexagon socket flat round head spring washer combination screw M4Xl6 x 5
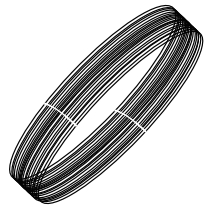
- Filament xl
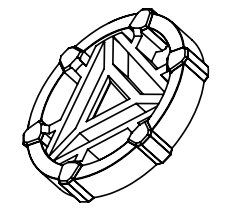
- Indication knob x 1
- Hexagon socket countersunk head screw (black) M4Xl4 x 1
- Nozzle x l


Installation of Z-axis limit switch kit and Z-axis profiles

Tip: Step: Put the endstops sensor on Z-axis (left) like the picture above. Then use the four pieces screw MSX45 to fix Z-axis with the base.
Printer base x 1

Z-axis profile(left) x 1

Z-axis profile(right) x 1
Z-axis ~mil switch kit x 1

31. Hexagon socket head spring washer combination screw M5X45 x 4

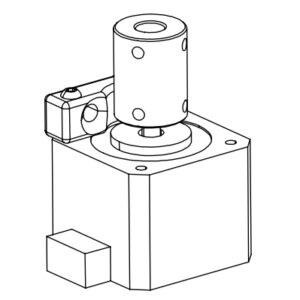
Install Z-axis motor kit and t-type screw

Tip: Steps: Lock the T-shaped screw rod on the Z-axis motor component, and then use two M4Xl8 screws to slightly lock the Z-axis motor component on the profile (as shown above).
13. Hype screw x 1

6. Z-axis motor kit x 1

28. Hexagon socket countersunk head screw M4x18 x 2

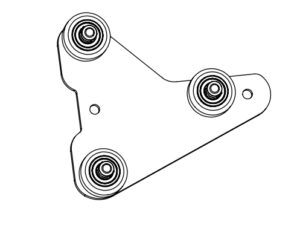
Install pneumatic joint, XE-axis kit and synchronous belt

Tip: Step: Tighten the tube connector by open end wrench. And fix the XE axis kit with two pieces M4*16 screw. Put the timing belt through the XE-axis kit with direction same as the picture.
8. XE axis kit x l
12. X-axis profile x 1

23. Pneumatic joint x l

32. Hexagon socket flat round head spring washer combination screw M4X16 x 2

17. Synchronous belt x 1

25. Open-end wrench x 1

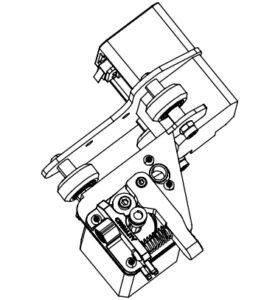
4. Install extrusion kit, Z-axis passive block

Tip:Steps: Put the synchronous belt into the profile along the v-wheel of the extrusion kit. When pushing it into the middle, as shown in the figure; lock the z-axis passive block with one M4X 16 screw.
3. Extruded kit x 1

4. Z-axis passive block x 1

32. Hexagon socket flat round head spring washer combination screw M4Xl6 x 1
5. Install X-axis Tensioner

Tip:Steps: Insert the timing belt into the tensioner block, and put it into the X-axis tensioner together with the timing belt, tighten it with a plastic hand screw nut, and then lock it with round head M4Xl6 and countersunk head M4Xl4 screws both sides of the Z axis passive block.
5. X-axis tensioner x 1

32. Hexagon socket flat round head spring washer combination screw M4Xl6 x 1
35. Hexagon socket countersunk head screw (black) M4Xl4 x 1

6. Install Z-axis moving kit

Tip: Steps: Make the Z-axis moving kit insert the two ends of the z-axis profile along V-wheel on both sides. As shown in the figure above.
Take the fifth step: assembled component

Take the second step: assembled components

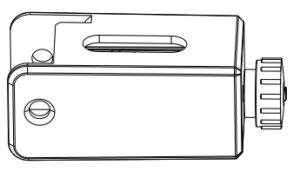
7. Install the gantry profile,display kit

Tip: Step: Install the upper frame of the gantry structurewith 4 pieces of MSX25 screw. Use an Allen wrench to lock the screen kit onto the machine with the left side four screws.
11. Gantry profile x 1
2. Display kit x 1

29. Hexagon socket head spring washer combination screw M5X25 x 4

8. Install material rack, gantry cover and indication knob

Tip: Steps: Put flat round head M5X8 and MST screws into the material rack(as shown), place the spool holder on the rack and fix on the profile with screws(as shown); Put the indication knob on the motor shaft and then place the 2020 profile cover on both side.
14. Material rack x 1

15. Material pipe and nut x 1

16. 2020 profile cover x 2

27. Hexagon socket flat round head screw M5X8 x 2

30. MST nut x2

34. Indication knob x 1

Wire connection
Connect X, E, Z-axis stepper motors according to the yellow label on the 6pin (4 wires) port
Connect X, Z-axis limit switches according to the yellow label on the 3pin (2wires) port
Plug in the power cord (as shown) and toggle the switch to turn on the power

24. Power cable x 1

26. Blue wire clip x l

X, E, Z-axis motor port

X, Z-axis limit switch

10. Preheat
Method 1

Note: The UI information is only for reference, the actual UI may be different.
Method 2

Load the filament
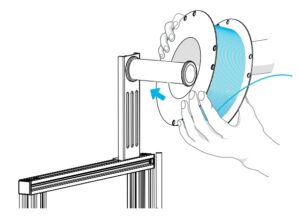
- When waiting for the temperature to rise, please hang the filaments on the material rack.
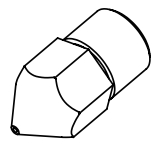
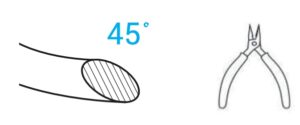
NOTE:For better printing, the end of filament Is as shown In t he figure.
- Press the extrusion spring and insert the filament until the nozzle along the extrusion. When the temperature is up to the target temperature, the filament will come out of the nozzle,nozzle, and complete loading the filament.


Note: Replace the filament:
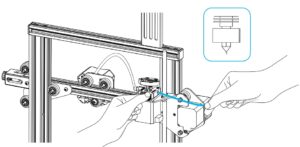
- If no filament in the nozzle, cut the filament at the extrude, put the new filament into the tube, and until the filament arrives on the feeding tube.
- If filament in the nozzle, heat up the nozzle to 185°+, draw out the filament, and then replace the filament according to step 1.
- If replace the filament during the printing process.adjust the printing speed to 10%, and then replace the filament according to step 2.
12. Start printing

Please level the platform according to the video in storage card. Bad leveling will cause clogging or break of nozzle.
5. Generate G-code, and save the geode file to TF card.

6. lnsert the TF card ➔ press the knob ➔ select the menu
➔ the file to be printed.

Warning: File names must be Latin letters or numbers, not Chinese characters or other special symbols.
Tip: Notes: For details on the software instructions, please refer
to the slicing software manual in the memory card!

Wiring connection

Troubleshooting

Is the Ender 3 3D printer worth it?
The Creality Ender 3 is an excellent option for beginners or makers on a budget. While this 3D printer does have its flaws, the affordability makes it a worthwhile investment
What can you print with a Creality Ender 3?
However, as it is not an all-metal hot-end, so the temperature is limited to 240°C because of the use of PTFE tubing and the quality of the components it’s made of. Otherwise, Creality Ender-3 3d printer is supposed to quite versatile in printing with a variety of plastics, such as PLA, ABS, TPU, and even PETG.
Do 3D printers use a lot of electricity?
Ordinary 3D printers do not use much electricity, only about 50-150 Watts while printing. This is about the same as one or two incandescent light bulbs. There are many different 3D printers and print settings available, however, so for a more accurate number you need to make some calculations or measurements.
What’s the difference between Ender 3 and Ender 3 Pro?
Ender-3 Pro has a detachable magnetic heated bed and improvements to the Y-axis to achieve a better print quality, which makes the Ender-3 Pro more expensive. The price is under $300. Compared to Creality Ender-3, it’s more expensive.
Can I make money 3D printing?
Yes, you can make money with a 3D printer. And there are a lot of ways that you can do it, whether that’s selling 3D printed items, digital goods, or even offering a 3D printing service in your local area
What size table do I need for Ender 3?
What size table do I need for the Ender 3? The Ender 3 has a footprint of 440 x 410 mm, so you will need a 3D printer table that is at least this size. If you want to be able to move the 3D printer around on the table, you may want to consider a table that is larger.
How do I connect my Ender 3 to my computer?
This step is simple: connect the mini USB end to your Ender 3 and the USB end to your computer. When you plug it into your computer, it will display a message and make a noise to indicate that it has detected your 3D printer. Typically, it will state that it is installing the drivers. Allow it to do so for a while
How tall can you print on an Ender 3?
Swap the firmware: By default, Creality’s Ender 3 firmware only allows you to use 220 x 220 mm of print surface.
Does the Ender 3 have WiFi?
The Ender 3, Pro, and V2 can all support ba Wi-Fi connection, though there are a few different options, which we’ll look at in the following sections. Let’s get started!
Can I connect my phone to my Ender 3?
Connecting your Creality Ender 3 V2 to WiFi using BuildBee Desktop allows you to connect via USB and get started quickly. If you need to head out, you can monitor the progress of your prints by using the BuildBee web app or Android app on your smartphone
How do I transfer files to Ender 3?
Until you see the save to file button at the bottom right corner of your slicer. Next you’re going to plug in your micro sd card into your adapter such that you can connect it to your pc.
What software does Creality use?
Creality Ender 3 is a fork of Cura, meaning it was based on older versions of Cura with some of Creality’s own developments added to the software. Creality Slicer has support for all Creality 3D printers and pretty well-tuned profiles for each one, including the Ender 3 models.

