CURT Oem Puck System Gooseneck Ball Safety Chain anchor Kit Installation Guide
PARTS LIST
| Item | Qty | Description |
| 1 | 2 | Safety chain anchor |
| 2 | 2 | 10mm pin |
| 3 | 2 | 5mm lynch pin |
| 4 | 1 | Gooseneck ball |
| 5 | 1 | Rubber cover |
| 6 | 1 | Case |
WARNINGS
Periodically check all gooseneck components to ensure that fasteners are tight and that structural components are sound.
Vehicle performance, such as braking, handling, acceleration and turning radius, can be drastically affected by the trailer. Allow additional time and space for stopping, changing lanes, passing and turning.
Do not tow more than one trailer at a time.
This may cause loss of control.
Severe bumps can damage your towing system. Avoid or drive slowly over rough terrain.
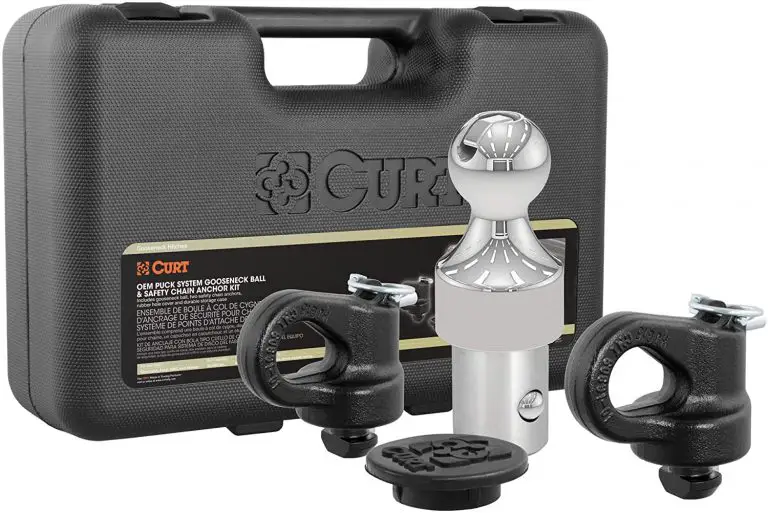
Product Overview


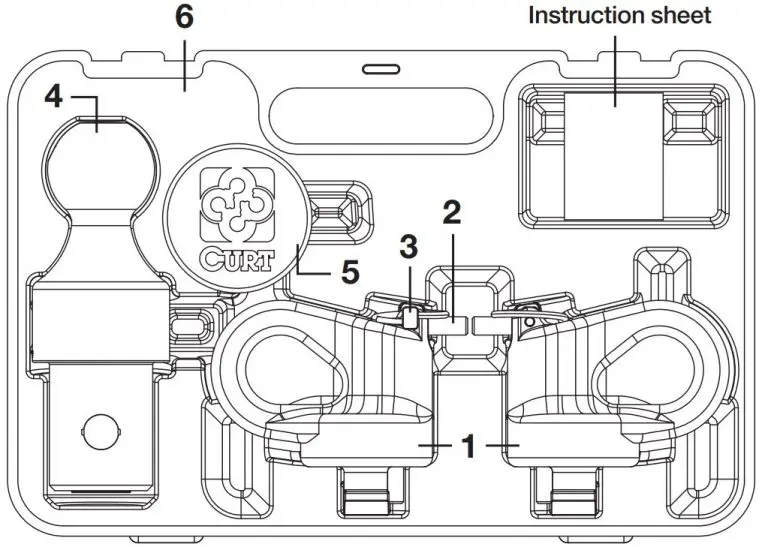
Figure 1
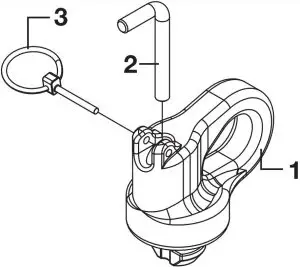
Figure 2
60629 OPERATION
Step 1
To install the 60629 gooseneck ball, lift the handle from its seat and rotate 90°. Insert the gooseneck ball into the receiver tube in the bed of truck. Rotate the handle to the locked position and flip it down into its seat. See figure 3.
Note: If handle does not freely rotate into the locked position, rotate the ball while applying light pressure to the side of the handle. When the handle rotates into the locked position flip it down into the seated position.
Step 2
When the gooseneck ball is not in use, remove it from the receiver tube and store it in the case, in a dry, clean area.
Step 3
Place the rubber cover (66155) in gooseneck receiver when the ball is removed to keep dirt and contaminates out.
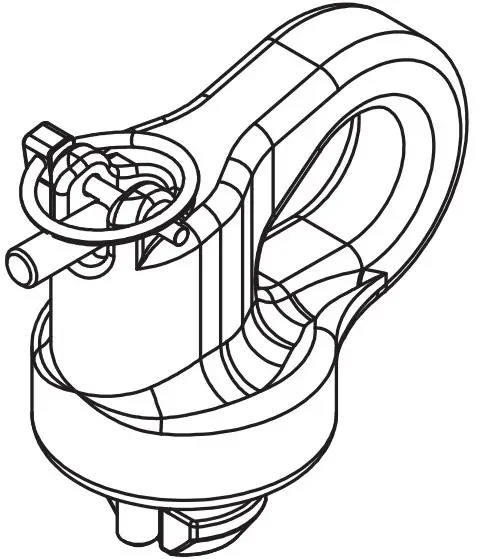
Figure 3
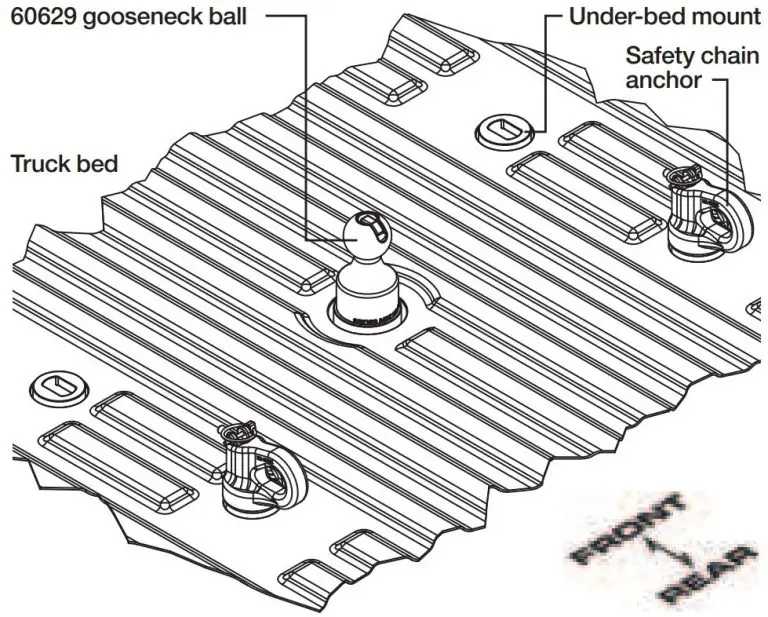
Figure 4
60691 OPERATION
Step 1
Align safety chain anchor with the rear-most under-bed mount on both sides. See figure 5.
Note: Always install both safety chain anchors in the rear-most under-bed mounts.
Step 2
Lower safety chain anchor into under-bed mount and rotate 90 degrees. See figures 5 and 6.
Step 3
Insert 10mm pin into the top of the safety chain anchor and lock into position using the 5mm lynch pin. See figures 7 and 8.
Note: Both the 10mm pin and 5mm lynch pin must be fully inserted and engaged.
Step 4
When safety chain anchors are not in use, remove from the under-bed mounts and store in the case, in a dry, clean area.

Figure 5
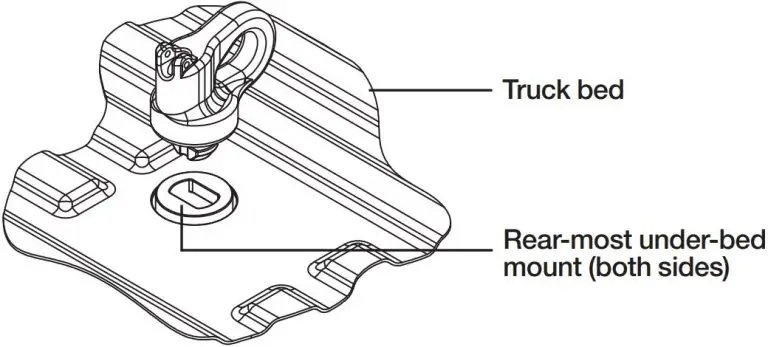
Figure 6
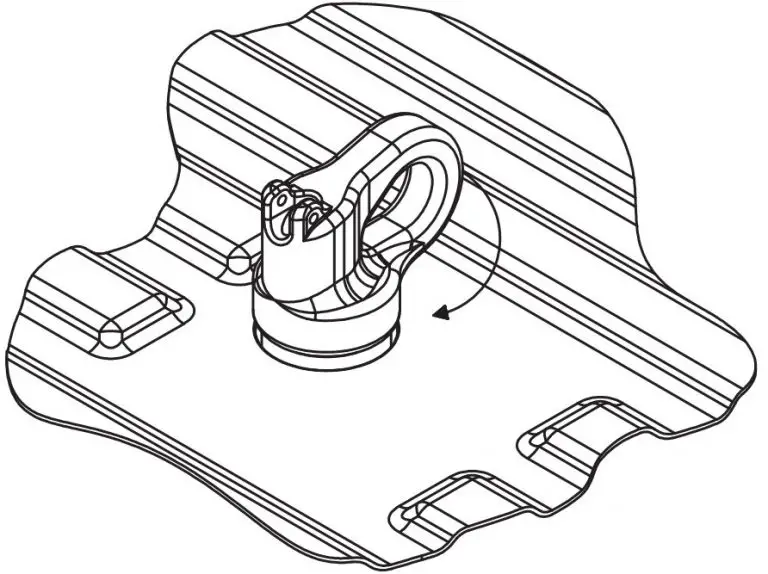
Figure 7
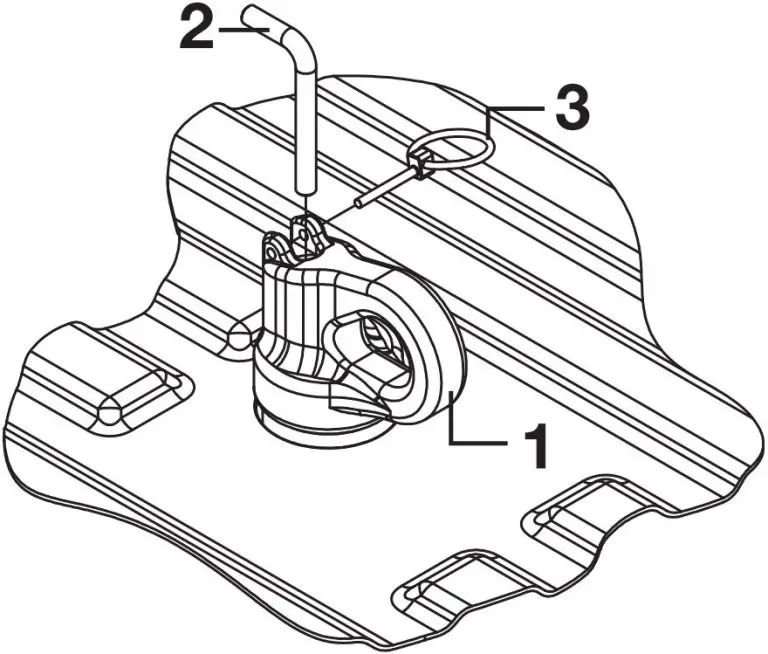
Figure 8
MAINTENANCE
Keep the 60629, receiver, trailer coupler and 60691 safety chain anchor pins lubricated. Use silicone spray or equivalent to prevent wear and rust.
Keep the 60629, receiver, trailer coupler, anchors and under-bed truck mounts free of dirt and other foreign debris.
Note: Failure to maintain your towing system could result in poor performance and / or catastrophic failure.
BEFORE TOWING FOR THE FIRST TIME
- Verify adequate turning clearance between the truck cab / box corners and trailer(s).
- Check truck box clearance. There should be a minimum clearance of 6″ between the bottom of the trailer(s) overhang and the top of the box sides.
- Verify all anchors are properly installed and secured with lynch pins.
- Verify the trailer safety chain length. Too much slack in the chain may prevent maintaining control in the event of separation. Leave only enough slack to allow full turning without interference.
- Verify the trailer attachments to the safety chain anchors are secure (cannot be shaken free during towing).
- Ensure the safety chains and hooks are rated to the load capacity of the trailer.
BEFORE TOWING EVERY TIME
- Ensure all fasteners are tight and that all structural components are sound. Note: Do not tow trailer with worn or damaged parts.
- Attach trailer chains securely to 60691 safety chain anchors.
- Ensure the trailer weight does not exceed any part of the towing system. Be sure load is heavier towards front of the trailer while not exceeding the hitch vertical weight rating. Be sure trailer load is secured to prevent shifting and centered from left to right. Note: Never load the trailer heavier behind the trailer axle(s).
- Check tires to ensure they are inflated to the proper specification. Follow vehicle and trailer recommendations.
- Verify trailer lights, electric brakes and breakaway switches are working properly.
CURT WARRANTY
CURT Manufacturing, LLC (CURT) warrants to the original purchaser (Purchaser), its products to be free from defect under normal use and service, ordinary wear and tear excepted, for the warranty period stated below, from the date of the original retail purchase, but subject to the limitations as set forth below.
LIMITATION ON WARRANTY
CURT’s obligation under the above warranty is limited to repair or replacement of the CURT Product (Product), at its option due to a manufacturing defect of the Product. CURT shall not be liable for the loss of or use of vehicles, loss of or damage to personal property, expenses such as telephone, lodging, gasoline, towing, tire damage or any other incidental or consequential damages incurred by the Purchaser, or any other person or entity.
CURT will examine the returned Product. If CURT, in its exclusive discretion, determines that the defect or damaged Product is covered under this limited warranty, CURT will repair the Product or replace it at that time.
Alterations to or misuse of the Product will void the warranty. For example, overloading or exceeding an automobile or trailer manufacturers’ weight ratings, or maneuvering motor vehicles equipped with Products at improper rate of speed, shall void the warranty on any of the Products. Failure to properly maintain and regularly inspect the Product according to the specific instruction sheet accompanying each Product shall also void the warranty.
Some states do not allow the exclusion or limitation of incidental or consequential damages. If such exclusions or limitations are prohibited under the applicable law, the above limitation or exclusion may not apply.
This Warranty gives you specific legal rights and you may also have other rights, which vary from state to state.
The Purchaser, when returning a CURT Product, must observe the following steps:
- The Purchaser must have proof of purchase of any damaged Product and supply the same to the headquarters of CURT. The Purchaser must obtain from CURT (toll free number is 877-CURTMFG (877.287.8634)) a Returned Goods Authorization (RGA) number in order to return any damaged Product to CURT for inspection and evaluation under this Limited Warranty.
- The Purchaser must pay all handling charges and shipping costs to deliver Products to CURT and must send the damaged Product along with the RGA number and proof of purchase to CURT at 6208 Industrial Drive, Eau Claire, Wisconsin 54701.
- Upon receipt of damaged Product, CURT will determine whether the damaged Product is covered under the Limited Warranty. If it is, CURT will repair or replace the Product. If the Product is replaced, the Product that is originally returned by the Purchaser shall become the exclusive property of CURT. If the returned Product is not covered under the Limited Warranty, CURT will notify the Purchaser before taking any further action with regard to repair or replacement, which would be at the Purchaser’s cost.