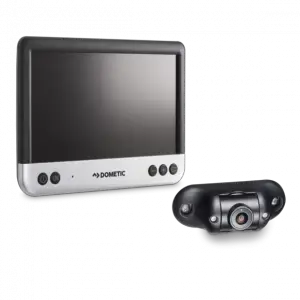
DOMETIC Driving Support Perfect View 360° Camera System

WARNING: Safety instruction: Indicates a hazardous situation that, if not avoided, could result in death or serious injury.
NOTICE: Indicates a situation that, if not avoided, can result in property damage.
NOTE: Supplementary information for operating the product.
Safety instructions
Please observe the safety instructions and stipulations issued by the vehicle manufacturer and service workshops.
The manufacturer accepts no liability for damage in the following cases:
- Faulty assembly or connection
- Damage to the product resulting from mechanical influences and incorrect connection voltage
- Alterations to the product without express permission from the manufacturer
- Use for purposes other than those described in the operating manual
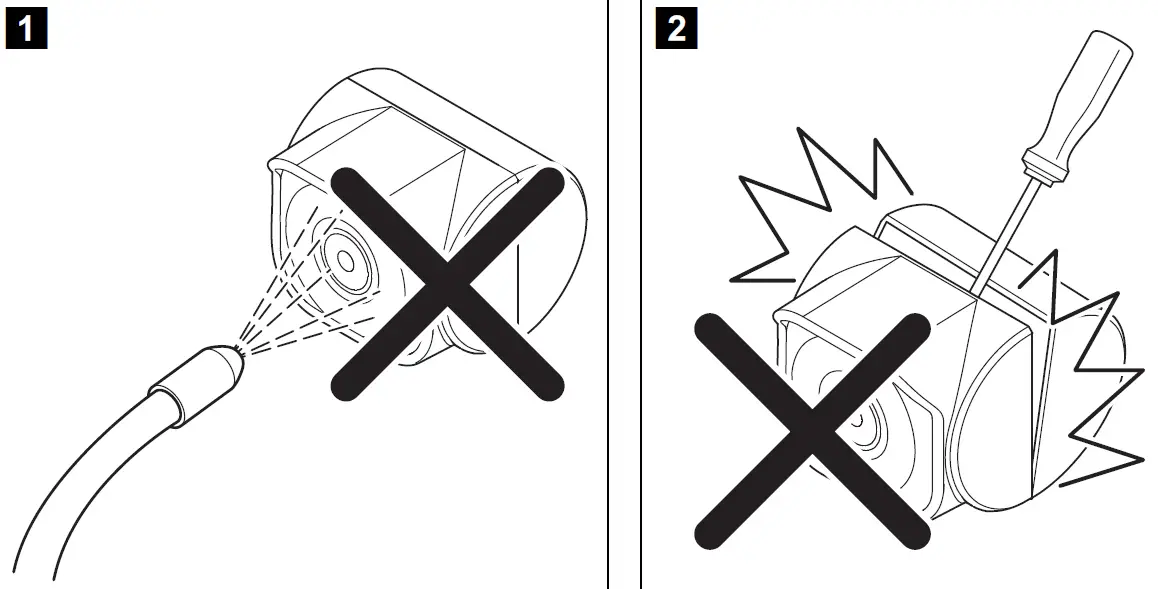
The cameras are waterproof. However, the seals on the cameras cannot withstand a high-pressure cleaner (fig.1). Therefore, you should observe the following instructions when handling the cameras:
NOTICE:
- Do not open the cameras, as this impairs the leak tightness and the function of the cameras (fig.2 ).
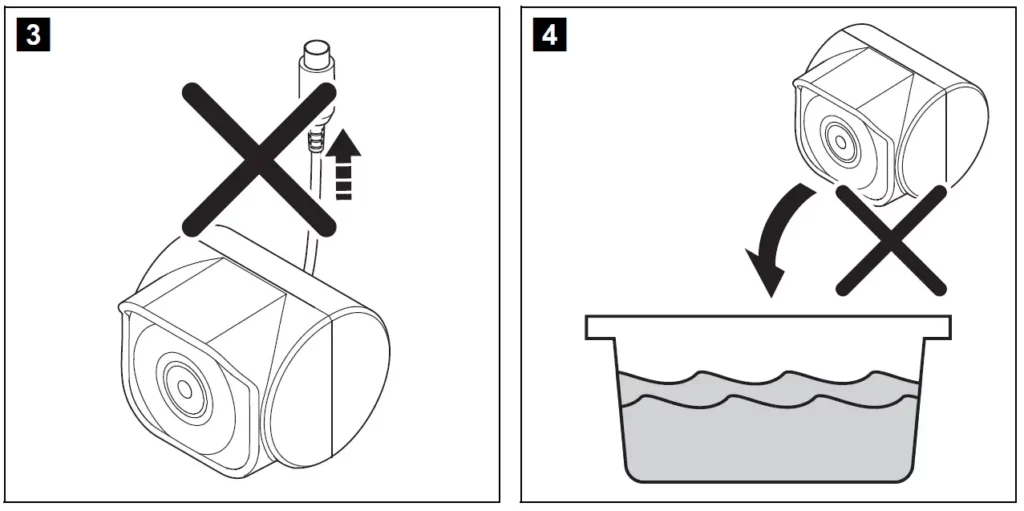
- Do not pull at the cables, as this impairs the tightness and the function of the cameras (fig.3).
- The cameras are not suitable for use under water (fig.4).

Operating the appliance safely
WARNING:
- Never play videos while you are driving to avoid dangerous situations in road traffic. Adhere to the country-specific laws and regulations.
- When driving, only use the device in its function as a driver assistance system, e.g. when changing lanes, manoeuvring or parking. The driver must not look be distracted at any time while driving. This could cause serious accidents.
NOTICE: If you use the device, the vehicle should be running during operation to prevent the vehicle battery from discharging.
Intended use
WARNING! Danger of personal injury by vehicle
Video systems are designed merely as an additional aid for reversing, however this does not relieve you of the duty to take proper care when reversing, turning or driving forwards.
The CAM360AHD video system (ref. no. 9600000509) is designed for use in vehicles.
The cameras transmit images in a 360° panoramic view, providing you with a birds-eye view of the vehicle’s environment to the sides, in front and behind. In addition, one of the four cameras can be shown selectively (split screen). The selection of an individual camera image depends on the input signals from the turn signals and reverse gear. In addition, the selection can also be made via the remote control provided.
It is used to monitor the direct vehicle environment, e.g. when driving, changing lanes, manoeuvring or parking.
Technical description
Four 180° wide wangle cameras are located on the front, the rear, and the left and right sides of the vehicle. A video processor merges the recorded images into a single image in real time that shows a birds-eye view of the vehicle and its surroundings at the front, rear and sides.
The camera system is switched on as soon as the vehicle is started. Depending on the settings, individual cameras can be activated by input signals, e.g. by using a turn signal or reverse gear.
The control unit features four camera inputs and connects the cameras to the screens via a plug connector.
The control unit allows the following options:
- A permanent split screen, or a split screen triggered by a control signal
- Automatic full screen mode for the reversing camera as a rear mirror function
- Permanent full screen mode for the 360° panorama view (birds-eye view)
Videos from the cameras can be saved (USB drive) according to the circular buffer principle and played back within the camera system. A recording sequence lasts up to 10 minutes, then the next recording sequence begins automatically. Once the memory is full, the oldest file is overwritten automatically.
To play the videos on a computer, the video format H.264 must be supported.
Control and display elements
NOTE: Use the remote control to navigate the video menu.
Video system settings
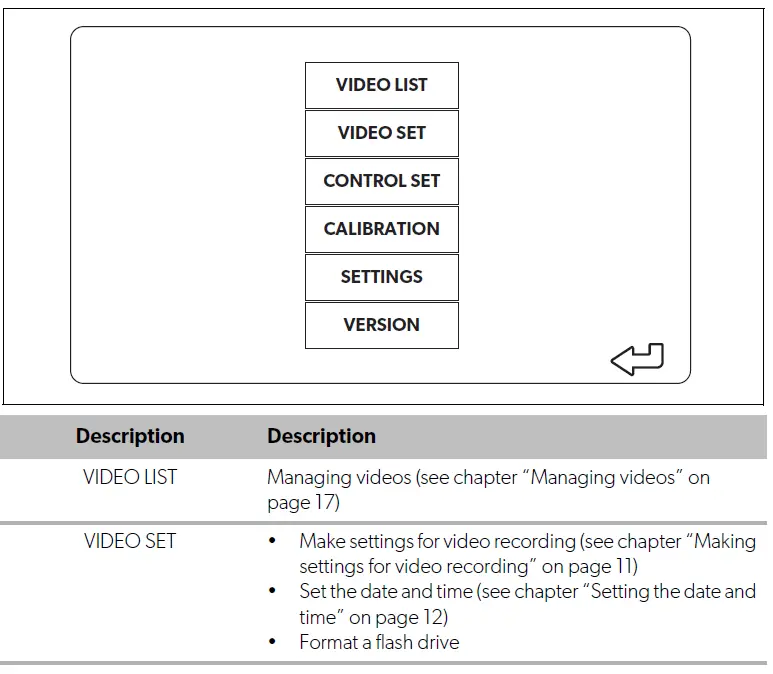
Menu overview
Navigating the video menu
- Activate the menu with .
- Navigate to the required menu item or video with , , , .
- Press to select the menu item.
- Press or the SAVE button in the menu to save.
Press to cancel your action or select the icon in the menu.
Main menu
Language settings
NOTICE:
The settings in this menu are intended only for trained specialists.
Do not change any other settings, as this could affect the function of the camera system.
- Select the “SETTINGS”.
- Enter the password “654321”.
- Select “BASIC VALUES”.
- Select a “LANGUAGE”.
You can choose between “ENGLISH”, “DEUTSCH” and “FRANCAIS”. - Save your settings.
- Exit the menu with .
Making settings for video recording
- Select “VIDEO SET”.
- Under “SHOW TIME”, choose if you want the date and time of the recording to be shown in videos.
- Under “RECORD TIME”, set your preferred duration before a new video is recorded.
- Save your settings.
Setting the date and time
- Select “VIDEO SET”.
- Set the following parameters:
- “YEAR”
- “MONTH”
- “DATE”
- “HOUR”
- “MINUTE”
- “SECOND”
- Save your settings.
Formatting an flash drive
NOTE: When formatting an flash drive all data stored on it is lost.
- Select “VIDEO SET”.
- Select “FORMAT USB”
- The flash drive gets formatted.
- After formatting the flash drive can be used by the device.
Configuring the screen display
- Select “CONTROL SET”.
- Select the desired parameter.
- Choose the desired setting according to the following table:
| Parameter | Value | Description |
| REAR MIRROR | ON | When you shift to reverse gear, the system switches to the rear view mirror function (rear camera in full screen mode) with a time delay. |
| OFF | The split screen function is permanently active. | |
Other screen settings
NOTICE!
The settings in this menu are intended only for trained specialists.
Do not change any other settings, as this could affect the function of the camera system.
- Select “SETTINGS”.
- Enter the password “654321”.
- Select “BASIC VALUES”.
Screen layout
You can configure the screen layout to your wishes.
- Select “DISP MODE”.
- Set the following parameters:
- “BV” = birds-eye view only
- “BV+SV” = birds-eye view left + individual image right
- “SV+BV” = individual image left + birds-eye view right.
Startup logo
You can configure if and how long the manufacturer‘s logo is shown when the device is switched on.
- Select “LOGO”.
- Set the following parameters:
- “OFF”
- “3SECOND”
- “5SECOND”
- “10SECOND”
Using the video system
Switching the video system on/off
NOTE
The video system is switched on as soon as the ignition of the vehicle is switched on.
In its basic setting, the video system shows two images on a split screen: A 360° panorama view on one half and the image from the front camera on the nother half (fig.6, page 4).
The 360° panorama view is always displayed. The display of the individual image from one of the four cameras can be selected with the arrow buttons or by using a turn signal and by switching to reverse gear.
Selecting cameras
- Press “Buttons” to select the front, rear, left or right camera.
- The symbol (fig.62, page 4) for the relevant camera is highlighted.
- Operate the left or right turn signal to activate the camera image of the relevant side.
- Shift to reverse gear to activate the rear camera image.
Recording a video
NOTICE! Never remove the USB drive when recording in order to avoid damage or loss of stored data.
The video is recorded automatically:
- The video recording begins when the vehicle is started.
- A red dot (fig.61, page 4) on the top left corner of the display indicates that the system is recording.
- The recording is stopped automatically after the set duration (maximum 10 minutes) and a new recording is started. Once the memory is full, the oldest file is overwritten automatically.
- The recording stops as soon as the ignition is switched off.
Removing the USB drive
- Wait 10 seconds after switching the ignition off before taking the flash drive out of the device.
Disabling automatic recording
- Select “VIDEO SET”.
- Under “RECORD TIME” select “OFF”.
- Save your settings.
- Automatic recording is disabled.
Managing videos
| DATE | TIME | DURATION | FILE TYPE |
| 20170308 | 11:13:02 | 00:16 | GENERAL |
| 20170308 | 11:08:31 | 00:09 | GENERAL |
| 20170308 | 11:01:50 | 00:03 | LOCKED |
| 20170308 | 11:57:18 | 00:03 | GENERAL |
- Select “VIDEO LIST”.
- A list of saved videos (sorted by date and time) is displayed.
Playing back a video
- Select the required video.
- Press buttons
- The video is played back in the 4-camera view.
- Press buttons to view the relevant recording from the individual camera.
- Press to switch back to the 4-camera view.
- Press again to pause the video.
- Press to fast rewind.
- Press to fast forward.
Locking a video
- Select the required video.
- Select the “LOCK” menu item.
- The word “LOCKED” appears next to the video.
- This video is excluded from the circular buffer principle and will not be overwritten.
- The “UNLOCK” menu item appears when selecting this video.
Unlocking a video
- Select a locked video.
- Select the “UNLOCK” menu item.
- The video can now be overwritten.
Deleting a video
- Select the required video.
- Select the “DELETE” menu item.
- Confirm the deletion with .
- The video is deleted.
Replacing the remote control batteries
Batteries need to be replaced if the range of the remote control reduces or the remote control can no longer be used to operate the device.
- Open the cover on the back of the remote control
- Replace the batteries (type CR2025, 3 V)
- Close the cover.
Cleaning and caring for the video system
NOTICE! Damage hazard
Do not use sharp or hard objects or cleaning agents for cleaning as these may damage the product.
- Occasionally clean the product with a damp cloth.
- Clean regularly with a damp cloth, particularly the infrared sensor.
Warranty
The statutory warranty period applies. If the product is defective, please contact the manufacturer’s branch in your country (see dometic.com/dealer) or your retailer.
For repair and warranty processing, please send the following items:
- Defect components
- A copy of the receipt with purchasing date
- A reason for the claim or description of the fault
Disposal
Place the packaging material in the appropriate recycling waste bins wherever possible.
If you wish to finally dispose of the product, ask your local recycling centre or specialist dealer for details about how to do this in accordance with the applicable disposal regulations.
Protect the environment!
Do not dispose of any batteries with general household waste. Return defective or used batteries to your retailer or dispose of them at collection points.
Technical data
| Camera | PerfectView CAM360AHD |
| Image sensor: | 1/3″ |
| Pixels: | 720 (H) x 1280 (V) |
| Horizontal resolution: | 720p |
| Sensitivity: | 0.1 lux |
| Viewing angle: | 180° |
| Dimensions (W x H x D): | fig. 8, page 5 |
| Weight: | 100 g |
| Protection class: | IP69k |
| Operating temperature: | –20 °C to +75 °C |
| Control unit | |
| Dimensions (W x H x D): | 126 x 86 x 26 mm |
| Video format: | AHD/NTCS, 1 Vpp |
| Connection voltage: | 9 Vg – 32 Vg |
| Power consumption (switched on): | <700 mA (approx. 500 mA/12 V, approx. 300 mA/24 V) |
| Power consumption (switched off): | approx. 2 mA |
| Operating temperature: | –30 °C to +80 °C |
| Remote control battery | CR2025 |
![]()