Dyson Cyclone V10 Cordless Vacuum Cleaner
Your machine will come with one or more of these
cleaner heads – not all will be included.
 |
Vacuum cleaner |
|
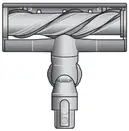
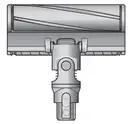
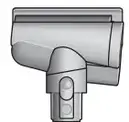
Motorbar™ cleaner head De-tangling vanes automatically clear wrapped hair from the brush bar as you clean. |
 |
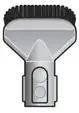
Fluffy™ cleaner head Soft woven nylon removes large debris, while anti-static carbon fiber filaments extract fine dust from hard floors. |
 |
Wall dock The Dyson cordless vacuum drops into the wall-mounted charging dock, ready for your next clean. |
 |
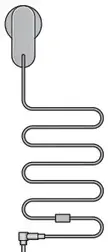
Charger Charges your vacuum with or without a dock. |
 |
Wand |
ome tools may not be included.
 |
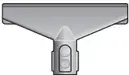
Combination tool Two tools in one – wide nozzle and brush, for quick switching between cleaning and dusting tasks around your home or car. |
 |
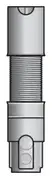
Crevice tool Engineered for precise cleaning around tricky edges and into hard-to-reach narrow spaces. |
 |
Hair screw tool Anti-tangle conical brush bar spirals hair off and into the bin. Motor-driven cleaning for smaller spaces. |
 |
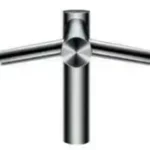
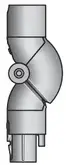
Bends and locks at different angles. Fits any compatible tool for effective cleaning in hard-to-reach high areas of your home. Up-top adaptor |
 |
Fabric and mattress tool Removes dust, dirt and allergens from mattresses and upholstery. |
 |
Soft dusting brush Enclosed in a skirt of soft nylon bristles for gentle, vacuum-assisted dusting of delicate objects and surfaces. |
You can buy additional tools at www.dyson.com.au or www.dyson.co.nz
 |
Extension hose Adds up to 61cm of flexible reach to any tool attachment, to clean up high or down low in your home or car. |
 |
Stubborn dirt brush Stiff nylon bristles dislodge ground-in dirt from coarse carpets, high traffic areas and car interiors. |
 |
Bends to comfortably reach down low. Engineered to clean further under low furniture by adjusting the wand angle up to 90°. Low-reach adaptor |
 |
Flexi crevice tool Extends and bends. For hard-to-reach places around your home and car. |
 |
Mini motorised tool Motorised brush bar, concentrated in a smaller head to remove stubborn dirt from mattresses, upholstery and stairs. |
Getting started
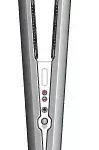
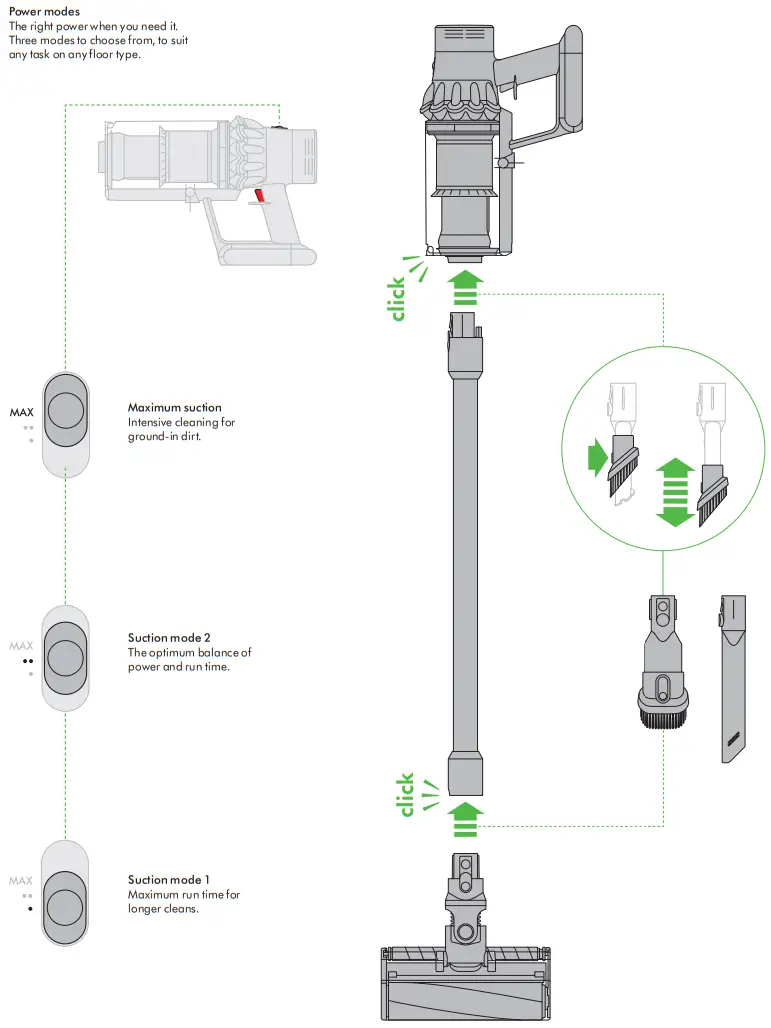
Power modes
The right power when you need it.
Three modes to choose from, to suit any task on any floor type.
Caring for your floors
Check that the underside of the cleaner head or tool is clean and free from any objects that may cause damage.
Before vacuuming your flooring, rugs, and carpets, check the manufacturer’s recommended cleaning instructions.
The brush bar on your machine can damage certain carpet types and floors. Some carpets will fuzz if a rotating brush bar is used when vacuuming. If this happens, we recommend vacuuming without the motorized floor tool and consulting with your flooring manufacturer.
Charging your machine
Connect to the charger either directly or in the dock.
Your machine won’t operate or charge if the ambient temperature is below 5°C (41°F). This is designed to protect both the motor and battery.
The LED lights on your machine will tell you the level of charge.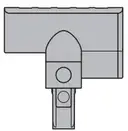
 |
Charging, low charge. |
 |
Charging, medium charge. |
 |
Charging, nearly full. |
 |
Fully charged. |
Emptying your bin
Empty as soon as the dirt reaches the MAX level – don’t overfill. Using your machine when the dirt is above the MAX line may affect the performance and require more frequent filter washing.
Remove your wand
Press the red wand release button, on the top of the wand, and pull the wand away from the bin.
Release the dirt
Hold the machine over the bin, pointing downwards.
Firmly push the red bin release button. The bin will slide down, cleaning the shroud as it goes, and the bin base will open.
The bin base won’t open if the red bin release button isn’t pushed down all the way.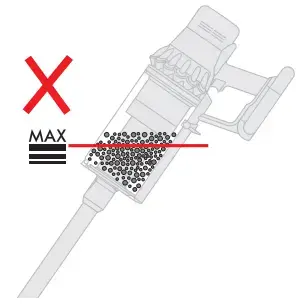
Minimise dust contact
Cover your bin tightly in a dust-proof bag while you empty. Remove your bin carefully, seal the bag tightly and dispose .
Close the bin
Push the bin base upwards until your bin and bin base click into place.
Cleaning your bin
Remove your bin
If it is necessary to clean your bin, empty it as shown in the ‘Emptying your bin’ section.
Press the red button located on the bin runner to release the bin and slide your bin off the runner.
Only use a damp, lint-free cloth to clean your bin.
Make sure that your bin and seals are completely dry before replacing.
Refit your bin
Insert the spine onto the bin runner.
Close your bin by pushing the bin base upwards until the bin and bin base click into place.
Your bin isn’t dishwasher safe and the use of detergents, polishes or air fresheners to clean your bin isn’t recommended, as it may damage your machine.
Clearing blockages
Disconnect your machine from the charger before looking for blockages.
Be careful not to touch the power button and be aware of sharp objects.
Leave your machine to cool down before looking for blockages.
Don’t use your machine when looking for blockages as this could cause injury.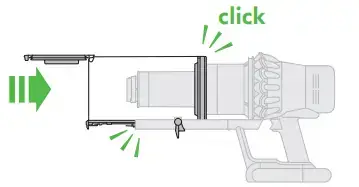
If your machine detects a blockage, the motor will pulse six times. You won’t be able to use your machine until the blockage has been cleared.
If you try to use your machine when the motor is pulsing, it will automatically cut out.
Leave your machine to cool down before looking for blockages and, for your safety, take care not to touch the trigger.
Clearing obstructions from your
Motorbar™ cleaner head
Your Motorbar™ cleaner head doesn’t have a washable brush bar. To maintain optimum performance, check your brush bar regularly and clear any obstructions.
Make sure your machine is disconnected from the charger and take care not to touch the trigger.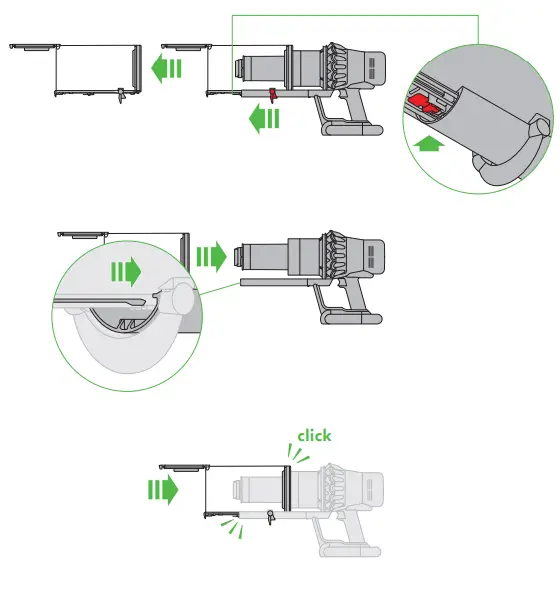
Remove your brush bar
Don’t put any part of your machine in a dishwasher or use detergents, polishes or air fresheners.
Press the cleaner head release button on the end of the wand. Place the cleaner head upside down.
Use a coin to unlock the end cap.
Twist the end cap and remove it from your brush bar. Don’t wash the end cap.
Slide your brush bar out of the cleaner head.
Look for obstructions
Clear any debris from your brush bar.
Check inside the cleaner head and remove any debris or blockages.
Your Motorbar™ cleaner head and brush bar aren’t washable.
Wipe over with a damp lint-free cloth.
Replace your brush bar
Push the end cap back on to your brush bar and slide it back into the cleaner head.
Turn the end cap into the locked position.
Your cleaner head isn’t washable and should only be wiped over with a damp lint-free cloth.
 Clearing blockages from your
Mini motorised tool
Mini Motorised tool may not be included in the box.
Your Mini motorised tool doesn’t have a washable brush bar. To maintain optimum performance, check your brush bar regularly and clear any obstructions.
Make sure your machine is disconnected from the charger and take care not to touch the trigger.
Remove your brush bar
Don’t put any part of your machine in a dishwasher or use detergents, polishes or air fresheners.
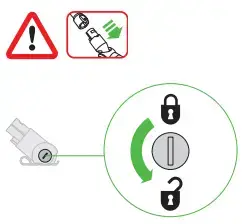
Use a coin to unlock the end cap.
Twist the end cap and remove it from your brush bar. Don’t wash the end cap.
Slide your brush bar out of the cleaner head.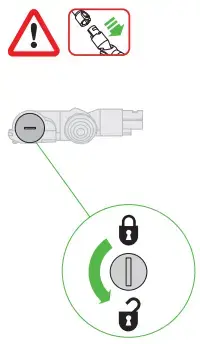
Look for obstructions
Clear any debris from your brush bar.
Check inside the cleaner head and remove any debris or blockages.
Your Mini motorized tool and brush bar aren’t washable. Wipe over with a damp lint-free cloth.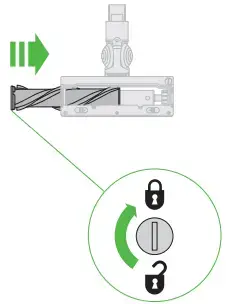
Replace your brush bar
Push the end cap back onto your brush bar and slide it back into the cleaner head.
Turn the end cap into the locked position.
Your cleaner head isn’t washable and should only be wiped over with a damp lint-free cloth.
Clearing blockages from your
Hair screw tool
The hair screw tool may not be included in the box.
Your Hair screw tool doesn’t have a washable brush bar. To maintain optimum performance, check your brush bar regularly and clear any obstructions.
Make sure your machine is disconnected from the charger and take care not to touch the trigger.
Remove the cover and brush bar
Remove the Hair screw tool from the wand or machine.
Push the base plate open. Press the red lever down to release the cleaner head cover.
Pull the cleaner head cover off the main body of the tool.
Look for obstructions
Pull your brush bar firmly to remove it from the main body.
Check and remove any obstructions from all three parts of your Hair screw tool.
Your Hair screw tool isn’t washable. Wipe over with a damp lint-free cloth.
Don’t put any part of your machine in a dishwasher or use detergents, polishes or air fresheners.
Reassemble Hair screw tool
Put your brush bar back into position and press firmly until it clicks back into
position.
Check the red locking lever is in the unlocked position. Align the cleaner head cover with the guide on the main body. Push it down until it clicks into position.
Push the red locking lever up until it clicks into position and push the base plate back into place.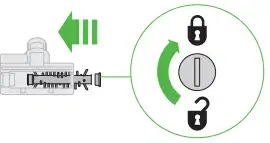
Washing your filter
Wash your filter at least once a month to maintain optimum suction power.
For more information and support videos for your machine go online: www.dyson.com/support
Twist off your filter
Twist your filter anti-clockwise and pull it away from your machine
Tap your filter
Before washing your filter, tap it gently over a bin to remove any loose dust and debris.
Wash your filter
Wash with warm, running tap water – gently rub your filter with your fingers to remove the dirt.
Fill and shake
Fill the filter with warm tap water.
Place your hand over the open end of the filter and shake it firmly to remove trapped dirt and debris.
Repeat these steps until the water runs clear.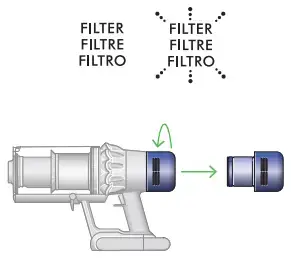
Shake and dry
Empty the filter and shake firmly to remove excess water.
Keep shaking until there’s no water coming from the filter.
Place your filter end up, as shown.
Place the filter on its end and leave to dry for at least 24 hours in a well ventilated, warm place.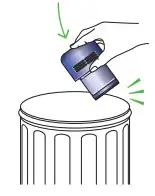
Don’t dry your filter in a tumble dryer, microwave or near a naked flame.
Important: your filter must be completely dry before you put it back into the machine. Your machine could be damaged if used with a damp filter.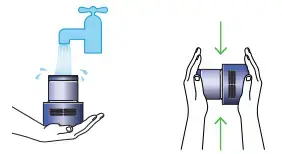
Washing your Fluffy™ brush bars
Fluffy ™brushbar may not be included in box.
Your machine has two washable brush bars. To maintain optimum performance, check and wash your brush bars regularly.
Make sure your machine is disconnected from the charger and take care not to touch the trigger. 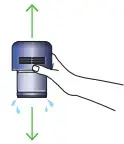
Remove your brush bars
Don’t put your brush bars in a dishwasher, washing machine, tumble dryer, oven, microwave or near a naked flame.
Only use cold water to wash your brush bars and don’t use any detergents. Turn the cleaner head upside down. Use a coin to turn the end cap lock 180° anticlockwise until it clicks into the unlocked position.
Push the end cap up to the open position and slide the brush bar out of the cleaner head.
Remove the end cap from the brush bar and don’t wash it.
Lift the smaller brush bar out of the cleaner head.
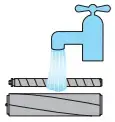
Wash and dry your brush bars
Hold your brush bars under running water and gently rub to remove any lint
or dirt.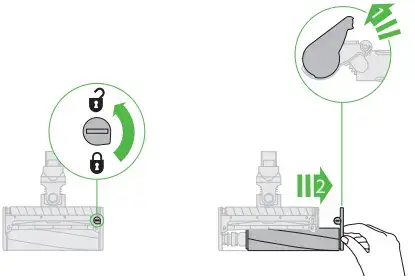
Stand your brush bars upright as shown. Leave to dry completely for at least
24 hours.
Before replacing, check that your brush bars are completely dry. Refit your small brush bar first, insert the round end into place and then push down the octagonal end until it clicks into place.
Reattach the end cap to your main brush bar.
Slide your main brush bar into the cleaner head. Push the end cap back down to the closed position.
Turn the end cap lock 180° clockwise to the locked position. Check that the fastener and brush bars are all securely in place.
Cleaning your tools
Don’t put any part of your machine in a dishwasher or use detergents, polishes or air fresheners.
Wipe with a damp, lint-free cloth, without touching the connector end.
Make sure your tools are completely dry before using.
Some tools may not be included in the box.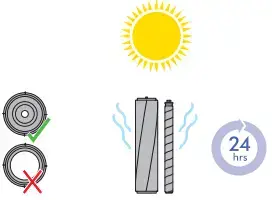
Looking after your machine
To always get the best performance from your machine, it’s important to clean it regularly and check for blockages.
Look after your machine
If your machine is dusty, wipe with a damp lint-free cloth.
Check for blockages in the cleaner head, tools and main body of your machine.
Wash your filter regularly and leave to dry completely.
Don’t use detergents or polishes to clean your machine.
Look after your battery
To get the best performance and life from your battery, use Eco mode.
Your machine won’t operate or charge if the ambient temperature is below
5°C (41°F). This is designed to protect both the motor and battery.
Diagnostic lights
If you see a diagnostic light on your machine, call Dyson for assistance.
| Battery fault. |  |
| Main body fault. | 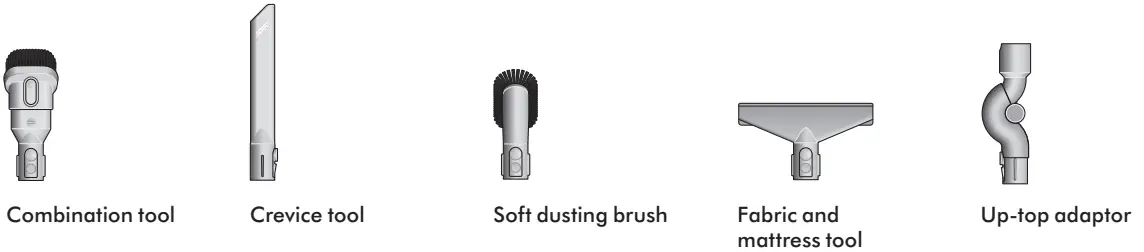 |
| Charger fault. |  |
Your serial numbers
You can find your serial numbers on your machine, battery and charger.
Use your serial number to register.
For more information and support videos for your machine go online: www.dyson.com.au/support or www.dyson.co.nz/support
FAQS
What is the difference between absolute & animal V10?
Absolute comes with a soft roller head which is designed for hard floors. Animal does not include this extra head. That’s the only difference.
When trigger is let go i hear something like a vacuum thud…is this normal ?
The “thud” you hear is normal. It is produced when the magnets bounce around as the motor brakes the rotor almost instantly (when letting go of the trigger). Dyson calls the sound the ‘boing’.
Check the Dyson v10 engineering story for more information.
Does the rubber back piece of the floor nozzle, thats thick and squishy come off? i find hard maneuver vacuum w/that thing. especially on rug is impos.
It’s easy to maneuver no modifications needed
does battery charger itself need to be plugged in? all videos show the wall mount but nothing plugged in. Is this accurate or does it need outlet?
You do hang it so the base that the vacuum fits in can charge. The unit fits very nicely in charger.
How much is a replacement battery?
60 to 90 bucks just search amazon for v10 battery.
It involves taking 3 screws out and replacing the bottom of the unit with the new battery section.
Does it need to connected to the docking station to charge, or can it just be plugged in?
No docking station, there is a simple cord. However, a wall mounting is included if you’d prefer it charge in a stationary position.
Will soft roller pick up dog hair?
It will pick up dog hair like crazy. We first used ours, brand new on an oriental rug we had just vacuumed with our old vacuum cleaner. It was mind blowing how much it picked up off what we thought was a clean rug!
Does this come with all the attachments?
Mine came with attachment for edges/corners and brush attachment. Still the worst purchase ever.
What size drill bit to use for included screws?
You will have to go on to Dysons website or call customer service for those specifications
We just bought this less the 24hours ago? Can we get this sell price?
Amazon does not price match. They told me to reorder and return the first purchase.
Can work in a shaggy rug?
Yes
Do you use a ordinary wall electric plug in to charge the batteries?
It comes with a charging station that you mount on the wall that plugs in to a regular 120v wall outlet.
Does the V11 have a soft roller attachment?
Not at this time
Crazy-expensive to buy separate from absolute model (arrives today)
Swapped b/c V10 lighter weight and soft roller.