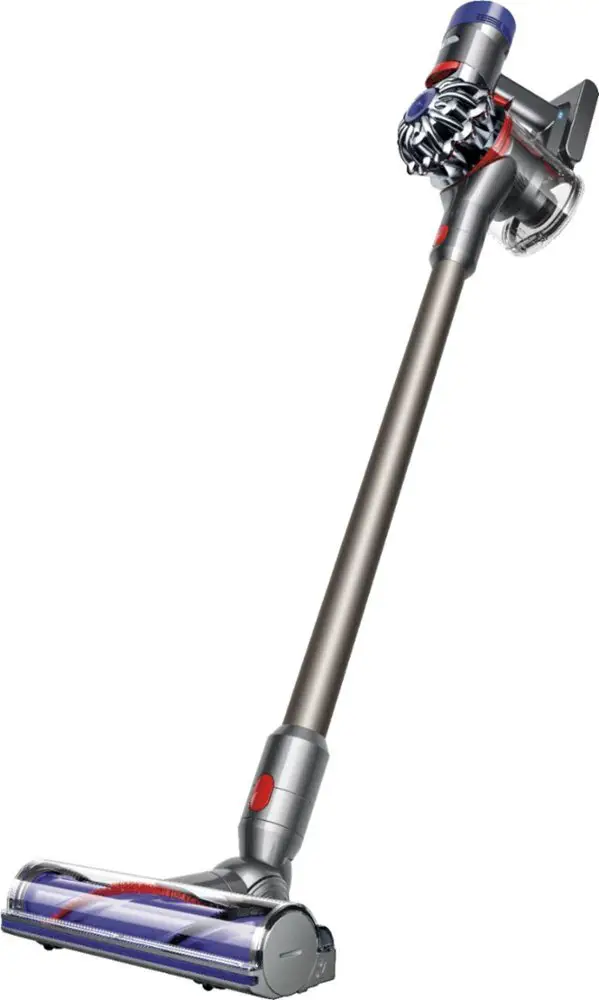
dyson V8 Cordless Vacuum Cleaner

dyson V8 Cordless Vacuum Cleaner
In the box
Your machine will come with one or more of these cleaner heads – not all will be included.
Vacuum cleaner
A rectangular dock that needs to be fixed to a wall with screws.
A charger is a one-piece unit with a plug, connector end and cable.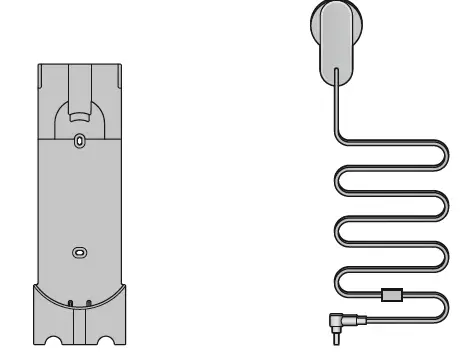
- Wall dock
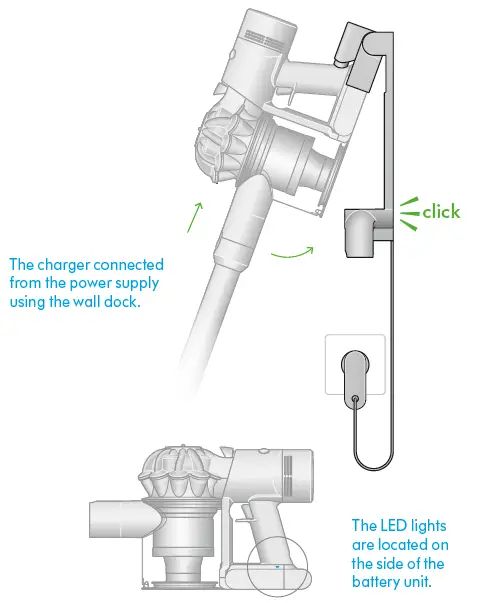
The Dyson cordless vacuum drops into the wall-mounted charging dock, ready for your next clean. - Charger
Charges your vacuum with or without a dock.

Motorbar™ cleaner head De-tangling vanes automatically clear wrapped hair from the brush bar as you clean. 
Fluffy™ cleaner head
Soft woven nylon removes large debris, while anti-static carbon fiber filaments extract fine dust from hard floors.
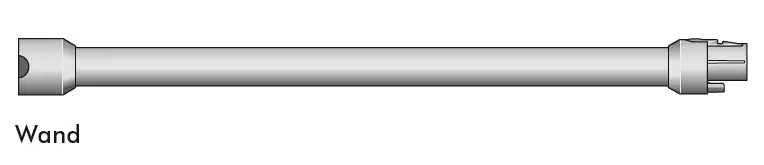
Wand
The narrow connector end at the top, connects to the bin and the wider end at the bottom that connects to the cleaner head or tool.
Some tools may not be included.
You can buy additional tools at www.dyson.com.
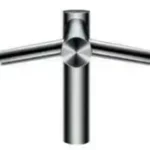
Combination tool
Two tools in one – wide nozzle and brush, for quick switching between cleaning and dusting tasks around your home or car.
This tool has a combination of brush head and crevice tool together in one unit. The brush head slides down the crevice tool when needed. 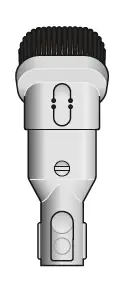
Crevice tool
Engineered for precise cleaning around tricky edges and into hard-toreach narrow spaces. Hair screw tool
De-tangling the conical brush bar spirals hair off and into the bin. Motor-driven cleaning for smaller spaces.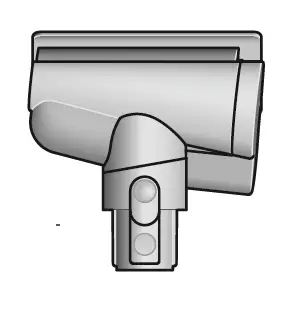 Mini motorized tool
Motorized brush bar, concentrated in a smaller head to remove stubborn dirt from mattresses, upholstery and stairs.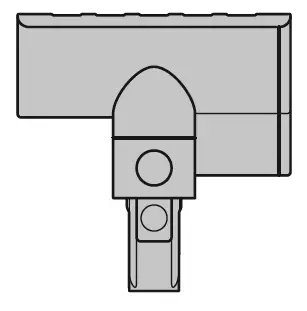 Soft dusting brush
Enclosed in a skirt of soft nylon bristles for gentle, vacuum-assisted dusting of delicate objects and surfaces.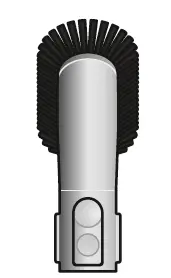 Stubborn dirt brush
Stiff nylon bristles dislodge ground-in dirt from coarse carpets, high traffic areas and car interiors.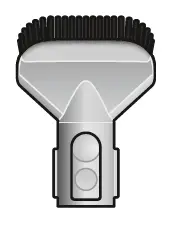 Fabric and mattress tool
Removes dust, dirt, and allergens from mattresses and upholstery.
Extension hose
Adds up to 24 in of flexible reach to any tool attachment, to clean up high or down low in your home or car.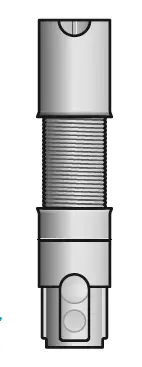
Getting started
 Two power modes
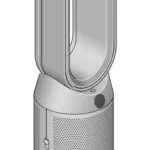
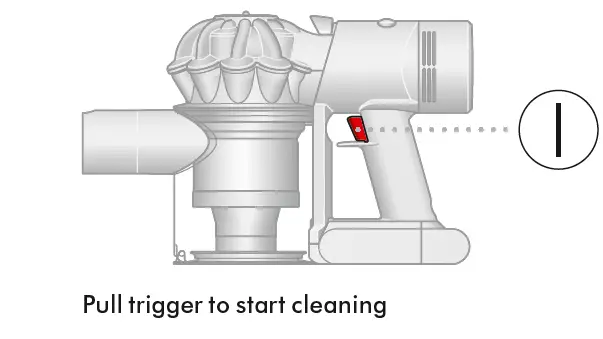
Toggle between Powerful mode – for longer suction – and MAX mode, for stronger suction. Just hold down the trigger and slide the control back and forth.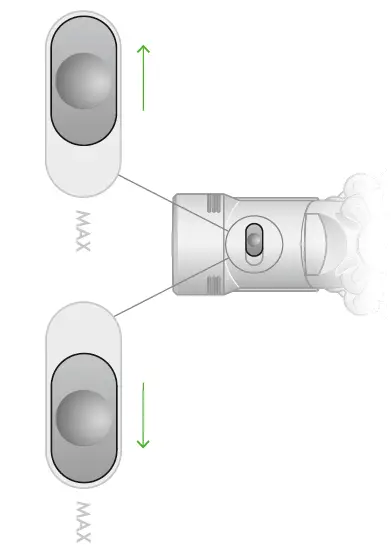 The power mode button is located on the top of the machine between the bin and filter. Slide to the left for powerful cleaning and to the right for max mode.
Switch accessories quickly
The quick-release tools click into place, and release in moments by simply depressing the release switch.
Caring for your floors
Check that the underside of the cleaner head or tool is clean and free from any objects that may cause damage.
Before vacuuming your flooring, rugs, and carpets, check the manufacturer’s recommended cleaning instructions.
The brush bar on your machine can damage certain flooring. Some rug materials may fuzz if a rotating brush bar is used when vacuuming. If this happens, we recommend vacuuming without the motorized floor tool and consulting with your flooring manufacturer.
Check that the underside of the cleaner head or tool is clean and free from any objects that may cause damage.
Before vacuuming your flooring, rugs, and carpets, check the manufacturer’s recommended cleaning instructions.
The brush bar on your machine can damage certain flooring. Some rug materials may fuzz if a rotating brush bar is used when vacuuming. If this
happens, we recommend vacuuming without the motorized floor tool and consulting with your flooring manufacturer.
Charging your machine
Fully charge your machine before your first use. Connect to charger either directly or in the dock.
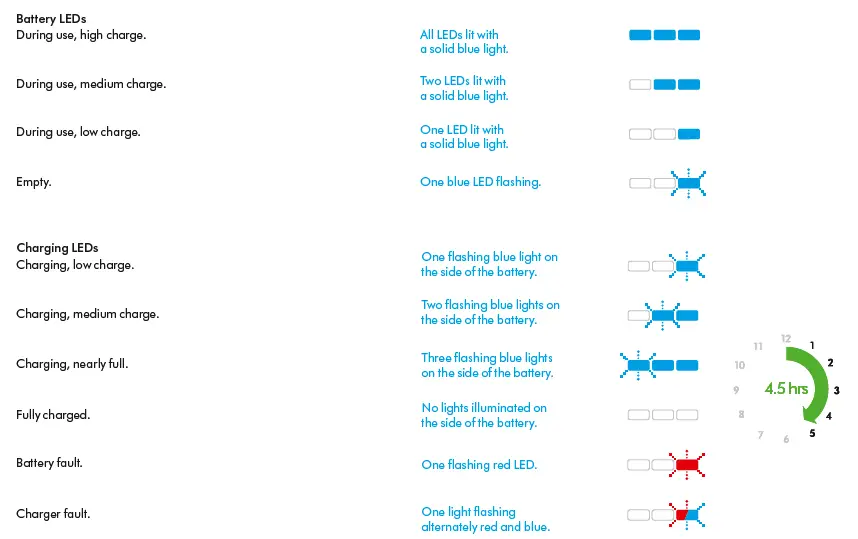
A full charge will take approximately 4.5 hours. While your battery is charging, the LEDs will flash with the current level of charge.
These lights will turn off once your machine is fully charged.
 Emptying your bin
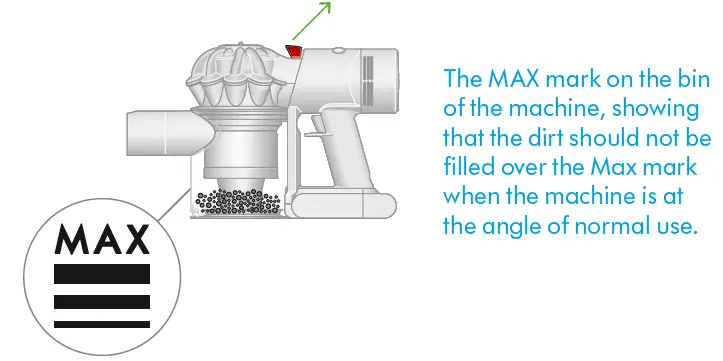
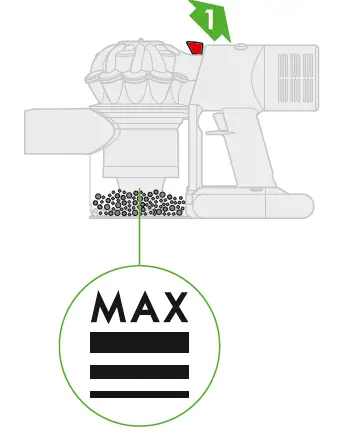
Empty as soon as the dirt reaches the MAX level – don’t overfill. Using your machine when the dirt is above the MAX line may affect the performance and require more frequent filter washing.
Release the dirt
Remove the wand from your machine.
Hold your machine over the bin and pull the bin release catch upwards. The cyclone will slide up and the bin base will open.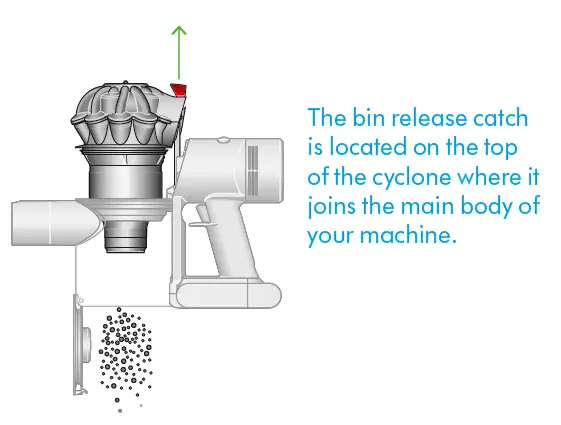
Minimize dust contact
Cover your bin tightly in a dustproof bag while you empty. Remove the bin carefully, seal the bag tightly and dispose.
Close the bin
Push down on the cyclone until it slides into position.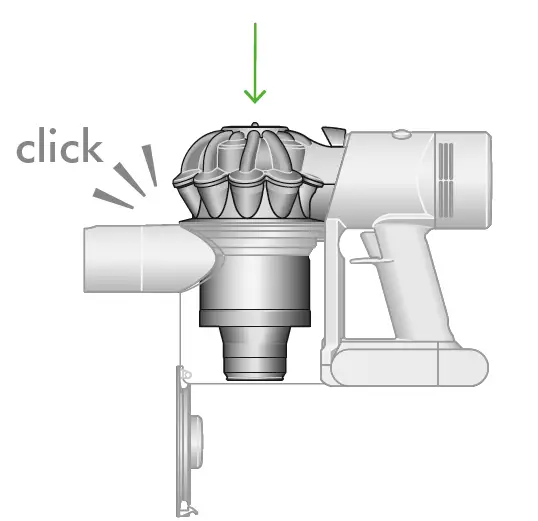
Cleaning your bin
Empty your bin as soon as the dirt reaches the MAX mark. You may need to clean the filter more often if you use your machine with a full bin.
Empty your bin
Remove the wand from your machine.
Hold your machine over a bin and pull the bin release catch upwards. The cyclone will slide up and the bin base will open.
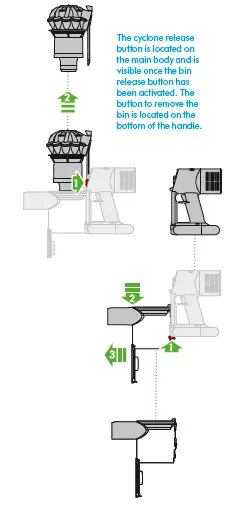
Remove the cyclone
Pull the bin release catch upwards. The cyclone will slide up and the bin base will open.
Locate the cyclone release button behind the cyclone and push to remove the cyclone from your machine.
Remove the bin
Pull back on the red catch located on the base, slide the bin down and pull it off your machine.
Clean the bin
Wipe your bin with a damp, lint-free cloth. Don’t put the bin in a dishwasher or use detergents, polishes or air fresheners.
Make sure the bin is completely dry before replacing.
Replace the bin
Align the tabs on the bin with the grooves on the main body and slide it upwards until it clicks into place.
Replace the cyclone
Slide the cyclone into the grooves of the main body and push down until it is in position.
Push the bin base up until it clicks firmly shut.
Clearing blockages
Your machine is fitted with an automatic cut-out. If any part of it is blocked, your machine’s motor will pulse and won’t function until the blockage has been cleared.
Disconnect your machine from the charger before looking for blockages. Be careful not to touch the trigger and be aware of sharp objects.
Leave your machine to cool down before looking for blockages. Don’t use your machine when looking for blockages as this could cause injury.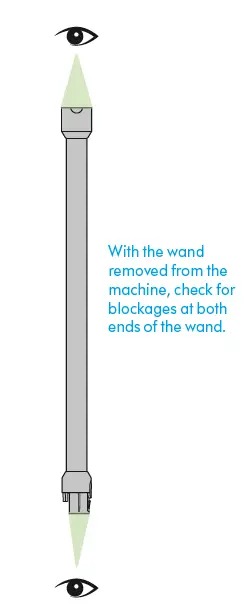
Washing filter A
Remove your filter
Lift the filter out of the top of the cyclone. Tap to remove excess dust and debris.

Wash your filter
Hold the open end of the filter under a running tap, until the water runs clear.
Turn the filter upside down and tap it to remove excess water.
Run water over the outside of the filter until the water runs clear.
Squeeze and twist with both hands to make sure the excess water is removed.
Dry your filter
Leave your filter to dry for at least 24 hours in a well-ventilated, warm place.
Do not dry your filter in a tumble-dryer or near a naked flame.
Important: your filter must be completely dry before you put it back into the machine. Your machine could be damaged if used with a damp filter.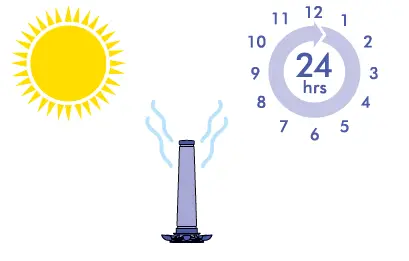
Reassemble your machine
Align the arrow on the top of the filter with the bin release button.
Push down to fit securely in place.
Washing filter B
Twist off your filter
Twist your filter counter-clockwise and pull it away from your machine.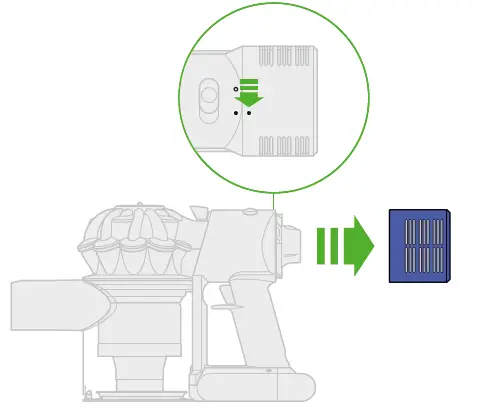
Wash your filter
Wash the inside of the filter under cold, running water, rotating the filter to make sure all the inside is clean.
Repeat until the water runs clear.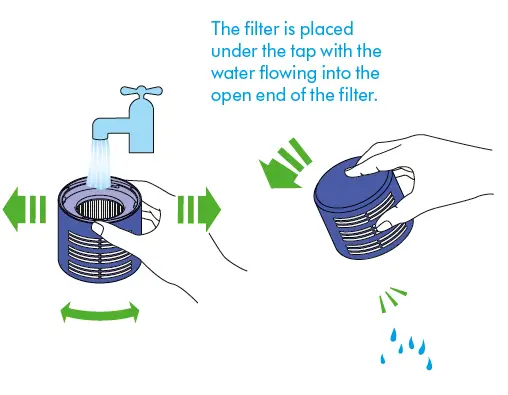
Shake out the water
Empty the filter and shake firmly to remove excess water.
Keep shaking it until there’s no water coming from the filter.
Dry your filter
Place your filter, with the open end facing up, to dry.
Leave your filter to dry for at least 24 hours in a well-ventilated, warm place.
Do not dry your filter in a tumble-dryer or near a naked flame.
Important: your filter must be completely dry before you put it back into the machine. Your machine could be damaged if used with a damp filter.
Reassemble your machine
Place your filter on your machine, aligned in the open position.
Twist clockwise until it clicks securely into position.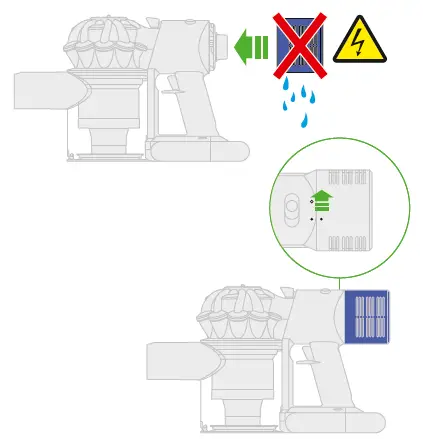
Clearing obstructions from your Motorbar™ cleaner head
Your Motorbar™ cleaner head doesn’t have a washable brush bar. To maintain optimum performance, check your brush bar regularly and clear any obstructions.
Make sure your machine is disconnected from the charger and take care not to touch the trigger.
Remove your brush bar
Don’t put any part of your machine in a dishwasher or use detergents, polishes or air fresheners.
Press the cleaner head release button on the end of the wand. Place the cleaner head upside down.
Use a coin to unlock the end cap.
Twist the end cap and remove it from your brush bar. Don’t wash the end cap. Slide your brush bar out of the cleaner head.
Look for obstructions
Clear any debris from your brush bar.
Check inside the cleaner head and remove any debris or blockages.
Your Motorbar™ cleaner head and brush bar aren’t washable.
Wipe over with a damp lint-free cloth.
Replace your brush bar
Push the end cap back on to your brush bar and slide it back into the cleaner head.
Turn the end cap clockwise into the locked position.
Your cleaner head isn’t washable and should only be wiped over with a damp lint-free cloth.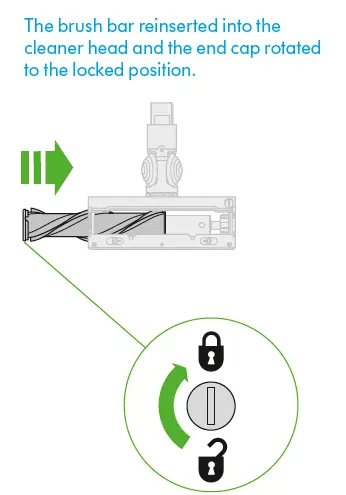
Clearing blockages from your Hair screw tool
Your Hair screw tool doesn’t have a washable brush bar. To maintain optimum performance, check your brush bar regularly and clear any obstructions.
Make sure your machine is disconnected from the charger and take care not to touch the trigger.
Remove the cover and brush bar
Remove the Hair screw tool from the wand or machine.
Push the base plate open. Press the red lever down to release the cleaner head cover.
Pull the cleaner head cover off the main body of the tool.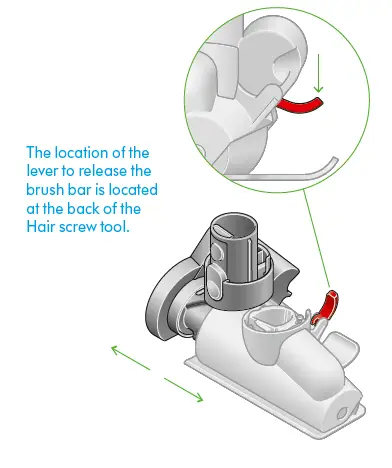
Look for obstructions
Pull your brush bar firmly to remove it from the main body.
Check and remove any obstructions from all three parts of your
Hair screw tool.
Your Hair screw tool isn’t washable. Wipe over with a damp lint-free cloth.
Don’t put any part of your machine in a dishwasher or use detergents, polishes or air fresheners.
Washing your Fluffy™ cleaner head brush bar
Your Fluffy™ cleaner head has a washable brush bar. To maintain optimum performance, check and wash your brush bar regularly.
Make sure your machine is disconnected from the charger and take care not to touch the trigger.
Remove your brush bar
Don’t put any part of your machine in a dishwasher or use detergents, polishes or air fresheners.
Press the cleaner head release button on the end of the wand. Place the cleaner head upside down.
Push the end cap up fully and pull the brush bar out of the cleaner head. Remove the end cap from the brush bar. Don’t wash the end cap.
Wash and dry your brush bar
Hold your brush bar under running water and gently rub to remove any lint or dirt.
Remove as much excess water as possible, run your hand down the length of the brush bar to squeeze out the water.
Stand your brush bar upright, with the closed end at the top. Leave to dry completely for at least 24 hours.
Replace your brush bar
Before replacing, check that your brush bar is completely dry.
Reattach the end cap to your brush bar.
Slide your brush bar into the cleaner head. Push the end cap back down to the closed position.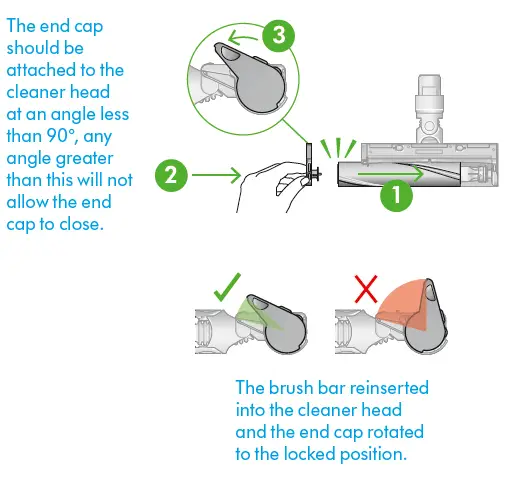
Cleaning your tools
Don’t put any part of your machine in a dishwasher or use detergents, polishes or air fresheners. Wipe with a damp, lint-free cloth, without touching the connector end.
Make sure your tools are completely dry before using.
Looking after your machine
To always get the best performance from your machine, it’s important to clean it regularly and check for blockages.
Look after your machine
If your machine is dusty, wipe with a damp lint-free cloth.
Check for blockages in the cleaner head, tools and main body of your machine.
Wash your filter regularly and leave to dry completely.
Don’t use detergents or polishes to clean your machine.
Look after your battery
To get the best performance and life from your battery, use Powerful
suction mode.
Your machine won’t operate or charge if the ambient temperature is below
5°C (41°F). This is designed to protect both the motor and battery.
Your serial numbers
You can register your machine using the serial number found on the bottom of your machine.
You can find your serial numbers on your machine, battery and charger.
Use your serial number to register.
FAQ’S
What is the lifespan of a Dyson V8 battery?
Battery life
It will last up to 30 minutes with the fluffy head attached, up to 25 minutes with the traditional spinning brush head or seven minutes when in maximum suction mode.
What’s the difference between a Dyson V7 and a Dyson V8?
V8: What’s the Difference? The primary difference between the V7 and V8 is suction power and battery life. The Dyson V8’s more powerful motor can generate 115 AW of suction, while the V7 generates 100 AW of suction. Additionally, the V8 can run for up to 40 minutes compared to the V7, which runs for 30 minutes.
Is Dyson battery worth replacing?
What is this? Disclaimer: Dyson recommends purchasing original batteries for the best performance and longevity. These options are costly but worth it if the price isn’t a concern. However, some replacement brands have gotten high ratings and are a worthy replacement for your older, out-of-warranty Dyson.
Can I leave my Dyson v8 on charge all the time?
If it is a lithium ion battery then yes it can stay plugged in all the time. But if it is a nickel metal hydride then it should be run down, charged fully and then unplugged. Lithium batteries do not get a memory so they can be charged no matter what the state of charge is.
How do I reset my Dyson v8 battery?
To reset your Dyson battery, you’ll have to:
Unplug the charger from the wall.
Plug the charger back in again.
Connect the charger to the Dyson vacuum.
Pull the trigger and hold for 20 seconds, even though the vacuum doesn’t turn on .
Let go of the trigger.
How can I test my Dyson battery?
Testing a Dyson battery
Fully charge the vac (at least 3 to 4 hours, preferably overnight).
Once charged, you will do a time test with the vacuum set to MAX, so get out your phone and set the stopwatch function for time to 0:00.
Why does my Dyson stop working after 5 minutes?
In short: if a Dyson vacuum cleaner keeps turning off while vacuuming, there is most likely a battery problem. If fully charging the battery does not resolve the problem, battery replacement may be necessary. View suitable batteries for your Dyson.
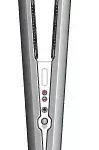
What does flashing blue light mean on Dyson v8?
Low Battery
Check the light indicator on the right side of the device, a flashing blue light will indicate that the device needs to be charged. If the device is not charged, hook up the device to a docking station or charging cable. The device will take up to 5 hours to charge fully.
What do the lights on my Dyson V8 mean?
Dyson V8 models have three LED lights and two colors: red and blue. First, if there is a blinking blue light, that means the battery is charging or needs to be charged. Second, you may see one, two, or three blue lights in a row. These will tell you the amount of charge in the battery: low, medium, or full.
How do I know if my Dyson stick battery needs replacing?
Dyson replacement batteries
Your Dyson machine may show signs that your vacuum cleaner battery needs replacing, some typical signs are reduced run time when not in MAX/Boost mode or when the battery displays more than 12 flashing lights
Why is my Dyson not working after cleaning filter?
If your Dyson V10 isn’t working after you’ve cleaned the filter, it might be because the filter unit isn’t reinstalled correctly, the filter is still wet, or the motor head has failed. The filter may have also worn out, or there are other blockages that you did not clean out before.
Can you replace a Dyson motor?
Dyson motors are typically robust. Unless you do something crazy like use the max setting exclusively, it should exceed past the two-year manufacturer warranty. But in case the inevitable happens and the motor burns out, replacing it is simple. Fortunately, the process is simple, with simple tools like a screwdriver.
VIDEO
dyson V8 Cordless Vacuum Cleaner
www://dyson.com/vacuum-cleaners/cordless/v8/absolute/yellow