Press a Wheel Bearing Without A Press
EVER press in another wheel bearing OFF the vehicle! Forget the traditional press! This is the fastest and most efficient repair process you will find on the interwebnets . Replace bearings on the vehicle! Front and rears are easier than ever! Works on all sealed and unsealed press-in style wheel bearings.
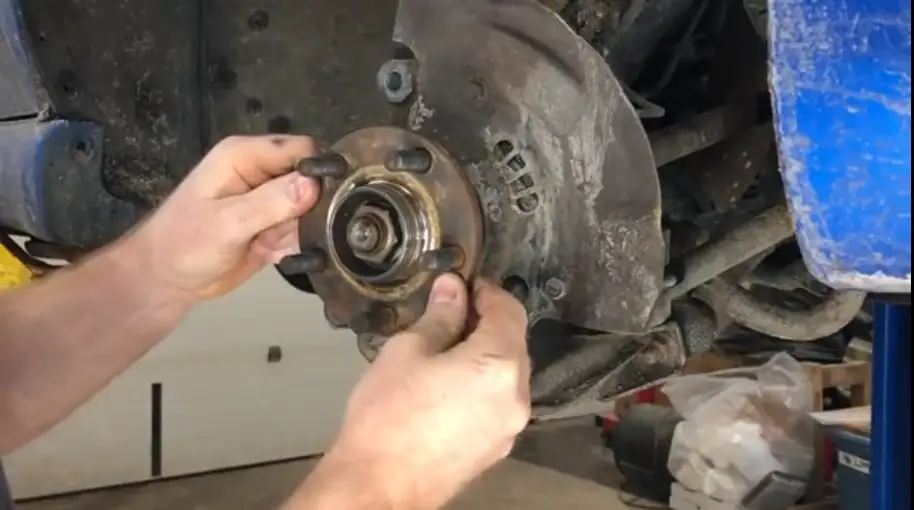
 In order for this tool to work on the car the main thing we have to do is get the cv shaft out of the bearing pressing bearings are basically all the same.
- What is a press in wheel bearing
- Tools
- Diagnosis
- Removal
- Install “1st push”
- Seals if needed
- Wheel hub reuse
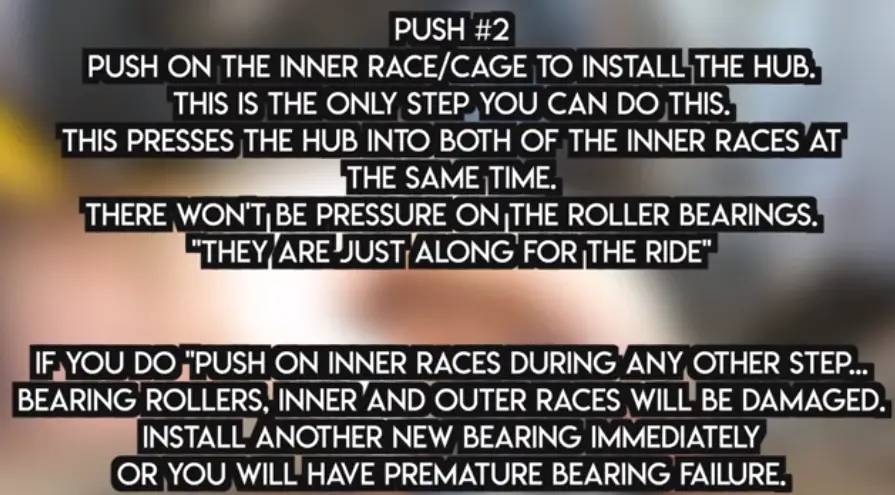
- Install wheel hub “2nd push”
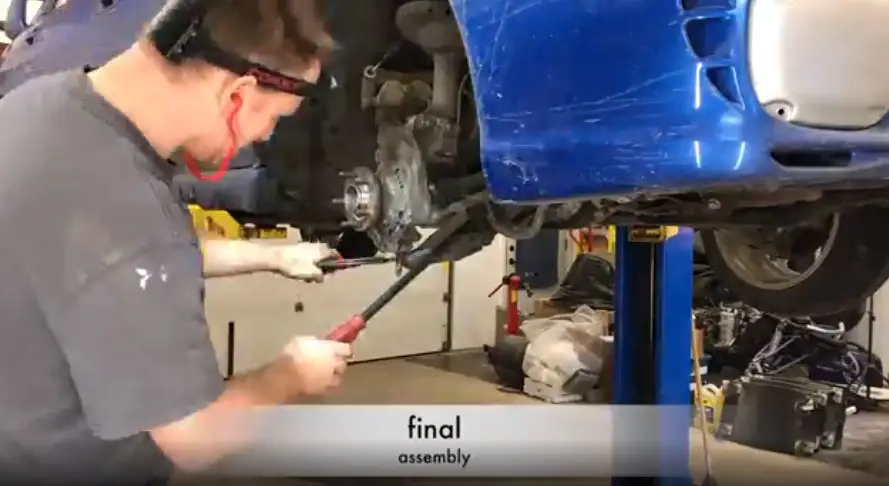
- Assembly and fastener torque
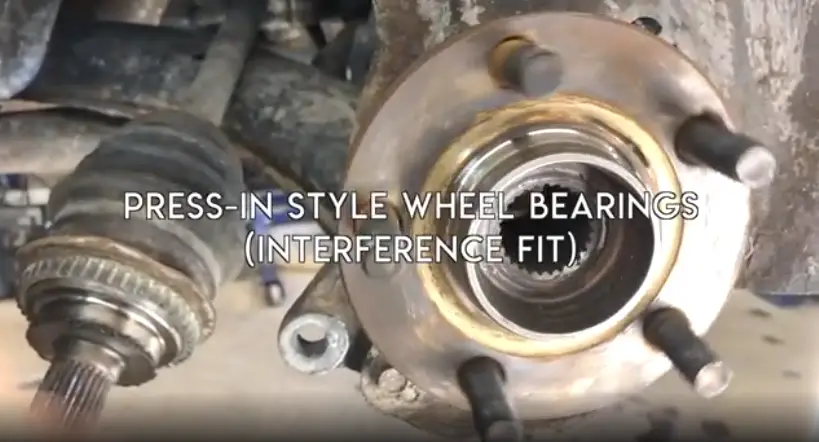
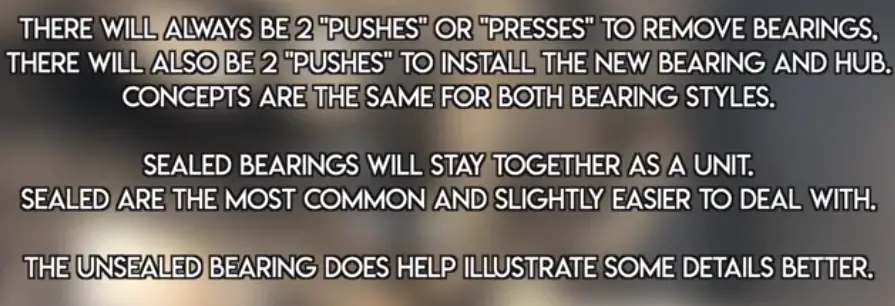
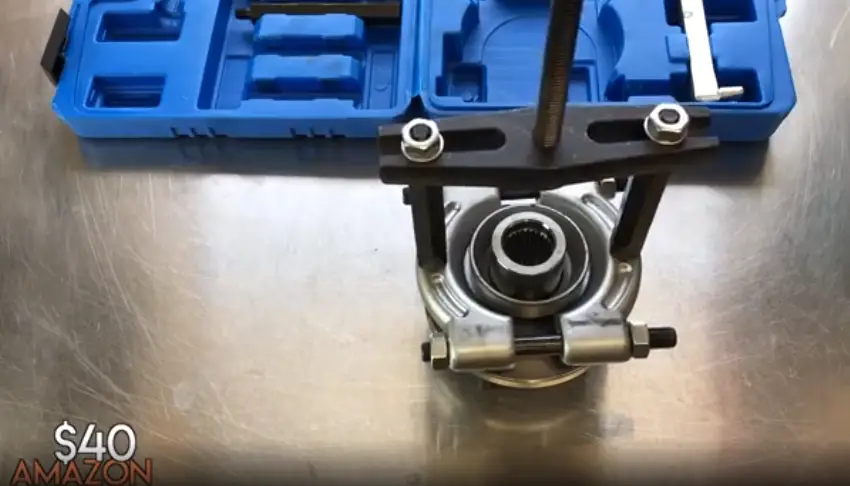
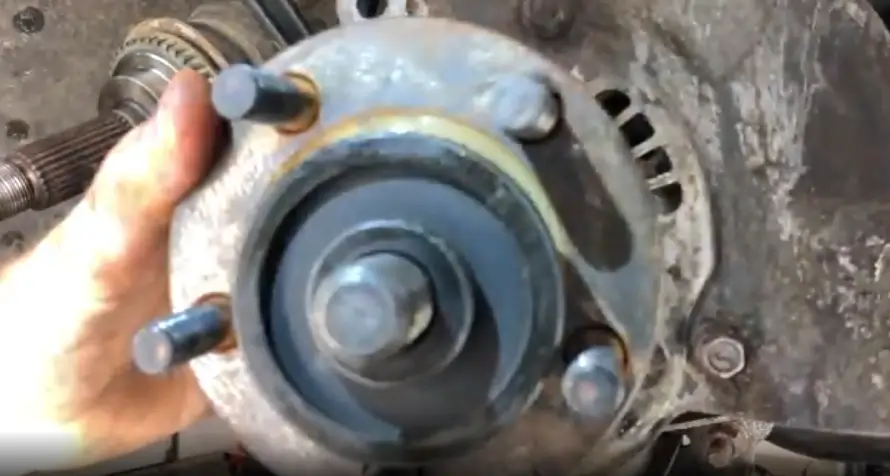
Front or the rear any vehicle sealed or unsealed this is a hub unit bearing this has uh the seal the hub the bearings.
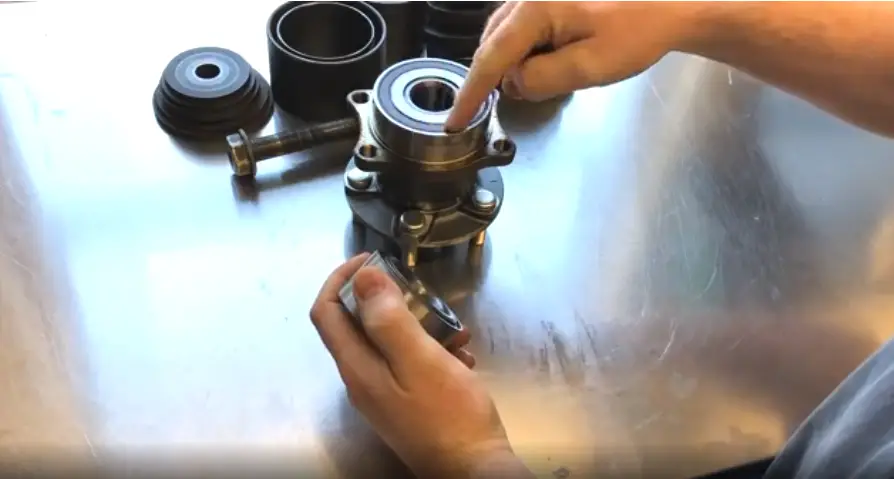
Everything all in one basically just bolted in the vehicle with four bolts so that actually works quite well but the advantage of pressing wheel bearing is usually. These will last longer there’s two different styles of press-in wheel bearings.
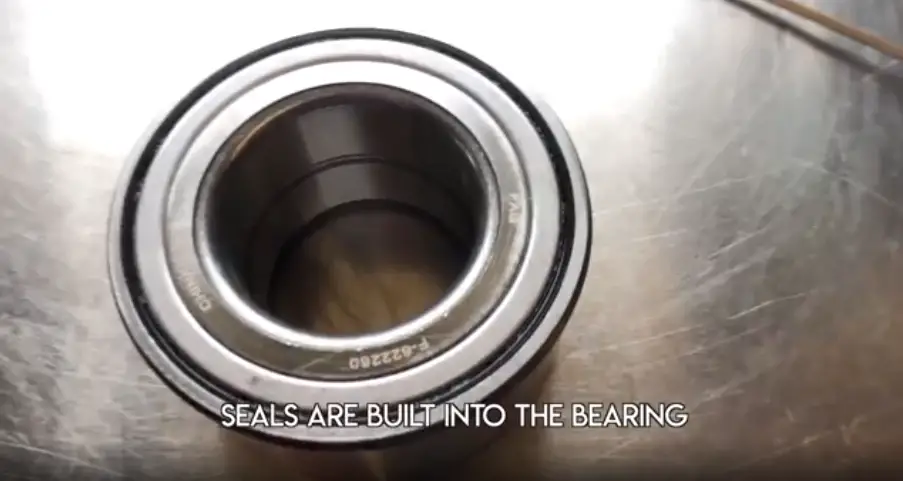
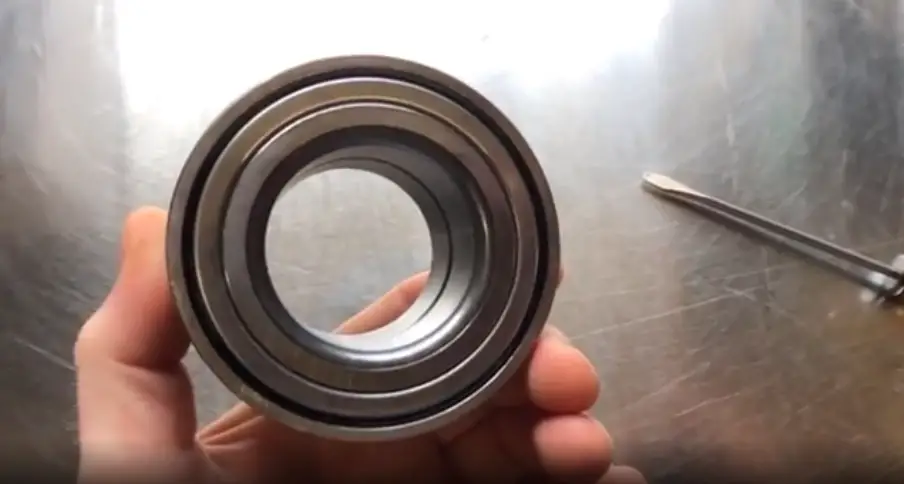
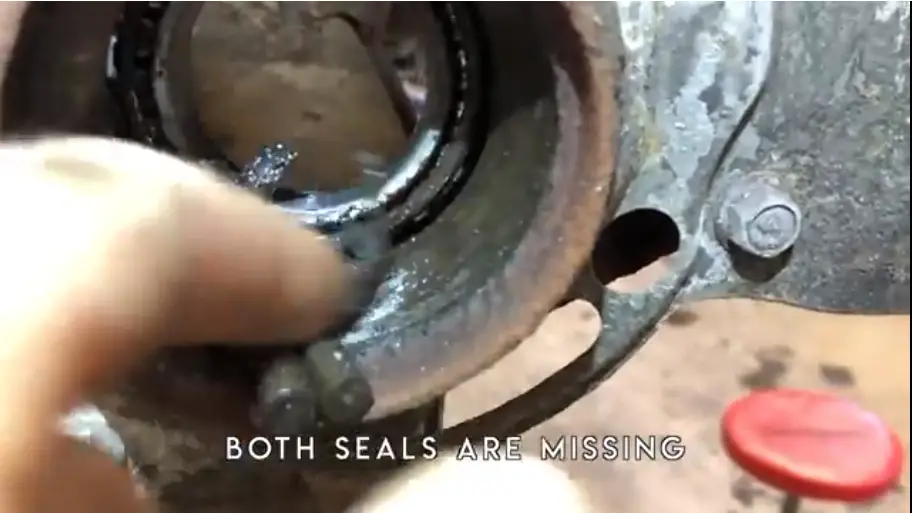
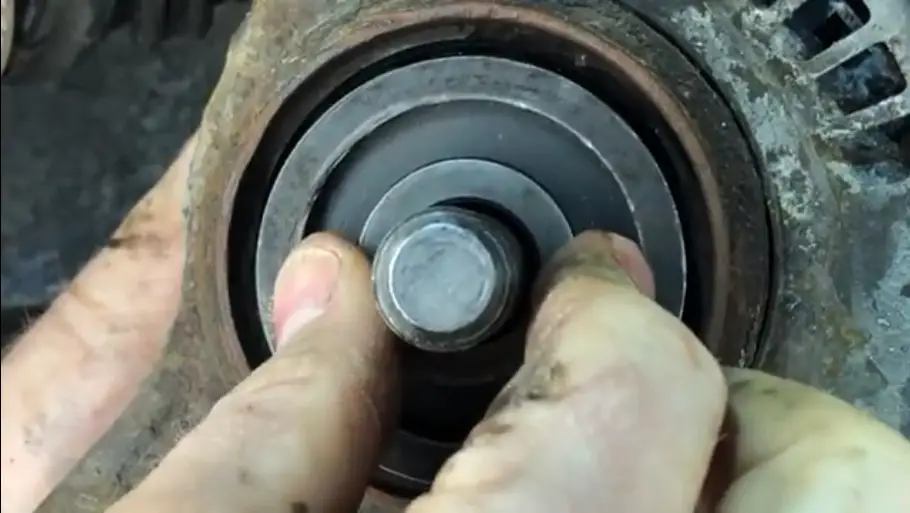
There’s a sealed style and there’s a unsealed style this is a unsealed press-in wheel bearing
you can see all the bearings individually because the seal is missing and it’s that way on both sides it’ll require a small two-step process
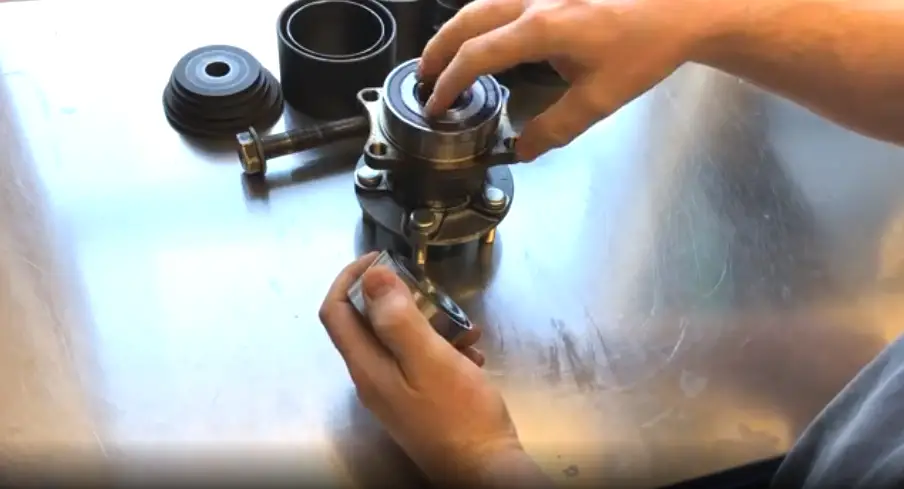
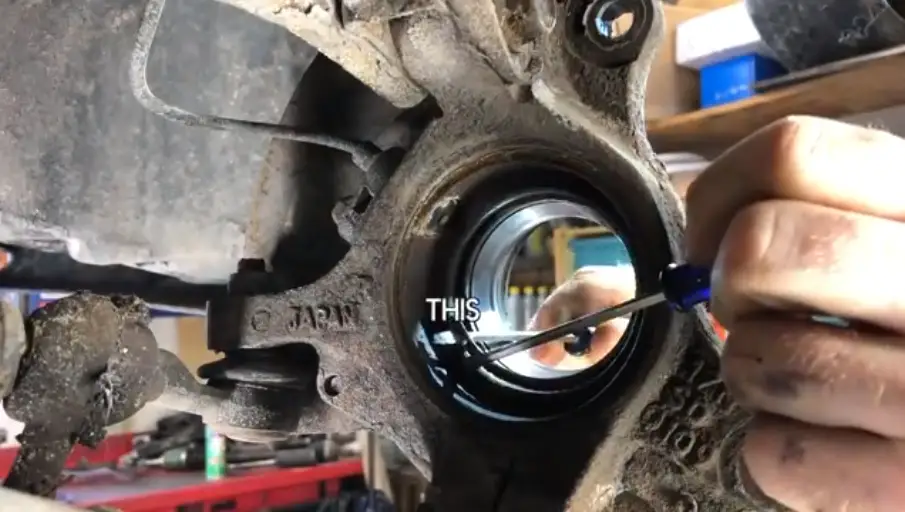
Just add your seals these seals ride on the cv shaft keep debris out and keep your grease in sometimes there’ll be a reluctoring right behind the seal on the inside but you won’t know which side it’s on because it can look.
Identical if you can see and feel a little screwdriver magnetism right here.
You want to make sure you face this side of the bearing when you press it in towards the wheel speed sensor if you have one seal separate or included in the bearing either way they’re both the same process.
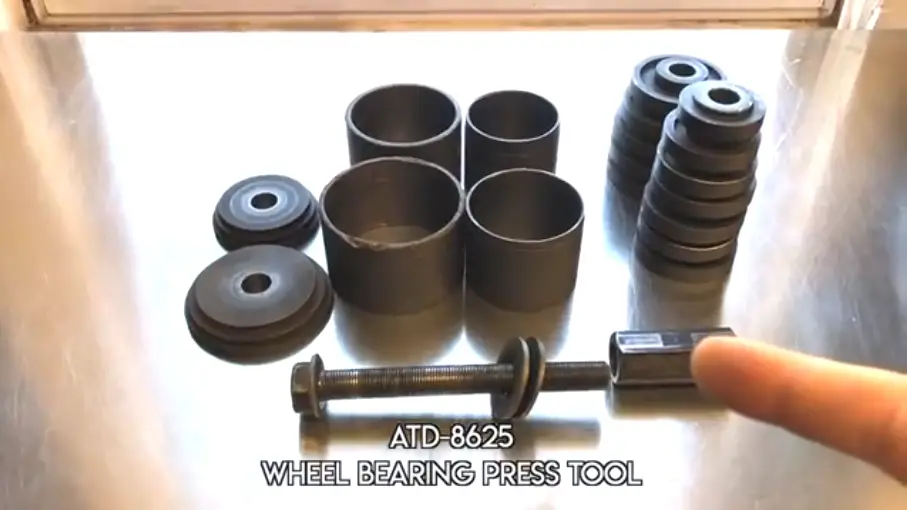
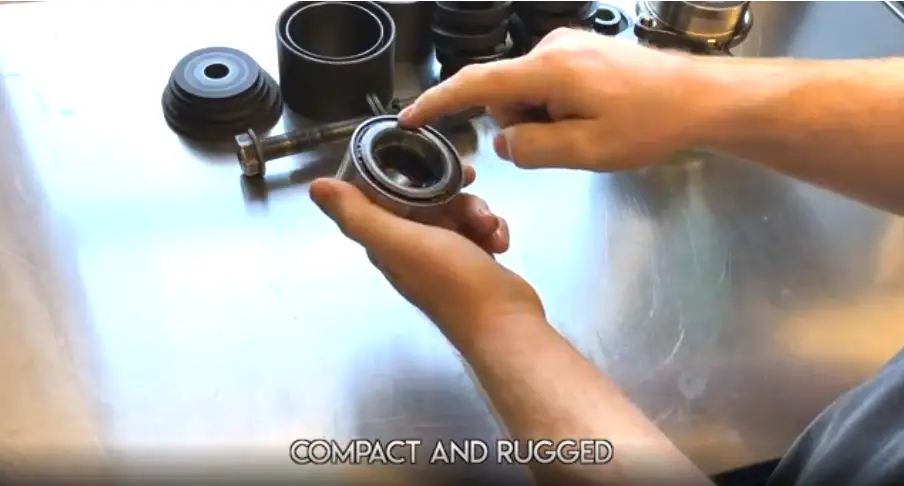
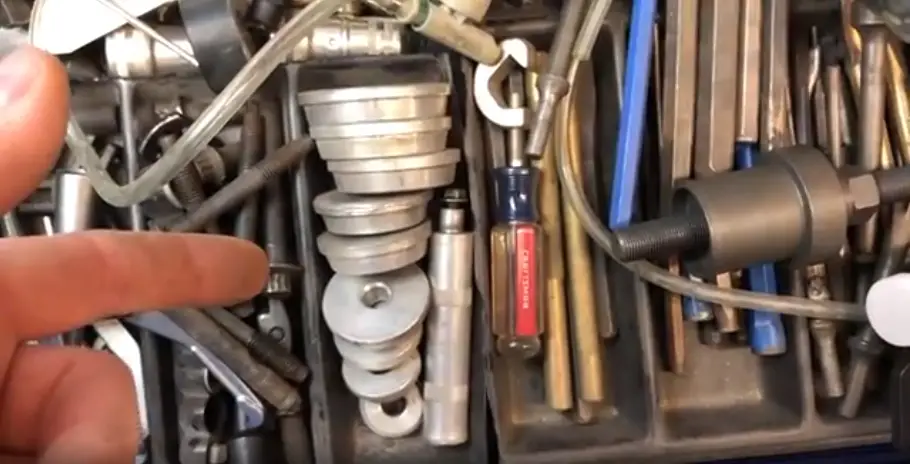
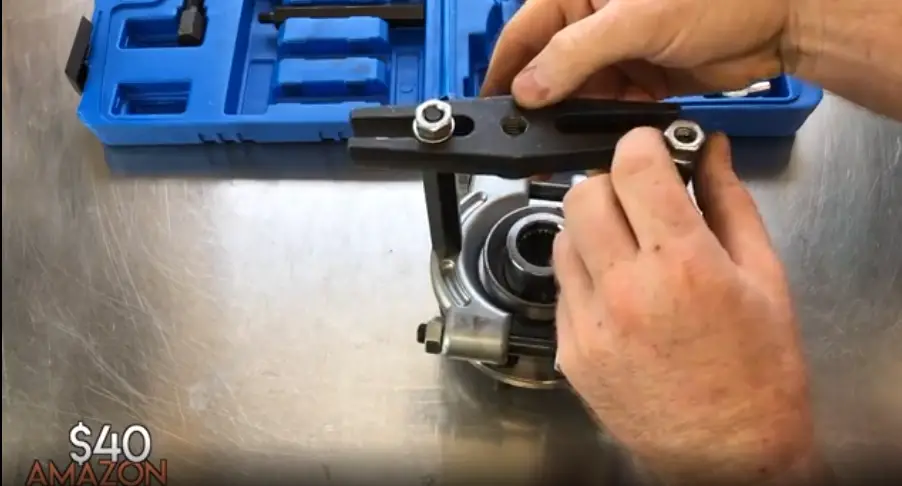
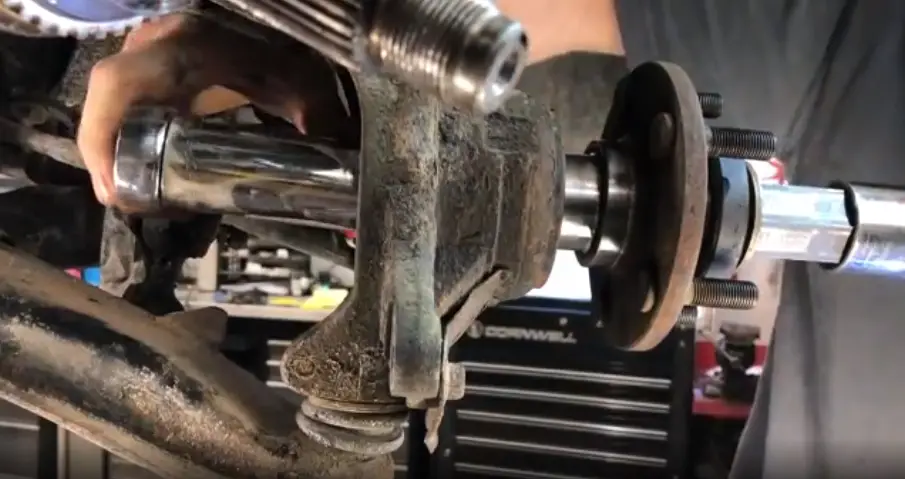
ATD 8625 bearing press tool
Sometimes they’re referred to as front wheel drive press tool kits and amazon is the best place to get it i’ll leave some links down below five pound and 10 pound versions.
I like the 10 pound version this will attach to your uh hub and this will separate to pull the hub out of this bearing and it’s one of the first steps any questions on how this process works
if it’ll work on your car any questions at all let me know.
I will get back to you hit that like button i would love to hear what kind of car.
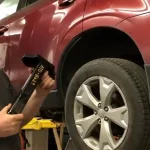
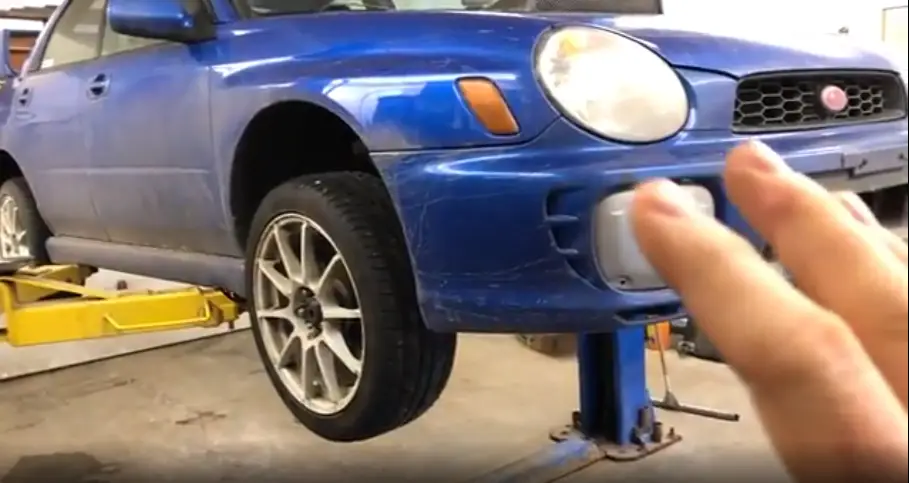
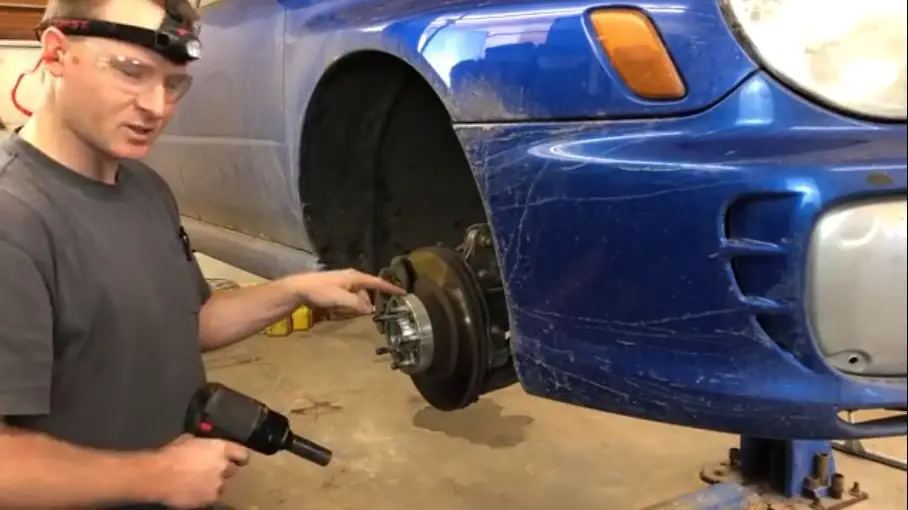
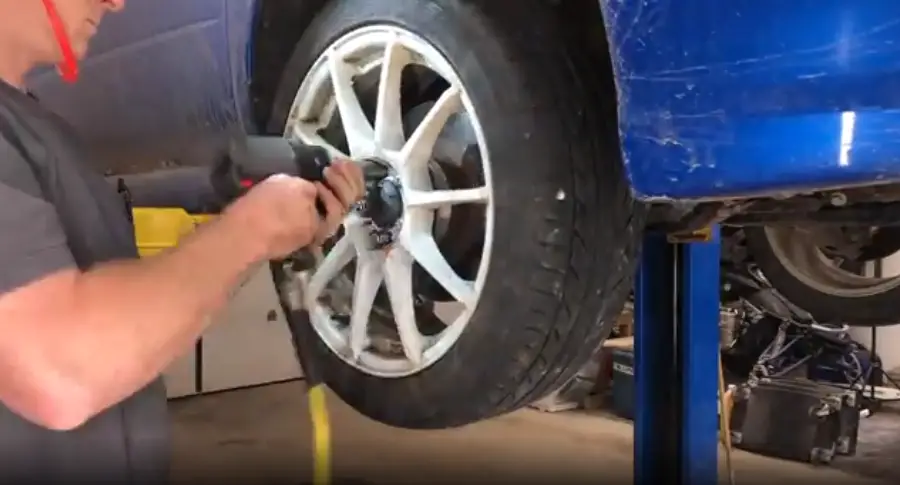
what year it is that you’re working on the front wheel bearing on the right side is bad 2002.
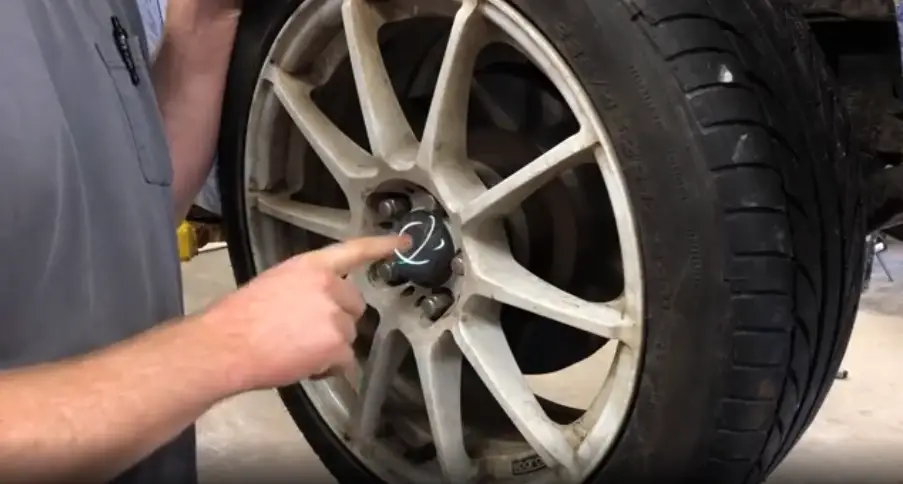
Subaru wrx impreza so you got your bracket you got your rotor the bracket’s mounted to the knuckle the bearing’s mounted to the knuckle if you have any play like that the wheel bearing is bad because it’s allowing that rotor to move around one of them’s moving.
so it’s always the wheel barrow you have a bad wheel bearing it’s gonna shake in all directions right
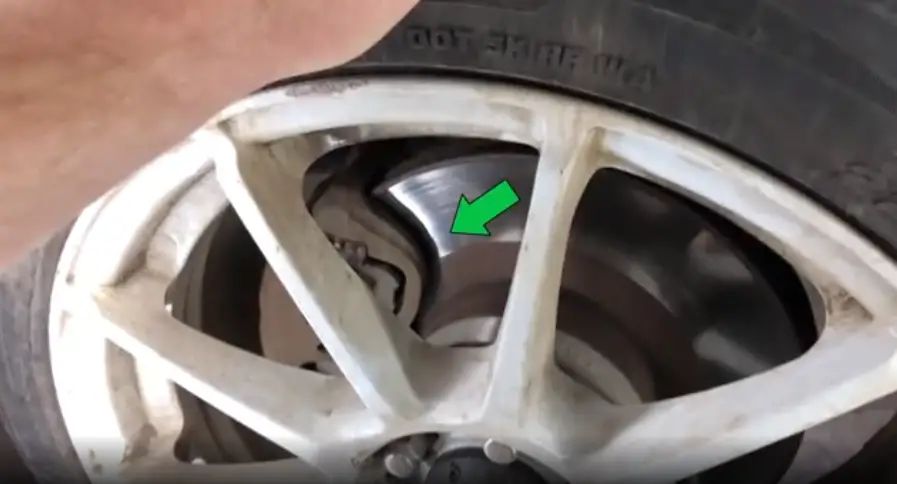
So we’re gonna shake it from top to bottom

Do not recommend the use of spacers I’ve seen these get loose and wheels fall off cars.
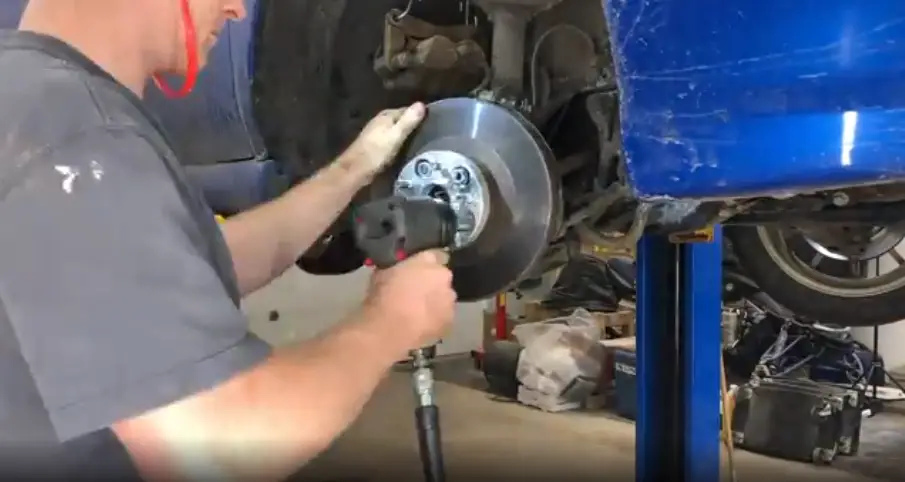
I’m going to take a screwdriver put it between the rotor and a pad or a rotor in the caliper and just slowly pry and that will give us the room.
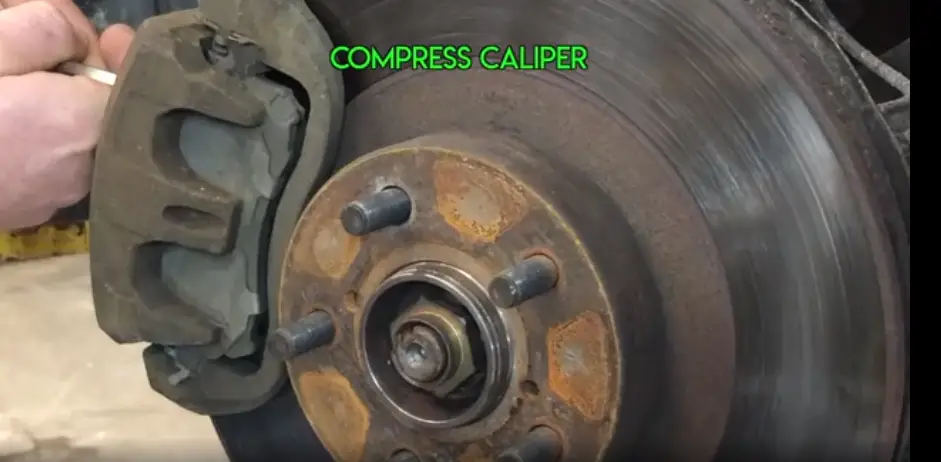
We need to slide this caliper off.
S hook or a small bungee cord kind of like this…. hang it up out of the way through the caliper.
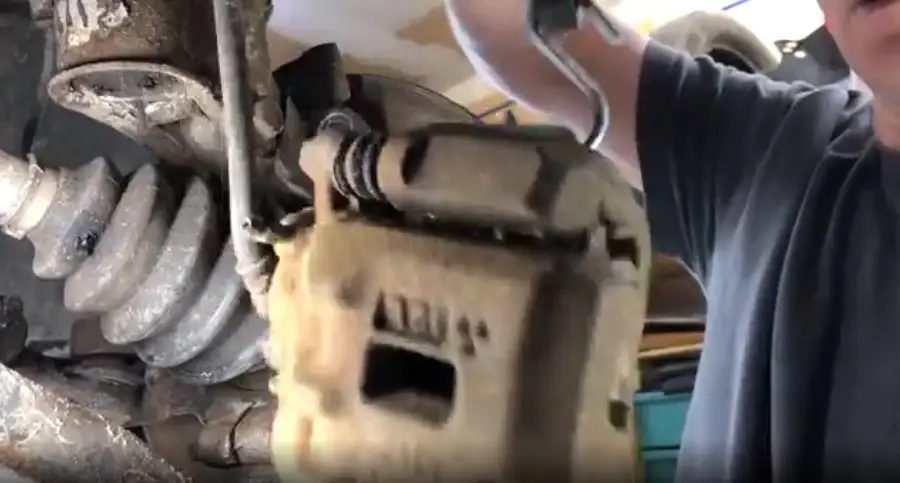
Somewhere convenient it seemed as loose
Right…
Here I can’t get much leverage on it axle’s right here,
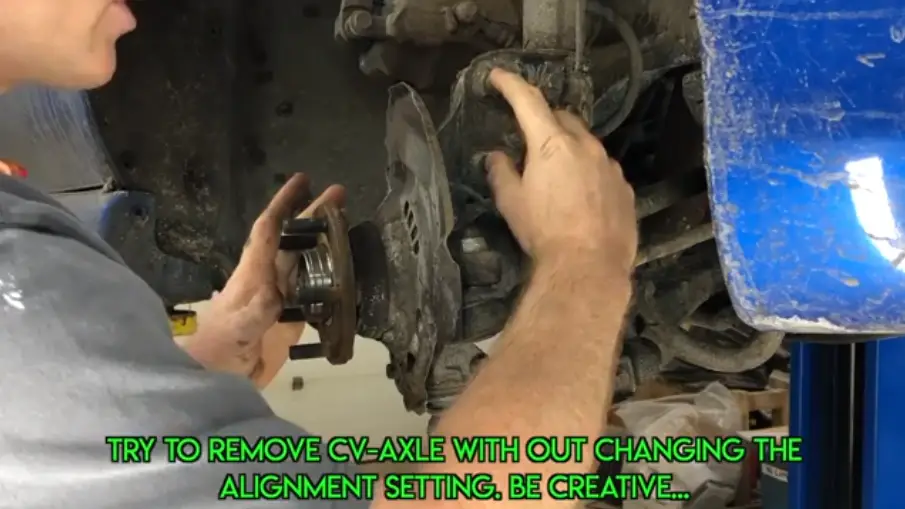
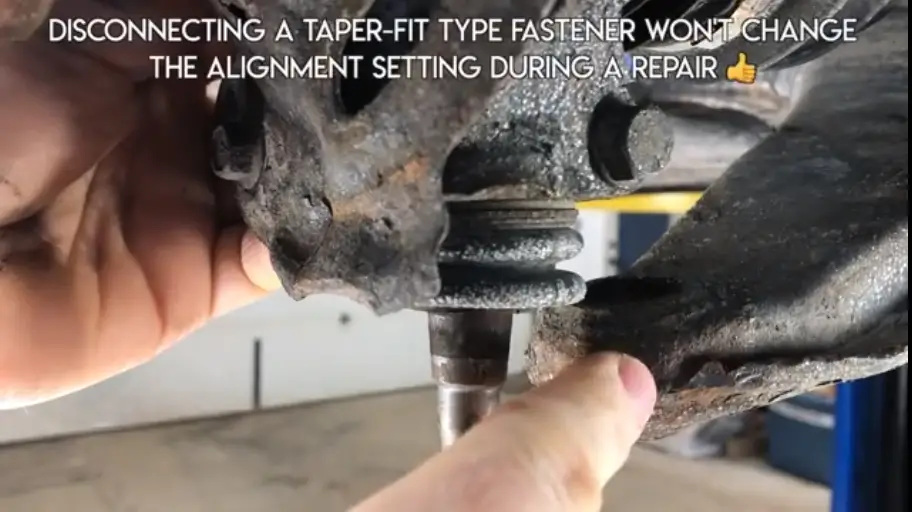
so we need to come up with a way to remove that while not disturbing these two upper strut, bolts these two upper strut bolts control the camber adjustment.
This isn’t going to change the alignment by popping this ball joint loose i’ll pry this arm down slide the cv shaft out.
This is a 17 down here…
Here’s where the trick comes in we’re just going to strike right here on the lower control arm mount point that is going to release.
This stud from the ball drive i could hit it right here I could hit it right here.
On the back side since I’m right-handed I’m gonna aim for this general area.
All right now….
I think, I loosened it just, because there’s more of a thought at the end I bar and pry down.
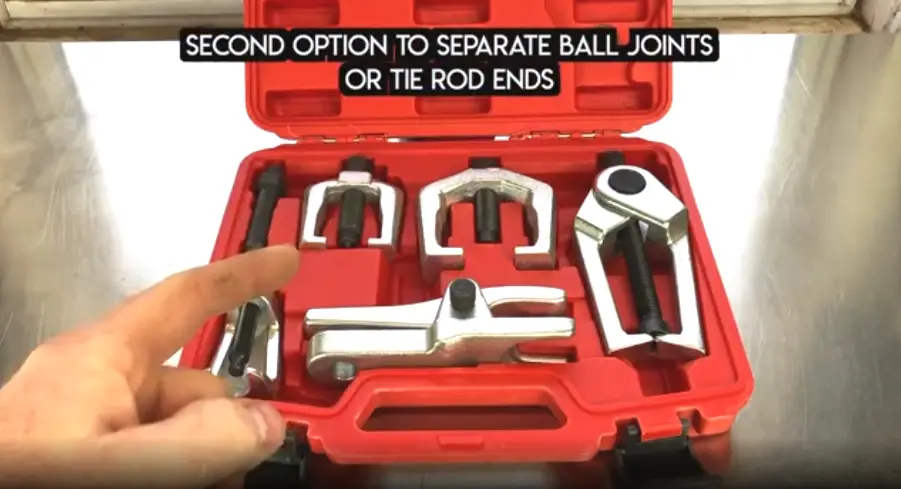
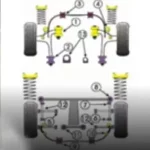
if you’re not comfortable striking the lower control arm to jar the ball joint loose five in one front end service kit ball joint separator pitman arm puller tie rod end tool got a bunch of things here that you could use on the front end of your vehicle.
See how
The shaft has a taper to it centers itself inside the lower control arm.
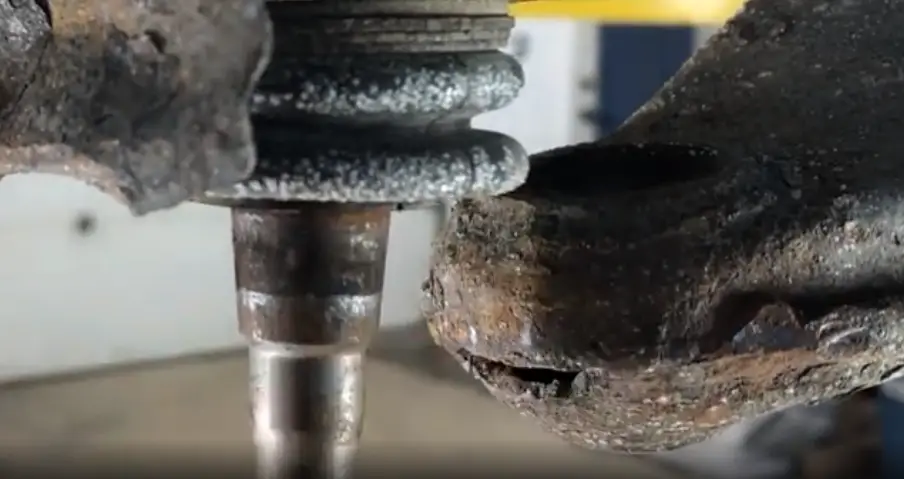
Great for alignment purposes it does make it a little more difficult to get out of the lower control arm this hole and shaft for the tie rod end is also tapered.
So these are all similar concepts.
If you want to take this tie rod end out you just strike it right here and that’ll just jar it loose and usually fall out the way that it’s oriented right here the weight of it will pull it right down now that the bottom is loose that will provide enough space to slide out our cv shaft buddy that was driving this car.
He could hear that because he knows the car pretty well but i couldn’t hear it because the exhaust is so loud that.
This is bad.
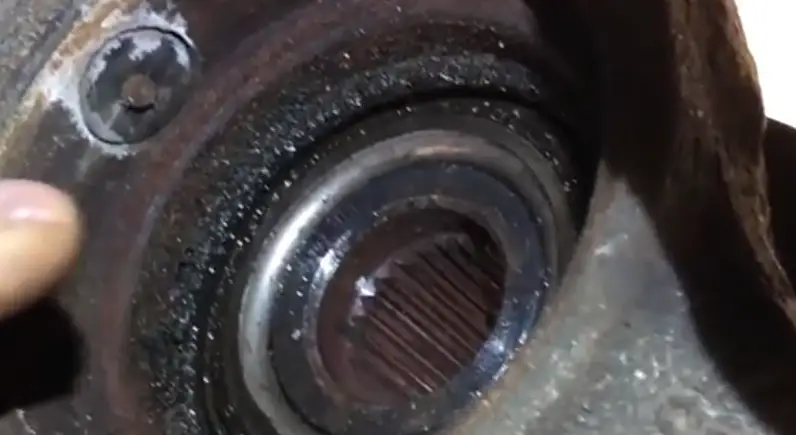
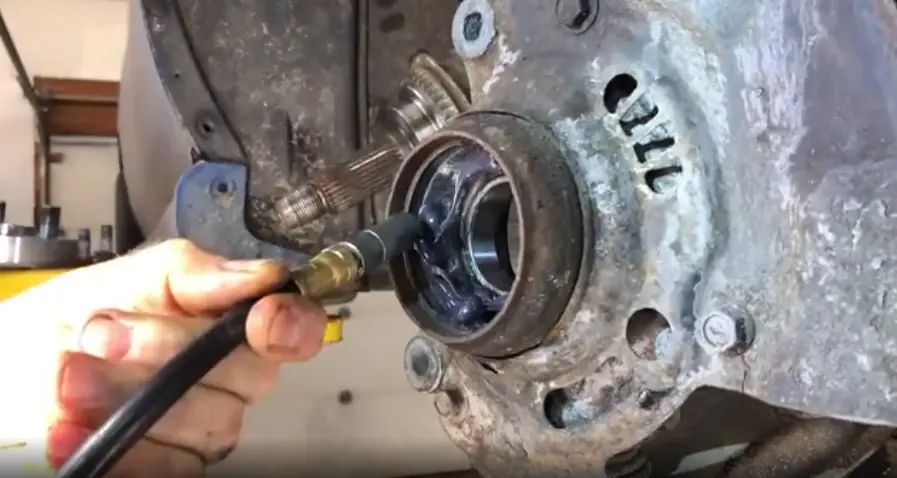
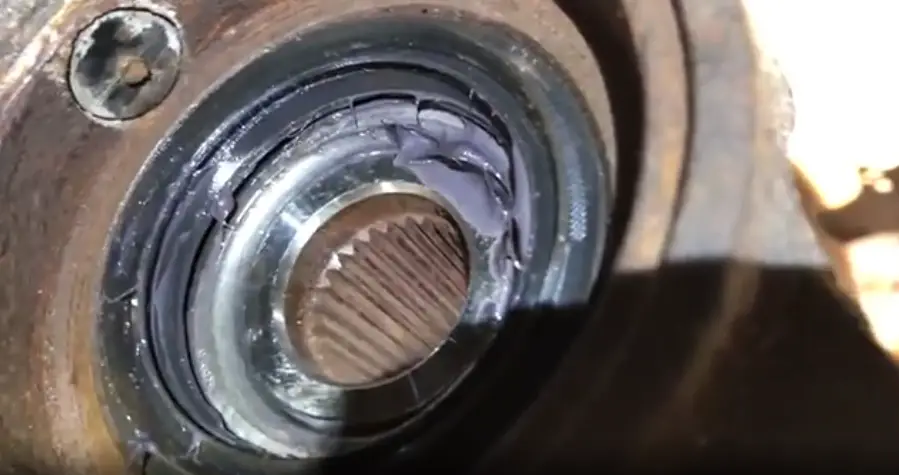
I can tell you why that bearing failed there’s no inner seal there should be a seal in this bore right here whoever replaced that last for cut the seal no big deal we’ll put a new seal in it and we’ll get them back up and running be careful with your fingers right here.
I have had this pry bar slip use a pair of channel locks.
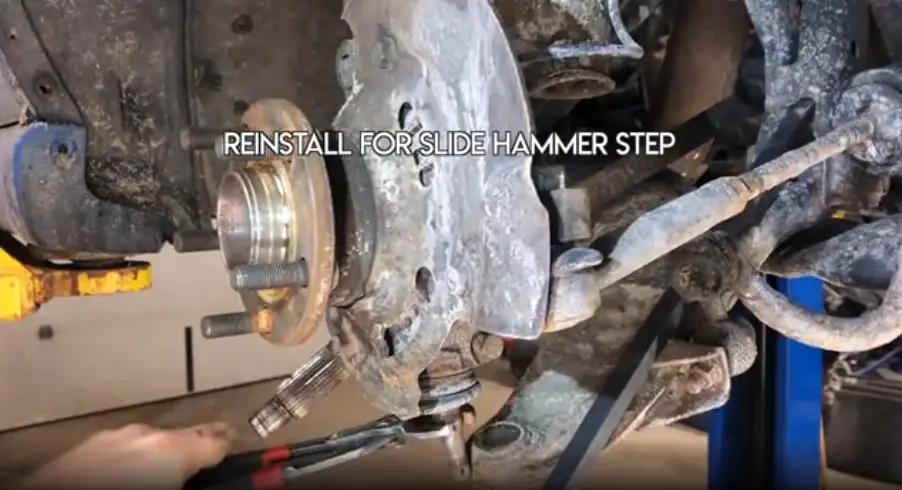
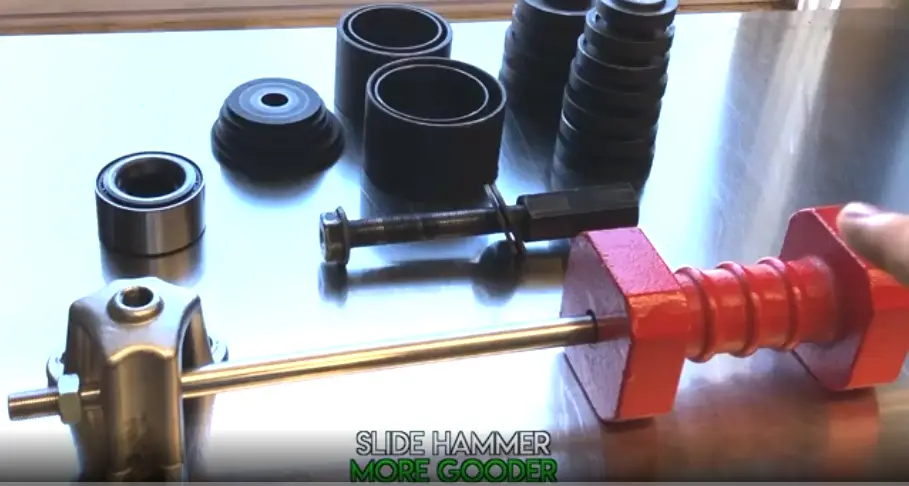
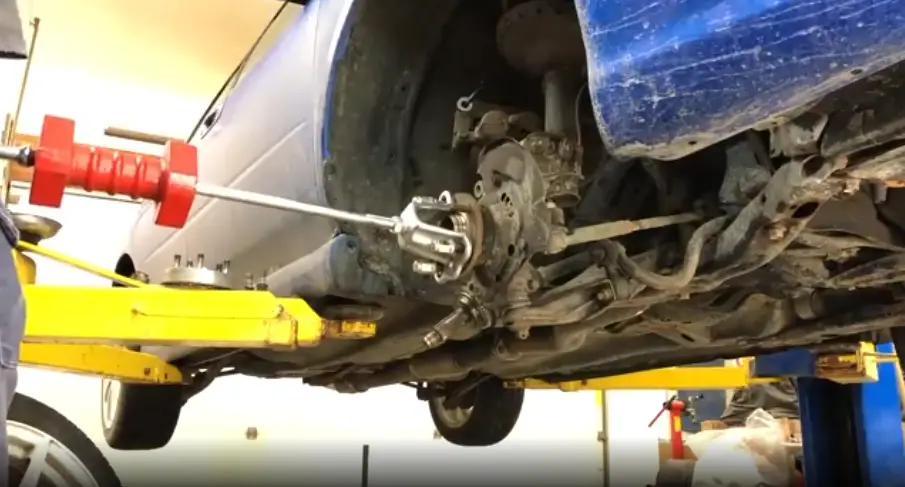
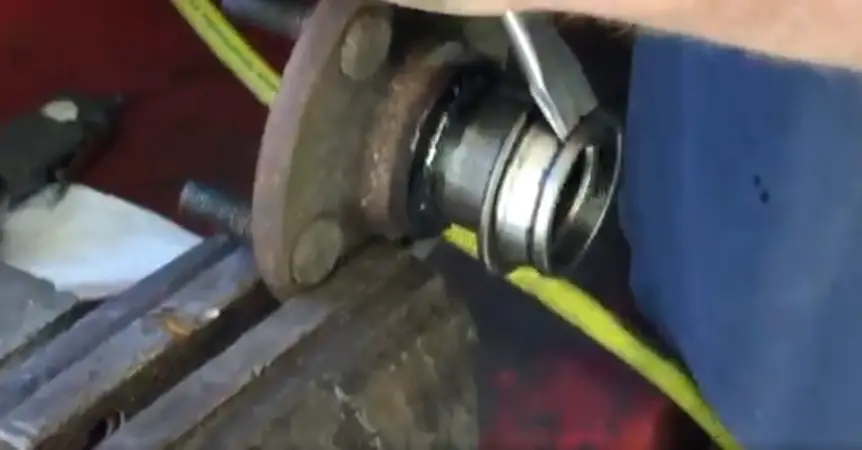
I’m just gonna pry down put that in there we’ll give this a little shake to access the bearing we got to pull this hub apart so we’re going to depress.
It by using a slide hammer this is the best way. you could use a hammer and a socket to do it from the inside pound it out you risk damaging the hub there should be a seal right here.
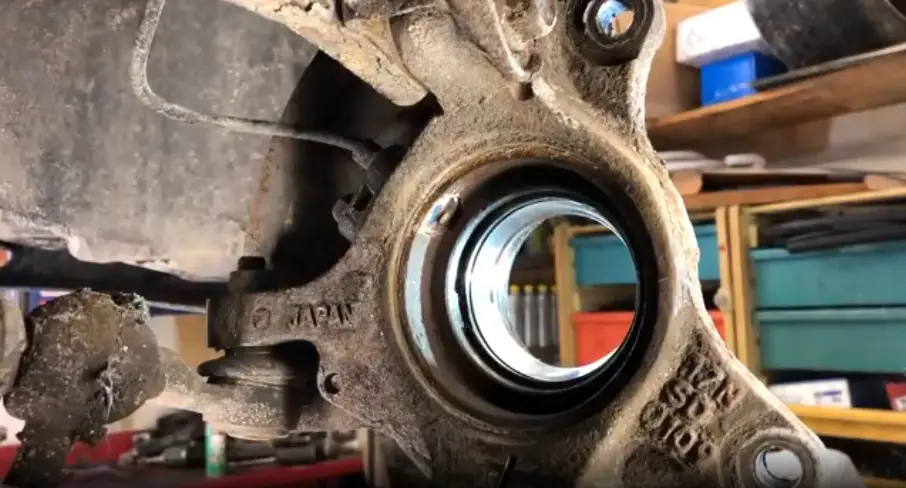
See some rust we got some water in there the ring landing for the seal on this side and then it’s the uh landing for the bearing. on the inside significant damage um they’re trying to force it that’s okay that ring landing should be just fine it’s a pretty substantial piece of meta all the way around.
so just give that kind of a nice little wipe down whatever you do don’t stick your fingers in here and just start walking them around too hard.
I’ve definitely gotten slivers of metal from bad bearings in my finger.
So you don’t want to go two two bonkers that’s a circlip right there so we need to get this out and we gotta do that from the inside.
I messed up a lot of things and learned the hard way to get where I’m at.
which is why you guys on youtube are smart because you’re checking this all out and you’re making sure you don’tmake these same mistakes and you’re.
Learning the easy way….
You hear all these horror stories of people messing up their car and this and that and the other thing.
Bad experiences all the things that can happen.
This is a bad experience i have to do a whole lot of extra work.
Seal is missing um this is pretty pretty obvious now to get this snap ring out you can see there’s these little ledges right here.
Where you can get a screwdriver in there and pop that out this secures the bearing from popping out this is the extra safety measure the integrity of this is still good so we can reuse it these snap rings can be on the inside of the knuckle or the outside of the knuckles this landing area the ring that it goes in i’m going to inspect that there’s anything on here.
That’s not good.
We’ll… we’ll … just go ahead and replace this knuckle if it’s necessary we do it if it’s not we don’t now what i need to do is find a cup that fits right back here or a spacer that the bearing will fit right into and drop right through presses
Just perfectly inner landing of the knuckle where the seal goes.
We’ll put this spacer here in order to push on it but we need a way to push on this race
So there’s two ways to do it you can use a bearing spacer that’s big enough to just catch the lip of the race needs to pass through this area here.
Where the seal is going to land and that does and that that hits the race that’s tapered and it’ll push it right through.
It might rock a little bit but it’ll push it right through now you might get some marks on the edge of your race here. you can see where I’ve probably pressed. out bearings like that before the other option which i will always use.
if I can on an old bearing only would be to just use the old bearing inner inner race and cage and rollers to push that out uh you never ever want to push a new bearing in because all the pressure of pushing on these roller bearings will destroy these brand new bearings.
That you’re trying to replace.
That’s one of the things you definitely don’t want to screw up we need a spacer that fits the bearing we could use this spacer.
we can flip it around it’s not quite the right size we could use this size that.
we previously kind of used let’s go that direction this is the size that I like for no particular reason go ahead and assemble.
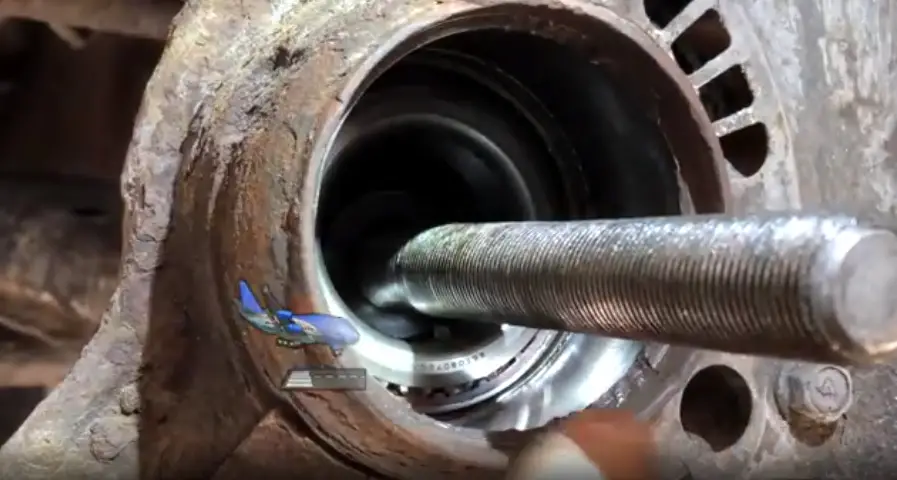
Your bolt and now basically this takes place of a press we’re going to press the bearing into that cup you can do this by hand with a ratchet.
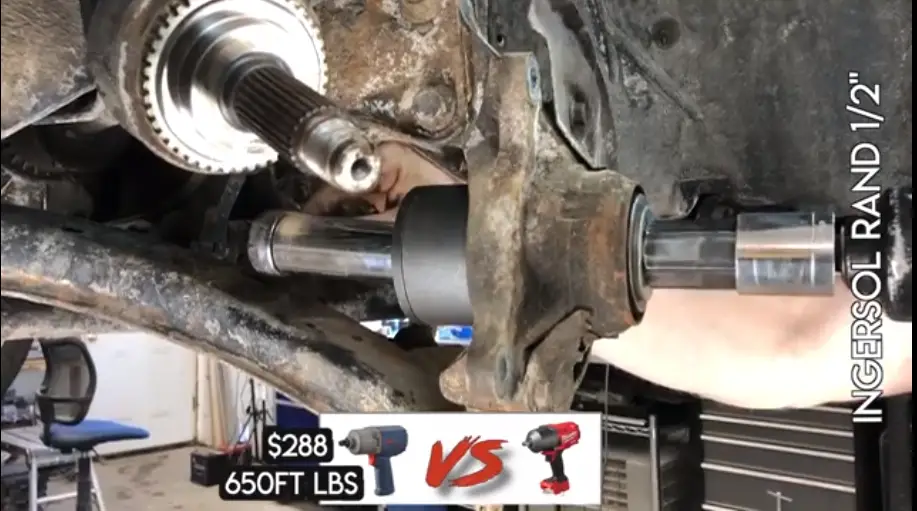
All right that made quick work of it these uh milwaukee tools are amazing
We have a cup with a bearing in it here’s our washer and our spacer and there’s our old bearing the inside seems to be pretty flat.
So the bearing can rest up against it
There’s a collar in there a little plastic collar and that’s just basically holding the two halves of the bearing in press this collar out and now you have two bearing inner cage assemblies and the center section here.
Make sure we have this inner bearing in because once we push this race in we may not be able to get that bearing in on that side this side which we can put in.
After we press this outer race and bearing ends you find a perfect spacer that fits right up on that bearing.
But I will also pass through and into our bore so you can see that.
This fits in there just barely but yet.
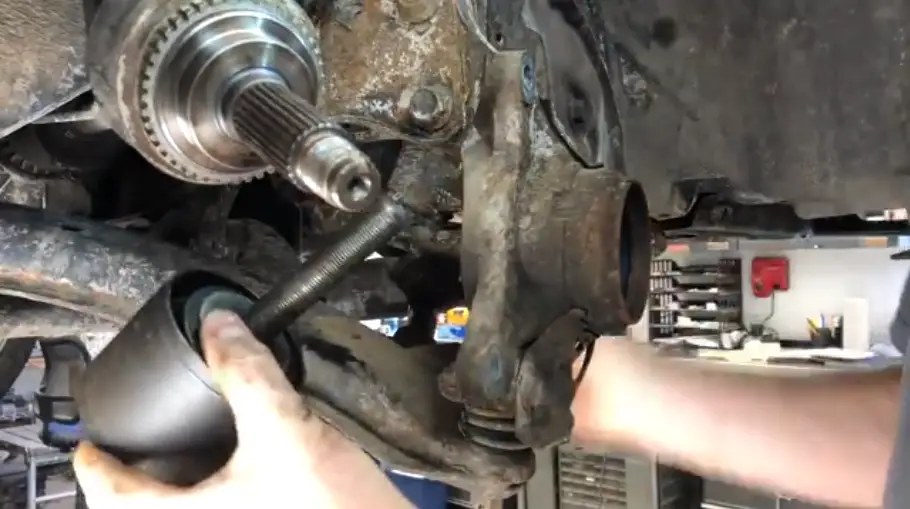
It fits our bearing cup exactly like we need it to. so it’s going to fit right on our cup just like that and push our cup in and since this one presses from the inside.
We’re just going to kind of get it up and in the bore hole and since we’re only going to be going right up to this lip in here basically all We need. is a spacer that will land on the outside right here of the knuckle.
I think that one will do the trick yep our spacer slipped off to the side just a little bit I got everything all lined up.
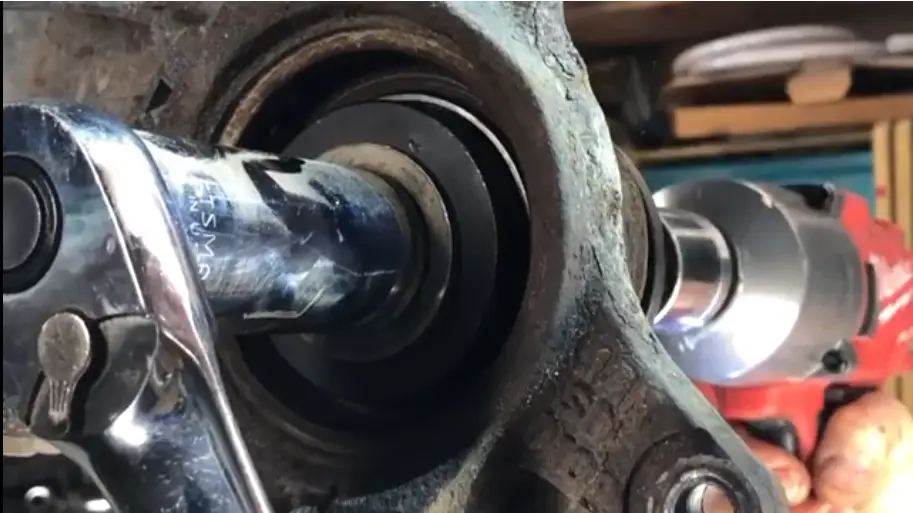
Tighten this up now when it hits the landing on the inside it should have an abrupt stop the socket will stop spinning and there’ll even be some different noise to the way it’s being pulled in.
So want to make sure you don’t over tighten things when it stops and stops now at this stage of the game I’m just forcing.
If I keep going it definitely landed so now we’ll just remove our tool.
Don’t ever lubricate the surfaces that were pressing together that would kind of defeat the purpose of pressing them together it may not hurt anything but on the same token um it’s not designed to be done that way here’s our race on the on the outside I can remove it so.
After it’s all said and done we didn’t have to have that installed
Check our ring landing right there which which is uh good and everything’s seated so now we need to push our clip in uh you can also use some snap ring pliers but once you get it started in there.
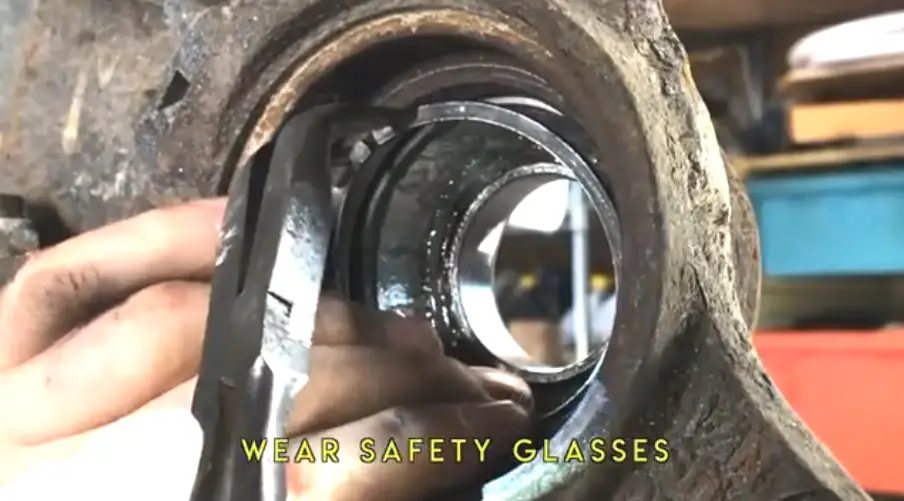
Make sure you hold on to it all times because I’ve seen those things go flying wear your safety glasses because those things can get you just pry on this a little bit.
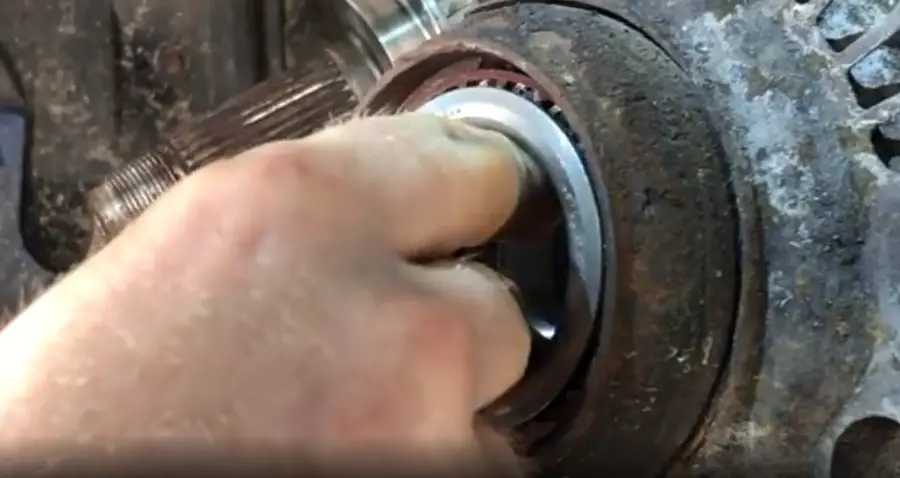
Make sure yep it’s seated in there all the way install our bearing.
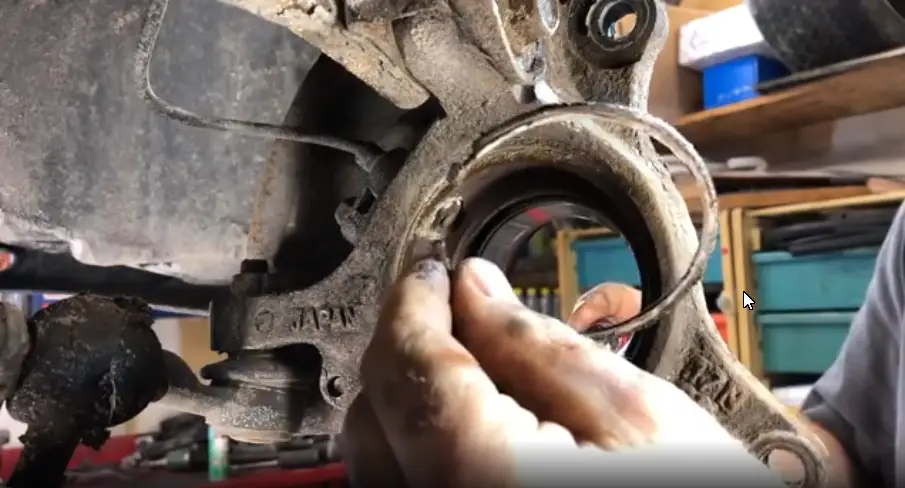
There’s our inner bearing now we need to put our seal right there
Here’s our inner seal and that is gonna just kind of go into that little spot right there.
So you wanna do is just get that in there square and it’s gonna land on it’s gonna land on this on the clip
So even if you start it a little bit wonky as long as you don’t bend it.
It should go in pretty straight
Just work it around
There we go i think we’re getting here in.
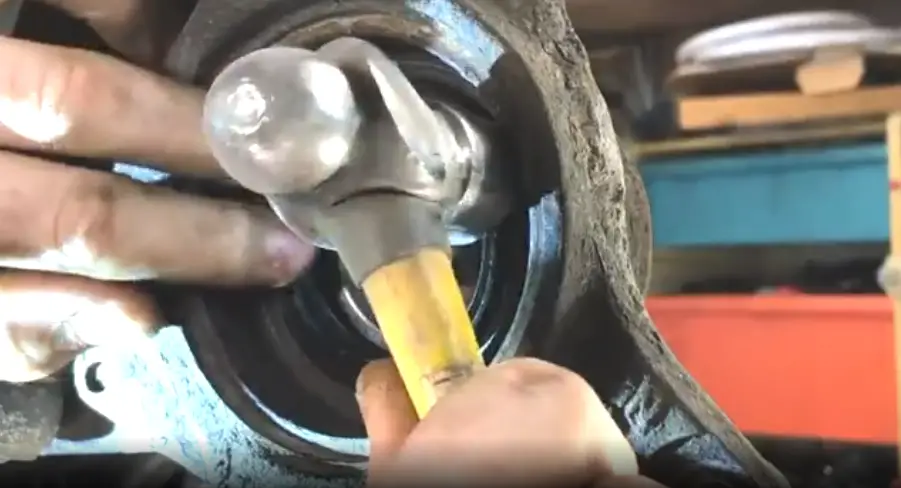
Now i look really bad at this because I’m catering to the camera here trying to give you guys the best angle that’s real slick so i dropped on the ground I’m going to clean the dirt off that put a little more grease on using a seal or race driver would be the proper way to do this.
Typical hub seals inners and outers like.
We’re driving today I can just tap them in with a hammer and I feel comfortable this would have knocked in our seal quite nicely tapered for a race
If you need to install bearing races like in a rear axle type situation.
Also one of the reasons I don’t have a lot of cases in here is, because I have more room.
I don’t want to have 10 tool boxes so this is a much easier way for me.
If you’re talking all that smack about the last installer.
I’m gonna end up damaging something but if I do.
I’ll put another seal using the old finger gauge here and that is installed all the way perfectly.
I really like it
So I’m pretty happy there as long as i didn’t hit that with my hammer.
It was a really awkward angle there a little bit of uh wheel bearing grease in here wheel bearings u-joints ball joints as far as grease goes the more the merry i didn’t disturb the grease inside this cage this is still packed.
Just cleaned off the outside there’s a couple specks of dirt there
So we’re just gonna shove that in there…
 We might get a little squish action and that’s fine now we don’t have to put a clip on this side because there’s this ring landing right here all the way around.
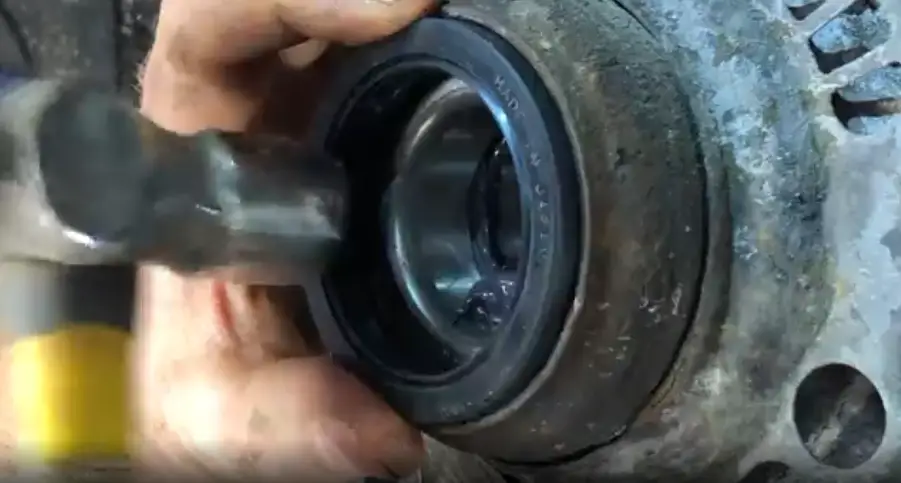
As long as we can pound this evenly all the way around we should be able to seal this bearing just by putting that seal on it shows you the imperfections
I gotta take two or three extra looks just because of the way the last person did this.
I don’t want to miss anything it looks like this is going to work perfectly fine they’re at home they spin good now they’re kind of loosy.
loosey-loosey-loosey because these are now going to be pressed onto the hub unit.
We need to get this old inner race removed bridge where it’s not smooth anymore burnelling spalling divots or ditches in the race.
Make the bearing no longer tight allow the bearings to wobble a little bit which gives you your play we just want to slide this collar off.
This inner race is pressed onto this hub.
Even Though I have a press sitting right over there this is how I do it?
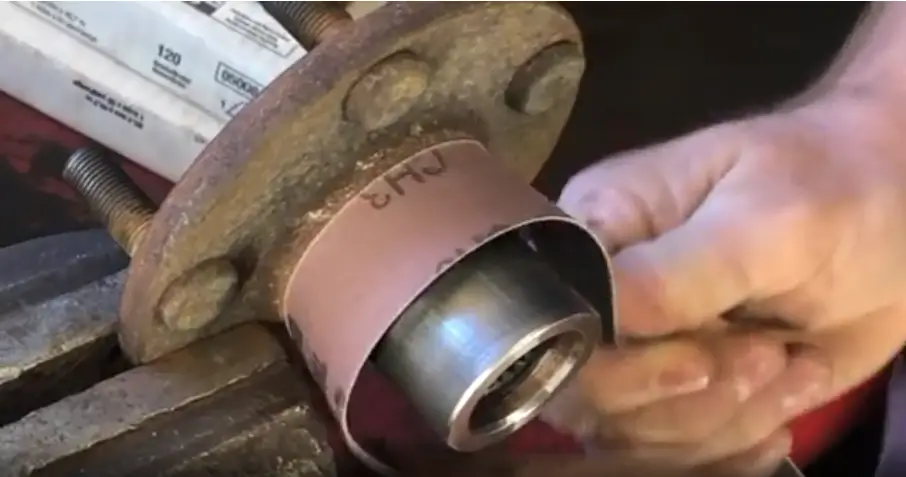
Every time so you take a chisel and you try to hammer and press this race off you don’t want to hit this inner hub take this grinder and I’ll grind this entire race.

At a slight angle right here so that I can get in as deep as i can half or three quarters of the way through this thickness.
If you can go down.
Just deep enough that will give me a slot to stick my chisel in this whole.
collar will split like this and you can pull it off by hand. if you nick it really bad then you’re just going to want to go ahead and replace this.
Option number three is always the best.
option much more gooder bearing separator puller kit it has a range of pullers.
The fourth option is you can always take your bearing press splitter set this on the press
Take your press anvil and you’d push, that down and this would be remaining on top and then on bottom will be the hub.
That’s a good sign it’s walking out.
I’m only pushing the button on here like quarter throttle
I’m doing it nice and slow
So that, that bit stays in here you just go full throttle right out of the gate it’ll chip off this race and we may chip this off right now.
The way that it started moving immediately more likely than not we’re
Just going to shove this off in one pretty easy motion
Our splines are good our surface here is good no reason that you can’t reuse.
This i almost forgot this is the seal
Surface can’t get it cleaned up
I’ll have to get a new hub I’m gonna give it a few scuffs of 80 and then after that I’ll go to 120 180 and then after that I’ll go to 400.
You can see it’s got some pits but you can’t get your finger in them if we were trying to hold an engine oil on a crank seal or something.
I’d be a little more nervous grease is going to have a harder time crossing through there this is for the outer seal.
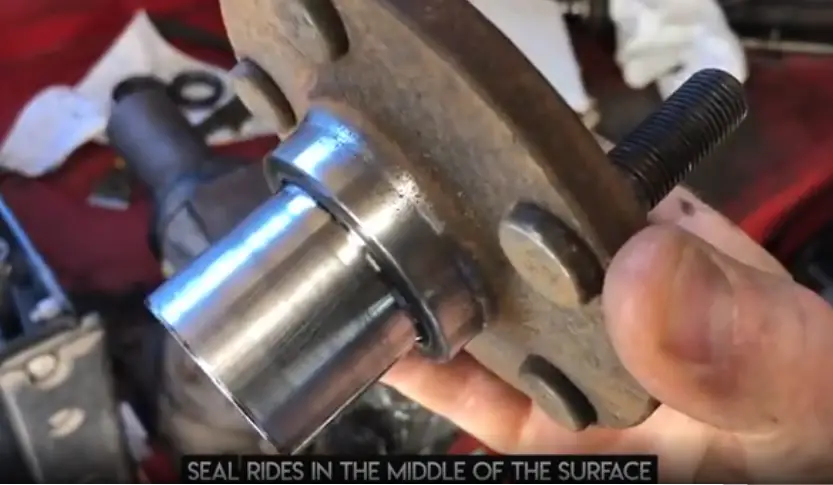
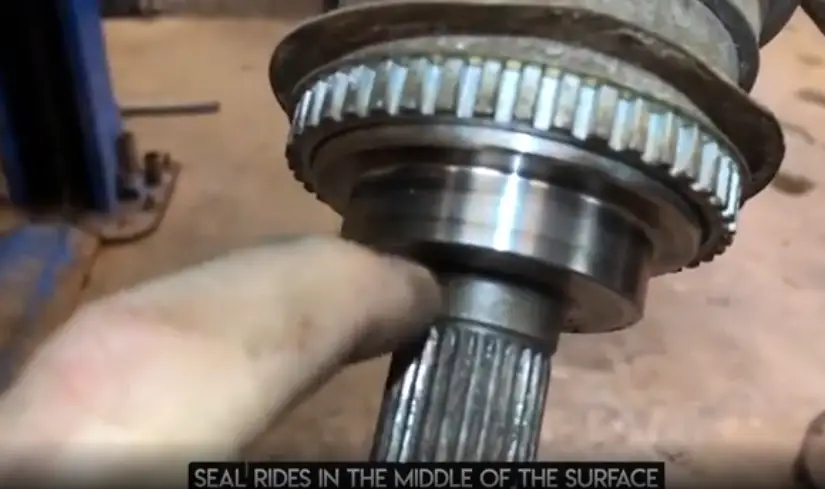
That is what the seal surface should have looked like this is going to be the inner seal you can’t get your fingernail in there at all that’s.
That’s a perfect.
Seal surface….
I’m going to put a little bit of wheel bearing grease in that little crevasse right there and that’ll just you know give it some more grease plus it’ll give that seal.
A fighting chance to survive there’s a little cavity right there and you can you can fill that right up there’s never been a dry bearing in the world that’s outlasted a greased bearing when it comes to grease.
Liberal amounts are always good i try to clean the bearing surfaces of grease when we are installing the hub only you gotta turn this flat.
By turning that flat you allow this hub to come all the way in and push flat against this race and a lot of times it.
Won’t even get fully flat it’ll just stop you know like an eighth of an inch before that you do want to press together on that inner bearing race that’s actually not going to put any forces on these rollers.
It’s just going to give something to push against
So that this hub can press itself into this bearing race.
There’s no other way to do it but you got to have this flat you don’t want to have this conical uh cone here kind of sticking down in there because then it won’t press all the way in and you’ll have a loose wheel bearing so use your flat end.
Now this is the smallest spacer in the kit the beauty of this is it also fits between.
The seal on the back side so we’re going to put this in our seal and you can see me pushing already.
So now we’re going to push against that spacer and we’re going to push against the face of this hub feed our bolt through our hub and that’s dry pick any spacer that will go around the edge here.
It doesn’t matter, which one it is as long as it fits
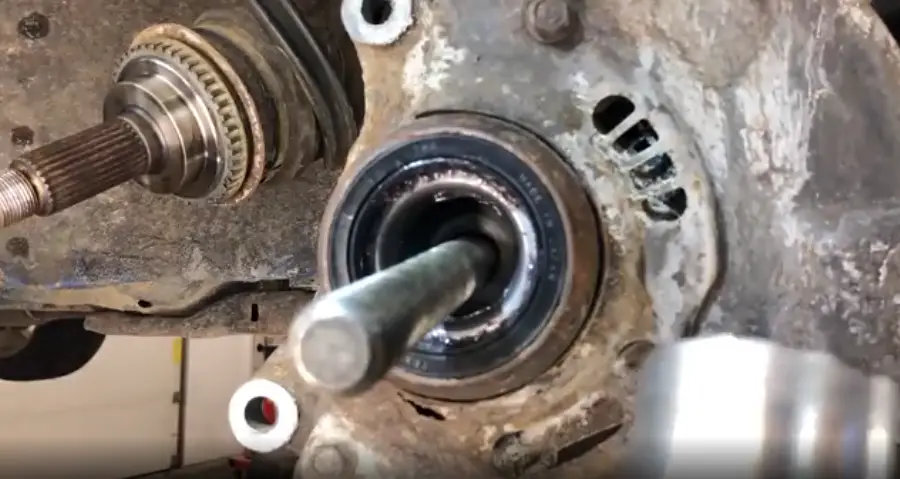
This is nice and flat so we’ll put that on there put our washer, on put our nut, on see how that spacer fits right into that seal.
Back there …
It doesn’t affect that seal or push on that seal or ruin that seal in any way tighten this all up you can see it’s not true right now.
As soon as we tighten it up it’ll pull itself true into the bearing we got our sockets on everything looks stopped right there all of a sudden That’s If I pull the trigger anymore.
At this stage of the game I’m just kind of forcing things so you don’t want to do that.
See where that bearing basically I didn’t get pressed all the way into that inner race.
If you were to switch that spacer around the wrong direction it definitely wouldn’t be pressed in correctly.
A perfect wheel bearing well perfect till somebody tears us apart and sees what we have to deal with but it should last a long long time now.
If you have a sealed bearing you’re not gonna have to deal with any of that seal stuff but the concepts of removing it and pushing it back in is exactly the same.
The cv axle nut is the fail safe along with the cv shaft that holds the bearing and the hub all together these act as a long bolt through the two of them and hold them together.
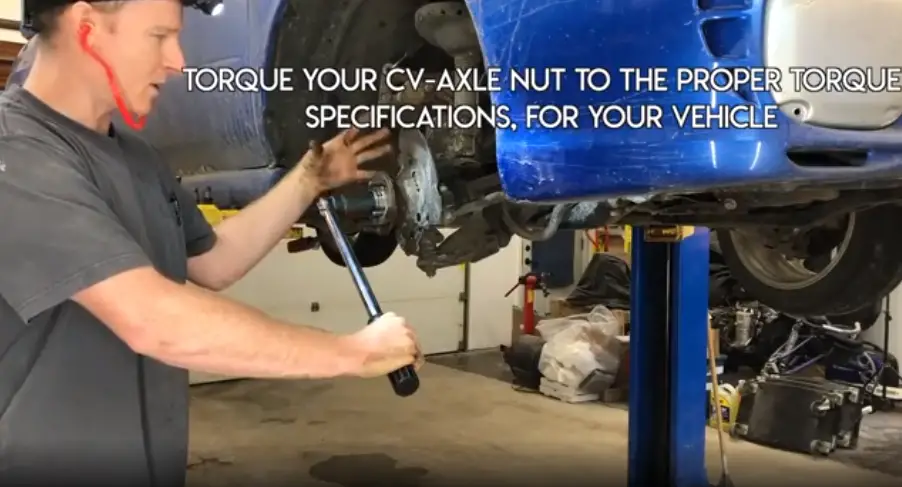

So you want to make sure you torque this to the proper amount.
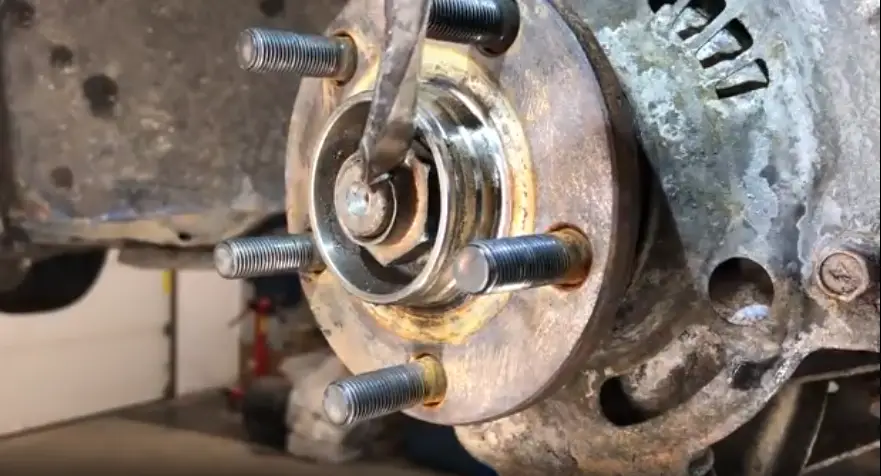
To restake your nut pound it back down flush with this keyway
You can make it pretty that’s fantastic but as long as you get it pushed in the main thing holding the nut in place is the torque of the fastener .
So this Should never come into play but if it were this will slow it down right here from spinning off the moment of truth is the bearing tight or is the bearing loose.
There’s no play whatsoever
I also have videos on preston style bearings bolt in style bearings trailer bearings and if you want to check them out that’d be cool and if you’re new.
Please subscribe and see you in the next one