Energizer Smart wifi. Video doorbell
Installation Guide
Thank you for choosing the Energizer® Smart Video Doorbell. This installation guide will help you with installing your device with your existing doorbell power wires and mechanical chime.
![]()
Note: Please follow the app setup steps in the Quick Start Guide BEFORE installing your device.
Not compatible with digital chimes.
System Requirements:
• Requires a working wired doorbell
• 16-24V AC 10VA transformer voltage
• WiFi router with an interent connection
• WiFi 2.4GHz 802.11n
• Android 7.0 or higher/ iOS 11 or higher
• Energizer. Connect App (on mobile devices)
©2021 Energizer. Energizer and certain graphic designs are trademarks of Energizer Brands, LLC and related subsidiaries and are used under license by Jem Connected IOT, Inc. All other brand names are trademarks of their respective owners. Neither Jem Connected IOT, Inc. nor Energizer Brands, LLC is affiliated with the respective owners of their trademarks.
Step 1
First, ring your doorbell to locate your mechanical chime. Turn off the power breaker at your fuse box for your existing doorbell and mechanical chime. Ring your doorbell again to confirm it’s now off.
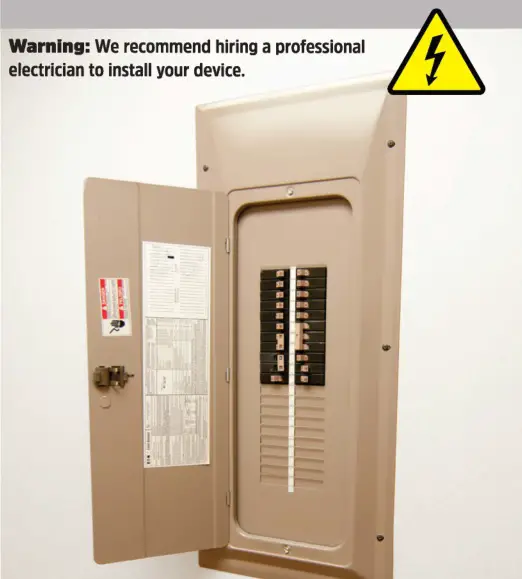
NOTE: Your doorbell circut breaker might be unlabled. Try ringing your doorbell to make sure it’s off.
Step 2
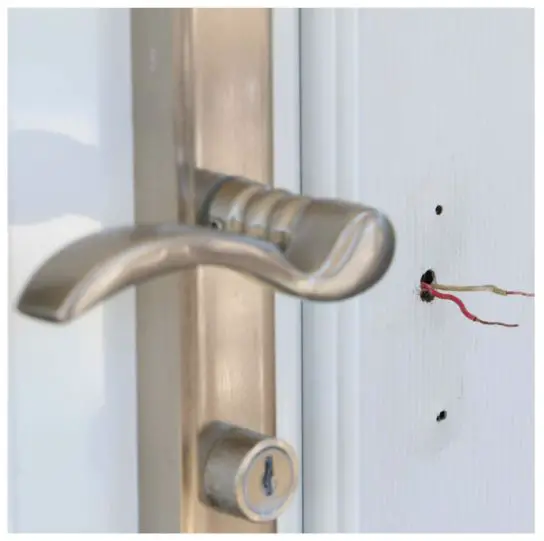
Outside at your door, remove the old working doorbell and disconnect the two existing wires from the unit.
![]()
NOTE: It is recommended to clean the wires
to be free of any corrosion.
Step 3
Based on your door and entry way, choose either the flat mounting bracket or wedge+flat mounting brackets for an angled view and install it around the wires.
Step 4
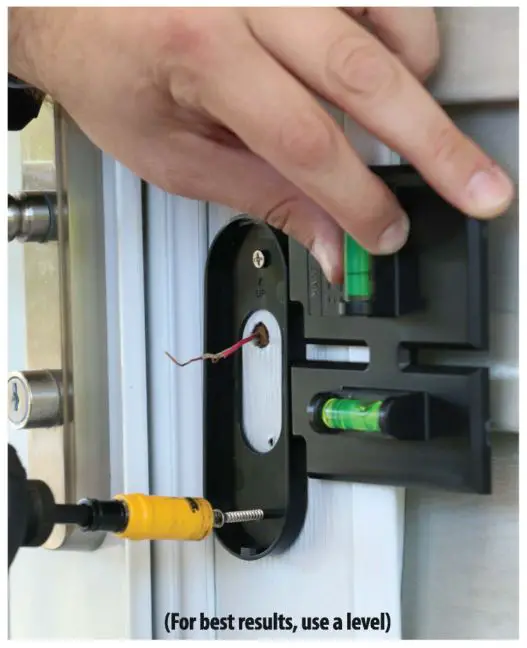
Option 1: Mounting Flat Bracket
Use the long screws to mount on the wall.
![]()
NOTE: Make sure the bracket shows the arrow facing up and the pre-installed foam backing is against the wall.
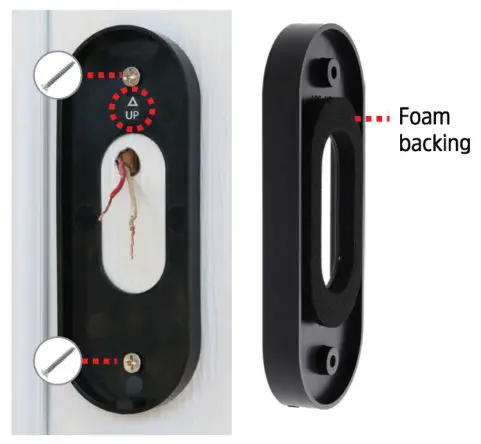
![]()
NOTE: Make sure to screw the bracket very tightly against the wall to prevent water from touching your wires.
Step 5
Option 2: Mounting Wedge+Flat Bracket (for angeled view)
A) Take the wedge (angled) bracket and position left or right for best viewing angle. Use the long screws to mount to wall.
![]()
NOTE: There are two holes, the one that allows you to view the wall is the correct one to drill through. (See image A)
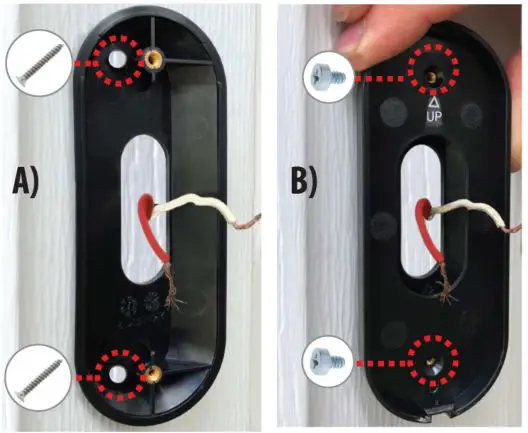
B) Next, take the flat bracket, with arrow facing up, and screw it into the mounted wedge bracket using the short screws.
Step 6
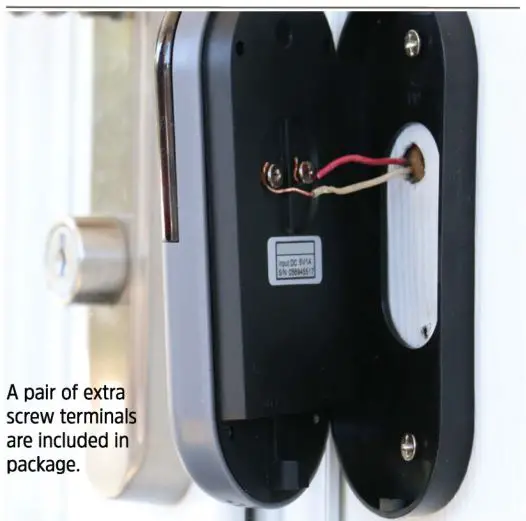
Connect the two wires to the screw terminals on the back of your doorbell.
![]()
NOTE: If using a microSD card (not included), install prior to mounting doorbell.
![]()
NOTE: It does not matter which wire goes to
which screw terminal, just make sure they are secure.
![]()
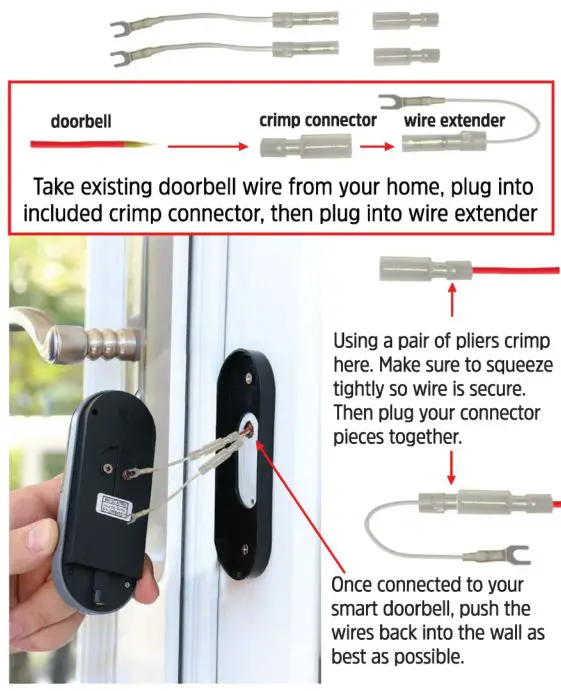
NOTE: If the wires coming out from your home are too short you can use the included wire crimp extenders.
Step 7
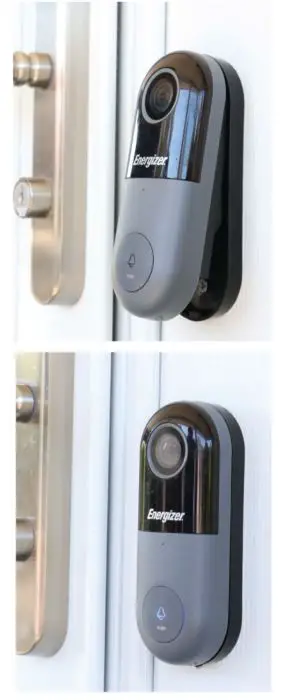
Install the doorbell into the mounting bracket at the top first and then press and hold the bottom in.
Step 8
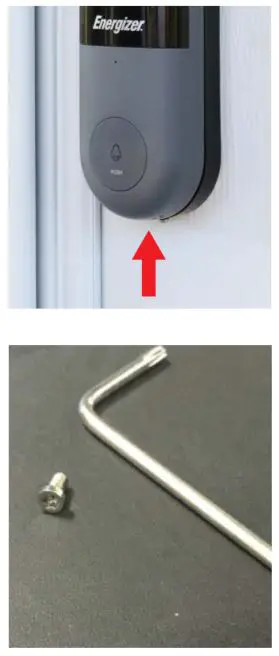
Lastly, make sure to secure the doorbell with the included security screw and tool.
Step 9
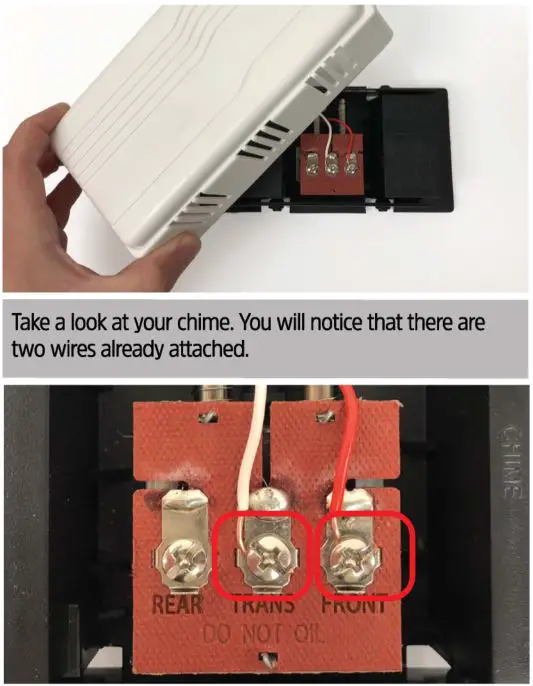
Next, find your mechanical chime and remove the cover and batteries (if applicable).
Step 10
Take the power kit included with your doorbell. Notice there is one main wire that splits into two.

Step 11
Slightly unscrew both screw terminals and slip one hook from the power kit under each screw. Make sure that the wires already on the chime stay connected too.
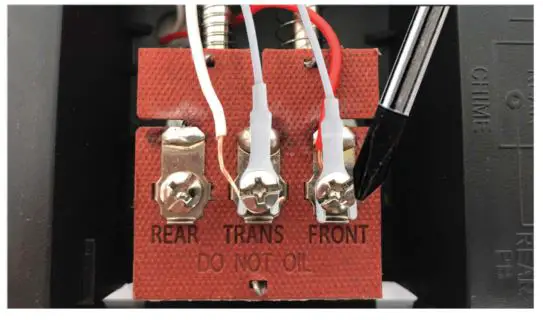
![]()
NOTE: It does not matter which color wire
from the power kit connects to which screw.
Step 12
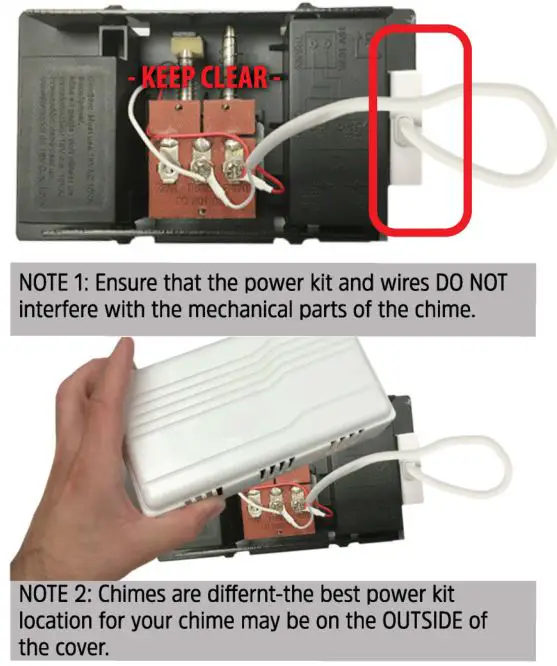
Using the included double sided tape, affix the power kit to your chime wherever there is space and replace the cover.
Step 13
Turn the doorbell power back on at the fuse box. The light on the doorbell button should tum on and after a few minutes become solid blue.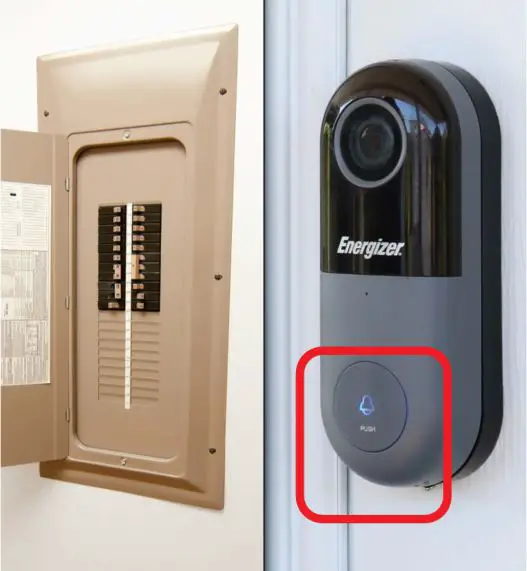
Enter the Energizer®. Connect App and select the doorbell to choose the appropriate chime and finalize setup. Your Smart Video Doorbell is now ready for use!
Troubleshooting
![]()
Visit our FAQ at www.energizerconnect.com
Doorbell:
If the light on your doorbell button does not illuminate and the Energizer® Connect App cannot locate the product:
- Check that the power has been restored at the fuse box.
- Check that the wire connections at the screw terminals are secure. Remember to turn the power off before and back on after.
Notice
Chime:
Not all home setups require the power kit to be installed. If after fully installing and setting up your doorbell, you find that everything works except for the mechanical chime:
- First make sure to check the “CHIME SETTINGS” in the Energizer® Connect App and ensure “MECHANICAL CHIME” is selected.
- Make sure the power kit and cables are not interfering with the movement of the mechanical chime.
- If your mechanical chime is still not working, try removing the power kit from the chime. Remember to turn the power off before, and back on after, and then select “MECHANICAL CHIME” again in the app once the doorbell turns back on.
- If the issue is not resolved, use the included wireless chime and select “WIRELESS CHIME” in the app.
