![]()
GE Front Load Steam Washer & Condenser Dryer Combination GFQ14 User Manual
THANK YOU FOR MAKING GE APPLIANCES A PART OF YOUR HOME. Whether you grew up with GE Appliances, or this is your first, we’re happy to have you in the family.We take pride in the craftsmanship, innovation, and design that goes into every GE Appliances product, and we think you will too. Among other things, registration of your appliance ensures that we can deliver important product information and warranty details when you need them. Register your GE appliance now online. Helpful websites and phone numbers are available in the Consumer Support section of this Owner’s Manual. You may also mail in the pre-printed registration card included in the packing material.
Introduction
- This unit allows: wash only; dry only; wash and dry cycles.
- Fill the drum 2/3 full with laundry for best wash and dry performance. This allows air movement and proper drying. A fully loaded drum will lead to longer dry times.
NOTE:
During Dry cycles temperatures in the unit can get very hot. For this reason, the door will lock during the dry cycle and remain locked, after pausing or at the end of the cycle, until temperatures cool down. Forcing the door open will result in a broken door mechanism. - This unit uses condenser drying technology. This enables installation and use without a vent, but loads take approximately 1.5 times longer to dry than a traditional vented dryer.
WARNING
- To reduce the risk of death, fire, explosion, electric shock, or injury to persons when using your appliance, follow basic precautions, including the following:
- Read all instructions before using the appliance.
Follow all fabric care instructions and warnings to prevent melting of garments or damage to the appliance. - DO NOT wash or dry articles that have been previously cleaned in, washed in, soaked in or spotted with gasoline, dry-cleaning solvents, or other flammable or explosive substances, as they give off vapors that could ignite or explode.
- DO NOT add gasoline, dry-cleaning solvents, or other flammable or explosive substances to the wash water.
These substances give off vapors that could ignite or explode. - DO NOT place items exposed to cooking oils in your unit. Items contaminated with cooking oils may contribute to a chemical reaction that could cause a load to catch fire. To reduce the risk of fire due to contaminated loads, the final part of the tumble dryer cycle occurs without heat (cool down period). At the end of the cycle the door remains locked during the cool-down period to protect from surfaces that get hot during drying. The cool down period will be approximately 10 minutes before the door is unlocked.
- DO NOT dry articles containing foam rubber or similarly textured rubber-like materials.
DO NOT store combustible materials, gasoline or other flammable liquids near the unit. Keep area around the air intake vent on the front of the unit and adjacent surrounding areas free from the accumulation of lint, dust, and dirt. - The interior of the appliance should be cleaned periodically by qualified service personnel.
DO NOT add dryer lint sheet in the unit when washing. - DO NOT spray any type of aerosol into, on or near the unit at any time. DO NOT use any type of spray
cleaner when cleaning the interior. Hazardous fumes or electrical shock could occur. - Under certain conditions, hydrogen gas may be produced in a hot-water system that has not been used for 2 weeks or more. HYDROGEN GAS IS EXPLOSIVE. If the hot water system has not been used for such a period, before using a washing machine, turn on all hot-water faucets and let the water flow from each for several minutes. This will release any accumulated hydrogen gas. As the gas is flammable, DO NOT smoke or use an open flame during this time.
- DO NOT allow children to play on or in this appliance. Close supervision of children is necessary when this appliance is used near children. Before the appliance is removed from service or discarded, remove the door or lid. Failure to follow these instructions may result in death or injury to persons.
- DO NOT reach into the appliance if the drum is moving to prevent accidental entanglement.
- DO NOT install or store this appliance where it will be exposed to the weather.
- DO NOT tamper with controls, repair or replace any part of this appliance or attempt any servicing unless specifically recommended in the user maintenance instructions or in published user repair instructions that you understand and have the skills to carry out.
- DO NOT climb or stand on this unit.
- DO NOT operate this appliance if it is damaged, malfunctioning, partially disassembled or has missing or broken parts including a damaged cord or plug.
Unplug the appliance or turn off the circuit breaker before servicing. Pressing the Power button - DOES NOT disconnect power. See “ELECTRICAL REQUIREMENTS” located in the Installation Instructions for grounding instructions.
PROPER INSTALLATION
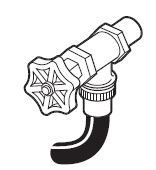
This unit must be properly installed and located in accordance with the Installation Instructions before it is used. Ensure that the hot water hose is connected to the “H” valve and the cold water hose is connected to the “C”
valve.
- Install or store where it will not be exposed to temperatures below freezing or exposed to the weather, which could cause permanent damage and invalidate the warranty.
- Properly ground unit to conform with all governing codes and ordinances. Follow details in the Installation Instructions.
- Ensure unit is properly leveled and unit legs are adjusted such that unit is stable.
- GE Appliances strongly recommends the use of factory-specified parts. A list of factory hoses available for purchase are listed. These hoses are manufactured and tested to meet GE Appliances specifications.
- GE Appliances strongly recommends the use of new water supply hoses. Hoses degrade over time and need
WHEN NOT IN USE
- Turn off water faucets to minimize leakage if a break or rupture should occur. Check the condition of the fill hoses; GE Appliances recommends changing the hoses every 5 years.
PARTS AND ACCESSORIES
Order online at GEApplianceparts.com today, 24 hours a day or by phone at 877.959.8688 during normal business hours. In Canada, visit your local GE Appliances parts distributor or call 800.661.1616 or GEAppliances.ca/en/products/parts-filters-accessories.
Part Number Accessory
- PM14X10002 4 ft rubber water supply hoses
- PM14X10005 4 ft braided water supply hoses
- GFA140SS 24” Front-load
- To reduce the risk of fire, electric shock, or injury to persons, read the IMPORTANT SAFETY INFORMATION before operating this appliance. riser – ADA compliant with a plumbable drip pan
Getting started
Introduction
- This unit allows: wash only; dry only; wash and dry cycles.
- Fill the drum 2/3 full with laundry for best wash and dry performance. This allows air movement and proper drying. A fully loaded drum will lead to longer dry times.
NOTE:
During Dry cycles temperatures in the unit can get very hot. For this reason, the door will lock during the dry cycle and remain locked, after pausing or at the end of the cycle, until temperatures cool down. Forcing the door open will result in a broken door mechanism. - This unit uses condenser drying technology. This enables installation and use without a vent, but loads take approximately 1.5 times longer to dry than a traditional vented dryer. Throughout this manual, features and appearance may vary from your model.
- Add fabric softener to the fabric softener dispenser; see page 14.
- Add the manufacturer’s recommended amount of detergent. GE Appliances recommends the use of High-Efficiency detergents such as in your energy-efficient unit. Place detergent pods in the bottom of the wash basket before adding
- Loosely add items. Overloading may negatively impact wash and dry performance. See page 15 for suggested loading examples.
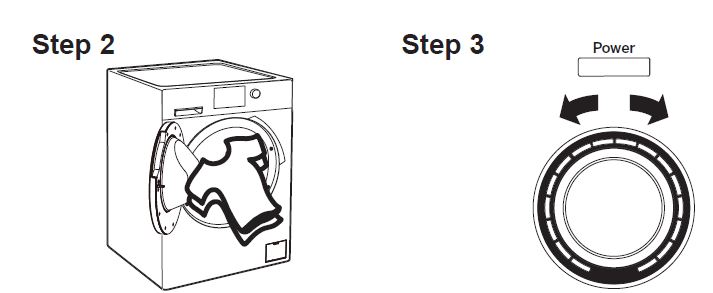
- Close door.
NOTE:
The unit will not start with the door open.
- If the screen is dark, press the Power button to “wake up” the display.
- Select a wash cycle. (Defaults are set for each wash cycle. These default settings can be changed. See Control settings for more information.)
The unit can be used as a dryer only by turning the selector knob to one of the red dry cycles. - Set the dry cycle by pressing the Dry pad. The unit will automatically run Auto
- Dry after the wash cycle is complete.
- Set Dry pad to Off to run a wash-only cycle.
- Press the Start/Pause button.


Controls
Display and Status Lights
The display shows cycle status (WASH SPIN DRY COOL ), the Estimated Time Remaining until the end of the cycle and the options selected. In addition, the display will show:
NOTE:
If an out-of-balance condition is detected by the unit, the SPIN light will blink during the remaining portion of the cycle and will stay illuminated for a short time after cycle completion. When this occurs, the unit is taking action to correct the out-of-balance condition and complete the cycle normally. In some cases, the unit may not be able to balance the load and spin up to full speed. Run a Spin Only cycle.
A Power
Press to “wake up” the display. If the display is active, press to put the unit into standby mode.
NOTE:
Pressing Power does not disconnect the appliance from the power supply.
Cycles – Wash, Soak, Spin and Clean
The cycles are optimized for specific types of loads. The chart below will help you match the setting with the loads. The Gentle Wash™ lifters lightly tumble the clothes into the water and detergent solution to clean the load.
| Items to Wash | Cycle | Soil Level | Wash Temp | Spin Selection | Dry | Options Available | Cycle Details |
| Cycle for normal, regular, or typical use for washing up to a full load of normally soiled cotton clothing. | Normal | Ex. Heavy Heavy Normal Light
Ex. Light |
Ex. Hot Hot Warm Cool Cold | Max High Medium No Spin | Off Tumble Low Normal | Time Saver Extra Rinse Extended Tumble Delay | Cycle for normal, regular, or typical use for washing up to a full load of normally soiled cotton clothing. Choose the Heavy or Extra Heavy soil level selection and Warm or Hot water temperature
selection as appropriate for your clothes load for a higher degree of cleaning. |
| Lingerie and special care fabrics with light soil. | Delicates | Ex. Heavy Heavy Normal Light
Ex. Light |
Warm Cool Cold | High Medium Low
No Spin |
Off Tumble Low Normal | Time Saver Extra Rinse Extended Tumble
Delay |
For lighty soiled items labeled hand-washable. Provides gentle tumbling and soak during wash and rinse. |
| Casual clothes, lightly soiled office wear. | Casuals | Ex. Heavy Heavy Normal Light
Ex. Light |
Ex. Hot Hot Warm Cool Cold | Max High Medium Low
No Spin |
Off Tumble Low Normal | Time Saver Extra Rinse Extended Tumble
Delay |
Wash cycle tailored to care for casual clothes and office wear items. |
| Whites and household linens. | Whites | Ex. Heavy Heavy Normal Light
Ex. Light |
Ex. Hot Hot Warm Cool Cold | Max High Medium Low
No Spin |
Off Tumble Low Normal | Time Saver Extra Rinse Extended Tumble
Delay |
Cycle tailored to clean and brighten your whites. |
| Sturdy fabrics with heavy to medium soil. | Heavy Duty | Ex. Heavy Heavy Normal Light
Ex. Light |
Ex. Hot Hot Warm Cool Cold | Max High Medium Low
No Spin |
Off Tumble Low Normal | Time Saver Extra Rinse Extended Tumble Delay | Incorporates multi-step wash and soak periods combined with extended wash periods to effectively clean heavily to medium soiled sturdy fabrics. |
| Small loads of lightly soiled items that are needed in a hurry. | Quick Wash | Ex. Heavy Heavy Normal Light
Ex. Light |
Hot Warm Cool Cold | Max High Medium Low
No Spin |
Off Tumble Low Normal | Extra Rinse Extended Tumble Delay | For cleaning lightly soiled loads in the fastest time possible. Cycle time
is approximately 33 minutes, depending on selected options. |
| Cycle for heavily soiled colorfast laundry. | Stain Wash with Steam | Ex. Heavy Heavy Normal Light
Ex. Light |
Ex. Hot Hot Warm Cool Cold | Max High Medium Low
No Spin |
Off Tumble Low Normal | Time Saver Extra Rinse Extended Tumble Delay | Add steam to the unit to assist with stain removal for heavily soiled colorfast laundry. |
| Items to Wash | Cycle | Soil Level | Wash Temp | Spin Selection | Dry | Options Available | Cycle Details |
| Heavily soiled colorfast items with the need for sanitization. | Sanitize | Ex. Heavy Heavy Normal | Ex. Hot | Max High Medium Low
No Spin |
Off Tumble Low Normal | Extra Rinse Extended Tumble Delay | Use this cycle to eliminate 99.9% of bacteria from fabrics. Cycle uses an increased water temperature and a longer wash cycle to provide the sanitization benefit. A longer rinse is incorporated to remove contaminates. For best results, select the Extra Heavy soil selection if available. See NOTE below. |
| Use to soak clothes. | Soak | Ex. Heavy Heavy Normal Light
Ex. Light |
Ex. Hot Hot Warm Cool Cold | Time Saver Extended Tumble | The basket will fill with water to soak and gently agitate the load. At the end of the cycle the remaining water will be drained. | ||
| For items that need only to be rinsed, use this cycle. | Rinse + Spin | Max High Medium Low
No Spin |
Off Tumble Low Normal | Extra Rinse Extended Tumble Delay | To quickly rinse and spin out any items at any time. Utilizes a high speed spin to extract water from wet items. To achieve a drain and spin, delselect the Extra Rinse option. This cycle will dispense prewash detergent and fabric softener. | ||
| Use to spin dry clothes that have already been | Spin Only | Max High Medium | Off Tumble Low | Delay | Utilizes a high-speed spin to extract water from wet items. | ||
| washed. | Low
No Spin |
Normal | |||||
| Cleaning the | Tub | Delay | Recommended use | ||||
| tub of residue | Clean | of at least once per | |||||
| and odor. No | month to clean the | ||||||
| clothes to be | basket of residue | ||||||
| washed using | and odor. Never load | ||||||
| this cycle. | laundry when using | ||||||
| this cycle; laundry may | |||||||
| become damaged. | |||||||
| Cycle incorporates a | |||||||
| hot extended wash, | |||||||
| intense agitation action | |||||||
| and a flush out of the | |||||||
| pump. |
NOTE:
The Sanitize cycle water temperatures CANNOT be changed. The Sanitize cycle is certified by NSF International, an independent third-party testing and certification organization.
The Sanitize certification verifies that the cycle reduced 99.9% of bacteria typically found in the residential laundry and that no significant contamination is transferred to subsequent washer loads. Only the Sanitize cycle has been designed to meet the requirements of NSF Protocol P172 for sanitizing effectiveness.
Cycles – Dry
The cycles are optimized for specific types of loads. The chart below will help you match the setting with the loads.
| Items to Dry | Cycle | Soil Level | Wash Temp | Spin Selection | Dry | Options Available | Cycle Details |
| Use to dry clothes for a specific amount of time. | Timed Dry | Tumble Low Normal | Extended Tumble
Delay |
1. Once the Timed Dry cycle is selected, press the arrow pads to increase or decrease the dry time.
2. Select the dry Temp. 3. Close the door. 4. Press Start/Pause. |
|||
| Use for drying heavy-duty fabrics or items that should be very dry, such as towels. | Auto Extra Dry | Tumble Low Normal | Extended Tumble
Delay |
The sensor continuously monitors the amount of moisture in the load by detecting temperature in the drum. The cycle ends when the moisture reaches the selected dry level. | |||
| Use for normal dryness level suitable for most loads. This is the preferred cycle for energy saving. | Auto Dry | Tumble Low Normal | Extended Tumble
Delay |
The sensor continuously monitors the amount of moisture in the load by detecting temperature in the drum. The cycle ends when the moisture reaches the selected dry level. | |||
| For leaving items partially damp. | Auto Damp Dry | Tumble Low Normal | Extended Tumble
Delay |
The sensor continuously monitors the amount of moisture in the load by detecting temperature in the drum. The cycle ends when the moisture reaches the selected dry level. |
Soil
Changing the Soil level increases or decreases the wash time to remove different amounts of soil.
To change the Soil level, press the Soil level pad until you have reached the desired setting. You can choose between Extra Light, Light, Normal, Heavy or Extra Heavy soil.
Temp
Adjust to select the proper water temperature for the wash cycle. The rinse water is always cold to help reduce energy usage and reduce setting of stains and wrinkles.Follow the fabric manufacturer’s care label when selecting the wash temperature.To change the wash temperature, press the Temp pad until you have reached the desired setting. You can choose between Cold, Cool, Warm, Hot or Extra Hot.
Spin
Changing the Spin setting changes the final spin speed of the cycles. Always follow the garment manufacturer’s care label when changing the Spin setting.To change the Spin setting, press the Spin setting pad until you have reached the desired setting. You can choose between No Spin, Low, Medium, High or Max. Higher spin speeds are not available on certain cycles, such as Delicates.Higher spin speeds remove more water from the clothes and will help reduce dry time, but may also increase the possibility of setting wrinkles on some fabrics.
Dry
Changing Dry will change the temperature for your dry cycle:
| Normal | For regular to heavy cottons, synthetics, blends, and items labeled permanent press. |
| Low | For delicates, synthetics, and items labeled Tumble Dry Low. |
| Tumble | Items are continuously tumbled without heat. |
| Off | Unit will skip dry cycle and wash only. |
Options
Press to select your desired options:
| Time Saver | Choose your own timing and save it for the chosen cycle. |
| Extra Rinse | Extra rinse is the extra wash before the main wash. Use it for heavily soiled clothes or for clothes with a care label that recommends prewashing before washing. Be sure to add liquid or powder high-efficiency detergent, or the proper wash additive, to the prewash dispenser. |
| Ex Tumble | Add more tumbling time by selecting this option. |
Delay Wash
Use to delay the start of your unit.
- Choose your wash cycle and any options.
- Press Delay Wash pad. You can change the delay time in 1-hour increments (up to 24 hours) each time you press the Delay Wash pad. Stop pressing the pad when your desired time is displayed.
- Press the Start/Pause button to start the countdown.The countdown time will be shown in the Est Time Remaining (Estimated Time Remaining) display.
NOTES:- If the door is opened while the unit is in Delay Wash, the countdown time will stop the count down and the display will show “door”. The door must be closed and the Start/Pause button must be pressed to continue the delay time count down.
- You can delay the start of a wash cycle up to 24 hours.
- the light on the pad will light up when Delay Wash is on.
Start/Pause
Press to start a wash cycle. If the unit is running, pressing it once will pause the unit and unlock the door. This function can be used to add garments during a cycle. Press again to restart the wash cycle.
NOTE:
If the unit is paused and the cycle is not restarted within 15 minutes, the current wash cycle will be canceled.
NOTE:
In some cases the unit will drain first, then unlock the door when it is paused.
NOTE:
The unit performs automatic system checks after pressing the Start/Pause button. Water will flow in 45 seconds or less. You may hear the door lock and unlock before water flows; this is normal.
Lock
You can lock the controls to prevent any selections from being made. Or you can lock or unlock the controls after you have started a cycle.Children cannot accidentally start the unit by touching pads with this option selected.To lock the unit, press and hold the Soil and Temp pads together for 3 seconds.To unlock the unit controls, press and hold the Soil and Temp pads together for 3 seconds. A sound is made to indicate the lock/unlock status.The control lock icon on the display will light up when it is on.
NOTE:
The Power button can still be used when the unit is locked.
Signal
When the light is on, the unit will beep at the end of the cycle and every time you press a pad on the control panel.
To turn the signal off, press and hold the Temp and Spin pads together for 3 seconds. A sound is made to indicate the lock/unlock status.
Add Dry Time
Press the up and down arrow pads to increase or decrease the Dry cycle time as desired.
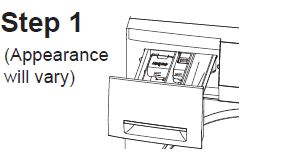
Dispenser Drawer
Slowly open the dispenser drawer by pulling it out until it stops.After adding laundry products, slowly close the dispenser drawer. Closing the drawer too quickly could result in early dispensing of the fabric softener or detergent.
You may see water in the fabric softener compartment at the end of the cycle. This is a result of the flushing/siphoning action and is part of the normal operation of the unit.
Detergent Compartment
- Only use high-efficiency detergent in this unit. Use the detergent manufacturer’s recommended amount. DO NOT fill above the MAX line.
- Detergent is flushed from the dispenser at the beginning of the wash cycle. Either powdered or liquid high-efficiency detergent can be used.
- Detergent usage may need to be adjusted for water temperature, water hardness, size and soil level of the load. Avoid using too much detergent in your unit since it can lead to oversudsing and detergent residue being left on the clothes.
Divider Drawer System
The detergent compartment is in the front left of the dispenser drawer.
- Powder Detergent – Lock the detergent card flat into its top position in the compartment. Make sure the card is locked, then pour the suggested amount of powder detergent into the detergent dispenser.
- Liquid Detergent – Lock the detergent card vertically into its center position in the compartment. Make sure the card is locked, then pour the suggested amount of liquid detergent into the detergent dispenser.


Fabric Softener Compartment
If desired, pour the recommended amount of liquid fabric softener into the compartment labeled “Fabric Softener.” Use only liquid fabric softener in the dispenser.Dilute with water to the maximum fill line.Do not exceed the maximum fill line. Overfilling can cause early dispensing of the fabric softener, which could stain clothes.
NOTE:
Do not pour fabric softener directly on the wash load.
Loading
Always follow fabric manufacturer’s care label when laundering.
Sorting and Loading
Sort by color (whites, lights, colors), soil level, fabric type (sturdy cottons, easy care, delicates) and whether the fabric produces lint (terry cloth, chenille) or collects lint (velveteen, corduroy). Wash lint producers such as cotton towels and socks separate from lint collectors including synthetic garments and dress pants.
- DO NOT wash fabrics soiled with flammable liquids or cleaning solvents.
- No washer can completely remove oil.
- DO NOT wash or dry anything that has been soaked in or spotted with any type of oil (including cooking oils). DO NOT reach into the unit until all moving parts have stopped.
- Keep flammable materials and vapors, such as gasoline, away from the unit.
- Items containing foam, rubber, or plastic must be dried on a clothesline.
- Failure to do so can result in death, explosion, fire or amputation.
Loading to Wash
The drum may be fully loaded with loosely added items.To add items after the unit has started, press Start/Pause and wait until the door is unlatched. The unit may take up to 30 seconds to unlock the door after pressing Start/Pause, depending on the machine conditions. Do not try to force open the door when it is locked. After the door unlocks, open gently. Add items, close the door and press Start/Pause to restart.
Loading Examples
| WORKWEAR | LINENS | MIXED LOAD | DELICATES* | QUICK WASH (2–3 GARMENTS) |
| 3 Jeans
3 Work Wear Shirts 2 Work Wear Pants |
1 Bath Sheet
6 Bath Towels/ 8 Washcloths 4 Hand Towels/ 1 Terrycloth Bath Mat OR 1 Flat Queen-Sized Sheet 1 Fitted Queen-Sized Sheet 2 Pillowcases |
2 Pillowcases
1 Hand Towel 1 Flat Sheet/ 1 Fitted Sheet 2 Bath Towels/ 2 Washcloths OR 4 Shirts (Men’s or Women’s) 3 Pair Pants (Khakis or Twills) 3 T-shirts 4 Pairs of Boxers 2 Pairs of Shorts OR 4 T-shirts 2 Pairs of Sweatpants 2 Sweatshirts 1 Hoodie 5 Pairs of Socks |
4 Bras
4 panties 2 Slips 1 Camisole 3 Nightgowns *Using a nylon mesh bag for small items is recommended. |
2 Casual Wear Work Shirts
1 Pair Casual Wear Work Pants OR 3 Soccer Uniforms |
Loading to Dry
As a general rule, if clothes are sorted properly for the wash, they are sorted properly for the dry cycle. Try also to sort items according to size. For example, do not dry a sheet with socks or other small items.
Do not add fabric softener sheets once the load has become warm. They may cause fabric softener stains. Bounce® Fabric Conditioner Dryer Sheets have been approved for use in this unit when used in accordance with the manufacturer’s instructions.
Care and cleaning
Water Supply Hoses
Hoses connecting unit to faucet should be replaced every 5 years.
Exterior
Immediately wipe off any spills. Wipe with damp cloth. Wipe or dust spills or washing compounds with a damp cloth. Unit control panel and finishes may be damaged by some laundry pretreatment and stain remover products. Apply these products away from the unit. The fabric may then be washed and dried normally. Damage to your unit caused by these products is not covered by your warranty. Do not hit surface with sharp objects.
Interior
Dry around the door opening, flexible gasket (including attached hoses) and door glass. These areas should always be clean to ensure a watertight seal.It is recommended to rinse the unit at least once per month with 1 cup of bleach (or other commercially available product manufactured for this purpose, such as Tide® Washing Machine Cleaner) poured directly into the basket without clothes and using the Tub Clean Cycle.The interior of the appliance should be cleaned once a year by qualified service personnel.
Stainless Steel
To clean stainless steel surfaces use a damp cloth with a mild, non-abrasive cleaner suitable for stainless steel surfaces. Remove the cleaner residue and then dry with a clean cloth.The stainless steel used to make the drum provides the highest reliability available in a GE Appliances unit. If the drum should be scratched or dented during normal use, the drum will not rust or corrode. These surface blemishes will not affect the function or durability of the drum.
Door Gasket
Open the door. Using both hands, press down the door gasket. Remove any foreign objects if found trapped inside the gasket. Make sure there is nothing blocking the holes behind the gasket.While holding down the door gasket, inspect the interior of the gasket by pulling it down with your fingers. Remove any foreign objects if found trapped inside this gasket. Make sure there is nothing blocking the holes behind the gasket.When you are finished cleaning the door gasket, remove your hands and the gaskets will return to the operating position.
Pump Filter
Clean EVERY MONTH
to remove any items that may have been caught in the filter or housing.Due to the nature of the front-load unit, it is sometimes possible for small articles to pass to the pump. The unit has a filter to capture lost items so they are not dumped to the drain. To retrieve lost items, clean out the pump filter. Unscrew the pump filter. Rinse off any debris. Replace. Close the access door.
Dispenser Drawer Area
Detergent and fabric softener may build up in the dispenser drawer. Residue should be removed once or twice a month.
- Remove the drawer by first pulling it out until it stops. Then reach back into the rear of the drawer cavity and press down firmly on the lock tab, pulling out the drawer.
- Remove the insert from the dispenser drawer. Rinse the insert and drawer with hot water to remove traces of accumulated laundry products.
- To clean the drawer opening, use a small brush to clean the recess. Remove all residue from the upper and lower parts of the recess.
- Return inserts to the proper compartments. Replace the dispenser drawer.
- To reduce buildup in the Dispenser Drawer area:
Moving and Storage
Ask the service technician to remove water from drain pump and hoses. Do not store the unit where it will be exposed to the weather. When moving the unit, the tub should be kept stationary by using the shipping bolts removed during installation. See Installation Instructions in this manual. If these parts are not available, they can be ordered by visiting our Website at GEApplianceparts.com or by calling GE Appliances at 877.959.8688. In Canada, visit your local GE Appliances parts distributor or call 800.661.1616 or GEAppliances.ca/en/products/parts-filters-accessories.
Long Vacations
Be sure water supply is shut off at faucets. Drain all water from hoses and water filter pump area if weather will be below freezing.
Installation Instructions
- Note to Installer – Be sure to leave these instructions with the Consumer.
- Note to Consumer – Keep these instructions
- Skill level – Installation of this appliance requires basic mechanical and electrical skills.
- Completion time – 1-3 hours
- Proper installation is the responsibility of the
- Product failure due to improper installation is not covered under the Warranty.
TOOLS REQUIRED FOR UNIT INSTALLATION
- Safety Glasses
- Gloves
- Level
- Wrench (provided)
- Channel-lock adjustable pliers
- Water Hoses (2) (Flat washers pre-installed)


LOCATION OF YOUR UNIT
DO NOT Install the Unit:
- In an area exposed to dripping water or outside weather conditions. The ambient temperature should never be below 60°F (15.6°C) for proper unit operation.
- In an area where it will come in contact with curtains or drapes.
- On the carpet. The floor MUST be a hard surface with vibrates or move, you may have to reinforce the floor.
IMPORTANT:
Minimum Installation Clearances
- When installed in closet: Sides/Rear = 0” and Top/Front
- Consideration must be given to provide adequate clearance for installation and service.
- Closet doors must be louvered or otherwise ventilated and have at least 60 square inches (387.1 cm2) of open area. If the closet contains a second laundry unit, doors must contain a minimum of 120 square inches (774.2 cm2) of open area.
Installation Instructions
UNPACKING THE UNIT
plastic bags after the unit is unpacked. Make materials inaccessible to children. Children might use them for play. Cartons covered with rugs, bedspreads or plastic sheets can become airtight chambers causing suffocation.
- Cut and remove all packaging straps.
- While it is in the carton, carefully lay the unit on its side. DO NOT lay the unit on its front or back.
- Turn down the bottom flaps. Remove all base packaging including the styrofoam base.
- Carefully return the unit to an upright position and remove the carton by lifting it upward.
- Carefully move the unit to within 4 feet (122 cm) of the final location.
- Remove the following from the back side of the unit:
- bolts plastic spacers (including rubber grommets) NOTE: Do NOT remove the screw or clip holding the hose.
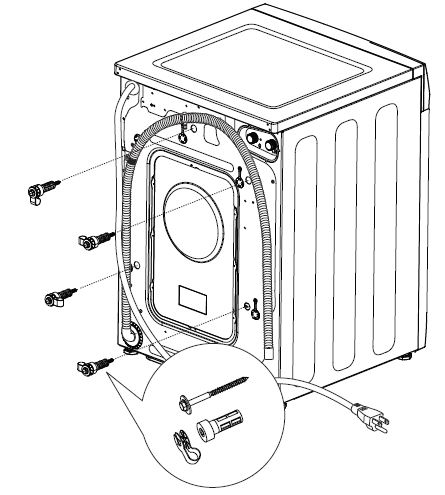
- Insert shipping bolt hole covers into shipping bolt holes.


NOTES:
- Failure to remove the shipping braces can cause the unit to become severely unbalanced.
- IMPORTANT:
- Save all bolts for future use. If you must transport the unit at a later date, you must reinstall the shipping support hardware to prevent shipping damage. Keep the hardware in the plastic bag provided.
ELECTRICAL REQUIREMENTS
- Plug into a grounded 3-prong outlet.
- DO NOT remove ground prong.
- DO NOT use an adapter.
- DO NOT use an extension cord.
- Failure to follow these instructions can result in death, fire or electrical shock.
- CIRCUIT – Individual, properly polarized and grounded 15 or 20 amp circuit breaker or time-delay fuse.
POWER SUPPLY – 2 wire plus ground, 120 Volt, single phase, 60 Hz, alternating current. Outlet Receptacle – Properly grounded 3-prong receptacle to be located so the power cord is accessible when the unit is in an installed position. If a 2-prong receptacle is present, it is the owner’s responsibility to have a licensed electrician replace it witha properly grounded 3-prong grounding type receptacle. Unit must be electrically grounded in accordance with local codes and ordinances, or in the absence of local codes, with latest edition of the NATIONAL ELECTRICAL CODE, ANSI/NFPA NO. 70 or CANADIAN ELECTRICAL CODE, CSA C22.1. Check with a licensed electrician if you are not sure that the unit is properly grounded.

GROUNDING INSTRUCTIONS
This appliance must be grounded. In the event of malfunction or breakdown, grounding will reduce the risk of electric shock by providing a path of least resistance for electric current. This appliance is equipped with a cord having an equipment- grounding conductor and a grounding plug. The plug must be plugged into an appropriate outlet that is properly installed and grounded in accordance with all local codes and ordinances.If required by local codes, an external 18 gauge or larger copper ground wire (not provided) may be added. Attach to unit cabinet with a #10-16 x 1/2” sheet metal screw (available at any hardware store) to rear of unit. Disconnect power supply before servicing.
Replace all parts and panels before operating. Failure to do so can result in death or electrical shock.Certain internal parts are intentionally not grounded and may present a risk of electric shock only during servicing.
Service personnel – DO NOT contact the following parts while the appliance is energized: water valve, drain pump, NTC, motor, fan capacitor, fan motor, heater, door lock, inverter board and MC board.
WATER SUPPLY REQUIREMENTS
Hot and cold water faucets MUST be installed within 42 inches (107 cm) of your unit’s water inlet. The faucets MUST be 3/4” (1.9 cm) garden hose-type so inlet hoses can be connected. Water pressure MUST be between 10 and 120 pounds per square inch. Your water department can advise you of your water pressure. The hot water temperature should be set to deliver water at 120° to 140°F (48°–60°C) to provide proper Automatic Temperature Control (ATC) performance.
DRAIN REQUIREMENTS
- Drain capable of eliminating 9.5 gals (36 L) per minute.
- A standpipe diameter of 1-1/4” (3.18 cm) minimum.
- The standpipe height above the floor should be: Minimum height: 36” (91.4 cm) Maximum height: 58” (147 cm)


INSTALLING THE UNIT
- Run some water from the hot and cold faucets to flush the water lines and remove particles that might clog the water valve screens.
- Remove the inlet hoses from the plastic bag. Remove black rubber washers from bag and insert into hose fitting before connecting to unit.
- (90° elbow end) Carefully connect the inlet hose marked HOT to the outside “H” outlet of the water valve. Tighten by hand; then tighten another 2/3 turn with pliers. Carefully connect the other inlet hose to the inside “C” outlet of the water valve. Tighten by hand; then tighten another 2/3 turn with pliers. Do not cross-thread or overtighten these connections.

- Connect the inlet hose ends to the HOT and COLD water faucets tightly by hand;then tighten another 2/3 turn with pliers. Turn the water on and check for leaks.
- Carefully move the unit to its final location. Gently rock the unit into position. It is important not to damage the rubber leveling legs when moving your unit to its final location. Damaged legs can increase appliance vibration. It may be helpful to spray window cleaner on the floor to help move your unit into its final position. NOTE: To reduce vibration, ensure that all four rubber leveling legs are firmly touching the floor. Push and pull on the back right and then back left of your unit.
NOTE: Do not use the dispenser drawer or door to lift the unit.
NOTE: If you are installing into a drain pan, you can use a 24-inch-long 2×4 to lever the unit into place. - With the unit in its final position, place a level on top of the unit (if the unit is installed under a counter, the unit should not be able to rock). Adjust the front leveling legs up or down to ensure the unit is resting solidly and level
front-to-back and left-to-right. It may also be necessary to adjust the rear legs. Turn the locknuts on each leg up toward the base of the unit and snug with a wrench.
NOTE:
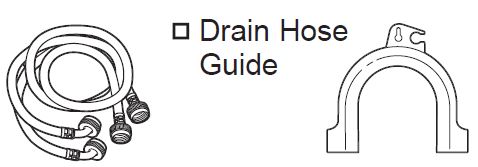
Keep the leg extension at a minimum to prevent excessive vibration. The farther out the legs are extended, the more the unit will vibrate. If the floor is not level or is damaged, you may have to extend the rear leveling legs. - Attach U-shaped hose guide to the end of the drain hose. Place the hose in a laundry tub or standpipe. Drain hose should be secured to the home or adjacent faucet with a zip-tie to keep it from coming free during operation.

- Plug the power cord into a grounded outlet.
NOTE: Check to be sure the power is off at the circuit breaker/fuse box before plugging the power cord into an outlet. - Turn on the power at the circuit breaker/fuse box.
- Read the rest of this Owner’s Manual. It contains valuable and helpful information that will save you time and money.
- Before starting the unit, check to make sure:
- Run the unit through a complete cycle. Check for water leaks and proper operation.
- If your unit does not operate, please review the Troubleshooting Tips section before calling for service.
- Place these instructions in a location near the unit for future reference.


REPLACEMENT PARTS
If replacement parts are needed for your unit, they can be ordered in the United States by visiting our Website at GEApplianceparts.com or by calling GE Appliances at 877.959.8688. In Canada, visit GEAppliances.ca/en/products/parts-filters-accessories or call 800.661.1616.
Troubleshooting
| Problem | Possible Cause | What To Do |
| Not draining Not spinning Not tumbling | Load is out of balance | Redistribute clothes and run Rinse+Spin.
Increase load size if washing small load containing heavy and light items. |
| Pump filter may be clogged | See the Care and Cleaning section on how to clean the Pump Filter. | |
| Drain hose is kinked or improperly connected | Straighten drain hose and make sure unit is not sitting on it. | |
| Household drain may be clogged | Check household plumbing. You may need to call a plumber. | |
| Drain hose siphoning; drain hose pushed too far down the drain | Ensure there is an air gap between hose and drain. | |
| Leaking water | Door gasket is damaged | Check to see if gasket is seated and not torn. Objects left in pockets may cause damage to the unit (nails, screws, pens, pencils)
Water may drip from the door when the door is opened. This is a normal operation. Carefully wipe off rubber door seal. Sometimes dirt or clothing is left in this seal and can cause a small leak |
| Check back left of the unit for water | If this area is wet, you have oversudsing condition. Use less detergent. | |
| Fill hoses or drain hose is improperly connected | Make sure hose connections are tight at unit and faucets and make sure end of drain hose is correctly inserted in and secured to drain facility. | |
| Household drain may be clogged | Check household plumbing. You may need to call a plumber. | |
| Dispenser clogged | Powder soap may cause clogs inside the dispenser and cause water to leak out the front of the dispenser. Remove drawer and clean both drawer and inside of dispenser box. Please refer to Care and Cleaning section. | |
| Incorrect use of detergent | Use only HE and correct amount of detergent. | |
| Clothes too wet | Load is out of balance | Redistribute clothes and run Rinse+Spin. |
| Increase load size if washing small load containing heavy and light items. | ||
| Pump filter may be clogged | See the Care and Cleaning section on how to clean the Pump Filter. | |
| Overloading | Load your unit so clothes have enough room to move freely. | |
| Drain hose is kinked or improperly connected | Straighten drain hose and make sure unit is not sitting on it. | |
| Household drain may be clogged | Check household plumbing. You may need to call a plumber. | |
| Drain hose siphoning; drain hose pushed too far down the drain | Ensure there is an air gap between hose and drain. |
| Problem | Possible Cause | What To Do |
| Incomplete cycle or timer not advancing | Automatic load redistribution | Timer stops at 1 minute; machine has redistributed the load once or twice. This is normal operation.
Do nothing; the machine will finish the wash cycle. |
| Pump filter may be clogged | See the Care and Cleaning section on how to clean the
Pump Filter. |
|
| Drain hose is kinked or improperly connected | Straighten drain hose and make sure unit is not sitting on it. | |
| Household drain may be clogged | Check household plumbing. You may need to call a plumber. | |
| Drain hose siphoning; drain hose pushed too far down the drain | Ensure there is an air gap between hose and drain. | |
| Loud or unusual noise; vibration or shaking | Cabinet moving | Unit is designed to move 1/4” to reduce forces transmitted to the floor. This movement is normal. |
| All rubber leveling legs are not firmly touching the floor | Push and pull on the back right and then back left of your unit to check if it is level. If the unit is uneven, adjust the rubber leveling legs so they are all firmly touching the floor and locked in place. | |
| Unbalanced load | Pause unit, open door and manually redistribute load. To check machine, run rinse and spin with no load. If normal, unbalance was caused by load. | |
| Pump filter may be clogged | See the Care and Cleaning section on how to clean the
Pump Filter. |
|
| No power/unit not working or dead | Unit is unplugged | Make sure cord is plugged securely into a working outlet. |
| This is normal. Control panel is “asleep”. | Press the Power button to “wake up” the display. | |
| Unit was accidentally paused when starting Delay Dry | If the light on the Start/Pause button is flashing, the unit is paused. Press Start/Pause button to restart the countdown. | |
| Water supply is turned off | Turn both hot and cold faucets fully on. | |
| Circuit breaker/fuse is tripped/blown | Check house circuit breakers/fuses. Replace fuses or reset breaker. Unit should have separate outlet. | |
| Automatic self system checks | First time the unit is plugged in, automatic checks occur. It may take up to 20 seconds before you can use your unit. This is normal operation. | |
| Snags, holes, tears, rips or excessive wear | Pens, pencils, nails, screws or other objects left in pockets | Remove loose items from pockets. |
| Pins, snaps, hooks, sharp buttons, belt buckles, zippers and sharp objects left in pockets | Fasten snaps, hooks, buttons and zippers. | |
| Control time wrong or changes | This is normal | During spin the unit may need to rebalance the load sometimes to reduce vibrations. When this happens, the estimated time is increased causing time left to increase or jump. |
| Not enough water | This is normal | Horizontal machines do not require the tub to fill with water like top-load machines. |
| Unit pauses or has to be restarted, or its door is locked and will not open | Pump filter may be clogged | See the Care and Cleaning section on how to clean the
Pump Filter. |
| Problem | Possible Cause | What To Do |
| Door unlocks or press Start and machine doesn’t operate | This is normal | Front-load machines start up differently than top-load machines, and it takes several seconds to check the system. The door will lock and unlock. |
| Incorrect operation | Simply open and close the door firmly; then press Start. | |
| Water does not enter unit or enters slowly | Automatic self system checks | After Start is pressed, the unit does several system checks. Water will flow several seconds after Start is pressed. |
| Water valve screens are stopped up | Turn off the water source and remove the water connection hoses from the upper back of the unit. Use a brush or toothpick to clean the screens in the machine. Reconnect the hoses and turn the water back on. | |
| Inlet hose screen washers are stopped up | Turn off the water source and remove the inlet hoses from the wall faucets. Use a brush or toothpick to clean the screen washers in the end of the hoses. Reconnect the hoses and turn the water back on. | |
| Pump filter may be clogged | See the Care and Cleaning section on how to clean the
Pump Filter. |
|
| Fill hoses may be kinked | Check that fill hoses are not kinked or clogged. | |
| Water supply is turned off | Turn on both hot and cold faucets fully. | |
| Energy efficiency | This is an energy-efficient unit. As a result, the temperature settings for this unit may be different than for a non-energy- efficient unit. | |
| Insufficient water supply | Make sure that the water supply is turned on. Make sure that the water faucets are turned to their completely open position. | |
| The door is open | The door must be closed for all cycle operations. If the door is opened during operation, all functions will stop, including water filling. | |
| Incorrect fill hose connection | Make sure that the fill hoses connect the hot water supply to the hot inlet on the unit and the cold water supply to the cold inlet on the unit (hot to hot, cold to cold). | |
| Wrinkling | Improper sorting | Avoid mixing heavy items (like work clothes) with light items (like blouses). |
| Overloading | Load your unit so clothes have enough room to move freely. For best drying results, load the unit 2/3 full. | |
| Incorrect wash cycle | Match cycle selection to the type of fabric you arewashing (especially for easy care loads). | |
| Repeated washing in water that is too hot | Wash in warm or cold water. | |
| Grayed or yellowed clothes | Not enough detergent | Use correct amount of detergent. |
| Not using HE (high efficiency) detergent | Use only HE detergent. | |
| Hard water | Use hottest water safe for fabric. | |
| Use a water conditioner like Calgon brand or install a water softener. | ||
| Water is not hot enough | Make sure water heater is delivering water at 120°–140°F (48°–60°C). | |
| Detergent is not dissolving | Try a liquid HE detergent. | |
| Dye transfer | Sort clothes by color. If fabric label states wash separately, unstable dyes may be indicated. |
| Problem | Possible Cause | What To Do |
| Colored spots | Incorrect use of fabric softener | Check fabric softener package for instructions and follow directions for using dispenser. |
| Dye transfer | Sort whites or lightly colored items from dark colors. | |
| Promptly remove wash load from unit. | ||
| Water temperature is incorrect | Water supply is improperly connected | Make sure hoses are connected to correct faucets. |
| House water heater is not set properly | Make sure house water heater is delivering water at 120°– 140°F (48°–60°C). | |
| Slight variation in metallic color | This is normal | Due to the metallic properties of paint used for this unique product, slight variations of color may occur due to viewing angles and lighting conditions. |
| Bad odor inside your machine | Unit unused for a long time, not using recommended quality of HE detergent or used too much detergent | Run a Tub Clean cycle. |
| In case of strong odor, you may need to run the Tub Clean
cycle more than once. |
||
| Use only the amount of detergent recommended on the detergent container. | ||
| Use only HE (high efficiency) detergent. | ||
| Always remove wet items from the unit promptly after machine stops running. | ||
| Leave the door slightly open for the water to air dry. Close supervision is necessary if this appliance is used by or near children. Do not allow children to play on or in this or any other appliance. | ||
| Detergent leak | Incorrect placement of detergent insert | Make sure detergent insert is properly located and fully seated. Never put detergent above max line. |
| This is normal | It is normal operation to see detergent leak on door gasket about 20 seconds after filling the dispenser. | |
| Improper dispensing of softener | Dispenser clogged | Monthly clean the dispenser drawer to remove buildup of chemicals. |
| Softener is filled above the max line | Make sure to have the correct amount of softener. | |
| Softener cap issue | Make sure softener cap for dispenser is seated or it will not work. | |
| Dispenser drawer not dispensing properly | Laundry detergent packet placed in dispenser drawer | Laundry detergent packets should not be used in the dispenser. They should only be added directly to the wash tub following the manufacturer’s directions. |
| Pump running while unit is not in use | Clog in sump drain | This is normal. Drain sump is detecting an undesired water fill level from a potential open faucet. Shut off water valve and inspect water valve for blockage. |
| Problem | Possible Cause | What To Do |
| Clothes take too long to dry | Improper sorting | Separate heavy items from lightweight items (generally, a well-sorted washer load is a well-sorted dryer load). |
| Large loads of heavy fabrics (like beach towels) | Large, heavy fabrics contain more moisture and take longer to dry. Separate large, heavy fabrics into smaller loads to speed drying time. | |
| Non-venting unit | Condensing dryers usually take longer to dry than a vented dryer. | |
| Controls improperly set | Match control settings to the load you are drying. | |
| Blown fuses or tripped circuit breaker | Replace fuses or reset circuit breakers. Since most dryers use 2 fuses/breakers, make sure both are operating. | |
| Overloading/combining loads | Do not put more than one washer load in the unit at a time. | |
| Underloading | If you are drying only one or two items, add a few items to ensure proper tumbling. | |
| The Dry dryness level was chosen but load is still damp | Load consists of a mixture of heavy and light fabrics | When combining heavy and light fabrics in a load, choose
Auto Extra Dry. |
| Control buttons not responding | Controls accidentally put in service mode | Press Start/Pause. |
| Controls accidentally put in lock mode | Hold the Soil and Temp buttons for 3 seconds to unlock the unit. | |
| Controls performed an incorrect operation | Reset the in-house breaker. | |
| No numbers displayed during cycle, only lights | Unit is continuously monitoring the amount of moisture in the clothes | This is normal. When the unit senses a low level of moisture in the load, the unit will display the dry time remaining. |
| Time Remaining jumped to a lower number | The estimated time may change when a smaller load than usual is drying | This is normal. |
| Cannot make a selection and the unit beeps twice | The dryness Level, Temp or option that you are trying to select is incompatible with the chosen dry cycle | This is normal. |
| Unit is running but 00 is displayed
in Time Remaining |
The Ext Tumble option was chosen | This is normal. During extended tumbling, the time remaining is not displayed. The extended tumbling option lasts approximately 60 minutes. |
| Problem | Possible Causes | What To Do |
| Unit doesn’t heat | Fuse is blown/circuit breaker is tripped; the unit may tumble but not heat | Check the building’s fuse/circuit breaker box and replace both fuses or reset both breakers. Your unit may tumble if only one fuse is blown or one breaker tripped. |
| Inconsistent drying times | Type of load and drying conditions | The load size, types of fabric, wetness of clothes and/or air intake vent located on the front of the unit will affect drying times. |
| Excess debris has collected on the fan preventing proper airflow | Refer to the Care and Cleaning section. | |
| Clothes are still wet and unit shuts off after a short time | The door was opened mid-cycle. The load was then removed from the
unit and a new load put in without selecting a new cycle |
A dry cycle must be reselected each time a new load is put in. |
| Load was already dry except for collars and waistbands | Choose Timed Dry to dry damp collars and waistbands. In the future, when drying a load with collars and waistbands, choose Auto Extra Dry. | |
| Unit is not level | Move unit to an even floor space or adjust leveling legs as necessary until even. | |
| Clothes are wrinkled | Letting items sit in unit after cycle ends | Remove items when cycle ends and fold or hang immediately, or use the Ext Tumble option. |
| Overloading | Separate large loads into smaller ones. | |
| Clothes shrink | Some fabrics will naturally shrink when washed.
Others can be safely washed, but will shrink while drying in the unit. |
To avoid shrinkage, follow garment care labels exactly. Some items may be pressed back into shape after drying.
If you are concerned about shrinkage in a particular item, do not machine wash or tumble dry it. |
| Greasy spots on clothes | Improper use of fabric softener | Follow directions on fabric softener package. |
| Drying dirty items with clean ones | Use your unit to dry only clean items. Dirty items can stain clean items and the unit. | |
| Clothes were not completely clean | Sometimes stains which cannot be seen when the clothes are wet appear after drying. Use proper washing procedures before drying. | |
| Lint on clothes | Improper sorting | Sort lint producers (like chenille) from lint collectors (like corduroy). |
| Static electricity can attract lint | See suggestions in this section under Static occurs. | |
| Overloading | Separate large loads into smaller ones. | |
| Paper, tissue, etc., left in pockets | Empty all pockets before laundering clothes. | |
| Static occurs | No fabric softener was used | Try a fabric softener. |
| Synthetics, permanent press and blends can cause static | Try a fabric softener. |
| Problem | Possible Causes | What To Do |
| Collars and waistbands still wet at end of cycle | The dryness monitor senses that the body of the clothes is dry | Choose Timed Dry to dry damp collars and waistbands. In the future, when drying a load with collars and waistbands, choose Auto Extra Dry. |
| Unit continues to tumble after display says Complete | Ext Tumble was selected | Ensure Ext Tumble option is not selected. |
GE Appliances Washer/Dryer Limited Warranty
GEAppliances.com
All warranty service is provided by our Factory Service Centers, or an authorized Customer Care® technician. To schedule service online, visit us at GEAppliances.com/service, or call GE Appliances at 800.GE.CARES (800.432.2737). Please have your serial number and your model number available when calling for service.Servicing your appliance may require the use of the onboard data port for diagnostics. This gives a GE Appliances factory service technician the ability to quickly diagnose any issues with your appliance and helps GE Appliances improve its products by providing GE Appliances with information on your appliance. If you do not want your appliance data to be sent to GE Appliances, please advise your technician not to submit the data to GE Appliances at the time of service.
What is not covered:
- Service trips to your home to teach you how to use the product.
- Improper installation, delivery or maintenance.
- Failure of the product if it is abused, misused, or used for other than the intended purpose or used commercially.’
- Replacement of house fuses or resetting of circuit breakers.
- Products that are not defective or broken, or which are working as described in the Owner’s Manual.
- Damage to the product caused by accident, fire, floods or acts of God.
- Incidental or consequential damage caused by possible defects with this appliance.
- Defects or damage due to operation in freezing temperatures.
- Damage caused after delivery.
- Product not accessible to provide required service.
- Cleaning of the condenser to restore product drying performance.
EXCLUSION OF IMPLIED WARRANTIES
Your sole and exclusive remedy is product repair as provided in this Limited Warranty. Any implied warranties, including the implied warranties of merchantability or fitness for a particular purpose, are limited to one year or the shortest period allowed by law.
In the United States:
This limited warranty is extended to the original purchaser and any succeeding owner for products purchased for home use within the USA. If the product is located in an area where service by a GE Appliances Authorized Servicer is not available, you may be responsible for a trip charge or you may be required to bring the product to an Authorized GE Appliances Service location for service. In Alaska, the limited warranty excludes the cost of shipping or service calls to your home. Some states do not allow the exclusion or limitation of incidental or consequential damages. This limited warranty gives you specific legal rights, and you may also have other rights which vary from state to state. To know what your legal rights are, consult your local or state consumer affairs office or your state’s Attorney General.
Consumer Support
GE Appliances Website
Have a question or need assistance with your appliance? Try the GE Appliances Website 24 hours a day, any day of the year! You can also shop for more great GE Appliances products and take advantage of all our online support services designed for your convenience. In the US: GEAppliances.com. In Canada: GEAppliances.ca.
FAQS
How do I know if my unit is operating properly?
If your unit is not operating properly, check the following:
Check to see if the power cord is plugged in.
• Check to see if the door is locked.
• Check to see if the control panel is set to the correct cycle.
• Check to see if there are any obstructions in the drum.
• Check to see if there are any items blocking the door.
• Check to see if the drain hose is connected and draining properly.
• Check to see if there are any loose parts or damaged parts.
• Check to see if the water supply is turned on and hot water is available at the faucet.
If you still cannot find a problem, contact your local service center for assistance.
Are GE washer dryer combos good?
If you’re after a compact washer dryer combo which is great value and low in price, this is our top pick. The GE GFQ14ESSNWW features industry-leading cycle options, such as steam, sanitize and even add-a-garment wash settings.
How do you open a GE steam washer dryer combo?
If the washer is running, press the START/PAUSE button once it will pause the washer and unlock the door. It will take a few seconds for the door to unlock after pressing PAUSE. Press again to restart the wash cycle. In some cycles the washer will drain first, and then unlock the door when it is paused.
Is GE or LG washer better?
Both machines are high-efficiency by design and Energy Star certified, but the LG uses 105 kWh versus 158 for the larger GE. The GE model offers 12 cycles and nine options, including a wash-and-dry cycle for small loads and the UltraFresh venting system.
How long do GE washer and dryers last?
A GE machine may last longer than a Kenmore and, yet, it may not. The range is more specific with a GE, and you can expect to get 11 or 12 years out of a machine.
Why is my GE dryer not drying?
Check the household fuse or circuit breaker that supplies power to the dryer. Make sure they are not burned out or tripped. There may be too many items in the dryer. Only dry one wash load at a time.
What is the capacity of a washer dryer combo?
The capacity of an all-in-one washer dryer is much smaller than a separate washer or dryer model. All-in-one washer dryers typically have between 2.3 to 4.5 cubic feet of interior space. In comparison, a full-size washer has an average of 5.0 cubic feet, and a dryer has an average of 7.4 cubic feet.
How does a ventless dryer work?
A ventless dryer constantly recirculates air through the drum to pick up moisture from the clothes, then condenses the moisture later in the process through a heat exchanger. This contrasts with vented dryers, which push hot humid air outside through a dryer vent.
How much can you fit in a 2.4 cubic foot washer?
Generally speaking, compact washers have a 2.0 to 2.5 cubic foot capacity and can handle 15 to 20lbs of laundry per load.
Who makes GE washers now?
While GE’s appliance division is now owned by the Chinese company Haier, laundry appliances are still made at GE headquarters in Louisville, Kentucky. Now offering the utmost in technological advances, the 128-year old General Electric Company is a leader in American made washer and dryer brands.
Is GE a good brand?
With a total score of 67, GE is in a three-way tie for eighth place. The brand received mostly good ratings, with electric wall ovens and electric ranges rated excellent. Over-the-range microwaves, as well as top-freezer and bottom-freezer refrigerators, received very good ratings.
Which dryer brand is most reliable?
A reputation for reliability: Consumer Reports surveys its subscribers every year and publishes each dryer brand’s estimated five-year breakage rate. The most-reliable brands include LG, Speed Queen, and Whirlpool (including Amana and Maytag). Brands at the bottom include GE, Electrolux, and Samsung.
How much longer do ventless dryers take?
Ventless dryers are notorious for taking a very long time to dry. This is because the technology used is not efficient. A vented dryer may take around 45-50 minutes to dry the average load of laundry, whereas a ventless could run for an hour and a half.
Are condenser dryers cheaper to run?
Vented dryers are cheaper than condenser dryers as they are more economically friendly to run as they are not having to convert the moisture, they are simply just expelling it from your home.
Do washer dryer combos use a lot of electricity?
Another misconception is that a combo washer dryer has poor energy usage. Many people assume that they used more energy than the regular units, because they have more features. The truth is, condensing dryers use anywhere from 50-70 percent less energy than vented dryers.
Do you have to run dryer twice to dry clothes?
Excess lint, dirt, and debris buildup inside your dryer vent duct or hose reduces airflow. It can’t effectively push the hot, moist air out of the dryer, so it stays in your clothes, causing the dryer to take two cycles to dry.