GENIE GEN37517S 3-Button Garage Door Opener Remote Instruction Manual

Features
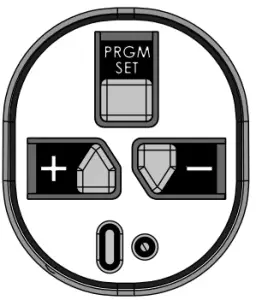
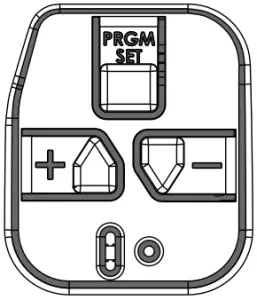
Residential Style Transmitters


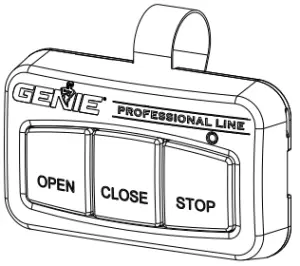
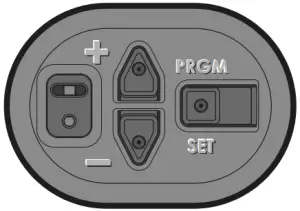
Commercial Style Transmitters


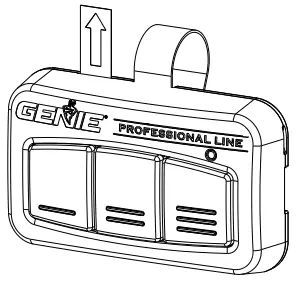

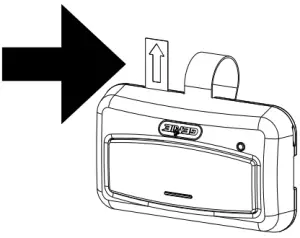
Pull protective tab to activate remote
 WARNING
 Moving Door can cause serious injury or death.
- Wall Console must be mounted in sight of door, at least 5 feet above floor and clear of moving parts.
- Keep people clear of opening while door is moving.
- DO NOT allow children to play with the remote or door opener.
If SAFETY REVERSE does not work properly: - Close door then disconnect opener using the manual release handle.
- Refer to Door and Door Openers Owners Manuals before attempting any repairs.
PLACE CURRENT PRODUCTION RESIDENTIAL OPENER INTO PROGRAMMING MODE
NOTE: The openers LEARN MODE will time out in 30 seconds. Programming must be completed within 30 seconds.
Current Production Openers
- TYPE 1
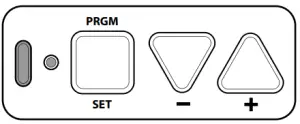
- TYPE 2
- TYPE 3
There are 4 types of programming button pads. Type 1 is shown in these steps. All buttons perform the same function and programming is the same for all types shown above.
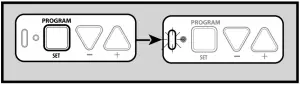
Place operator into programming mode: TYPE 1-2-3-4
- Press and hold the program button until the round LED turns blue, then release.
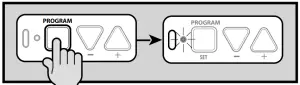
- The round LED will go out and the long LED will begin flashing purple.
- Proceed to STEP 2.
- Press desired remote control button 3 times slowly until door operates.
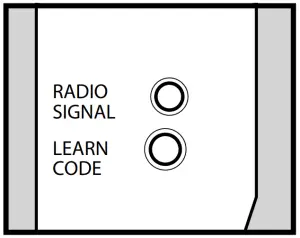
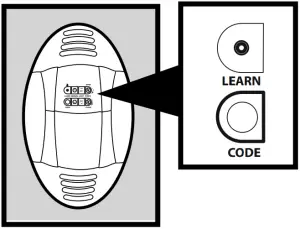
PLACE OLDER STYLE RESIDENTIAL OPENER OR EXTERNAL RECEIVER INTO PROGRAMMING MODE
Openers manufactured between 1995 to 2011 and all external receivers. (LEARN CODE TYPE)
NOTE: Learn Code Buttons are normally located under lens covers on earlier models.
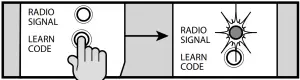
Place opener into programming mode:
- Press LEARN CODE button until RED LED begins to blink then release.
- Press desired remote control button 3 times or until door operates.
OR
PLACE COMMERCIAL OPENER INTO PROGRAMMING MODE
Adding a SINGLE (1-2-3-4 Button) Transmitter
- If operator is in RUN mode, press CAL/RUN key to enter calibration mode.
- Press SCROLL (up or down) until display reads “LEARN NEW XMTR? ” Fig.1
- This question along with the instruction “HIT SET FOR YES” will continuously pan across the display window. (Pressing SCROLL or CAL/RUN will cancel the operation.)
- Press SET/CLEAR .
- Display will read “PUSH XMTR BUTTON TWO TIMES TO LEARN XMTR.”
- Press Transmitter button two times.
- The display will read “XMTR ___LEARNED.” Where it assigns a random number to the transmitter. That transmitter is entered and ready to operate the door. (Label the transmitter with this number.)
- Press SCROLL (up or down) to move on to another menu item, or CAL/RUN to exit the CAL mode.

Adding a Single (OPEN/CLOSE/STOP) Transmitter
- If operator is in RUN mode, press CAL/RUN key to enter calibration mode.
- Press SCROLL (up or down) until display reads “LEARN NEW XMTR? ” Fig.1
- This question along with the instruction “HIT SET FOR YES” will continuously pan across the display window. (Pressing SCROLL or CAL/RUN will cancel the operation.)
- Press SET/CLEAR .
- Display will read “PUSH XMTR BUTTON TWO TIMES TO LEARN XMTR.”
- Press OPEN Transmitter button two times.
- The display will read “XMTR ___LEARNED.” Where it assigns a random number to the transmitter. That transmitter is entered and ready to operate the door. (Label the transmitter with this number.)
- Press SCROLL (up or down) to move on to another menu item, or CAL/RUN to exit the CAL mode.
PROGRAMMING ASSISTANCE
If the opener does not activate after the steps shown, repeat steps or contact Customer Care by website chat(www.geniecompany.com) or by phone at: 1-800-354-3643 for programming assistance. You may also scan this QR code for additional information and links.

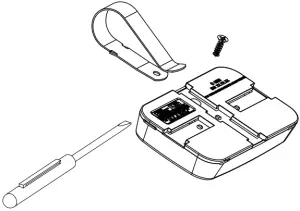
Changing the Battery:
- Remove vispr clip.
- Remove small phillips head backing screw.
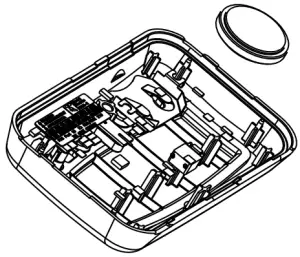
- Pry case open with small coin or screwdriver.
- Remove circuit board.
- Replace battery with CR2032 coin cell.

For Patent Information: www.geniecompany.com/patent, ©2020, The Genie Company
FCC Part 15.21 Statement
Changes or modifications not expressly approved by the party responsible for compliance could void the user’s authority to operate the equipment.
FCC / IC Statement:
This device complies with FCC Part 15 and Industry Canada licence-exempt RSS standard(s). Operation is subject to the following two conditions:
- this device may not cause harmful interference, and
- this device must accept any interference received, including interference that may cause undesired operation of the device.