Haier AS09PBDHRA Split Type Room Air Conditioner

WARNING:
- Read the maintenance instructions before opening the appliance.
- Eye or skin irritation may result from exposure from top air inlet and inner part. During air filter taking and putting for maintenance, please make sure that the power is cut off before approaching the product.
- UV-C barriers bearing the ultraviolet radiation hazard symbol should not be removed.
- Appliances that are obviously damaged must not be operated.
- Do not operate UV-C lamps outside of the appliance.
- The appliance must be disconnected from the power supply before replacing or cleaning or other maintenance of the UV-C lamp.
- The type of UV-Clamp is 0011012908A.
- Front panels bearing the ultraviolet radiation hazard symbol which have UV-C radiation are provided with a switch to interrupt the power to the UV-Clamps for your safety. Do not over-ride switch by magnet and other similar material.
- Before opening front panels bearing the ultraviolet radiation hazard symbol for the conducting user maintenance, it is recommended to disconnect the power.
- If the UV-C lamp is damaged, it must be replaced by the manufacturer, its service agent or similarly qualified persons in order to avoid a hazard.
- Unintended use of the appliance or damage to the housing may result in the escape of dangerous UV-C radiation. UV-C radiation may, even in small doses, cause harm to the eyes and skin.
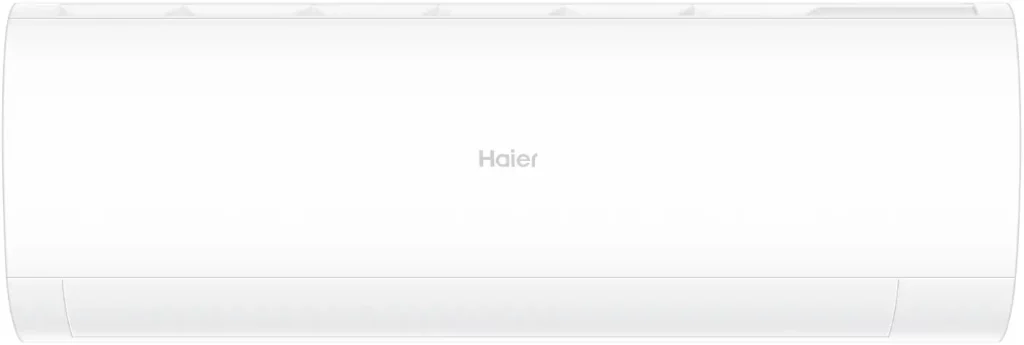
Parts and Functions
Indoor Unit

Display board
- Setting temp. display
- Operation mode indicator
- Remote signal receiver
Actual inlet grille may vary from the one shown in the manual according to the product purchased
Outdoor Unit
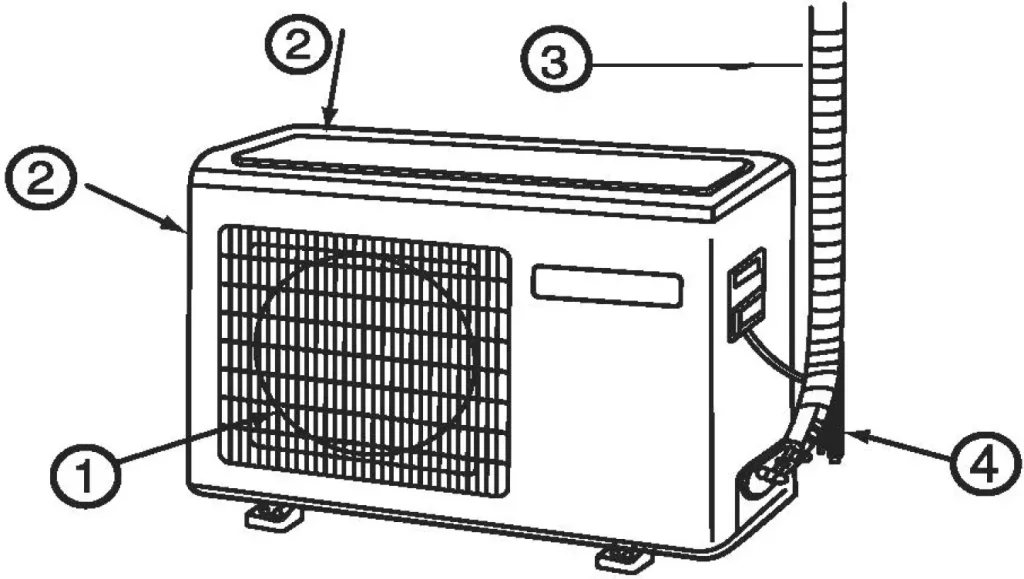
- OUTLET
- INLET
- CONNECTING PIPING AND ELECTRICAL WIRING
- DRAIN HOSE
Wi-Fi Setup
If your Air Cond几ioner (AC) has a Connected Appliance Information label located under the front cover as shown below, your AC is Wi-Fi Connect Enabled. A Wi-Fi communication card is built into the product allowing it to communicate with your smart phone for remote monitoring, control and notifications.
Please visit www.haier.com.au/smart or www.haier.co.nz/smart to learn more about connected appliance features, and to learn what connected appliance apps will work with your smart phone.

Remote Controller

- Mode display

- Signal sending display
- SWING display
- FAN SPEED display

- LOCK display
- TIMER OFF display TIMER ON display
- TEMP display
- Additional functions display
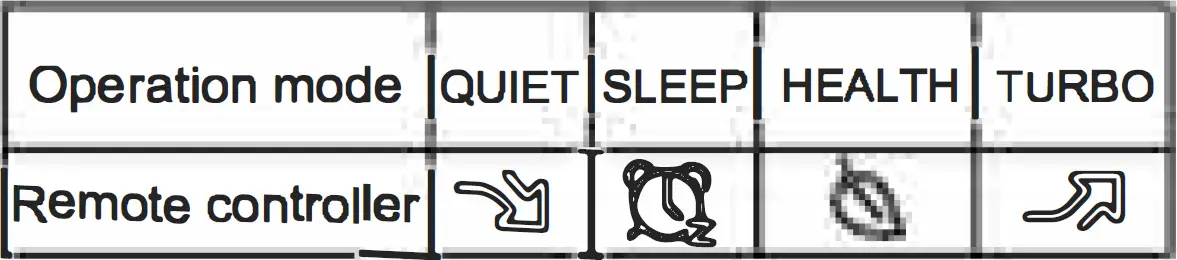
- QUIET button
- HEAT button
- COOL button
- AUTO button
- FAN SPEED button
- TIMER button
- SELF CLEAN button
- LOCK button
Used to lock buttons and LCD display - LIGHT button
Control the lightening and extinguishing of the indoor LED display board. - POWER ON/OFF button
- DRY button
- TEMP button
- SWING button
- HOUR button
- EXTRA FUNCTION button
Function: Sleeping → HEALTH (UV-C lamp starts working) → Healthy airflow position 1 → Healthy airflow position 2 → Power → Air sending → A-8 yard → Left/Right Swing (This function is unavailable on some models.) - CANCEUCON FIRM button
Function: Setting and cancel to the timer and other additional functions. - RESET button
When the remote controller appears abnormal, use a sharp pointed article to press this button to reset the remote.
NOTE:
Cooling only unit do not have displays and functions related with heating If the unit which you purchased has healthy function, follow it. If not, please ignore.
Loading of the Battery
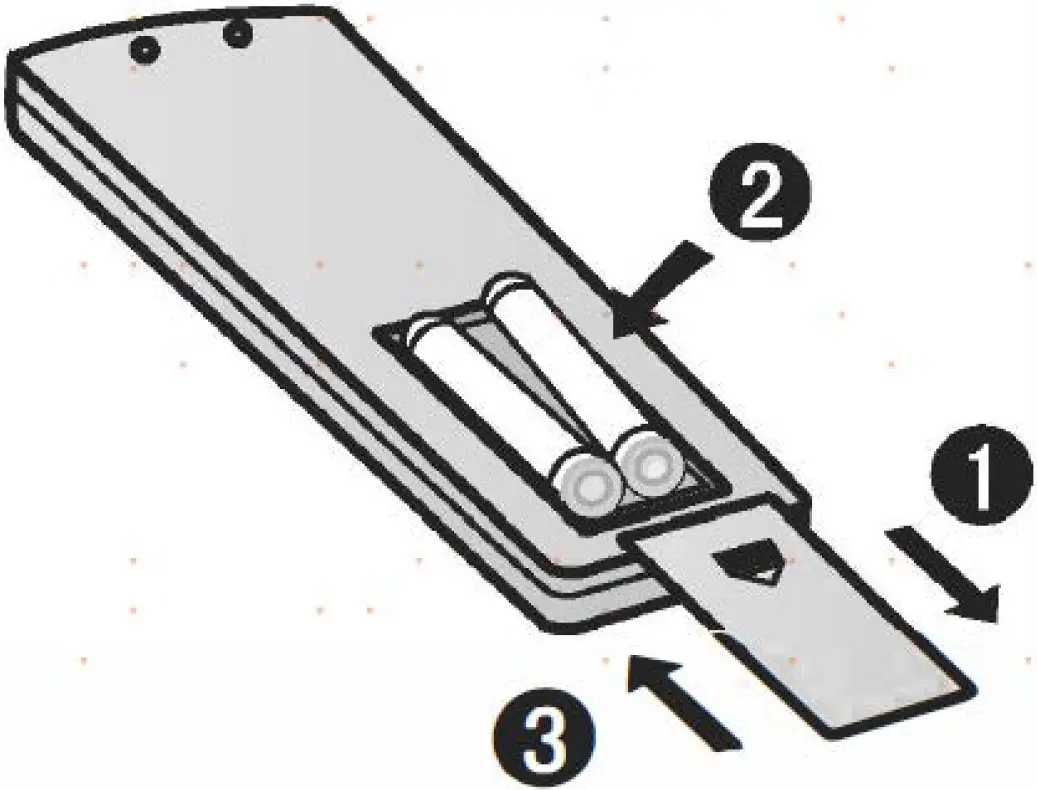
- Remove the battery cover;
- Load the batteries as illustrated. 2 R-03 batteries, resetting key (cylinder); e sure that the loading is in line with the “+” / “-“;
- Load the battery, then put on the cover again.
Note:
- The distance between the signal transmission head and the receiver hole should be within 7m without any obstacle as well.
- When electronic-started type fluorescent lamp or change- over type fluorescent lamp or wireless telephone is installed in the room, the receiver is apt to be disturbed in receiving the signals, so the distance to the indoor unit should be shorter.
- Full display or unclear display during operation indicates the batteries have been used up. Please change batteries.
- If the remote controller can’t run normally during operation, please remove the batteries and reload several minutes later.
Operation
Unit Start / Stop
Remote Controller
- Unit start
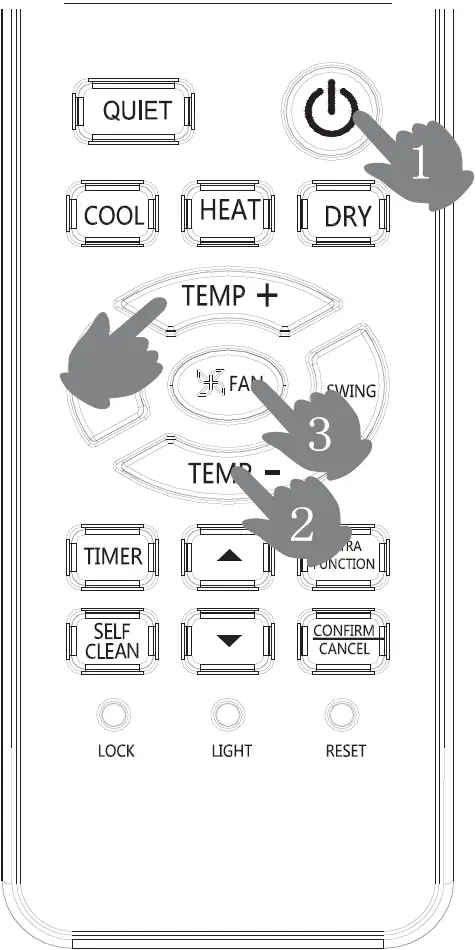
Press ON/OFF on the remote controller, unit starts. - Select temp. setting
Press TEMP+/ TEMP- button
TEMP+ Every time the button is pressed, temp. setting increase 1°C, if kept depressed, it will increase rapidly
TEMP- Every time the button is pressed, temp. setting decrease 1°C, if kept depressed, it will decrease rapidly
Select a desired temperature. - Fan speed selection
Press FAN button. For each press, fan speed changes as follows:
Remote controller:
 Air conditioner is running under displayed fan speed. When FAN is set to AUTO, the air conditioner automatically adjusts the fan speed according to room temperature.
| Operation Mode | Note |
| AUTO | Under the mode of auto operation, air conditioner will automatically select Cool or Heat operation according to room temperature. When FAN is set to AUTO, the air conditioner automatically adjusts the fan speed according to room temperature. |
| COOL | Cooling only unit do not have displays and functions related with heating |
| DRY | In ORY mode, when room temperature becomes lower than temp.setting +2°C, unit will run intermittently at LOW speed regardless of FAN setting. |
| HEAT | In HEAT mode, warm air will blow out after a short period of the time due to cold draft prevention function. |
| FAN | In FAN operation mode, the unit will not operate in COOL or HEAT mode but only in FAN mode, AUTO is not available in FAN mode. And temp. setting is disabled. When FAN is set to AUTO, the air conditioner automatically adjusts the fan speed according to room temperature. In FAN mode, SLEEP operation is not available. |
Cautions:
- When adjusting the flap by hand, turn off the unit.
- When humidity is high. condensate water might occur at air outlet if all vertical louvers are adjusted to left or right.
- It is advisable not to keep horizontal flap at downward position for a long time in COOL or DRY mode, otherwise, condensate water might occur.
Note:
When restart after remote turning off, the remote controller will automatically return to the previous set swing position.
OREO Operation
Haier Peaksmart enabled air-conditioners have a Demand Response Mode display on the indoor unit.
The display could be labelled d1, d2, d3 (wording may differ model to model).
These modes are described in more detail below:
| DRM3 | d3 | Your air-conditioner will continue to cool or heat during the peak demand event. The energy consumed by your air-conditioner is capped to 75%. | No action is required. |
| DRM2 | d2 | Your air-conditioner will continue to cool or heat during the peak demand event. The energy consumed by your air-conditioner is capped to 50%. | No action is required. |
| DRM1 | d1 | Your air-conditioner is still turned on and the fan will continue to operate. Your compressor is turned off and cool/hot air will no longer be generated | DRM1mode is only activated during emergency demand management situations. This mode will automatically reset the device within2 hours .If your air-con is in this mode for longer than 2 hours please contact Energex on 13 12 53. |
Timer On/Off On-Off Operation
- After unit starts, select your desired operation mode.
- Press TIMER button to change TIMER mode. Every time the button is pressed, display changes as follows:
Remote controller:
 Then select your desired TIMER mode (TIMER ON or TIMER OFF or TIMER ON-OFF). “ON” or “OFF” will flash.
 - Press ⇑ / ⇓ button to set time.
- ⇑ Press the button for each time, setting time in the first 12 hours increased by 0.5 hour every time, after 12 hours, increased by 1 hour every time.
- ⇓ Press the button for each time, setting time in the first 12 hours decreased by 0.5 hour every time, after 12 hours, decreased by 1 hour every time.
It can be adjusted within 24 hours.
- Confirm timer setting
After adjust the time, press Confirm/Cancel button and confirm the time ON or OFF button will not flash any more. - Cancel timer setting
Press the Confirm/Cancel button by times until the time display eliminated.
Hints:
After replacing batteries or a power failure happens, time setting should be reset.
According to the Time setting sequence of TIMER ON or TIMER OFF, either Start-Stop or Stop-Start can be achieved.
Self Clean Operation
- Functional description: the purpose of this function is to clean the evaporator and condenser.
- Entry and exit, Press self clean button to enter this function, then it will display “CL” on the panel of the indoor unit and also on the remote controller. After running 20-30 minutes, this function will exit automatically when the “Pi” sound is heard twice, then the unit returns to original state. Under operation process of self clean, pressing the button repeatedly has no effect and the function will not exit, but pressing the power off button and other mode button can make it exit.
POWER/SOFT Operation
- POWER Operation
When you need rapid heating or cooling, you can use this function. Press Extra Function button to enter additional options, when cycle display to will flash, and then press Confirm/Cancel, enter to power function. When cancel the function, please enter additional options again and to cancel power function. - QUIET Operation
You can use this function when silence is needed for rest or reading. Press QUIET button, the remote controller will show down arrow, and then achieve to the quiet function. Press again this QUIET button , the quiet function will be cancelled.
Note:
During POWER operation, in rapid COOL mode , the room will show inhomogeneous temperature distribution.
Long period QUIET operation will cause effect of not too cool or not too warm.
Emergency Operation and Test Operation
Emergency Operation:
- Use this operation only when the remote controller is defective or lost.
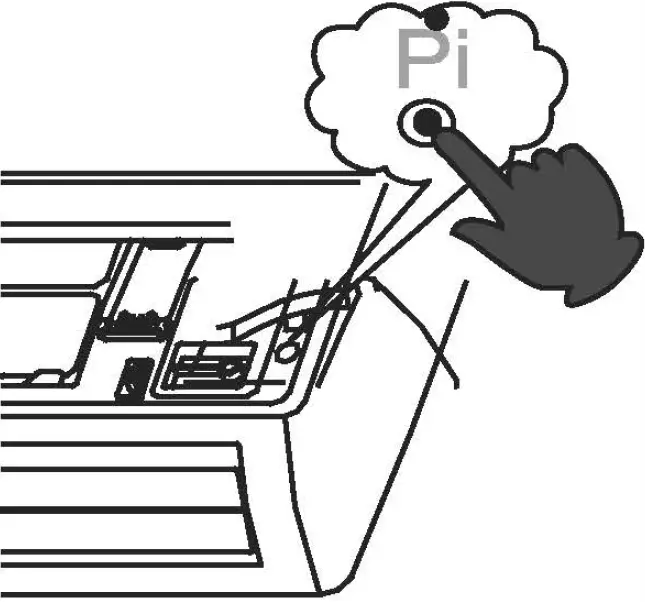
- When the emergency operation switch is pressed, the “Pi” sound is heard once, which means the start of this operation.
- In this operation, the system automatically selects the operation modes, cooling or fan or heat, according to the room temperature.
Room Temperature Operation Mode Designated Temperature Timer Mode Air Flow Above 23°C Cooling 26°C No Automatic Below 23°C Heat 23°C No Automatic (Cooling Only Unit)
Room TemperatureOperation Mode Designated Temperature Timer Mode Air Flow Below 23°C Fan 26°C No Automatic - It is not possible to operate in dry mode.
Test Operation:
Test operation switch is the same as emergency switch.
- Use this switch in the test operation when the room temperature is below 16·c, do not use it in the normal operation.
- Continue to press the test operation switch for more than 5 seconds. After you hear the “Pi” sound twice, release your finger from the switch: the cooling operation starts with the air flow speed “Hi”.
- After 30 minutes, test operation ends automatically.

Comfortable SLEEP
Press EXTRA FUNCTION button to enter additional options, when cycle display to CLOCK icon, clock icon will flash. And then press Confirm/Cancel button enter to sleep function.

Operation Mode
- In COOL,DRY mode
1 hour after SLEEP mode starts.temp will become 1°C higher than temp setting. After another 1 hour, temp rises by 1°C further .The unit will run for further 6 hours then stops. Temp is higher than temp setting so that room temperature won’t be too low for your sleep.

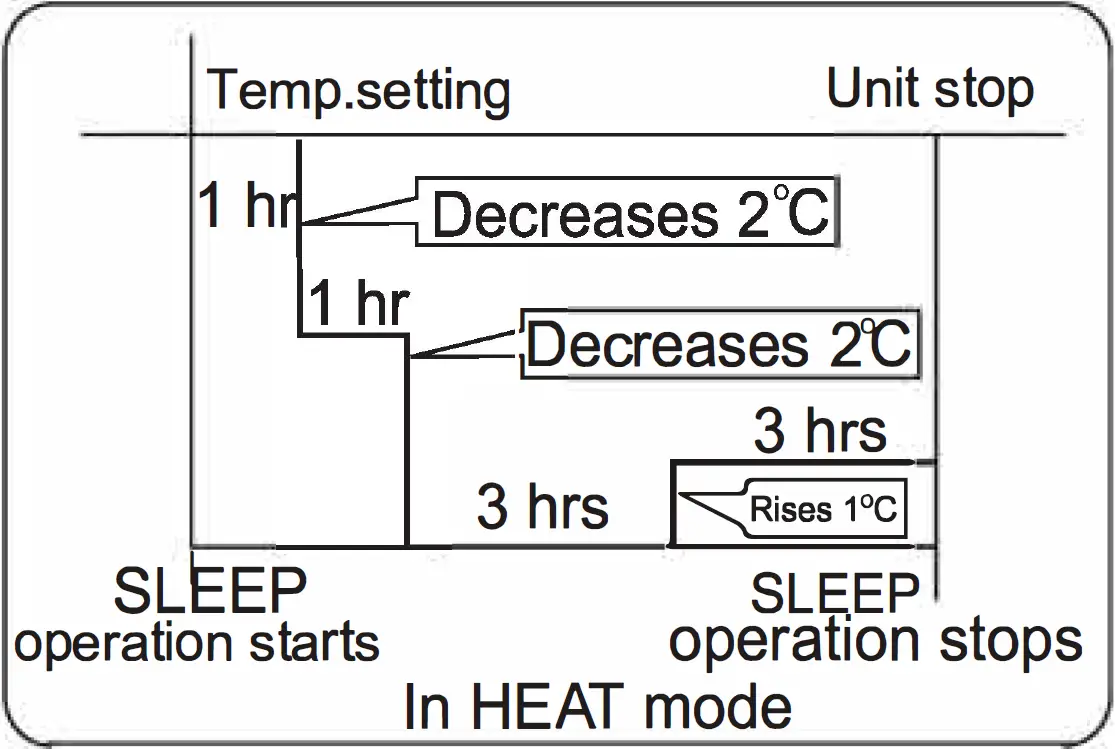
- In HEAT mode
1 hour after SLEEP mode starts, temp will become 2°C lower than temp setting. After another 1 hour, temp decrease by 2°C further. After more another 3 hours, temp rises by 1°C further. The unit will run for further 3 hours then stops.Temp is lower than temp setting so that room temperature won’t be too high for your sleep.
- In AUTO mode
The unit operates in corresponding sleep mode corresponding sleep mode adapted to the automatically selected operation mode. - In FAN mode
It has no SLEEP function. - When comfortable sleeping function is set to 8 hours the comfortable sleeping time can not be adjusted. When TIMER function is set, the comfortable sleeping function can’t be set up. After the sleeping function is set up, if user resets TIMER function, the sleeping function will be cancelled; the machine will be in the state of timing-on, if the two modes are set up at the same time, either of their operation time is ended first, the unit will stop automatically, and the other mode will be cancelled.
Note:
When TIMER function is set, the sleeping function can’t be set up. After the sleeping function is set up, if user resets TIMER function, the sleeping function will be cancelled; the machine will be in the state of timing-on.
Power Failure Resume Function
If the unit is started for the first time, the compressor will not start running unless 3 minutes have elapsed. When the power resumes after power failure, the unit will run automatically, and 3 minutes later the compressor starts running.
Healthy Airflow Operation
- Press Power button to starting
Setting the comfort work conditions. - The setting of healthy airflow function
Press EXTRA FUNCTION button to enter additional options. Press this button continuously, the louvers location will cycle between in the following three locations, to choose the swing location what you needed, and then press Confirm/Cancel button to confirm.

- The cancel of the healthy airflow function
Press EXTRA FUNCTION button to enter additional options. Press this button continuously, the louvers location will cycle between in the following three locations again, and then press Confirm/Cancel button to cancel.
Notice: Do not direct the flap by hand. Otherwise, the grille will run incorrectly. If the grille is not run correctly, stop for a minute and then start, adjusting by remote
controller.
Note:
- After setting the healthy airflow function, the position grill is fixed.
- In cooling, it is better to select the slide mode.
- In cooling and dry, using the air conditioner for a long time under the high air humidity, condensate water may occur at the grille.
HEALTH Operation
Press EXTRA FUNCTION button to enter additional options, when cycle display to icon, icon will flash, and then press Confirm/Cancel enter to HEALTH function. When cancel the function, please enter additional options again and to cancel HEALTH function. UV sterilization function: it uses the c-band with the most effective sterilization effect in ultraviolet radiation to remove harmful micro-organisms such as bacteria in the air, which has remarkable effects to make the air healthy.
Attention:
- It is recommended to turn on the UV sterilization function for 1-2 hours in one day, longer time will affect the life of the UV lamp.
- Do not look directly at the UV lamp or touch it with your hand when the sterilizing function is on. Please turn off the sterilizing function before opening the panel.
- Tinged blue light may appear near the air conditioning inlet when the sterilizing function is on.
- Only when the internal fan starts and health function turned on, the UV lamp will be lighted.
Maintenance
For Smart Use of The Air Conditioner
| Setting of proper room temperature | 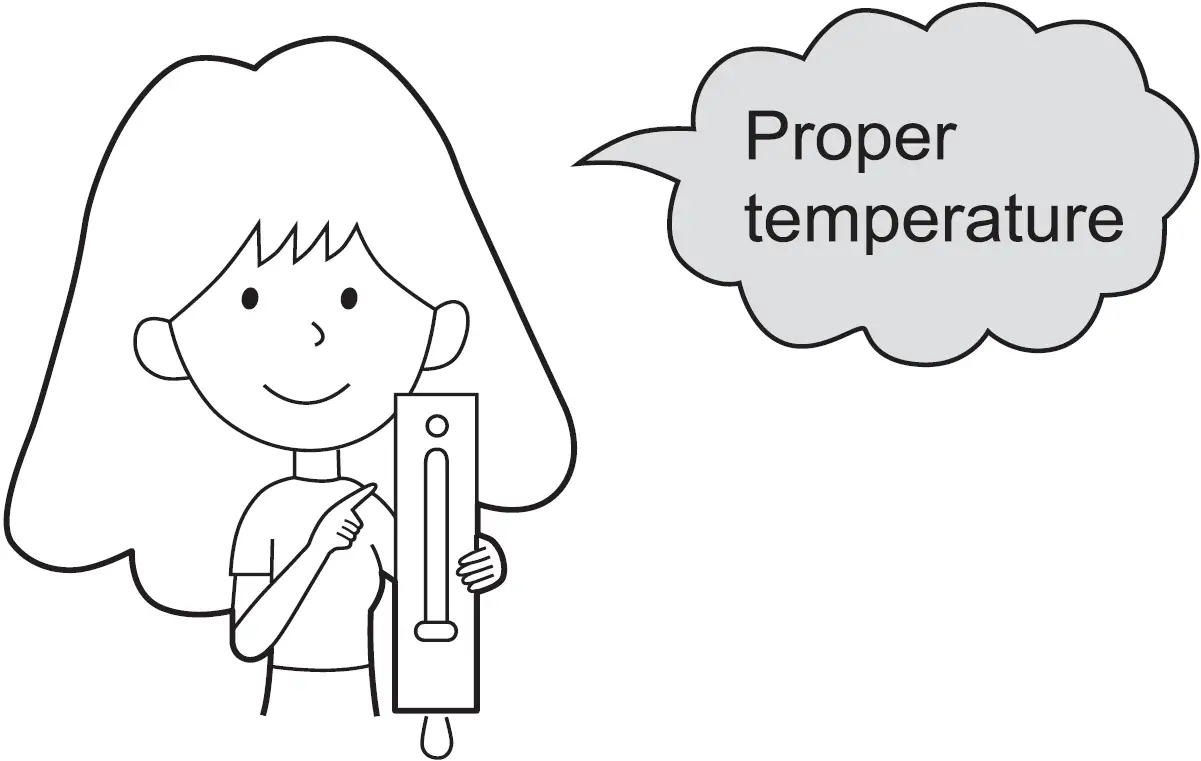 |
| Do not block the air inlet or outlet |  |
| Close doors and windows during operation | 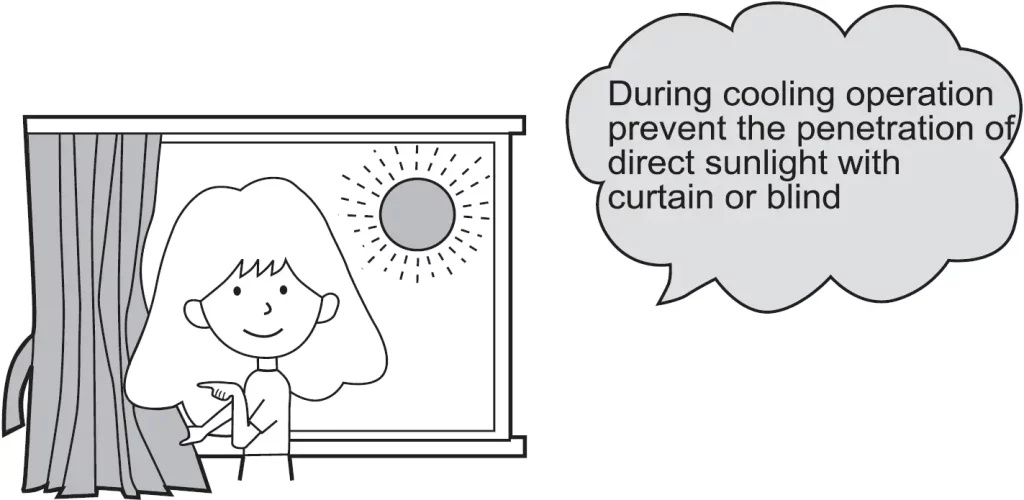 |
| Use the timer effectively |  |
| If the unit is not to be used for a long time, turn off the power supply main switch. | 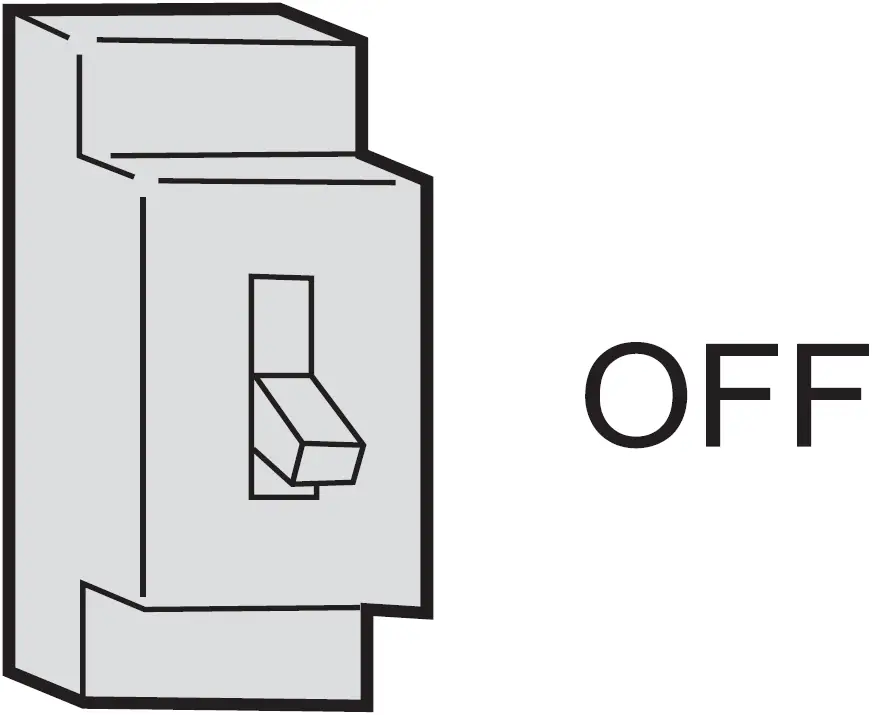 |
| Use the louvers effectively | 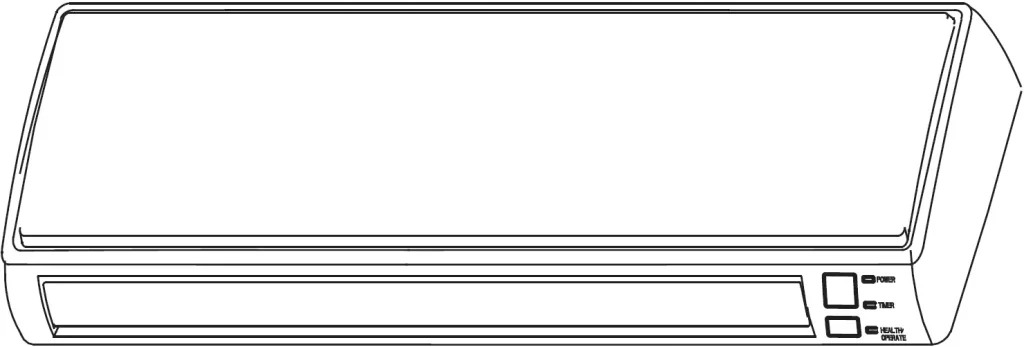 |
| Remote Controller Do not use water, wipe the controller with a dry cloth. Do not use glass cleaner or chemical cloth. |
 |
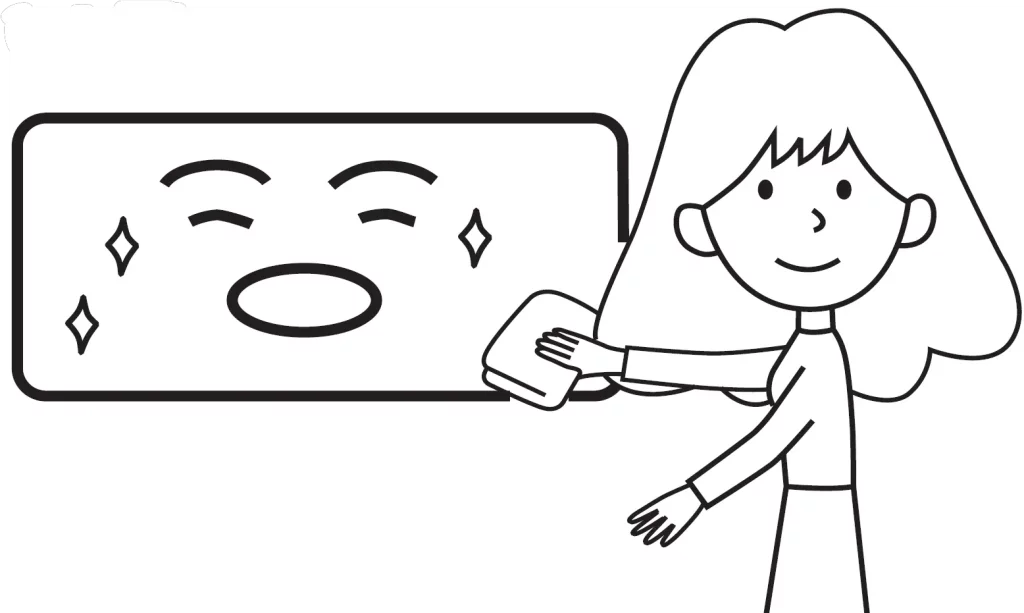
| Indoor Body Wipe the air conditioner by using a soft and dry cloth. For serious stains, use a neutral detergent diluted with water. Wring the water out of the cloth before wiping, then wipe off the detergent completely. |
 |
Do not use the following for cleaning
Gasoline, benzine, thinner or cleanser may damage the coating of the unit.

Hot water over 40°C (104°F) may cause discoloring or deformation.

Air Filter Cleaning
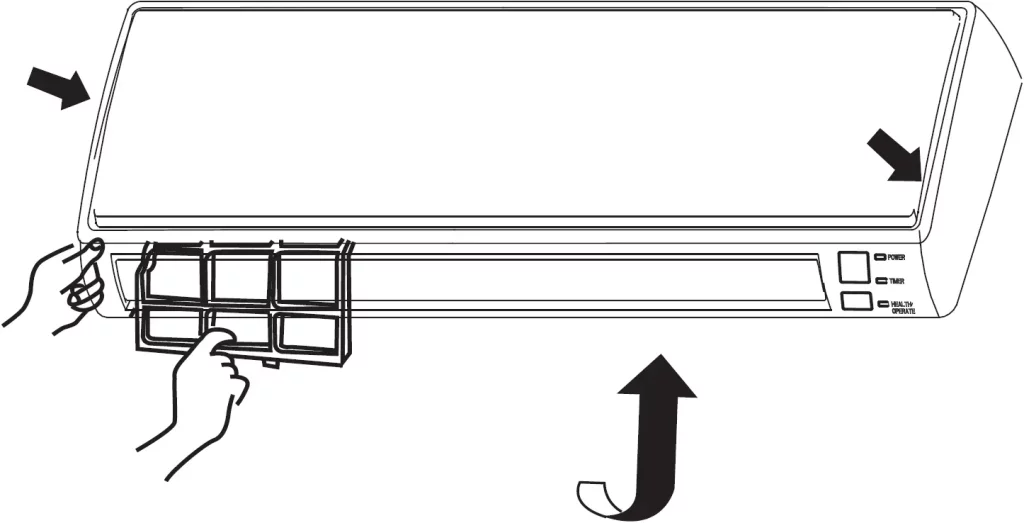
- Open the inlet grille by pulling it upward.

- Remove the filter.
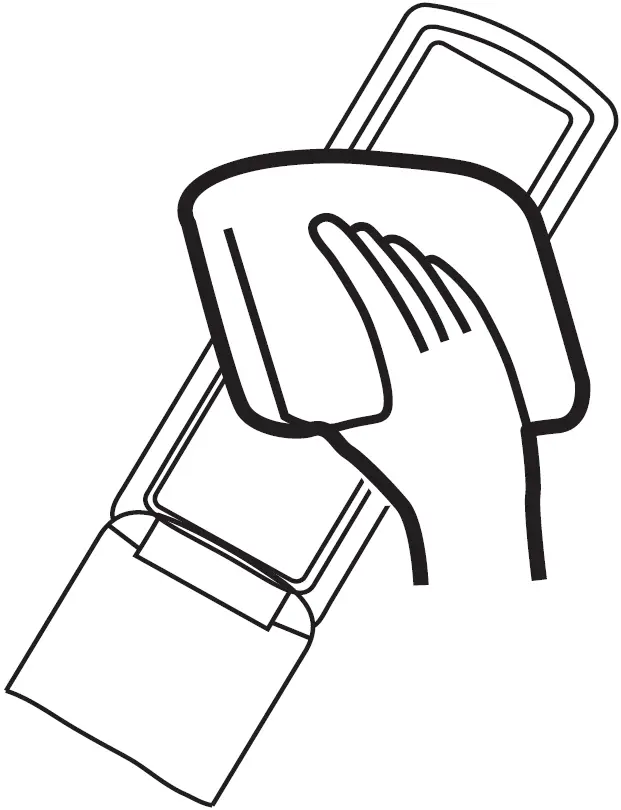
Push up the filters center tab slightly until it is released from the stopper, and remove the filter downward. - Clean the filter.
Use a vacuum cleaner to remove dust, or wash the filler with water. After washing, dry the filter completely in the shade. - Attach the filter.
Attach the filter correctly so that the “FRONT” indication is facing to the front. Make sure that the filter is completely fixed behind the stopper. If the right and left filters are not attached correctly, that may cause defects. - Close the inlet grille.
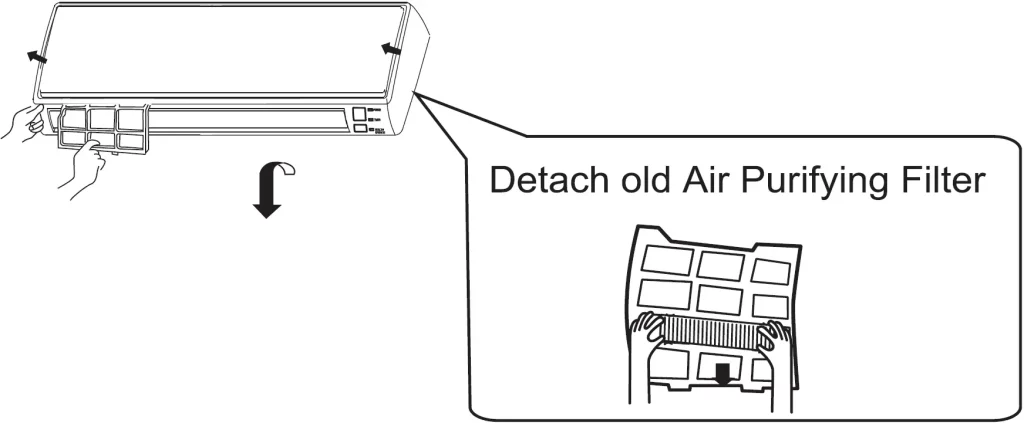
Replacement of Air Purifying Filter
- Open the Inlet Grille
Prop up the inlet grille by using a small device named grille-support which located in the right side of the indoor unit.

- Detach the standard air filter
Slide the knob slightly upward to release the filter, then withdraw it.
- Attach Air Purifying Filter
Put air purifying filter appliances into the right and left filter frames.
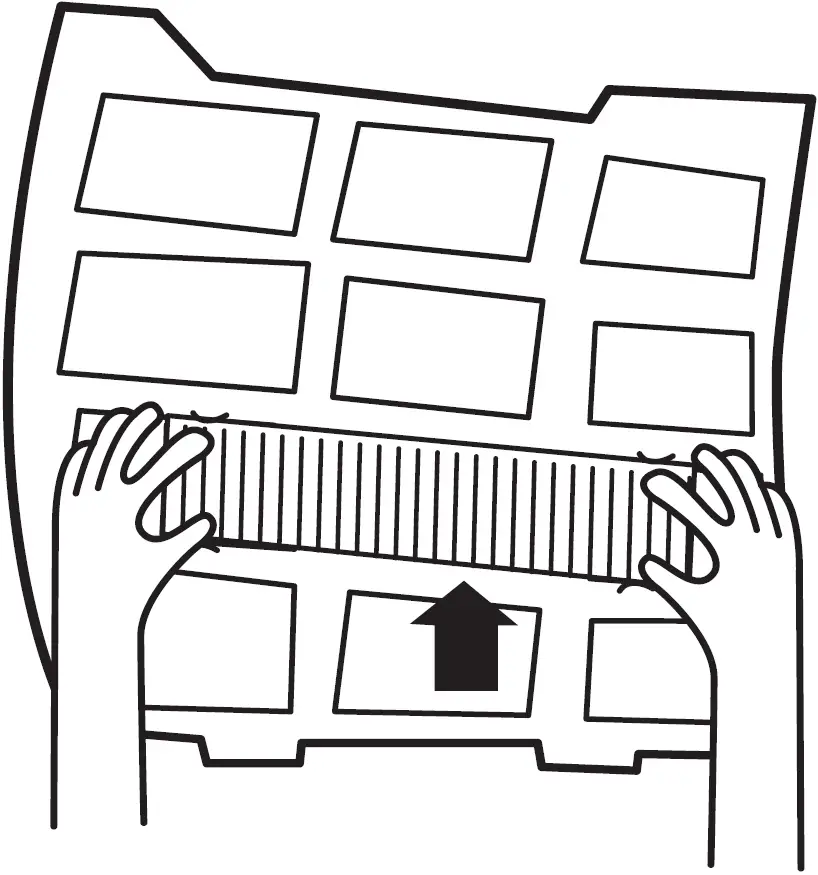
- Attach the standard air filter (Necessary installation)
 ATTENTION:
The white side of the photocatalyst air purifying filter face outside,and the black side face the unit. The green side of the bacteria-killing medium air purifying filter face outside, and the white side face the unit. - Close the Inlet Grille
NOTE:
- The photocatalyst air purifying filter will be solarized in fixed time. In normal family, it will be solarized every 6 months.
- The bacteria-killing medium air purifying filter will be used for a long time, no need for replacement. But in the period of using them, you should remove the dust frequently by using vacuum cleaner or flapping them lightly, otherwise , its performance will be affected.
- Please keep the bacteria-killing medium air purifying filter in the cool and dry conditions avoid long time directly sunshine when you stop using it, or its ability of sterilization will be reduced.