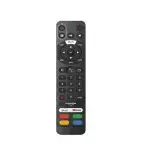
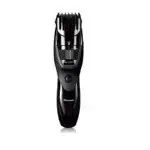
hama PANASONIC TVs Remote Control Replacement Instruction Manual
Replacement remote control for PANASONIC SERIES: TV/LCD/LED/HDTV
Thank you for choosing a Hama product.
Take your time and read the following instructions and information completely. Please keep these instructions in a safe place for future reference. If you sell the device, please pass these operating instructions on to the new owner.
With the factory settings supplied, the remote control can control approx. 90% of all PANASONIC devices. There is no need to make any settings. If the remote control does not work, select one of the setting options described in Section 5.
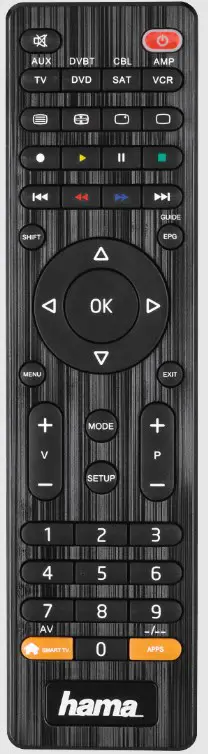
Function buttons

- Power TV ON/OFF/LED
- TV mute
- TV selection
- AV input selection
- Streaming app menu
- LINK
- Show the programme guide
- supported by the TV)
- Menu setting
- HOME
- Close menu
- Menu
- Internet
- SD/USB input
- Device settings
- Back
- Selection
- Preview other programme or select on-screen options
- Selection of on-screen options
- Volume +/-
- Programme +/-
- Teletext ON/OFF
- Teletext subtitles
- Teletext info
- Teletext hold page
- Numeric keys 0-9 for programme selection
- Enter 2 or 3-digit programmes
- Previous channel
Info - Normal
- Picture size setting
- Fast rewind (DVD, BluRay, etc. )
- Start (DVD, BluRay, etc. )
- Fast forward (DVD, BluRay, etc.)
- Previous scene (DVD, BluRay, etc.)
- Next scene (DVD, BluRay, etc.)
- Freeze / Pause (DVD, BluRay, etc.)
- 3D mode ON/OFF
- Stop (DVD, BluRay, etc. )
- Recording
Explanation of warning symbols and notes
 vWarning
This symbol is used to indicate safety instructions or to draw your attention to specific hazards and risks.
 Note
Note
This symbol is used to indicate additional information or important notes.
Supplied package
- Replacement remote control
- 2 x AAA (R03) batteries
- These instructions for use with list of codes
Safety instructions
- Do not use the universal remote control in damp environments and avoid contact with splashing water.
- Keep the universal remote control away from heat sources and do not expose it to direct sunlight.
- As with all electrical products, the universal remote control should be kept out of the reach of children.
- This product is intended for private, non-commercial use only.
- Use the product only for the intended purpose.
- Protect the product from dirt, moisture and overheating and use it in dry rooms only.
- Do not use the product in areas in which electronic products are not permitted.
- Do not drop the product and do not expose it to any major shocks.
- Do not modify the product in any way. Doing so voids the warranty.
- Keep the packaging material out of the reach of children due to the risk of suffocation.
- Dispose of packaging material immediately in accordance with the locally applicable regulations.
- Do not operate the product outside the power limits given in thespecifications.
- Do not open the device or continue to operate it if it becomes damaged.
- Do not attempt to service or repair the product yourself. Leave any and all service work to qualified experts.
- Only use the article under moderate climatic conditions.
 Warning – Batteries
- When inserting batteries, note the correct polarity (+ and – markings) and insert the batteries accordingly. Failure to do so could result in the batteries leaking or exploding.
- Only use batteries that match the specified type. Keep the instructions for the correct choice of batteries included with the operating instructions of devices safe for future reference.
- Before you insert the batteries, clean the battery contacts and the polarity contacts.
- Do not allow children to change batteries without supervision.
- Replace all the batteries in a set at the same time.
- Do not mix old and new batteries, or batteries of different types or from different manufacturers.
- Remove the batteries from products that are not being used for an extended period (unless these are being kept ready for an emergency).
Do not short-circuit batteries. - Do not charge batteries.
- Do not burn batteries or heat them up.
- Never open, damage or swallow batteries or allow them to enter the environment. They can contain toxic, environmentally harmful heavy metals.
- Remove spent batteries from the product and dispose of them without delay.
- Avoid storing, charging and using in extreme temperatures and at extremely low atmospheric pressures (such as at high altitudes).
- Ensure that batteries with damaged housings do not come into contact with water.
- Keep batteries out of the reach of children.
First steps – Inserting the batteries
Note
- Use 2 type AAA batteries.
- Remove the battery cover on the underside of the remote control.
- Ensure the correct polarity (+/-) of the batteries and the battery compartment.
- Insert the batteries.
- Reattach the battery cover on the remote control.
Note – code memory
This remote control saves the settings even during a battery change.
Note: Energy saving function
The remote control switches itself off automatically if a button is pressed for longer than 15 seconds. This prolongs the life of the batteries if the remote control is stuck in a place where the buttons are pressed permanently, e.g. between sofa cushions.
Note: Low battery display
- This remote control indicates when the batteries are getting low.
- If the status LED flashes 2 times after a button is pressed, the batteries are weak and should be replaced promptly
Setup
With the factory settings supplied, the remote control can control approx. 90% of all PANASONIC devices. There is no need to make any settings. If the remote control does not work, select one of the setting options mentioned in 5.1 and 5.2 below.
Code input CODE list:
001, 002, 003, 004, 005, 006, 007, 008, 009, 010, 011, 012, 013, 014, 015, 016, 017, 018, 019, 020, 021, 022, 023, 024, 025, 026, 027, 028, 029, 030, 031, 032, 033, 034, 035, 036, 037, 038, 039, 040, 041, 042, 043, 044, 045, 046, 047, 048, 049, 050, 051, 052
- Press and hold the [MUTE] and [POWER] buttons simultaneously for approx. 3 sec. until the status LED lights up continuously.
- Enter a 3-digit code from the code list using the number keys. The status LED confirms each number entered with a short flash. When all three digits have been entered, the status LED goes out. If you have entered an invalid device code, the status LED flashes 3 times and then lights up permanently again for a new code entry
- Test the functions of the remote control. If the function does not work properly, try other device codes: [002], [003], [004], etc.
Note
If you have entered an invalid device code, the status LED flashes twice and then shows a steady light again. To exit the device code entry, press the mute button [MUTE].
Code search
- Press and hold [MUTE] and [POWER] simultaneously for approx. 3 sec. until the status LED lights up.
- Press the [CH+ or CH-] button to start the code search. With each button press, the remote control sends a new code to your TV. If your TV switches to a different programme, also test the found device code using the [POWER], [VOL+], [VOL-], [MENU] buttons and the number keys 0-9. If the functions work, press the [MUTE] button to save the device code and end the search.
- If the functions do not work, repeat the search by pressing the [CH+] button.
Code query
You can display the code currently used by the remote control:
- First press and hold the mute button [MUTE], followed by [POWER]. Release the two buttons when the status LED lights up after approx. 3 sec.
- Use the numeric keys to enter the numeric sequence 9-9-0. The status LED flashes twice and goes out.
- Use the numeric keys to enter the number 1. Count the number of individual flashes of the status LED – this number corresponds to the first digit of the current device code.
Proceed accordingly for the 2nd and 3rd digits of the code:
2nd digit -> enter 2 -> count flashing signals
3rd digit -> enter 3 -> count flashing signals
If a digit of the device code is a 0, the LED does not flash.
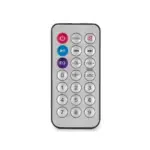
Overview of compatible remote controls
Due to the large number of different remote controls, we can only provide a limited number in the code list. If the button diagram and housing shape of your original remote control match one of the models shown, it is compatible (page 47).
Restoring factory settings
Press and hold the [RETURN] and [0] buttons simultaneously for approx. 5 sec. until the status LED flashes three times and then goes out. The remote control is now successfully reset to the factory setting.
Note
All taught-in or copied buttons as well as all settings of the remote control will be deleted.
Learning function
This remote control is equipped with a learning function. This allows you to transfer functions from your original remote control to this remote control.
Before you start the learning function
- Make sure that all batteries used in both remote controls are in perfect condition. Change them if necessary.
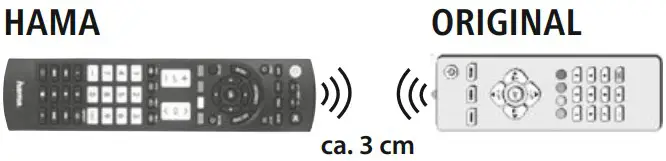
- Place your original remote control and the remote control next to each other so that the infrared diodes of the remote controls are directly opposite each other.
- If necessary, correct the height of both remote controls to achieve optimal alignment.
- The distance between the two remote controls should be approx. 3 cm.

Note
- Do not move the remote controls during the learning process.
- Make sure that the room lighting is not fluorescent tubes or energy-saving lamps, as these could cause interference and thus hinder the learning process.
- The distance between the two remote controls and the nearest light source should be at least 1 metre.
- The learning process is terminated without saving if no button is pressed or no signal is received for 15 sec. while learning mode is activated.
- In learning mode, each button can only be assigned one function. A new function overwrites the function previously taught on this but
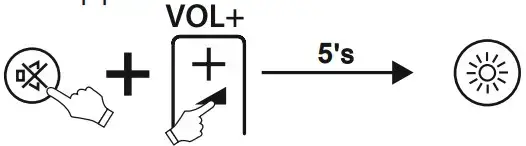
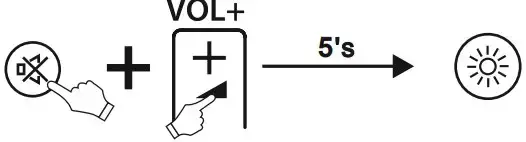
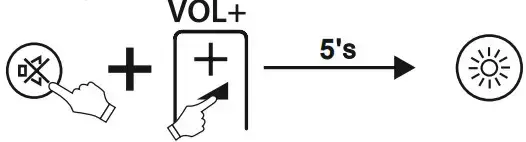
Activating the learning mode
- Press and hold the [MUTE] and [VOL+] buttons simultaneously for approx. 5 sec. until the status LED lights up continuously.

- Enter the code [9] [8] [0], the status LED flashes 2 times and then lights up permanently.
- The remote control is now in learning mode.
Transferring the button function
- Press the button on the original remote control whose function you want to transfer. To confirm that the command has been received, the status LED of the replacement remote control flashes.
- Now press the button on the replacement remote control to which the function is to be transferred.
- The function LED of the replacement remote control flashes 3 times for confirmation and then lights up permanently again. The new function is now saved.
- To transfer the functions of additional buttons, repeat these steps.
- Press the [MUTE] and [VOL-] buttons to save all taught-in functions and exit the learning mode.
Note
When changing the batteries of the remote control, the functions of the taught-in buttons are retained.
Deleting taught functions
Deleting a taught function
- Press and hold the [MUTE] and [VOL+] buttons simultaneously for approx. 5 sec. until the status LED lights up continuously.

- Enter the code [9] [8] [1], the status LED flashes 2 times and then lights up permanently again.
- Press the button whose function you wish to delete. The status LED flashes 3 times and the desired function is deleted.
Deleting all taught functions
- Press and hold the [MUTE] and [VOL+] buttons simultaneously for approx. 5 sec. until the status LED lights up continuously.

- Enter the code [9] [8] [2], the status LED flashes 2 times and then lights up permanently again.
- Press the [OK] button, the status LED flashes 3 times and all taughtin functions are deleted.
EASY mode
This remote control is equipped with an EASY mode function. This allows you to limit the range of functions of this remote control to essential functions. This prevents an accidental change of the TV settings.
In EASY mode, the following buttons are available:
 |
Power TV ON / OFF |
 |
Volume + / – |
 |
TV mute |
| CH | Programme + / – |
| 0-9 | Numeric keys 0 – 9 for programme selection |
 |
Teletext ON/OFF |
 |
Selection of on-screen options |
| GUIDE | Show the programme guide |
| TV | (if supported by the TV) |
| AV | TV/AV input selection |
 |
Close menu |
Deactivating EASY Mode
- Press and hold the [MUTE] and [VOL+] buttons simultaneously for approx. 5 sec. until the status LED lights up continuously.

- Enter the code [9] [7] [0], the status LED flashes 2 times and then lights up permanently again.
- Press the [EXIT] button, the status LED flashes 3 times and EASY mode is deactivated.
Note
If the remote control is in EASY mode, only the buttons indicated in point 7 function. If one of these buttons is pressed, the status LED lights up until the button is released. In normal mode, the status LED flashes when a button is pressed.
Maintenance
- Never use old and new batteries in the replacement remote control at the same time, as old batteries tend to leak and can lead to a loss of performance.
- Never clean the replacement remote control with scouring agents or harsh cleaning agents.
- Keep the replacement remote control free of dust by cleaning it with a dry soft cloth.
Troubleshooting
Q. My replacement remote control does not work!
A. Check your TV. If the main switch on the device is off, the replacement remote control cannot operate the device.
A. Check that the batteries are inserted correctly and that the polarity has been observed.
A. Check that you have pressed the appropriate device button for the device.
A. Replace the batteries if the battery level is low.
Q. My TV only responds to some button commands.
A. Try other codes until most of the buttons work properly.
F. Some button commands on the remote control are no longer working?
A. EASY mode may be activated. Deactivate EASY mode as described in point 7.2.
Warranty disclaimer
The manufacturer assumes no liability and provides no warranty for damage resulting from improper installation/mounting, improper use of the product or from failure to observe the operating instructions and/ or safety notes.
Hama GmbH & Co KG
86652 Monheim/Germany
Service & Support
 www.hama.com
 +49 9091 502-0
All listed brands are trademarks of the corresponding companies. Errors and omissions excepted, and subject to technical changes. Our general terms of delivery and payment are applied.