Smart IP Camera
(Quick Guide)
Email [email protected]
whatsapp: +8613392810296
web: www.hiseeu.com
Tel 1917338-1084
(Available Pacific Time: 5:00pm-12:00pm)
Please read the Quick Guide carefully before
Using the product and keep it properly
Device Installation and Configuration
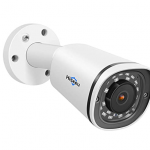
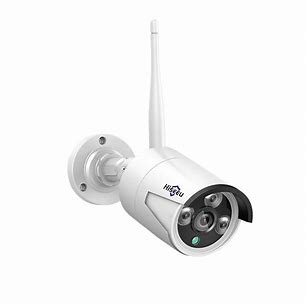
This manual is suitable for various types of c4 cameras-(The appearance may be different due to different hatches. The details are subject to the receiplThis manual is Only for the Installation Instructions of this series of equipment.)
- Wireless Pan-tilt IP Camera

- WiFi MINI Dome Cmaera
- WiFi Bullet Cmaera
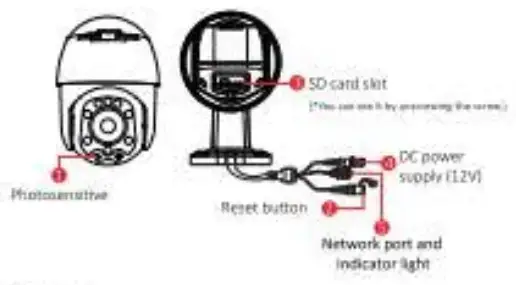
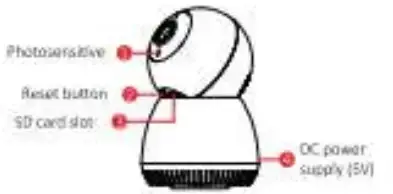
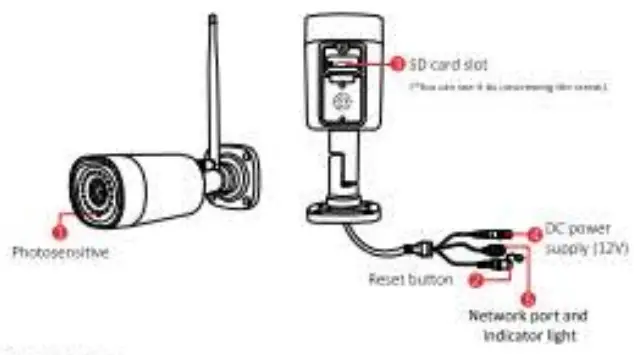
Descronon
- Photosensitive
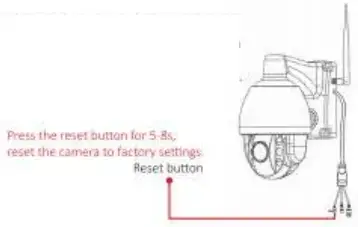
Collect ambient rumincolty value, turn On the infrared light when the current illuminance is less than 3 lux - . Reset button
The working state of the device, log pen 3.5 seconds to restore the factory, the Lerner, will have a *ace y01110 brOadtdal. - SD card salt
Tr card, storage video, and playback video. - DC power supply
Power input - Network peat and indicator light
connect the Lan cable and check the current device status indicated’ Behl Software Installation LAPP Download and Installation Users can search ‘EseeCloud’ on the APR store Of on Google Plato. SUB I the OR code Woa to install the APP
Software installation
- APP Download and Installation
Users can search “EsteCloud” on the APP store or on Google Plater ild11 the OR e.o0e below to Install the APP
Note. For 105 system. It requires 105 8 0 versos or above. hr AndroctArdront 4 4 or Dhow - Register Account
1,60 to login interface. cick ‘register’ 12NlegIster with your phone number or email addresses ca ICOnfimy “.a verhcaban code will sera to ru• email or your phone 13)put the verification code and set up vow own oast:AN: rd. then click “confirm” to complete.

Wifi Configuration add process
1) Add WWI mode (optional)
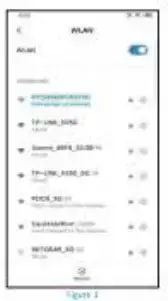
- Power an the device, ‘,yea fee the Indicator iglu to flash slowly, connect to the 113C)00( hotipot In the phone setting, the password 11111111:(1 sem e l?
- Open the APP and dick the ‘4’ in the upper right corner to enter the scan code tittelf40e; figure 2
- Scan the eft code on the device,;
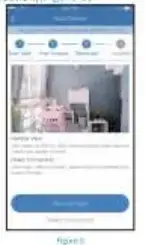
- On the search device interface, click 4Ader: figure 41

- To view and use via WiFi or other networks, please select Remote View, If there is no network if you connect to the camera at close range. please select local Direct Connection. H.Fore

2. Remote View adding process
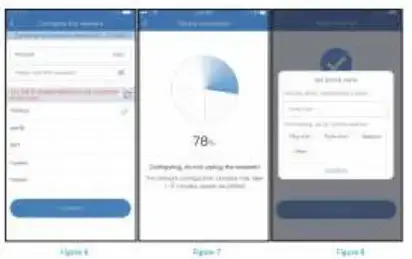
- Select ”Remote View’ to add. connect the device to Wife, select the correct Wirt. enter the password,(Figure6)
- Please wait patiently during the device configuration netivotkvitgure(Figure7)
- The device s successfully added, please set a name and password for the device.(Figure8)
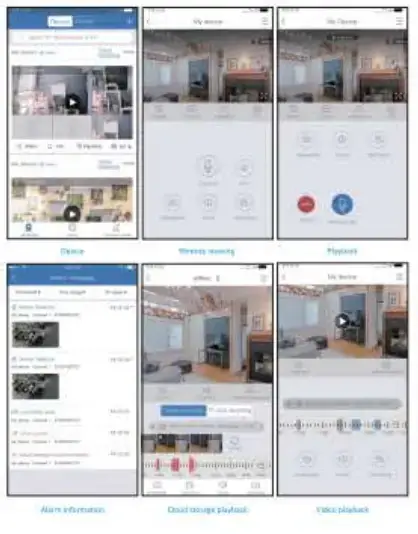
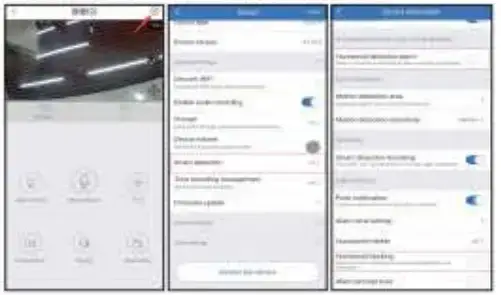
View Alarm, Preview, and Playback
- Lid the push .nronnerron or “Info’ buron to new the alarm information of the camera
- Click the cOrretOoncling play Icon on the device kit to enter the memos interface to view real-time video and have voice intercom &Cie: Elbe playback or cloud icon to view the video which is on the device or el the cloud
- Tap the share icon to share the can with others.
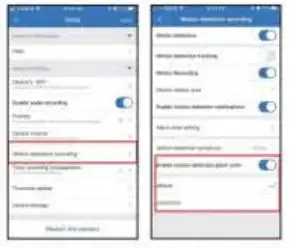
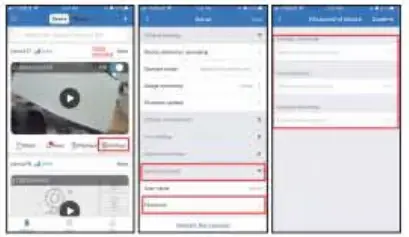
With the function on. the *op coil push an alum message 10 you when an another iS: fared Ctck ‘Semmes’ ar.4 case “Motion Detection recording”. I, On the-moon detector. ‘Motion Recording’ and “Enable motion Meow nonficanons’ i you sant to enable alarm sc‘ihrtenahle ‘Enable etymon detection alarm uteri. if not. Pima date it
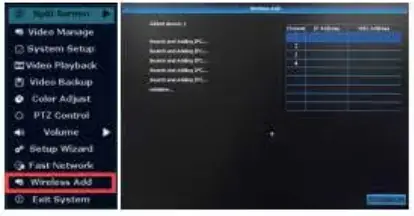
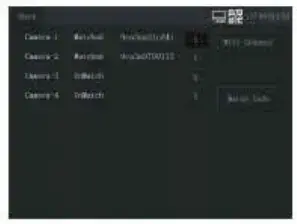
Match code the camera to wireless N VR
- wireless touch screen system 1 Re& click your NA moo:e aid choose kiss ac1d.
- Press the camera reset button for 10 seconds.
- Wad it snows camera IP >Mom 172 20.14 ••.
- If no IP address, Fri reset caner a tee Steer& times. Men you can but. blow 6 the video for Wu Cheek: •
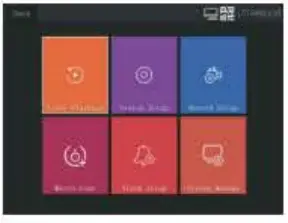
2. Wireless touch screen
- Dick the rem. dick the lane’ tat. an! dick the laat.ch Code’ module
- Cask Om ‘Match Code button. After the Admit is successful, click the ‘Stop” button
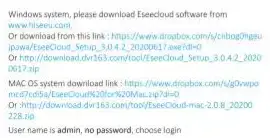
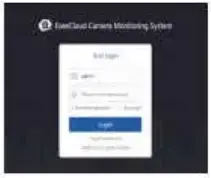
To view on Eseecloud software on PC
Input cloud ID (on your camera body or go to Eseedocd phone app Settings Dresses ID) Input User Name and Password on potion° app dolt More-EdWshow She clean yOu wall led the &once password sou we log RS

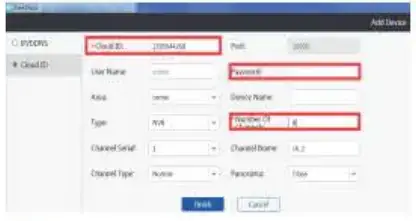
- ‘Select ‘Add’
- Select ‘Cloud Irtentef the cloud IDl9 or 10 numbers). You can hold your camera body or go to Eseecicud phone app kitbags-Device’s ID
- Usemame is adorned
- Password n the one you set for the camera
- Channels. Input 1
- Click Confirm and you will we the rest
FAQ
Ql. What can I do if the Wris setting failed?
- Be sure it is powered up COreKliy and yea rotate 450 when plugged men cameral
- Please put the camera new to the rater, Leo than S meters on animal setup
- Re dwelt your W., I password is tared and there are no special characters M n ! such as • I?gettS741
- Be sure your routers win SAD was rot hidden and O’s trectuerCY is 2 46. the CaMeras00eSnt works with 56
- When Mai is set done. please do not put the camera too far away from the route the sure Its under the will <Overeat 15 20 meters
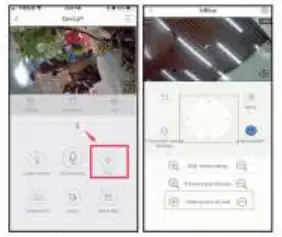
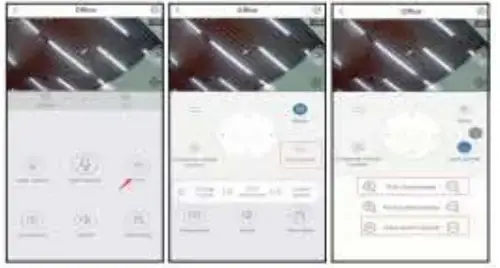
Q2. 140w to use the PTZ function? (only for 5ic digit& general 1. Zoom on the free cloud app. goes to the camera -ve screen. dick ‘PTZ’ in the lower right corner, you can control it to rotate up, down. left and net, click ‘View Loom in/outs to zoom year camera
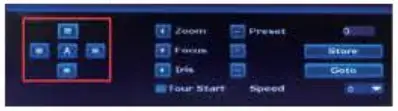
2. Zoom on the NVR monitor on the camera image seh click the mouse, it will show a small menu, click “zoom in then scroll the mouse to satin the camera
3. tan camera up/down, right net on NVR trxxOtot: on the um era image-led click the mouse, it will snow a smut menu,clia’PTZ Control.
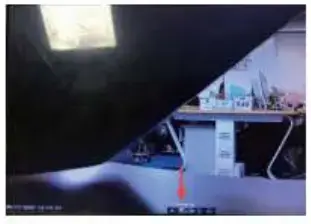
Then It will show a new menu. YOU can control it to turn the camera down and rightist.

Q3. how to tell or change a new password?
To protect your privacy, niece set a new password at ma earliest teoyemenre Click ‘Settings’ to enter the Camera Setting menu and select-mg ‘Password” to et or change a new password.
a) Original password: No password by tsetse’s and leave it blank;
b) New password: Set yours on Password 16-10 clips. no special characters.
c) Confirm passwOrd input your password again, confirm it
Q4 How to reset the camera to factory setting?
Keep the camera plugged in, press the reset button for 5-Ss until you hear the prompt tone “restore to factory settings. for example WHINOZA camera
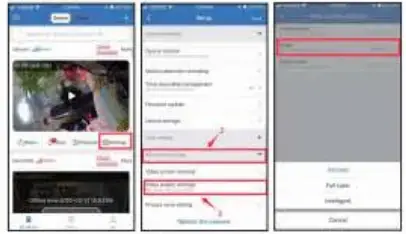
Q5. Now to set the full color insegellonly for Full-color camera)
- Set on Fseenouct app sarongs. Advanced sarongs Video quality settings Mode Full color
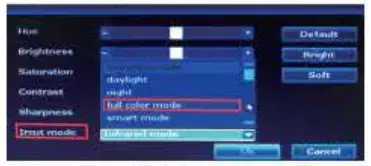
- Set On NSA monitor: on the camera mace left In the mouse. show a small menu la ‘Color Adjust”
Select ‘mut mode–full-color mode, camera at night the white light will smarty camera mace will be colorful.

Q6. What’s the meaning of intelligent’ on light control?
After selecting me ftntelligeM. at night the camera will automatically switch CO infrared night mode, and the image will turn black and white. When tee movement n detected, lboca€1.4 will turn on for 30 seconds and then turn off
Q7. How to set up Auto Tracking and Human Detection?
Go to the camera Lore screen, dirk setting—smart detection —turn on Humanoid tracking and Humanoid detection alarm Vi’lsen someone passes by, the camera will automatically track and record It. Only when a person is detected the alarm notification will be sent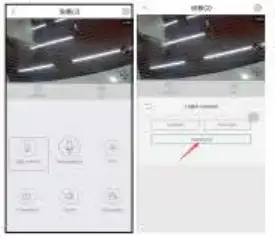
Q8. How to use 5X Optical Zoom on NVR and mobile phone?
(of* for 5)( optical camera) I Zoom in the Fueeeskur! An app so to the drrxq live screen Click “PIZ’, select Lena Control, you can select view zoom in/out and pull close/away to zoom yOur camera
2 Zoom in the NVR. on the camera image left-click the mouser it will thaw a smart menu. click ‘pie control’ it will show a new menu, ‘lieu can zoom ince out on this interlace.
 This device complies with part 15 of the FCC Rules. Operation is subject to the following two conditions: (1) This device may not cause harmful interference, and (2)this device must accept any interference received, including interference that may cause undesired operation.
Any changes or modifications not expressly approved by the party responsible for compliance could void the user’s authority to operate the equipment.
Note: This equipment has been tested and found to comply with the limits for a Class B digital device, pursuant to part 15 of the FCC Rules. These limits are designed to provide reasonable protection against harmful interference in a residential installation. This equipment generates uses and can radiate radio frequency energy and, if not installed and used in accordance with the instructions, may cause harmful interference to radio communications. However, there is no guarantee that interference will not occur in a particular installation. If this equipment does cause harmful interference to radio or television reception, which can be determined by turning the equipment off and on, the user is encouraged to try to correct the interference by one or more of the following measures:
- Reorient or relocate the receiving antenna.
- Increase the separation between the equipment and receiver.
- Connect the equipment into an outlet on a circuit different from that to which the receiver is connected.
- Consult the dealer or an experienced radio/TV technician for help.
This equipment complies with FCC radiation exposure limits set forth for an uncontrolled environment. This equipment should be installed and operated with a minimum distance of 20cm between the radiator & your body.