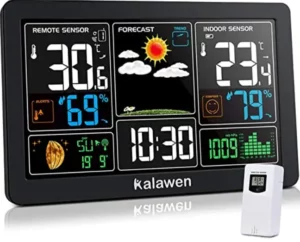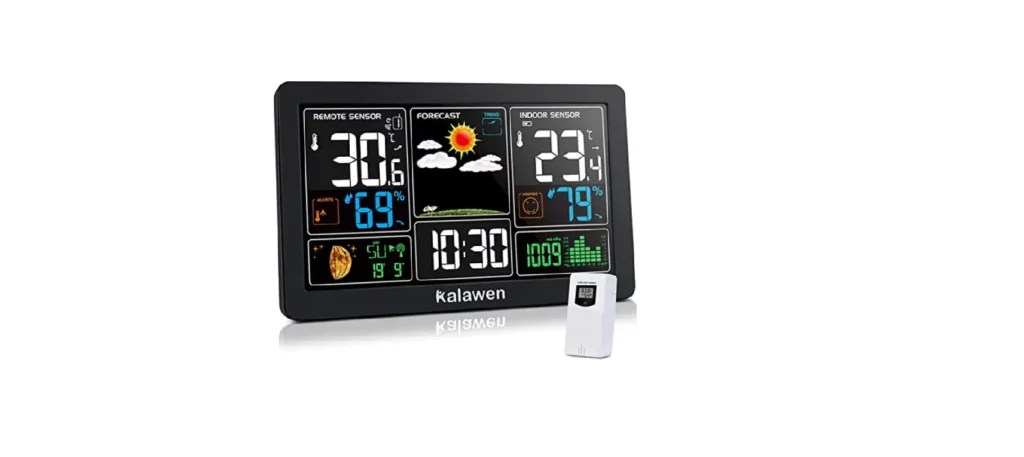

Kalawen EM3388-WWVB Weather Station

Kalawen EM3388-WWVB Weather Station
Features
- WWVB Radio control time function
- Perpetual Calendar Up to Year 2099
- Time in optional 12/24 hour format.
- Daily Alarm Function
- Automatic snooze function
- The moon phase display
- Barometric pressure:
Barometric pressure measurement ranges: 17.72 inHg~32.50 inHg & 600 hPa/mb~1100 hPa/mb- Pressure alternatively in inHg or hPa/mb
- Humidity: Indoor & Remote measurable range: 20%RH ~ 95%RH
- Temperature:
- Indoor temperature measurement ranges: 32°F (0°C) ~ 122°F (50°C)
- Remote temperature measurement ranges: -4°F (-20°C) ~ 140°F (60°C)
- Temperature alternatively in °F or °C.
- Remote thermometer and frost alert
- Minimum/maximum display for air humidity and temperature
- Wireless Remote Sensor:
- Wall Mount or Table Stand
- One Wireless Thermo Sensor Included
- 433.92MHz RF transmitting frequency
- 200 feet transmission range in an open area
- The weather forecasting function
- Power Supply
- Weather Station
- Battery: 2 x LR6 AAand mains adapter: DC5V 1.2A
- Wireless Remote Sensor
- Battery:2 x LR6 AA
- Weather Station
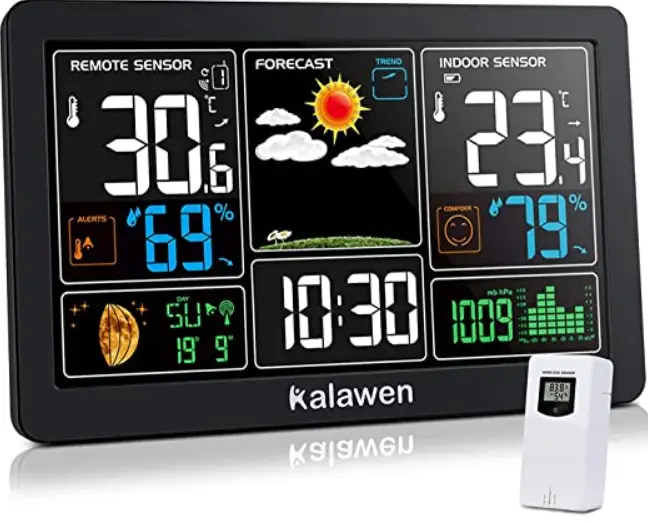
Weather Station Appearance

Part A-Positive LCD
A1: Remote Temperature
A2: Remote Humidity
A3: Remote Temperature Alert
A4: Moon Phase
A5: Calendar or Alarm time
A6: Time
A7: Barometric pressure
A8: Histogram shows the trend of 24 hours of atmospheric pressure
A9: Indoor Humidity
A10: Indoor comfort
A11: Indoor Temperature
A12: Weather Forecasting
Part B –Side buttons and power
B1: ![]() touch field
touch field
B2: ![]() button
button
B3: ![]() button
button
B4: ![]() button
button
B5: ![]() button
button
B6: ![]() button
button
B7: ![]() button
button
B8: “MEM” button
B9: Alarm on/off shift switch
B10: Power supply socket
B11: USB charger output socket
B12: Battery compartment
Part C –Wireless Outdoor Sensor

C1: LCD display – Temperature
C2: LCD display – Humidity
C3: Transmit signal LED
C4: “°C/°F” button
C5: “TX” button
C6: Channel selector switch
C7: Battery compartment
Initial operation
- Open Weather Station battery compartment cover
- Insert 2 x AA batteries observing polarity [ “+” and “ –“ marks]
- When you insert the batteries, all the icon on the LCD display will briefly light up for 3 seconds, and you will hear a beep tone, and detect indoor temperature & humidity.
- The Weather Station will now start to make a connection to the Remote remote sensor. This operation takes about 3 minutes and is displayed by a flashing reception RF antenna symbol in the “REMOTE SENSOR” display area on the receiver.
- This now, replace Wireless Remote Sensor battery compartment cover ,Open Weather Station battery compartment cover ,Insert 2 x AA batteries observing polarity [ “+” and “–“ marks]
- After receiver has created a connection to the remote sensor, it will then be enters the Radio control time receive mode.
Reception of the Radio signal
- The clock automatically starts the WWVB signal search after 7 minutes of any restart or changing of new fresh batteries. The radio mast icon starts to flash.
- At 1:00 /2:00 / 3:00 am, the clock automatically carries out the synchronization procedure with the WWVB signal to correct any deviations to the exact time. If this synchronization attempt is unsuccessful (the radio mast icon disappears from the display), the system will automatically attempt another synchronization at the next full one hour. This procedure is repeated automatically up to total 5 times.
- To start manual WWVB signal reception, press and hold down the “
 ” button for two seconds. If no signals received within 7 minutes, then the WWVB signal search stops (the radio mast icon disappears) and start again at the next full one hour.
 - During RC reception,to stop searching radio signal, press the “
 ” button once.
F.Y.I.:
- A flashing radio mast icon indicates that the WWVB signal reception has started
- A continuously displayed radio mast icon indicates that the WWVB signal was received successfully
- We recommend a minimum distance of 8 feets to all sources of interference, such as televisions or computer monitors
- Radio reception is weaker in rooms with concrete walls (e.g.: in cellars) and in offices. In such extreme circumstances, place the system close to the window.
- During the RC receive mode, only the “
 ” button function, other button operation have no function, If you want to carry out other functions of operation, please press “
 ” button to exit the RC receiving mode.
Manual time setting
- Press once
 button, can switch the display calendar or second
 - Press and hold down the
 button for 2 seconds, the 12/24 hour mode display starts to flash. Now use “
 ” and “
 ” buttons to set the correct 12/24 hour mode.
 - Press
 to confirm your setting, the Time zones start to flash, Now use “
 ” and “
 ” buttons set a correct time zone (PST MST CST and EST).
 - Press
 to confirm your setting, the DST icon to flash, Now use “
 ” and “
 ” buttons to set the DST in ON or OFF.
 - Press
 to confirm your setting, the Hour display starts to flash. Now use “
 ” and “
 ” buttons to set the correct hour
 - Press
 to confirm your setting, the Minute displays starts to flash. Now use “
 ” and “
 ” buttons to set the correct minute.
 - Press
 button to confirm your setting, the Month and Date icon display starts to flash. Now use “
 ” and “
 ” buttons to set the date display on Month/Date or Date/Month.
 - Press
 button to confirm your setting, the Year display 2015 starts to flash. Now use “
 ” and “
 ” buttons to set the correct year.
 - Press “ ” button to confirm your setting, the Month display starts to flash. Now use “
 ” and “
 ” buttons to set the correct month.
 - Press
 button to confirm your setting, the Date display starts to flash. Now use “
 ” and “
 ” buttons to set the correct date.
 - Press
 to confirm your setting and to end the setting procedures, enter the clock mode.
F.Y.I.:
- After 20 seconds without pressing any button, the clock switches automatically from Set Mode to Normal Time Mode.
- America time zone:
EST: Eastern Standard Time (E) -5
CST: Central Standard Time (C) -6
MST: Mountain Standard Time (M) -7
PST: Pacific Standard Time (P) -8 - The time zone must be set correctly according to the weather station area, or when the time signal is received, the time will be incorrect
- When the Daylight saving time system is not implemented in this area, please set DST to OFF
Setting the daily alarms
- Press once
 button, can switch the display calendar or alarm time
 - Press and hold down
 button for 2 seconds until Alarm Time hour display of the Alarm time starts to flash. Use the “
 ” and “
 ” buttons to set the required hour.
 - Press
 button to confirm your setting, The Minute display of the Alarm time starts to flash. Use the “
 ” and “
 ” buttons to set the required minute.
 - Press
 button to confirm your setting and to end the setting procedure.
F.Y.I.:
- After 20 seconds without pressing any button the clock switches automatically from setting mode to Normal clock mode.
The alarm for opening and closing
- The alarm shift switch is pushed in the
 position, LCD display the
  icon, the alarm function is open
 - Product back of the alarm shift switch is pushed in the
 position, the
  icon disappears, the alarm function is close
F.Y.I.:
- The alarm will sound for 2 minutes if you do not deactivate it by pressing any button. In this case the alarm will be epeated automatically after 24 hours.
- Rising alarm sound (crescendo, duration: 2 minutes) changes the volume 4 times whilst the alarm signal is heard.
Switching off the alarm signal
Press any button except the ![]() button to stop the alarm signal. It is not necessary to reactivate the alarm. It switches itself automatically to the alarm time which has already been set.
button to stop the alarm signal. It is not necessary to reactivate the alarm. It switches itself automatically to the alarm time which has already been set.
Snooze function:
- Touch the
 field or press the
  button the alarm signal sounds to get to SNOOZE mode. The alarm signal sounds again after approx. 5 minutes.
Lunar phases and tide indicator:
- The weather station has a display which automatically displays the current lunar phase


°C/°F temperature display
The temperature is displayed either in °C/°F. Briefly pressing the “![]() ” button allows you to switch between the individual modes.
” button allows you to switch between the individual modes.
Comfort display
- Indoor comfort level is calculated according to the indoor temperature and humidity, a total of 5 levels.

Displaying temperature/humidity/ barometric pressure and temperature/humidity trend
- The current indoor temperature/humidity/barometric pressure and the temperature/humidity trend (indoors) are shown in the LCD display.
- After successfully connecting with the remote sensor, the weather station can display the remote temperature/humidity and the temperature/humidity trend (remote)
- You may see the following displays:
 The temperature/humidity is rising.
 The temperature/humidity is remaining constant.
 The temperature/humidity is falling.
Remote sensor transmission
When the Weather Station successfully receives signals from the wireless sensor, the temperature and humidity of the “REMOTE SENSOR” are displayed on the “REMOTE SENSOR” column of the weather station.
- The weather station can connect up to 3 channel wireless sensor registration, the use of multiple wireless sensor, the wireless sensor channel cannot choose the same channel at the same time (a total of 1, 2, 3 channel can choose,)
- Press the “
 ” key can switch the display of different channels of remote temperature and humidity, when displaying the symbol
  , will display the channel every 5 seconds automatically switch a channel
 - If the weather station failed to receive transmission from remote sensor (“- -”display on the LCD), press and hold “
 ” button for 3 seconds to receive transmission manually. the remote temperature will show an animation of the RF antenna symbol,the Base Station will re receive the wireless signal of the remote sensor.
F.Y.I.:
- when the wireless sensor set up different channels, the weather station “REMOTE SENSOR” also want to switch to the same channel. When there is no wireless sensor signal transmission on the channel, “–” will be displayed in the channel of the weather station
- When the wireless remote sensor has no channel selection function, the sensor defaults to channel 1.
Maximum/Minimum Temperature/Relative Humidity
- To toggle indoor/ remote maximum, minimum temperature and humidity data, press the “MEM” button: Once to show the maximum temperature and humidity values. Twice to sow the minimum temperature and humidity values Three times to return to the current temperature and humidity levels
- To reset the maximum and minimum temperature and humidity, press and hold down the “MEM” button about 2 seconds. This will reset all minimum and maximum data recorded to the current displayed values
F.Y.I.:
If the temperature reading is below ranges, the LL.L will be displayed. If the temperature reading is above ranges, the HH.H will be displayed.
Remote Temperature alert setting
- Press and hold down the
 button for 2 seconds until the icon for the Temperature Alert” starts to flash
 - The icon of Upper limit of the Temperature alarm starts to flash. Use the “
 ” and “
 ” buttons to set the required maximum temperature. Press
  to confirm your setting.
 - The icon of the Lower limit of the Temperature alarm starts to flash. Use the “
 ” and “
 ” buttons to set the required minimum temperature. Press
  button to confirm your setting and to end the setting procedure
F.Y.I.:
- Before entering the setup, you must select the remote channel, different channels can set different temperature alarm range
Temperature and frost alert
- Press
 button to activate or deactivate the remote temperature alert, When the remote temperature alarm is activated, the temperature alarm icon is displayed in the remote sensor bar
 - When the remote channel temperature value exceeds the set temperature range, will activate the alarm, the weather station will every minute continuous alarm 5 times, at the same time, temperature alarm in alarm icon
 flashes, If the alarm activates the temperature that is currently displayed on the channel, its temperature value and alarm upper limit icon
  or lower limit icon
 also flashes
 - When the temperature of REMOTE SENSOR is –1°C to + 3°C or +30°F to + 37°F, the frost alarm will be activated, symbol
 flashing.
F.Y.I.:
- When the temperature is higher than the upper limit of the alarm temperature setting, the activation of the upper limit alarm, symbol
 flashing,
 - When the temperature is lower than the lower limit of the alarm temperature, the lower limit alarm is activated, and the symbol
 flashes.
Low battery
If the battery symbol “![]() ” appears the batteries in the remote sensor should be replaced as soon as possible.
” appears the batteries in the remote sensor should be replaced as soon as possible.
The weather forecast
- The weather station calculates a weather forecast for about the next 12 hours based on the barometric pressure trend. Of course this forecast can‘t compare to that of professional weather services supported by satellites and high performance computers, but merely provides an approximate indication of current developments. Please take the weather forecast from your local weather forecasting service into account as well as the forecast from your weather station. If there are discrepancies between the information from your device and from the local weather forecasting service, please take the advice of the latter as authoritative.
- Press and hold the
 button for 2 seconds to enter the air pressure unit and weather settings, the pressure units will be flashing display, Use the
  and
and  button to set the pressure unit to display in the “hPa/mb” or “inHg”.
 - Press the
 key to confirm the settings and switch to the weather, the weather graphics will be flashing display, Use the
  and
and  button to set the current weather conditions, so that the weather forecast is more accurate.
 - The weather station displays the following weather symbols:

- The weather station can display the barometric pressure trend.
- You may see the following displays:
 The barometric pressure will rise.
 The barometric pressure will remain constant.
 The barometric pressure will fall.
Background lighting
- If the product is powered by batteries, touch the
 field. Backlight lit 15 seconds.
 - When the power supply of the product is inserted into the power supply adapter, the battery will automatically disconnect the power supply, and the backlight will always be bright. Press the
 button to adjust the brightness of the backlight, you can adjust the 5 state: 4 different brightness backlight and close the backlight. Users can choose according to the personal preferences of different brightness backlight or turn off the backlight. Turn off backlight when you can touch the
  field to light the backlight 15 seconds.
After-sales Service
Thank you for purchasing from Kalawen. If you have any question about the product, please feel free to contact us via Amazon messages or email to [email protected]. We will reply you as soon as possible and offer you the best shopping experience.
DOWNLOAD RESOURCES
- Kalawen EM3388-WWVB Weather Station [pdf] User Manual EM3388-WWVB, Weather Station, EM3388-WWVB Weather Station, Station
- Read more: https://manuals.plus/kalawen/em3388-wwvb-weather-station-manual#ixzz7kdPMslXt
FAQ’S
How to set time?
Set time by pressing the button on the back of the weather station.
How to set moon phase?
Set moon phase by pressing the button on the back of the weather station.
How to check battery level?
Check battery level by pressing button on the back of weather station. The display will show battery level from 1~4. The battery is low when it shows 1 or 2, and it is ok when it shows 3 or 4. Replace battery when it shows 1 or 2.
How do you reset a weather station?
Opportunity by removing any random energy still in the station. Basically this returns the unit to its out-of-the-box. Condition. So after the 15 minutes insert new batteries into the sensor.
How long do batteries last in weather station?
Wireless weather stations use two AA sized lithium batteries providing a maximum life of 10 years.
How do I change the setting on my thermometer from weather station?
If you have an weather station or frontal thermometer with more functions, you will usually have a “MODE” key or “℃/℉” key above the weather station. Give it a short press, and the display toggles between F and C (The display also shows the label ℃ or ℉ so you can tell what it’s displaying).
What are the disadvantages of weather station?
The main disadvantage of an automatic weather station is that it removes the observer from the real elements being measured, and so the experience of what -5ºC temperatures or 30 knot winds feel like, is lost.
Do you need WIFI for weather station?
You CAN run your weather station without any internet connection or cellular connection.
How to set moon phase?
Set moon phase by pressing the button on the back of the weather station.
How do weather station sensors work?
Weather sensors measure wind speed and direction. This information tells us where the weather is heading and how soon it will get there. Weather sensors include anemometers and wind vanes. Anemometers measure wind speed, while wind vanes measure wind direction.
How do automatic weather stations measure visibility?
Visibility (or Meteorological Optical Range) is a measure of the clarity or transparency of the air. Visibility sensors utilise an infrared light transmitter and receiver to measure the amount of light scattering caused by obscurations such as rain, fog, dust and haze.
What are visibility modes controls?
Visibility Control allows you to control the visibility of certain Event Items based on the Attendee or Contact records. This feature only works when you are inviting Attendees to an Event, using Salesforce Communities, or Authentication via iframe.
