Sections in this Manual
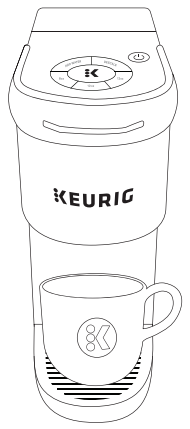
Brewer Features
Smart Start heats then brew in one simple process. No need to wait for the brewer to heat before selecting brew size. Simply power on your brewer by lifting the handle, insert K-Cup® pod, then select your brew size. Press the brew button. The brewer will heat, then automatically begin brewing.
Auto-Off automatically turns your brewer off 5 minutes after the last brew for energy savings.
High Altitude To ensure your brewer works properly at higher altitudes (5,000 feet), enable the High Altitude setting by pressing and holding the brew button and 8oz buttons for 3 seconds.
Caring For Your Brewer
Regular cleaning keeps your brewer running smoothly. Always be sure to turn off and unplug your brewer before cleaning.
Brewer Exterior
Keep your Keurig® brewer looking its best by cleaning the exterior from time to time. Just clean with a damp, soapy, lint-free, non-abrasive cloth. Never immerse the brewer in water or other liquids.

Drip Tray
The drip tray can hold up to 8 ounces of overflow and should be emptied and cleaned occasionally. To remove, slide it toward you, keeping it level to avoid spilling. Rinse and clean with a damp, soapy, lint-free, non-abrasive cloth.

Water Reservoir
The water reservoir should be cleaned periodically by wiping the inside of the reservoir and the underside of the lid with a damp, non-abrasive, lint-free cloth. Do not dry the inside of the water reservoir with a cloth as lint may remain. Allow the reservoir to dry completely.

K-Cup® Pod Holder
To remove the K-Cup® pod holder from the brewer, lift the handle and grasp the top of the K-Cup® pod holder with one hand while pushing up on the bottom of the K-Cup® pod holder from underneath with the other until it releases. After cleaning, align the K-Cup® pod holder with the opening using the two front ribs as a guide and snap into place from the top.

CAUTION: There are sharp needles that puncture the K-Cup® pod above the K-Cup® pod holder and in the bottom of the K-Cup® pod holder. To avoid the risk of injury, do not put your fingers in the K-Cup® pod holder.
NOTE: Always remove and dispose of the used K-Cup® pod after brewing.
Funnel
Washing the funnel ensures a fresh beverage experience. The funnel should be washed regularly and can be removed from the K-Cup® pod holder by pulling on it until it pops off. To replace it, orient the snaps to the indent and just snap it back onto the K-Cup® pod holder.

Exit Needle
Remove the pod holder assembly and detach the funnel. Locate the exit needle on the inside bottom of the K-Cup® pod holder. Insert a straightened paper clip into the exit needle to loosen any coffee grounds.