LINKSYS User Guide
RE6300/RE6400
Introduction
This User Guide can help you connect the extender to your network and solve common setup issues. You can find more help from our award-winning, 24/7 customer support at
Linksys.com/support.
Contents
Overview . . . . . . ………………………..1
How to install the range extender……………. 2
How to access the browser-based utility ……… 5
Using Wi-Fi Protected Setup………………… 7
How to use Site Survey…………………….. 9
Cross-Band
AC Power Pass-Through
Wireless Music Playback
Troubleshooting…………………………. 10
Specifications………………………….. 13
Overview
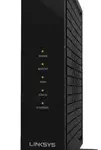
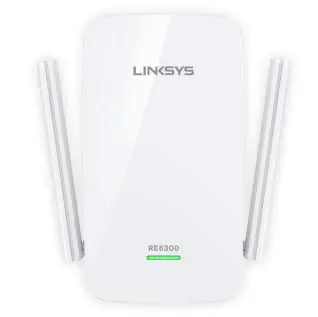
Front
RE6300

RE6400
The light on the front of the range extender gives you information about power, updating and signal strength.

Side

Power Switch European versions only.
Wi-Fi Protected Setup Button and LED Use Wi-Fi Protected Setup to automatically and securely add compatible wireless devices to your network. Refer to Using Wi-Fi Protected Setup on page 7.
Reset Press and hold for about five seconds to reset to factory defaults. You can also restore the defaults from the Administration> Factory Defaults Screen in the extender’s browser-based utility.
Bottom

How to install the range extender
Before setup, unplug or disconnect any range extenders on the network.
1. Plug in the range extender midway between your router and the area without Wi-Fi.
Be sure you have at least 50% of your router’s Wi-Fi signal at that point on the device you will use for setup. The setup software will help you find the best spot if you have trouble.
2. Wait for a solid light on the cover of the range extender. It could|take up to two minutes. On a computer, phone or tablet, connect to the Wi-Fi network “Linksys Extender Setup.”
3. If setup doesn’t start automatically, open a browser to http://extender.linksys.com.
Linksys’s Spot finder technology will help you find the right location for your range
extender if you have trouble. You will be guided to place the ra nge extender closer or farther from your router to improve the signal. if you nailed it with your first placement you will not see Spot finder screens.
4. During setup you will be asked whether you want the range extender to update itself
automatically. If you allow automatic updates, the range extender will download and install updates when released by Unksys. Automatic updates will take place overnight so they do not disrupt your network activit y.
You also can decide to manually update your range extender at your convenience.

Post set-up LED behavior menbon here as well and in the QSG
TIP
You can also connect the range extender by using Wi.-Fi Protected Setup. For more
information, see “Using Wi-Fi Protected Setup” on page 7.
Special Feature – Music Streaming
Wireless Music Playback
Stream music through your AC12OO MAX range extender to connected speakers.
iOS devices:
. Connect iOS device to the same Wi.-Fi network as your range extender.
. Swipe up from the bottom of your screen.
. Tap on Linksys Range Extender.

Android devices
For Samsung Galaxy
– Connect Galaxy device to the same Wi-Fi network as your range extender.
– Select Music app 
– Choose music file and tap Screen Mirroring icon
– Choose Linksys Range Extender.

Your screen might look different depending on your device model and version of Android.
For other Android devices, stream music with MediaHouse, UPnPlay, Skifita, ArkMC,
BubbleUPnP, Pixel Media, and 2Player 2.0.
Windows
– Open Windows Media Player
– Right-click on music file and choose Linksys Range Extender.

This list of supported media players is subject to change with the release of new
software or mobile apps.
– Windows users can stream music with Windows Media Player12.
– Mac users can stream music with proprietary software or the SofaPlay app..
– Android users can stream music with MediaHouse, UPnPlay, Skifita, ArkMC,
BubbleUPnP, Pixel Media, and 2Player 2.0.
– IOS devices including iPhone, iPad or iPod can stream music with proprietary
software or other apps such as, , ArkMC, Smartstor Fusion, , Mconnect, and DK
UPnP/DLNA.
– The extender supports MP3, FLAC, WAV, WMA and AAC file formats, as long as
those formats are supported by the device and app doing the streaming.
– The 3.5mm stereo port supports earphones and powered speakers.
How to access the browser-based utility
After setting up the extender use the extender-based utility to change any
settings.
On a computer or device that is connected to your range extender, open any browser
(Internet Explorer, Chrome, Firefox, Safari, etc.), and enter extender.linksys.com in the address bar.
You will be prompted to enter a user name and password. If yo u did not change them
during setup, leave the user name blank and enter admin” in the password field. If
you customized the $510 and passwo rd, enter those credentials.
If you are connected to your local network, but not to the range extender, you will need to enter the range extender’s IP address in your browser to access the extender’s
settings.
TIP
If you are unable to access the range extender’s seUings, do one of the foSowing:
Find the r ange extender’s IP address by going to your routef~s administration page and looking for the range extender under connected devices.
Windows XP:
1. Enable UPnP:
a) Click Start, Control Panel, Add a Remove Program, then dick Add/Remove Windows Components.
b) Select Network Servfces, then cSck Oefails.
c) Select UPnP User Interface, then click OK
2. Open Windows Expbrer. Click My Network Places on the lea panel.
3. L7k for the RE677icorf on the right panel. (You might be required to change the firewall settings to albw the display of networked computers. Refer to your operating system’s help for instructions)
Windows 8, Windows 7, or VisW:
1. Open Windows Explorer (File Expbrer in Windows 8). Click Networlk Look for the RE677 icon on the right panel. (You might be required to change the frewaS settings to aSow the display of networked computers. Refer to your operating system’s help for instructions .)
2. Right-click the RE6700 icon. Click Properfies. Click on the address fink in Device webpage.
Mac OS X:
1. Open Sahri. Be sure that Bonjour is included in the Bookmarks menu and Favorites bar.
a. Go to Safari Preferences > Advanced and be sure each Bonjour box is selected.
2. Find Bonjour in the Bookmarks menu or Favorites bar and choose Linksys Range
Extender. ” If you have changed your network name and password, choose the network
name and enter the password you created.
Using range extender seNings
Click Help cn the right side cf the screen fcr additicnal infcrmation cn the screen~s
options. Ch anges tc settings will net be effective untS you cBck Save at the boffom cf the screen. You also can click Cancel tc dear any changes.

Using Wi-Fl Protected Setup
WiFi Protected Setup~ makes it easy to connect your extender to your network, and
conned other de~es to your network through the extepder.
Wi-Fi Protected ktup light activity


Connecting the extender to an existing access point
If your access point or router supports it, you can use Wi-Fi Protected Setup to connect the range extender to the access point or router. Log in to the browser-based utility and click on WPS in the left navigation bar. Choose from the setup methods below to connect the extender.
NOTE
If you have an access point or a router that does not support Wi-Fi Protected Setup,
note the wireless settings, and then manually configure the extender. Connecting with the Wi-Fi Protected Setup Button Use this method if your router or access point has a Wi-Fi Protected Setup button

1. Press the Wi-Ff Protected Setup button on the extender. If you have a dual-band
router you will do this again to extend the second network . The 2.4 GHz band will
be extended first
2. Click the Wi-R Protected Setup button on the routef`s WiFi Protected Setup
screen (if avaSable), OR press and hold the Wi-Fi Protected Setup bu&on on the
router for one second. When the connection is complete, the Wi-Fi Protected Setup
fight on the extender Wat be solid.
3. If you used the extender’s WI-Fi Protected Setup screen, ~ OK in that screen
within two minutes.
TIP
You can also access W PS in the browser-based utility by clicking WPS in the left
navigation bar.
Connecting with the range extender’s PIN
The Wi Fi Protected Setup PIN (Personal Identification Number) can be found on the
produd label on the back of the extender. You can use this method only if your route~s
administration utiBty has a Wi-Fi Protected Setup menu.
1. Enter the extender~s PIN into the appropriate field on the router~s Wi- Fi Protected Setup screen. Click Register. When the connection is complete, the Wi-Fi Protected Setup light on the extender win be send.
2. Click OK Connecting devices to your network through the extender Choose from the methods below to connect devices that support Wi-Fi Protected Setup
to your network. Delete the screen below
NOTE
Repeat the instructions for each chem device that supports Wi Fi Protected Setup.
Connecting with the Wi-Ff Protected Setup Button
Use this method if your chem device has a WiFi Protected Setup button.
1. Press the Wi Fl ?retooled Setup button on the Ghent device.
2. CliGk the WI-R Protooted Setup button on the extenders WiFl ProteGted Setup
sGfeefi, OR press and hold the Wi-Fi ?retooled Setup bu&on on the side of the
extender for one second When the GOfffleGtfOfl is complete, the Wi-Fi ?retooled
Setup fight on the extender win be scud.
3. If using the extenders WiFl ProteGted Setup sGreefl, be sure to dfGk OKwithifl two
minutes or you will have to start over.
Connecting with the client devices PIN
Use this method if your diefff device has a Wi-Fi ProteGted Setup PIN (Personal
Identification Numbef).

1. Enter the PIN from the client device in the field on the extenders WiFl ProteGted
Setup sGreefl.
2. CliGk Register on the extenders WI-Fi ProteGted Setup sGreefl. When the GonrfeGflon is complete, the Wi-Fi Protected Setup light on the extender will be solid.
3. CliGk OK on the extender~s Wi-Fi ?retooled Setup sGfeefi within two minutes or you
will have to start over.
Connecting with the extendeYs PIN
Use this method if your client device asks for the extenders PIN
1. On the client device , enter the PIN listed on the extender~s Wi-Fi ?retooled Setup
sGfeefi. (It is also Bsted on the product label on the back d the exteflder.) When the
GonrfeGflon is complete, the Wi-Fi Protected Setup light on the extender will be solid.
2. CliGk OK on the extender~s Wi-Fi ?retooled Setup sGfeefi within two minutes.
How to use Site Survey
Site Survey gives a snapshot of aH neighboring access points and wireless routers
within range of the extender.
To open the Site Survey page:
1. log in to the browser-based utility (see How to access the browser- based utility”
on page 5).
2. Click the Wireless tab. CHck the Site Survey page.
3. Select-To oonnecf to a wireless network, click the bu&on next to the wireless
netwof k name (SSID) in the Select column, and click Connect.
4. SSID-Displays the name of neighboring wireless networks.
5. GHz-Displays the radio band (in GHz) of the neighboring wireless networks
6. Signal Stf engM -Displays the relative position of the neighboring access points
by indicating the power of the wireless signal received: dot only = 25% dot + one
wave = 50%, dot + two waves = 75%, dot + three waves = 1O0%. If no waves are
displayed, your extender is too far from the upstream access point or the signal is
blocked Try to keep the signal strength between 60% and 17% for optimum
performance
7. Security-Displays the mode of security in use by the neighboring APs. If a network
supports Wi-R Protected Setup, the Wi-Fi Protected Setup icon is also displayed.

To connect your extender wah an access point or router in Sac Survey, you will
need to know the password or passphrase d Me network on Mat device.
1. Selecf the network name (SSID) that you want to repeat with your extender by
clicking the corresponding button in the Selecf column.
2. Click Connect, When prompted, enter the password a passphrase used to secure
your wireless network. The type d security information required in this screen must
match your access point or router’s wireless security seuings.
TIP: For dual-band networks, be sure to connect to both bands, 2.4 GHz and 5 GHz.

3. Click Save. Your extender wireless parameters should be configured. The wireless
interface will restart, and the extender will connect to the access point or router you have chosen.
Cross-Band
Cross-Band is the simultaneous use of both bands for high-speed data transfer and
uninterrupted streaming and gaming.
Troubleshooting
NOTE Your RE6700 works on 2.4GHz and 5 GHz networks.
You cannot get your extender connected
Check the position of your router and extender
– For first-time setup, you may need to place the extender closer to the router .
After you.ve set up your extender, you can unplug it and move it to the final
location .
– To reduce signal obstfudions, tr y alternate locations for the router and extender.
– Avoid placing the router and extender near metal objects, masonry waifs, and reflective surfaces such as glass or mirmrs
– Avoid placing the router and extender near other electronics that may
cause signal interference
If you’re using Wi-Fi Profeded Setup to conned, wait until the Wf Fi Protected
Setup indicator stops blinking before tr ying to make the connection again.
You cannot access your range extender.
To access your range extender , you must be connected to your own netwoff<. ff
you currently have wireless Internet access, the problem may be that you have
accidentally conneded to a different wireless network.
For Mac instructions, see “To fix the problem on Mac computers:” on page 12
To fix the problem on Windows computers:

1. On your Windows desktop, right-click the wireless icon in the system tray. The icon might look different depending on which vef sion of Windows you af e running.
2. Click View Available Wireless Networks.
3. Select your network name. Click Connect. In the example below, the computer was connected to another wireless network named JimsRouter. The name of the correct network, BronzeEagle in this example, is selected.

4. If you are prompted to enter a network key, type your password (Security
Key) into the Network key and Confirm network key fields. Click Conned
You should now be able to access the range extender’s browser-based
utility.
To fix the problem on Mac computers:
1. In the menu bar across the top of the screen, click the Wi-Fi icon.
Unksys Conned has automatically assigned your network a name.
In the example below, the computer was connected to another wireless
networ k named JimsRouter . The name of the Linksys E-Series network,
BronzeEagle in this example, is selected.

2. Select the wireless network name of the router you want to connect to.
3. Type your wireless network password (Security Key) into the Password
field. Click OK.

You should now be able to access the range extender’s browser’based utility.
You have intermittent connec6on problems
Plug in the range extender midway between your router and the area without Wi-Fi. Be
sure you have at least 50% of your router~s WI-Fi signal at that point on the device you used for setup.

Visit linksys.com/support for award-winning 24/7 technical support BELKIN, LINKSYS and many product names and logos are trademarks of the Belkin group of companies. Third-party trademarks mentioned are the property of their respective owners. Licenses and notices for third party software used in this product may be viewed here: http://support.linksys.com/en-us/license. Please contact
http://support.linksys.com/en-us/gplcodecenter for questions or GPL source code requests.
© 2015 Belkin International, Inc. and/or its affiliates. All rights reserved.
Federal Communication Commission Interference Statement
This device complies with Part 15 of the FCC Rules. Operation is subject to the following two conditions:
(1)This device may not cause harmful interference, and
(2) this device must accept any interference received,including interference that may cause undesired operation. This equipment has been tested and found to comply with the limits for a Class B digital device, pursuant to Part 15 of the FCC Rules. These limits are designed to provide reasonable protection against harmful interference in a residential installation. This equipment generates, uses and can radiate radio frequency energy and, if not installed and used in accordance with the instructions, may cause harmful interference to radio communications. However, there is no guarantee that interference will not occur in a particular installation. If this equipment does cause harmful interference to radio or television reception, which can be determined by turning the equipment off and on, the user is encouraged to try to correct the interference by one of the following measures:
– Reorient or relocate the receiving antenna.
– Increase the separation between the equipment and receiver.
– Connect the equipment into an outlet on a circuit different from that
to which the receiver is connected.
– Consult the dealer or an experienced radio/TV technician for help.
FCC Caution: Any changes or modifications not expressly approved by the party responsible for compliance could void the user’s authority to operate this equipment. This transmitter must not be co-located or operating in conjunction with any other antenna or transmitter.
Operations in the 5.15-5.25GHz band are restricted to indoor usage only.
Radiation Exposure Statement:
This equipment complies with FCC radiation exposure limits set forth for an uncontrolled environment. This equipment should be installed and operated with minimum distance 22cm between the radiator &
your body.
Note: The country code selection is for non-US model only and is not available to all US model. Per FCC regulation, all WiFi product marketed in US must fixed to US operation channels only.
Industry Canada statement:
This device complies with RSS-210 of the Industry Canada Rules. Operation is subject to the following two conditions: (1) This device may not cause harmful interference, and (2) this device must accept any interference received, including interference that may cause undesired operation. Ce dispositif est conforme à la norme CNR-210 d’Industrie Canada applicable aux appareils radio exempts de licence. Son fonctionnement est sujet aux deux conditions suivantes: (1) le dispositif ne doit pas produire de brouillage préjudiciable, et (2) ce dispositif doit accepter tout brouillage reçu, y compris un brouillage susceptible
de provoquer un fonctionnement indésirable.
Caution :
(i) the device for operation in the band 5150-5250 MHz is only for indoor use to reduce the potential for harmful interference to co-channel mobile satellite systems;
(ii) high-power radars are allocated as primary users (i.e. priority users) of the bands 5250-5350 MHz and 5650- 5850 MHz and that these radars could cause interference and/or damage to LE-LAN devices.
Avertissement:
(i) les dispositifs fonctionnant dans la bande 5 150-5 250 MHz sont réservés uniquement pour une utilisation à
MHz et que ces radars pourraient causer du brouillage et/ou des dommages aux dispositifs LAN-EL.
Radiation Exposure Statement:
This equipment complies with IC radiation exposure limits set forth for an uncontrolled environment. This equipment should be installed and operated with minimum distance 27cm between the radiator & your body.
Déclaration d’exposition aux radiations:
Cet équipement est conforme aux limites d’exposition aux rayonnements IC établies pour un environnement non contrôlé. Cet équipement doit être installé et utilisé avec un minimum de 27 cm de distance entre la source de
rayonnement et votre corps.