MEDIACOM URC2068BC2 Remote Control
Getting Started
Primeros Pasos
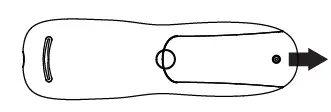
- Remove the battery cover.

- Insert 2 AA batteries. Match the + and – marks.
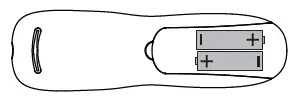
- Replace the battery cover.
Note
Make sure TV is ON before starting the remote control setup.
Setup Method
Popular Brands
- Press and hold SETUP until the LED blinks twice.

- Press the TV POWER key, LED remains ON.
- Press and hold down the DIGIT key for your TV brand.
- Let go of the key when your TV turns off. The setup is complete.

DIGIT/TV
- Insignia
- LG
- Mitsubishi
- Panasonic
- Philips
- Samsung
- Sharp
- Sony
- Toshiba
- Vizio
Tip
If your brand does not appear on a popular TV brand chart, try either Method B or Method C to set up the remote to control your TV.
Code Search
- Press and hold SETUP until the LED blinks twice.
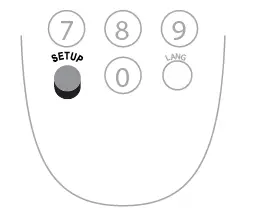
- Press and hold down the OK/SELECT key.
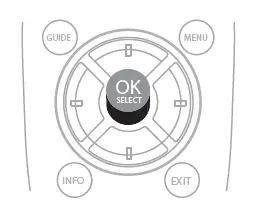
- Let go of the OK/SELECT key when the TV turns off.
Direct Code Entry
- Press and hold SETUP until the LED blinks twice.
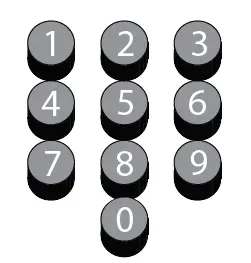
- Enter the 1st TV code for your brand from the code list to the right. LED blinks twice.
- Press the TV POWER key to test TV control. If the TV turns off, the setup is complete.
- If TV does not turn off, repeat this process using the next code for your TV brand.

Tip
To find the exact code for your TV, use our CODE FINDER feature at WWW.URCSUPPORT.COM
Functional Key Chart
LED does not blink when a key is pressed. Replace batteries. TV does not respond when TV POWER or VOLUME keys are pressed. Program remote control for your TV brand using instructions in Setup Method A, B, or C. Tried all codes for my TV brand, and none worked. Try the CODE SEARCH (Setup Method B) method or go to www.urcsupport.com for additional support and for the CODE FINDER search tool.
Set volume control for the TV
- Press and hold SETUP until the LED blinks twice.
- Press VOL +. The LED will blink twice.
Set volume control for the STB
- Press and hold SETUP until LED blinks twice.
- Press MUTE. The LED will blink 4 times.
Codes: TV
- Accurian 1803
- Action 0873 1675, 1207, 1676, 1688, 1689, 1692, 1935, 2232
- America Action 0180 0180 1365, 1590, 2014, 2087, 2402, 2621
- Aomni 1623
- Apex Digital 0890, 1217, 2397 1531, 1738
- Audinac 0180
- Audiovox 1564, 0180, 0802, 0846, 0875, 1766, 1803, 1937, 1951, 2121, 2513, 3065
- Aventura 0171 1937
- Baysonic 018 1032, 1315 0876
- Blue Sky 2153
- Bradford 0180
- Broksonic 1935
- Byd:sign 1309
- Candle 0186
- Carver 0170 1205
- Citizen 0186, 1935
- Clarion 0180 1538, 1634, 2017, 2306, 2314, 2315, 2326, 2338, 2340, 2344, 2345, 2348, 3202
- Commercial Solutions 1447
- Contec 0180
- Continental 2357
- Coradir 2844 0180
- Crown 0180 1200, 2352, 2397, 2855, 2859
- Curtis Mathes 0145, 1661 0180
- Daewoo 1661, 0661 1264, 1080 1369
- Denon 0145
- Denstar 0628
- Digital Lifestyles 1765, 1822
- Disney 1665, 1892
- Durabrand 0180, 0178, 0171, 1665
- Dynex 1463, 1785, 2049
- Electrograph 1755, 1623
- Electrohome 1670
- Elektra 1661
- Element 1687, 1886, 2183
- Emerson 1864, 0180, 0178, 0171, 1661, 1394, 1665, 1886, 1963
- Emprex 1422, 1765
- Encross 0876, 1474
- Envision 0813, 1365, 2014, 2087 0171, 1963
- Fujitsu 0809, 0186, 0683 0180, 0171, 1963
- Futuretech 0180
- Gateway 1755, 1756 1447, 0178 1864, 0171, 1665, 1886, 1963
- Go Video 0886, 1823, 1831
- GoldStar 0178 2693
- Gradiente 0170
- Grundig 0683
- Grunpy 0180 1753, 2293, 2494, 2690, 3204
- Hallmark 0178
- Hanns.G 1783
- Hannspree 1348, 1745, 1783
- Harvard 0180 0865
- Hewlett Packard 1494, 1088
- Hikato 0628
- Himitsu 0180, 0628
- RadioShack 0180, 0178
- RCA 1447, 1661, 0899, 1781, 2434, 2746, 2932
- Realistic 0180, 0178
- Recco 0706
- RevolutionHD 1623
- Runco 1398
- Sampo 1755
- Samsung 0178, 0766, 0814, 1060, 2051
- Sansui 0171, 1463, 1409, 1670, 1892, 1935
- Sanyo 1142
- Sceptre 0878, 1217, 1360, 1599, 2337
- Scotch 0178
- Scott 0180, 0178, 1711
- Sears 0156, 0178, 0171
- Semivox 0180
- Semp 0156, 1743
- Sharp 0818, 2402
- Sherwood 1399
- Simpson 0186
- Skyworth 1799
- Solarism 1220
- Sole 1377, 1483, 1530, 1623
- Sony 0810, 1685
- Soundesign 0180, 0178, 0186
- Sova 1320
- Soyo 1520, 1746, 1826,
- 1828, 1830, 1831
- Spectroniq 1498, 1687
- Squareview 0171
- SSS 0180
- Starlite 0180
- SunBriteTV 1610, 1420, 1435, 2337
- Superscan 0864
- Supersonic 1753, 2104, 2784, 3154, 3204
- SVA 0865, 0871, 1963
- Sylvania 1864, 0171, 1314, 1394, 1665, 1886, 1963
- Symphonic 0180, 0171, 1394
- Syntax 1610, 1144, 1240
- Tatung 1286, 1756, 2496
- TCL 2434
- Teknika 0180, 0150, 0186
- TMK 0178
- Tophouse 0180
- Toshiba 1524, 0156, 1343, 1369, 1743, 1935
- TruTech 1665, 1723
- US Logic 1286, 1303
- Vidikron 1398
- Vidtech 0178
- Viewsonic 1755, 1564, 0797, 0864, 0885, 1330, 1365, 1578, 1627, 1742, 2014, 2049, 2087, 2277
- Viore 1207, 1684, 2104, 2352, 3094, 3118
- Visart 1336
- Vito 1320
- Vizio 1758, 0864, 0885, 1756, 2707
- Wards 0156, 0180, 0178, 0186
- Waycon 0156
- Westinghouse 0885, 0890, 1217, 1282, 2195, 2293, 2499
- White Westinghouse 1661
- Wyse 1365
- Yamaha 0797
- Zenith 1423, 0178,
Pulse Pairing Options
RF PAIRING
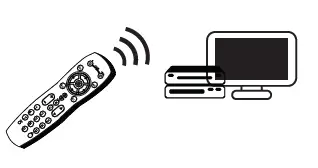
This remote control is capable of controlling a set-top box(STB) that is hidden from sight when it has been paired with an RF STB or an RF Adapter.
Tip: The STB or RF Adapter that you are using must be compatible with this remote control and the proper pairing method must be used. For the latest list of compatible RF devices, go to www.urcsupport.com/rf
RF Pairing to Set-Top Box
NOTE: Certain set-top boxes (such as EVOLUTION branded boxes) may require the user to put the box into RF PAIRING mode before RF pairing can occur. To do so, locate REMOTE CONTROL in the on-screen MENU and select REMOTE CONTROL PAIRING before following the steps shown below.
- Press and to hold the SETUP key on the remote until the LED blinks twice.
- Press the MENU key on the remote and the remote will begin blinking as it attempts to pair.
- If a PIN number appears on your TV screen, enter that number using the remote numeric keys.
- The LED on the remote will blink twice to verify success.
RF Pairing to an RF Adapter
To perform RF pairing with an RF adapter, please refer to the instructions provided with the adapter or go to www.urcsupport.com/rf and locate the support page for the RF adapter for more information.
FCC NOTICE
This equipment has been tested and found to comply with the limits for a Class B digital device, pursuant to part 15 of the FCC Rules. These limits are designed to provide reasonable protection against harmful interference in a residential installation. This equipment generates, uses, and can radiate radio frequency energy and if not used in accordance with the instructions, may cause harmful interference to radio communications. However, there is no guarantee that interference will not occur in a particular installation. If this equipment does cause harmful interference to radio or television reception, the user is encouraged or try to correct the interference by one or more of the following measures:
- Reorient or relocate the receiving antenna.
- Increase or decrease the separation between the equipment and receiver.
- Connect the equipment into an outlet on a circuit different from that to which the receiver is connected
- Consult the dealer or an experienced remote control/ TV technician for help.
- It is strongly recommended that the TV be plugged into a separate wall outlet.
This equipment has been verified to comply with the limits for a Class B computing device, pursuant to FCC Rules. The user is cautioned that changes and modifications made to the equipment without the approval of the manufacturer could void the user’s authority to operate this equipment.

