MI Beard Trimmer User Manual
Read this manual carefully before use, and retain it for future reference.
Safety Instructions
- The battery in this trimmer is non-replacable, do not disassemble the trimmer yourself.
- Do not charge this trimmer for long periods of time while leaving it unattended, and do not charge it longer than 24 hours.
- This trimmer has a built-in rechargeable battery and should never be exposed to fire or charged, used, or stored in a high temperature environment.
- This trimmer may be used while plugged in, but should never be used in a bath, shower, or extremely humid environment while plugged in.
- Do not place or insert any foreign objects into this trimmer.
- Do not allow children to play with or use this trimmer.
- Keep packaging materials away from children to prevent suffocation.
- Make sure the blade head is installed correctly before using the trimmer.
- Do not modify or repair this trimmer yourself.
- . It is normal for the blade head to become warmer during use
Warning
- Do not expose this trimmer or its battery to fire to prevent the battery from exploding or releasing toxic or hazaedous substances.
- Do not short-circuit the battery to prevemt it from combusting and causing a fire.
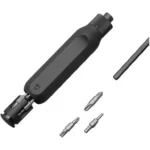
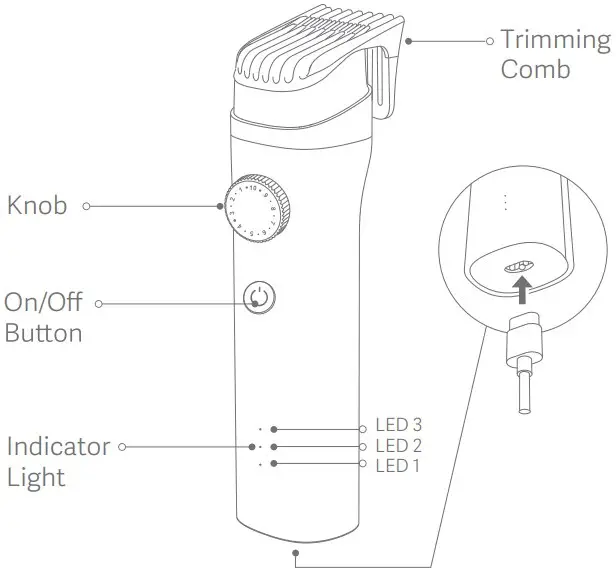
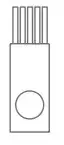
Product Overview
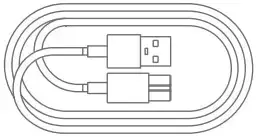
Package content: Mi Beard Trimmer, power cord, trimming comb ×2 (0.5 – 10 mm and 10.5-20 mm), travel pouch, cleaning brush, user manual, blade oil.

Power Cord
Blade Oil
Cleaning Brush
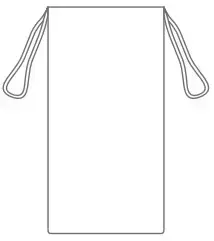
Travel Pouch
Note: Illustrations of product and accessories in the user manual are for reference purposes only. Actual product and functions may vary due to product enhancements.
Assembly and Disassembly
Installing & removing trimming comb
- To install the trimming comb, gently press it into the slot, clips first, until it clicks into place.
- To remove the trimming comb, first make sure it is set to the highest position. Then use one hand to hold the trimming comb by its sides and gently wiggle it out.
Note: Two trimming combs are included with this product, for trimming in the length range of 0.5–10 mm and 10.5–20 mm. Choose the appropriate trimming comb according to your needs.
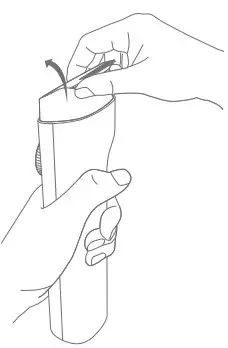
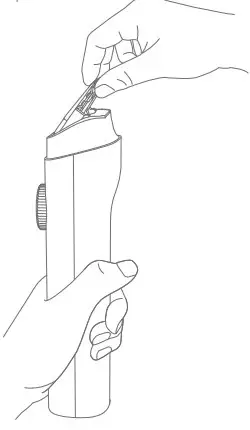
Installing & removing the blade head
- To install the blade head, align clip (A) of the blade head to slot (B) of the trimmer, then firmly press the blade head until it snaps into place.
- To remove the blade head, turn the trimmer with its head up and teeth facing your direction, place your hand onto the blade headas shown in the figure below, then gently pull the head until it pops out.

How to Use
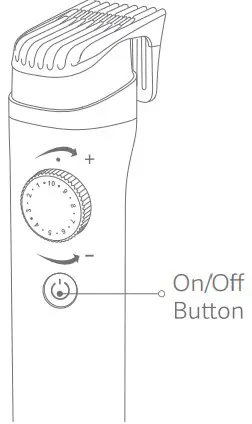
Turning on/of
Press the on/Off the trimmer.
Trimming length setting
Turn off the trimmer and turn the knob to adjust the trimming
comb to the desired length.

Trimming
After adjusting the trimming comb to the desired length, turn on the trimmer, and gently move the blade end through your beard in slow, stroking motions
Note: You can shave off your beared entirely by not attaching a comb. However, care should be taken to avoid scratching your skin.
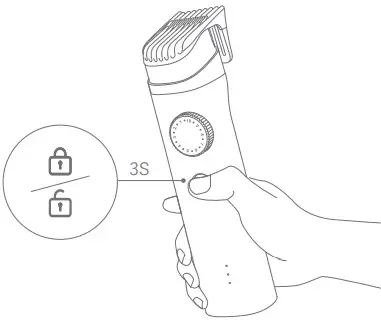
Travel lock
This trimmer is equipped with a travel lock to prevent it from accidentally turning on while being transported.
To enable the travel lock: Press and hold the On/Off button for three seconds while the trimmer is turned off until the indicator lights blink three times. This prevents the trimmer from turning on when the button is preserved accidently.
To disable the travel lock: Press and hold the On/Off button for three seconds until the trimmer is turned on. Press again to turn it off.
Note:
when presenting the On/Off button while the trimmer is locked, the indicator lights will blink three times, but the trimmer will not turn on.
The Beard Styles
Battery Level Indication
Description of the battery level indicator status while the trimmer is being used or charged.
| Battery level While using | |||
| Battery level | LED 1 | LED 2 | LED 3 |
| ≤10% | Blinking | Off | Off |
| 11% – 30% | On | Off | Off |
| 31% – 59% | On | On | Off |
| ≥60% | On | On | On |
| Battery level While Charging | |||
| Battery level | LED 1 | LED 2 | LED 3 |
| 30% | Blinking | Off | Off |
| 30% – 60% | On | Blinking | Off |
| >60% | On | On | Blinking |
| 100% | On | On | On |
This trimmer supports plug-and-play. If it does not turn on due to a low battery, it can be quickly charged for 5 minutes to provide sufficient power for one trimming session. It takes about 120 minutes to fully charge the battery. The trimmer can be used for about 90 minutes when fully charged. If it is not used for a long time, make sure fully charge it at least once every six months.
Cut-off voltage mode: The trimmer will be in cut-off voltage mode when the battery voltage is lower than 3 V. LED1 will blink for five times. The trimmer can be turned on after being charged.
Care and Maintenance
- To ensure optimal functionally, clean the trimmer after each use. The trimmer may be rinsed with water. Before cleaning the trimmer, make sure it is turned off and not being charged.
- Remove the trimming comb and blade head and use the provided cleaning brush to clean out the blade head slot and blade teeth.
- The trimming comb, blade head, trimmer, and trimming comb slot can be rinsed with water. All components should be dried
- Water on or near the charging port should be dried before storing the device.
- After drying, it is recommended to add lubricating oil to maintain smooth operation before reattaching the blade head to the trimmer.
- It’s normal for the blade to get warmer during use. Add the included blade oil onto the five points illustrated below, to keep the blade running normally.
Notes:
- The trimmer’s service life depends on the frequency of use and whether it is properly maintained.
- Do not use compressed gas, steel wool, abrasive cleaning agents, corrosive liquids (such as gasoline or acetone) and sharp objects to clean this trimmer.
Precautions
- The blade head needs to be correctly installed before use.
- Make sure the trimmer’s charging pins are completely dry before connecting the adapter.
- Do not wrap the charging cable around the trimmer to avoid damage to the cable.
- Only install, remove or adjust the trimming comb and blade head while the trimmer is turned off.
- The trimmer needs to be turned off and unplugged while cleaning.
- Do not press the blade teeth into the skin to prevent injuries.
- Stop using the trimmer immediately if it is faulty. Refer to the Troubleshooting section of this manual for assistance or, if necessary, contact customer service to request a repair.
- Stop using the trimmer’s charging cable or plug immediately if it is damaged or stopped functioning normally.
- Fully charge the trimmer at least once every six months, , if it has not been used for a long time.
- People (including children) who lack the relevant experience and knowledge, or capacity for civil conduct may not use, clean, or maintain the device without adult supervision and guidance.
Notes
- It is recommended to use a Mi brand adapter (5 V/2 A) with this btrimmer.
- Turn the trimming comb to the lowest position and enable the travel lock when transporting the trimmer.
- It is recommended to charge, use, and store this trimmer at temperatures between 5°C to 35°C.
- This trimmer is only suitable for facial hair, and is not recommended to be used on one’s head or other parts of the body. It is also not suitable for use on pets.
- . It is normal for water to drip from the gaps of the outer casing when cleaning the trimmer. Standing it upright can help moisture evaporate from the gaps more quickly.
- For hygiene reasons, s, it is recommended that this trimmer is only used by one person .
- . It is recommended to store the trimmer in a cool dry place.
- Make sure the trimmer is dry before packing it in order to prevent damage to other articles in your luggage.
Troubleshooting
| Fault | Possible Causes | Solutions |
| Trimmer does not cut well | Blade head is worn or damaged | Immediately replace it with a genuine blade head |
| Trimmer is clogged with hair | Thoroughly clean the trimme | |
| Low battery level | Plug the trimmer into the charger to charge it | |
| Trimmer does not turn on when pressing the button | Button does not function | Contact customer service |
| Travel lock is enabled | Press and hold the button for three seconds to disable the lock | |
| Battery is depleted | Plug the trimmer into the charger to charge it | |
| Indicator lights error/ do not light up | Circuit failure | Contact customer service |
| Fault | Possible Causes | Solutions |
| Unable to charge the battery | Trimmer is damaged | Contact customer service |
| Power cord is damaged | Contact customer service | |
| Charging ambient temperature is too low or too high | Charge at an ambient temperature of 5°C to 35°C | |
| Runs for less than 60 minutes on a full charge | Battery runtime depends on the trimming method, cleaning frequency and beard density | |
| Battery error | Contact customer service |
Specifications
| Name | Mi Beard Trimmer |
| Model | XXQ01HM |
| Rated Power | 3 W |
| Input Voltage | DC 5 V |
| Input Current | DC 2 A |
| Charging Time | Up to about 120 minutes |
| Usage Time | Up to about 120 minutes |
| Comb Setting | 40 lenghts |
| IP Rating | IPX& |
| Weight | Approx 270g |
| Item dimension | 4.8 x 3.8 x 15.4 cm |
Cross-out Wheeled Bin
All products bearing this symbol are waste electrical and electronic equipment (WEEE as in directive 2012/19/EU) which should not be mixed with unsorted household waste. Instead, you should protect human health and the enviroment by handing over your waste equipment to a designated collection point for the recycling of waste electrical and electronic equipment, appointed by the government or local authorities. Correct disposal and recycling will help prevent potential negative consequences to the environment and human health. Please contact the installer or local authorities for more information about the location as well as terms and conditions of such collection points.
After sales Services and Support
For after sales services, please contact
Phone No.: 18001036286
Email: [email protected]
Manufactured by: Shanghai Holomi Technology Co. ,Ltd. (a Mi Ecosystem company)
Address: Room 2227, No.2 Building, No.588 Zixing Road, Minhang District, Shanghai – 200235, China