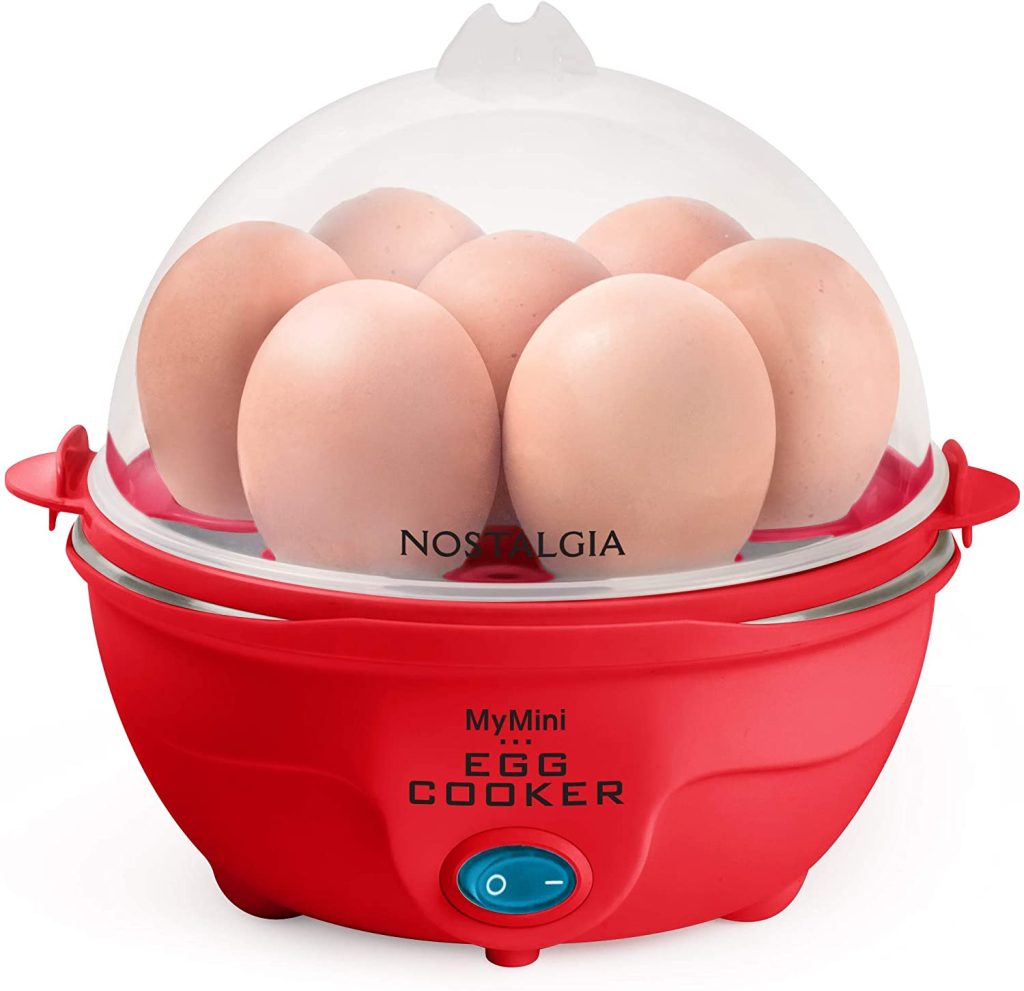
NOSTALGIA EC7AQ My Mini Premium 7-Egg Cooker

All products are trademarks of Nostalgia Products LLC.
Worldwide design & utility patented or patents pending.
© 2020 Nostalgia Products LLC.
www.nostalgiaproducts.com
(rev. 07/23/20 DL)
Make everyday a party!
Visit www.nostalgiaproducts.com for more fun products.
SAFETY
Your safety and the safety of others is very important.
We have provided many important safety messages in this manual and on your appliance. Always read and obey all safety messages.

This symbol alerts you to potential hazards that can cause serious injury to you and others.
All safety messages will follow the safety alert symbol.
All safety messages will tell you what the potential hazard is, tell you how to reduce the chance of injury, and tell you what can happen if the instructions are not followed.
Appliance Specifications:
120 Volts, 60 Hz, 350 Watts
THIS PRODUCT IS FOR USE IN 120V AC OUTLET ONLY.
Refer to www.nostalgiaproducts.com/user-manuals/ for the most updated manual.
IMPORTANT SAFEGUARDS
A person who has not read and understood all operating and safety instructions is not qualified to operate this appliance. All users of this appliance must read and understand this Instruction Manual before operating or cleaning this appliance.
When using electrical appliances, basic safety precautions should always be followed, including:
- Read all instructions before operating this appliance.
- DO NOT TOUCH the hot surfaces. Use handles or knobs.
- This appliance is NOT A TOY.
- Unsupervised young children and cognitively challenged individuals should never operate this appliance.
- Close supervision is necessary when any appliance is used by or near children.
- To protect against electrical shock do not immerse cord, plug or any part of this unit in water or other liquids.
- Unplug from outlet when not in use, before removing parts and before cleaning. Allow to cool before putting on or taking off any parts, and before cleaning.
- DO NOT operate any appliance with a damaged cord or plug, or after the appliance malfunctions, or if the appliance has been damaged in any manner. Return the appliance to the nearest repair shop for examination, repair or adjustment.
- The manufacturer does not recommend the use of accessory attachments other than what is provided by the manufacturer. Use of attachments may cause injuries.
- DO NOT use the appliance for other than its intended use.
- DO NOT use outdoors. FOR HOUSEHOLD USE ONLY.
- DO NOT place on or near a hot gas or electric burner, or in a heated oven.
- DO NOT let cord hang over edge of table or counter, or touch hot surfaces.
- NEVER leave unit unattended while in use or when plugged into an outlet.
- Extreme caution must be used when moving an appliance containing hot food.
ADDITIONAL IMPORTANT SAFEGUARDS
Operating Safety Precautions
- DO NOT put your hands or other objects into the appliance while it is in operation. If food spills on the heating platform, make sure the appliance is turned off and cool before cleaning.
- Temperature limiters are built into the heating plate to ensure that the safe operating temperature of the unit is not exceeded. The temperature limiter will cycle the heating plate on and off to prevent exceeding the maximum safe surface temperature.
- Keep hands and utensils away from heating platform while cooking eggs to reduce the risk of severe injury or damage to the appliance.
- Heated base and contents (water and eggs) of the appliance are hot when in use. Let cool before handling/or cleaning.
- USE EXTREME CAUTION when handling the measuring cup, as it contains a sharp pin located on the bottom which may cause injury.
- The lid becomes very hot while in use- do not touch while the eggs are cooking. Let it cool before touching.
- Be certain the lid is securely in place before engaging appliance.
- DO NOT USE EXPIRED EGGS, EXPIRED EGG WHITES, OR EXPIRED LIQUID EGGS.
Instructions for the Electrical Cord and Plug
- ELECTRICAL SHOCK HAZARD: Failure to follow these instructions can result in death, fire, or electrical shock.
- Plug into a grounded 3 prong outlet.
- DO NOT remove ground prong.
- DO NOT use an adapter.
- DO NOT use an extension cord.
- This unit MUST be grounded. In the event of an electrical short circuit, grounding reduces the risk of electric shock by providing an escape wire for the electric current. This unit is equipped with a cord having a grounding wire with a grounding plug. The plug must be plugged into an outlet that is properly installed and grounded.
- WARNING: Improper use of the grounding plug can result in a risk of electric shock. If the plug does not fit fully into the outlet, contact a qualified electrician. Do not attempt to modify the plug in any way.
- A short power supply cord is provided to reduce the risk resulting from becoming entangled or tripping over a long cord.
- The manufacturer does not recommend using this machine in countries that do not support 120V AC even if a voltage adapter, transformer, or converter is in use.
INTRODUCTION
Thank you for purchasing the Nostalgia™ PREMIUM 7-EGG COOKER! This egg cooker quickly prepares delicious boiled eggs, omelets, poached eggs and more in just minutes!
Features include:
- 7-egg capacity
- Makes 7 soft-, medium-, or hard-boiled eggs
- Use egg bowl to make poached eggs, scrambled eggs, omelets, egg custard and more
- Audible chime ensures perfectly cooked eggs
- Water measuring cup with built-in egg piercing tool ensures you use the correct amount of water
- Measuring cup, egg bowl and egg white separator accessories included
PARTS and ASSEMBLY
PARTS

ASSEMBLY

HOW TO OPERATE
Soft, Medium and Hardboiled Eggs:
- Set the unit on a dry, level surface and plug into an electrical outlet and remove the lid.
- Refer to the SOFT, MEDIUM, and HARD lines on the Measuring Cup, and use the chart below to determine how much water to add to the Measuring Cup and pour onto the Heating Plate.
Style Quantity Time Soft-Boiled 1-7 eggs 10 minutes Medium-Boiled 1-7 eggs 12 minutes Hard-Boiled 1-7 eggs 14 minutes NOTE: Time guidelines are for large eggs. Extra large or jumbo eggs may require additional time in the cooker to achieve desired result. Egg Cooker will continually beep if water isn’t added.
- Place the Egg Tray over the Heating Plate.
- Pierce the larger end of each egg with the piercing tool located on the bottom of the Measuring Cup.
- With the pierced end of the egg facing upward, place an egg in each designated spot in the Egg Tray. DO NOT let the eggs touch the Heating Plate.
- Cover with the Lid and toggle the ON/OFF Switch to the ON ( – ) position. The indicator light will illuminate.
- When eggs are cooked, an audible chime will sound until you toggle the ON/OFF Switch to the OFF ( o ) position.
- Carefully remove the Lid and transfer the eggs to a bowl. Cover with ice water by 1 inch and allow eggs to cool for about 10 minutes. Keep hands safe by using an oven mitt to remove the Lid.
CAUTION: Steam will be released from vent holes in the Lid during cooking. For your safety, avoid contact with steam as it is very hot and can cause burns.
Omeletes:
- Set the unit on a dry, level surface and plug into an electrical outlet and remove the lid.
- Fill the Measuring Cup to the “MEDIUM” line and pour onto the Heating Plate.
- Place the Egg Tray over the Heating Plate.
- Place a little butter or nonstick cooking spray in the egg bowl to avoid sticking.
- Prepare your omelete in a bowl, then pour mixture into the Egg Bowl.
- Place the Egg Bowl on top of the Egg Tray.
- Cover with the Lid and toggle the ON/OFF Switch to the ON ( – ) position. The indicator light will illuminate.
- When omelete is cooked, an audible chime will sound until you toggle the ON/OFF Switch to the OFF ( o ) position.
- Carefully remove the Lid. Keep hands safe by using an oven mitt to remove the Lid.
CAUTION: Steam will be released from vent holes in the Lid during cooking. For your safety, avoid contact with steam as it is very hot and can cause burns.
Poached Eggs:
- Set the unit on a dry, level surface and plug into an electrical outlet.
- Remove the Lid.
- Fill the Measuring Cup to the “SOFT” line and pour onto the Heating Plate.
- Place the Egg Tray over the Heating Plate.
- Place a little butter or nonstick cooking spray in the egg bowl to avoid sticking.
- Break an egg into the Egg Bowl and place bowl on top of egg tray.
- Cover with the Lid and toggle the ON/OFF Switch to the ON ( – ) position. The indicator light will illuminate.
- When poached egg is ready, an audible chime will sound until you toggle the ON/OFF Switch to the OFF ( o ) position.
- Carefully remove the Lid. Keep hands safe by using an oven mitt to remove the Lid.
CAUTION: Steam will be released from vent holes in the Lid during cooking. For your safety, avoid contact with steam as it is very hot and can cause burns.
Dumplings
- Set the unit on a dry, level surface and plug into an electrical outlet.
- Remove the Lid.
- Fill the Measuring Cup to the “SOFT” or “MEDIUM” line (depending on your preferred doneness) and pour onto the Heating Plate.
- Place the dumplings on the egg tray.
- Cover with the Lid and toggle the ON/OFF Switch to the ON ( – ) position. The indicator light will illuminate.
- When dumplings are ready, an audible chime will sound until you toggle the ON/OFF Switch to the OFF ( o ) position.
- Carefully remove the Lid. Keep hands safe by using an oven mitt to remove the Lid.
CAUTION: Steam will be released from vent holes in the Lid during cooking. For your safety, avoid contact with steam as it is very hot and can cause burns.
Vegetables
- Set the unit on a dry, level surface and plug into an electrical outlet and remove lid.
- Fill the Measuring Cup to the “SOFT” or “MEDIUM” line (depending on your preferred doneness) and pour onto the Heating Plate.
- Place the vegetables into the egg bowl and place on top of the egg tray.
- Cover with the Lid and toggle the ON/OFF Switch to the ON ( – ) position. The indicator light will illuminate.
- When vegetables are ready, an audible chime will sound until you toggle the ON/OFF Switch to the OFF ( o ) position.
- Carefully remove the Lid. Keep hands safe by using an oven mitt to remove the Lid.
CAUTION: Steam will be released from vent holes in the Lid during cooking. For your safety, avoid contact with steam as it is very hot and can cause burns.
HELPFUL TIPS
NEVER leave the unit unattended while operating.
Fresh Eggs: Fresh eggs provide the best results when using your egg cooker. To determine the freshness of your eggs, fill a large glass with water to the top. One by one, place each egg in the full glass of water.
- Eggs that sink and settle at the bottom of the glass in a horizontal position are the freshest eggs.
- Those eggs that float to the top of the glass are the bad eggs.
- Eggs that sink to the bottom of the glass but lie in a more vertical position are still good to eat but are less fresh and need to be eaten as soon as possible.
Cooking Time
Times noted in this manual are for large eggs. Smaller or larger eggs may require less or more cooking time to reach desired result.
Indicator Light
If your indicator light does not illuminate when switched to the ON ( – ) position, check to be sure the unit is plugged into a working electrical outlet.
Using Egg White Separator
To separate the egg whites from the yolk, set the separator over a bowl (the included egg bowl works well for this). Crack an egg into the separator and allow the egg whites to pass through into the bowl. The yolk will remain in the separator.
CLEANING and MAINTENANCE
Take care of your EGG COOKER by following these simple instructions and precautions.
General cleaning:
- Disconnect appliance from the electrical outlet and allow to cool completely.
- Wipe down the main body and Heating Plate with a damp, non-abrasive cloth.
- Wash all accessories (egg white separator, measuring cup, egg bowl, egg tray and lid) in the sink with warm, soapy water.
- Dry all parts with dry, non-abrasive cloth.
Brown stains on heating plate:
- The brown stains on the heating plate is simply residue from usage.
Allow the heating plate to cool completely to avoid burns. - Clean using a paper towel or a dish rag and white vinegar to wipe clean the heating plate.
RECIPES
Your EGG COOKER can make a variety of egg-cellent treats! Try out any of the recipes below to make food for dinner, parties or any special event.
You can even try steaming dumplings, vegetables and more!
| DEVILED EGGS | |
| • 7 hard-boiled eggs
• 3 tbsp. mayonnaise • 1 tbsp. Dijon- style mustard • 3-5 drops hot sauce • 1/8 tsp. salt • dash of paprika, chives and dill |
Once cooled, remove shells from hard-boiled eggs. Cut each in half and remove the yellow yolks from the middle. Put egg yolks in a large bowl and break up the yolks.
Mix in mayonnaise, mustard, salt and hot sauce. Spoon mixture into the egg whites. Place the eggs into the refrigerator until ready to serve. Just before serving, sprinkle on a dash of paprika, chives and dill. |
| EGG SALAD SANDWICH | |
| • 7 hard-boiled eggs
• 1/2 celery stalk, diced • 1/3 cup mayonnaise • 1 tsp. yellow mustard • 1/4 cup chopped green onion • 1/4 tsp. paprika • salt and pepper to taste • rye sandwich bread |
Once cooled, remove shells from hard-boiled eggs.
Chop and place eggs in a bowl, and stir in the celery, mayonnaise, mustard and green onion. Season with salt, pepper and paprika to taste. Serve on rye sandwich bread. |
| VEGETARIAN OMELETE | |
| • 2 egg whites
• 1 whole egg • cooked asparagus, red bell pepper, onion and mushroom • 1/4 cup Parmesan cheese • salt and pepper to taste |
Beat the egg whites and whole egg together in a bowl, then pour into the Egg Bowl. Add cooked vegetables.
Let cook according to the Omelete instructions under HOW TO OPERATE. Before serving, sprinkle with Parmesan and season with salt and pepper to taste. |
| SCOTCH EGGS | |
| • 1 lb. Italian-style turkey sausage
• 7 hard-boiled eggs • 1 egg, beaten • 1 cup baked cheese cracker crumbs (or another cracker) • 1/4 cup mayonnaise • 2 tbsp. Dijon- style mustard |
Preheat oven to 425°F.
Divide sausage into 7 equal portions. Flatten each portion and wrap around hard-boiled egg. Repeat for each egg. Dip sausage-covered eggs in beaten egg, then roll in cracker crumbs. Place on baking sheet. Bake at 425°F for 10 minutes. Reduce heat to 375°F and bake for an additional 20 minutes. Mix mayonnaise and Dijon mustard to make dipping sauce. Serve immediately. |
| SWEET POTATO WITH POACHED EGGS | |
| • 1 large sweet potato
• 4 poached eggs • 1 cup alfalfa sprouts • salt and pepper to taste Guacamole • 2 ripe avocados, pitted and peeled • 2 tbsp. fresh lime juice • 1 tbsp. extra- virgin olive oil • 1 tsp. salt • 1/2 tsp. pepper • 1/4 cup diced red onion • 1 jalapeno pepper, seeded and diced • 2 tbsp. chopped fresh cilantro |
Slice sweet potato into four 1/4-inch thick slices. Pat dry.
Toast slices in toaster oven for about 10 minutes, repeating the toasting process if necessary, until golden and potato is tender. Guacamole: Mash together avocados, lime juice, olive oil, salt and pepper. Stir in red onion, jalapeno and cilantro. Meanwhile: Prepare poached eggs according to directions under HOW TO OPERATE. Top each sweet potato with guacamole, poached eggs and alfalfa sprouts. Sprinkle with salt and pepper to taste. Serve with sriracha sauce. |
| STEAMED EGG CUSTARD | |
| • 2 large eggs
• 6 oz. water • 1/2 tsp. sesame oil • pinch of salt • green onion for garnish (optional) |
In a small mixing bowl, whisk eggs in a stirring motion in one direction until egg whites and yolks are combined.
Add water and sprinkle salt; then briefly stir in one direction. Pour mixture into Egg Bowl. Fill Measuring Cup with water to the CUSTARD line, then pour into Heated Base. Place the Egg Tray over the Heating Plate, then place Egg Bowl on top of the Egg Tray. Replace Lid, then turn ON/OFF Switch to the ON ( – ) position. Once done, add sesame oil and garnish with green onion. Serve immediately. |
RETURNS and WARRANTY
SHOULD YOUR UNIT NOT WORK OR IF DAMAGED WHEN YOU FIRST TAKE IT OUT OF THE BOX, PLEASE RETURN IT TO THE PLACE OF PURCHASE IMMEDIATELY.
PREMIUM 7-EGG COOKER / EC7AQ
Should you have any questions, please contact us via email or at the customer service number listed below between the hours of 8:00 AM and 5:00 PM, Monday through Friday, Central Standard Time.
Distributed by:
Nostalgia Products LLC
1471 Partnership Dr.
Green Bay, WI 54304-5685
Customer Service
Phone: (920) 347-9122
Web: www.nostalgiaproducts.com
Customer Service Inquiry
To submit a Customer Service inquiry, go to www.nostalgiaproducts.com and fill out the Customer Service Inquiry form and click the Submit button.
A representative will contact you as soon as possible.
Product Warranty Terms
Nostalgia Products LLC (the “Company”) hereby warrants that for a period of one (1) year from the date of original purchase, this product will be free of defects in material and workmanship under normal home use, provided that the product is operated and maintained in accordance with the operating instructions. As the sole and exclusive remedy under this warranty, the Company will at its discretion either repair or replace the product found to be defective, or issue a refund on the product during the warranty period. This warranty is only available to the original retail purchaser of the product from the date of initial retail purchase, and is only valid with the original sales receipt, as proof of purchase date is required to obtain warranty benefits. All warranty claims must be brought to the attention of the Company within the warranty period and no later than 30 days of the failure to perform. This warranty does not cover normal wear or damage caused by shipping, mishandling, misuse, accident, alteration, improper replacement parts, or other than ordinary household use. You may be required to return the product (with shipping prepaid by you) for inspection and evaluation. Return shipping costs are not refundable. The Company is not responsible for returns damaged or lost in transit. Unless otherwise specifically permitted by the operating instructions, this warranty applies to indoor household use only. In order to obtain service under this warranty, please contact the Company at the telephone number listed above or by filling out the Customer Service Inquiry Form located at www.nostalgiaproducts.com
Warranty valid only in USA and Canada.
This warranty is in lieu of all other warranties, expressed or implied, including warranties of merchantability and fitness for a particular purpose, which are hereby excluded to the extent permitted by law. In no event shall the Company be liable for any indirect, incidental, consequential, or special damages arising out of or in connection with this product or the use thereof. Some states, provinces or jurisdictions do not permit the exclusion or limitation of incidental or consequential damages, so the foregoing exclusion or limitation may not apply to you.
This warranty does not apply to re-manufactured merchandise.
Please read the operating instructions carefully. Failure to comply with the operating instructions will void this warranty.
For more information, visit us online at www.nostalgiaproducts.com
Like us on Facebook at www.facebook.com/NostalgiaElectrics
Follow our boards on Pinterest at www.pinterest.com/nostalgiaelctrx
Tweet along with us on Twitter at www.twitter.com/NostalgiaElctrx
![]()