NOSTALGIA MWF5SERIES MyMini Waffle Maker User Manual

SAFETY
Your safety and the safety of others is very important.
We have provided many important safety messages in this manual and on your appliance. Always read and obey all safety messages.

This symbol alerts you to potential hazards that can cause serious injury to you and others.
All safety messages will follow the safety alert symbol. All safety messages will tell you what the potential hazard is, tell you how to reduce the chance of injury, and tell you what can happen if the instructions are not followed.
Appliance Specifications: Appliance Specifications:
THIS PRODUCT IS FOR USE IN 120V AC OUTLET ONLY.
Refer to www.nostalgiaproducts.com/user-manuals/ for the most updated manual.
IMPORTANT SAFEGUARDS
A person who has not read and understood all operating and safety instructions is not qualified to operate this appliance. All users of this appliance must read and understand this Instruction Manual before operating or cleaning this appliance.
When using electrical appliances, basic safety precautions should always be followed, including:
- Read all instructions before operating this appliance.
- DO NOT TOUCH the hot surfaces. Use handles or knobs.
- This appliance is NOT A TOY.
- Unsupervised young children and cognitively challenged individuals should never operate this appliance.
- Close supervision is necessary when any appliance is used by or near children.
- To protect against electrical shock do not immerse cord, plug or any part of this unit in water or other liquids.
- Unplug from outlet when not in use, before removing parts and before cleaning. Allow to cool before putting on or taking off any parts, and before cleaning.
- DO NOT operate any appliance with a damaged cord or plug, or after the appliance malfunctions, or if the appliance has been damaged in any manner. Return the appliance to the nearest repair shop for examination, repair or adjustment.
- The manufacturer does not recommend the use of accessory attachments other than what is provided by the manufacturer. Use of attachments may cause injuries.
- DO NOT use the appliance for other than its intended use.
- DO NOT use outdoors. FOR HOUSEHOLD USE ONLY.
- DO NOT place on or near a hot gas or electric burner, or in a heated oven.
- DO NOT let cord hang over edge of table or counter, or touch hot surfaces.
- NEVER leave unit unattended while in use or when plugged into an outlet.
- Extreme caution must be used when moving an appliance containing hot food.
ADDITIONAL IMPORTANT SAFEGUARDS
Operating Safety Precautions
- Cooking Surface will be HOT. Wear oven mitts while using to prevent burns.
- DO NOT lift the Cover so that your arm is over the Cooking Surface as it is hot and may cause injury. Lift from the side.
Instructions for the Electrical Cord and Plug
- This appliance has a polarized plug (one blade is wider than the other). To reduce the risk of electrical shock, this plug is intended to fit into a polarized outlet only one way.
If the plug does not fit fully into the outlet, reverse the plug. If it still does not fit, contact a qualified electrician. Do not attempt to modify the plug in any way. - A short power supply cord is provided to reduce the risk resulting from becoming entangled or tripping over a long cord.
- If a long detachable power-supply cord or extension cord is used:
- Extension cords can be used if care is exercised in their use.
- The marked electrical rating of the cord or extension cord should be at least as great as the electrical rating of the appliance.
- When using a longer cord or extension cord, make sure that the cord does not drape over a countertop or tabletop where it can be pulled on or tripped over unintentionally.
- The manufacturer does not recommend using this machine in countries that do not support 120V AC even if a voltage adapter, transformer, or converter is in use.
SAVE THESE INSTRUCTIONS!
INTRODUCTION
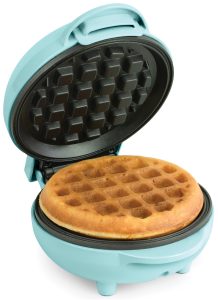
Congratulations on your purchase of the Nostalgia™ MyMINI WAFFLE MAKER! Now making fluffy and delicious waffles from the comfort of home is fun, quick and easy!
Features:
- Quickly makes delicious golden brown waffles every time
- 5-inch cooking surfaces efficiently heats up to 400 degrees for consistent cooking performance
- Compact size fits neatly into any kitchen, office, dorm room or camper and allows for tidy storage
- Cool-touch handle keeps hands safe when opening and closing lid
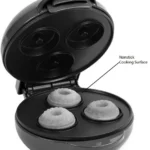
PARTS and ASSEMBLY


HOW TO OPERATE
- Before first use, wipe down all surfaces with a damp, non-abrasive cloth. Remove all protective paper and wrapping.
- Find a dry, level surface near an electrical outlet.
- Preheat the appliance by closing the lid and plugging into an electrical outlet. The indicator light will illuminate, signaling that the unit is heating up.
- Prepare your ingredients while the appliance is preheating.
- When the indicator light shuts off the unit is ready to cook.
- Raise the lid using the handle. Use an oven mitt or pot holder to prevent accidental burns.
- Spray the upper and lower cooking surfaces with a non-stick cooking spray or lightly coat with a small amount of vegetable oil.
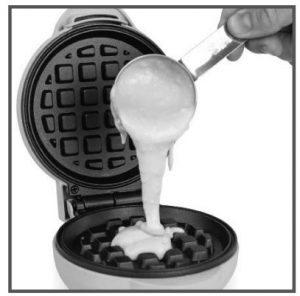
NOTE: The oil helps protect the non-stick quality of the cooking surfaces. - Carefully pour batter into the center of the lower cooking surface .
NOTE: The amount of waffle batter needed may vary based on the recipe or brand of batter mix used. Do not allow the batter to overflow. . Close the lid using the handle and allow to cook.
NOTE: Cooking time will vary based on the recipe or brand of batter mix used.
CAUTION: Steam may release from appliance during cooking. For your safety, avoid contact with steam as it is very hot and can cause burns. - Once waffle is cooked to your preference, raise the lid using the handle. Remove the waffle using a heat-resistant nylon, silicone or wooden cooking utensil.
NOTE: Do not use metal utensils, as they may scratch and damage the cooking surfaces. - If cooking more than one batch in a session, be sure to lower the lid in between batches to maintain the proper cooking temperature.
- As soon as you are finished cooking, unplug appliance and allow to cool.


HELPFUL TIPS
Smoking
- During first use, you may notice slight smoking or a slight odor; this is normal with most new appliances. The smoking and odor is caused by the residues burning off the non-stick cooking plates. Allow the appliance to preheat until smoke and odor no longer exists.
Non-stick Cooking Plates
- For each use, it is recommended that you coat the cooking plates with a non-stick cooking spray or with a small amount of vegetable oil. This will help preserve the longevity of your appliance.
- Only use heat-resistant nylon, silicone or wooden utensils when operating this unit. Metal utensils can scratch or damage the non-stick cooking plates.
Cooking Tips
- For healthier waffles, substitute whole grain flour for white flour.
- To keep waffles crisp when reheating, always reheat in an oven instead of a microwave. Preheat oven to 200˚ F and bake on a baking sheet or wire rack.
- DO NOT over-mix batter. Batter should be slightly lumpy so that waffles will be light and fluffy when cooked.
- You can store batter in a tightly-sealed container and refrigerate. Refrigerated batter will remain fresh for up to two days. Because cold batter will thicken, you may need to add a little milk or water to the batter before cooking.
CLEANING and MAINTENANCE
Please take care of your WAFFLE MAKER by following these simple cleaning directions.
- Disconnect appliance from the electrical outlet and allow to cool completely.
- Using a damp, soapy, non-abrasive cloth, wipe down the exterior or the appliance, as well as the upper and lower non-stick cooking surfaces. Thoroughly rinse the cloth and wipe again. Dry with a clean cloth.
- DO NOT put any parts in a dishwasher.
- NEVER immerse appliance or electrical cord in water.
RECIPES
You can make a variety of mouth-watering waffle recipes with your WAFFLE MAKER! With this quick-cooking appliance, waffles bake crisp and golden on the outside and soft on the inside. Try topping them with fruit and whipped cream, or the try the classic combo of butter and syrup. Be creative and enjoy your WAFFLE MAKER!
BELGIAN WAFFLES
- 1 (.25-oz.) Package Active Dry Yeast
- ¼ Cup Warm Milk
- 3 Egg Yolks
- 2¾ Cups Warm Milk
- ¾ Cup Butter, melted and cooled to lukewarm
- ½ Cup White Sugar
- 1½ Tsp. Salt
- 2 Tsp. Vanilla Extract
- 4 Cups AllPurpose Flour
- 3 Egg Whites
- In a small bowl, dissolve yeast in ¼ cup warm milk.
Let stand until creamy, about 10 minutes. - In a large bowl, whisk together the egg yolks, ¼ cup ofthe warm milk and the melted butter. Stir in the yeast mixture, sugar, salt and vanilla. Stir in the remaining 2½ cups milk alternately with the flour, ending with the flour.
- Beat the egg whites until they form soft peaks; fold into the batter. Cover the bowl tightly with plastic wrap. Let rise in a warm place until doubled in volume, about 1 hour.
- Preheat the appliance as directed.
- Pour batter into preheated wells of the lower cooking surface.
- Close the Lid and cook for 4-6 minutes or until golden brown.
- Open Lid with a pot holder or oven mitt. Remove waffles with a wooden or plastic kitchen utensil.
OATMEAL WAFFLES
- 1½ Cups AllPurpose Flour
- 1 Cup Quick-Cooking Rolled Oats
- 1 Tbsp. Baking Powder
- ½ Tsp. Cinnamon
- ¼ Tsp. Salt
- 2 Eggs, slightly beaten
- 1½ Cups Milk
- 6 Tbsp. Butter, melted
- 2 Tbsp. Brown Sugar
CHOCOLATE WAFFLES
- 1 Cup Butter
- 4 Eggs, beaten
- 1½ Cups Sugar
- ½ Cup Cocoa
- 2 Cups Flour
- 1 Tsp. Vanilla
- 1 Tsp. Salt
- ½ Cup Water
- Preheat the appliance as directed.
- In a large bowl, beat together all ingredients.
Batter will be slightly lumpy. - Pour batter into preheated well of the lower cooking surface.
- Close the Lid and cook for 4-6 minutes.
- Open Lid with a pot holder or oven mitt.
- Remove waffles with a wooden or plastic kitchen utensil.
Serve with sliced bananas and whipped cream.
CINNAMON WAFFLES
- 2½ Cups AllPurpose Flour
- 4 Tsp. Baking Powder
- 2 Tsp. Ground Cinnamon
- 1 Tsp. Ground Allspice
- 1 Tsp. Ground Ginger
- ½ Tsp. Salt
- ¼ Cup Packed Brown Sugar
- 1 Cup Canned Pumpkin
- 2 Cups Milk
- 4 Eggs, separated
- ¼ Cup Butter, melted
- Preheat the appliance as directed.
- Combine the flour, baking powder, cinnamon, allspice, ginger, salt, and brown sugar in a mixing bowl.
- In a separate bowl, stir together the pumpkin, milk, and egg yolks. Whip the egg whites in a clean dry bowl until soft peaks form.
- Stir the flour mixture and ¼ cup melted butter to the pumpkin mixture, stirring just to combine.
- Use a whisk or rubber spatula to fold 1 /3 of the egg whites into the batter, stirring gently until incorporated. Fold in the remaining egg whites.
- Pour batter into preheated well of the lower cooking surface.
- Close the Lid and cook for 4-6 minutes.
- Open Lid with a pot holder or oven mitt.
- Remove waffles with a wooden or plastic kitchen utensil.
Serve with apple cider syrup (recipe below).
APPLE CIDER SYRUP
- ½ Cup White Sugar
- 1 Tbsp. Cornstarch
- 1 Tsp. Ground Cinnamon
- 1 Cup Apple Cider
- 1 Tbsp. Lemon Juice
- 2 Tbsp. Butter
- To make the syrup, stir together the sugar, cornstarch, and cinnamon in a saucepan.
- Stir in the apple cider and lemon juice.
- Cook over medium heat until mixture begins to boil; boil until the syrup thickens.
- Remove from heat and stir in the 2 tablespoons of butter until melted. Serve warm.
WHOLE WHEAT WAFFLES
- 2 Eggs, beaten
- 1¾ Cups Skim Milk
- ¼ Cup Canola Oil
- ¼ Cup Unsweetened Applesauce
- 1 Tsp. Vanilla Extract
- 1 Cup Whole Wheat Pastry Flour
- ½ Cup Flax Seed Meal
- ¼ Cup Wheat Germ
- ¼ Cup AllPurpose Flour
- 4 Tsp. Baking Powder
- 1 Tbsp. Sugar
- ¼ Tsp. Salt
- Preheat the appliance as directed. In a large bowl, whisk together the eggs, milk, oil, applesauce and vanilla.
- Beat in whole wheat pastry flour, flax seed meal, wheat germ, all-purpose flour, baking powder, sugar and salt until batter is smooth. Carefully pour batter into the preheated well of the lower cooking surface.
- Close the Lid and cook for 4-6 minutes.
- Open Lid with a pot holder or oven mitt.
- Remove waffles with a wooden or plastic kitchen utensil.
BLUEBERRY WAFFLES
- 2 Eggs, separated
- 3 Tsp. Baking Powder
- 1 Tbsp. Sugar
- 2 Cups Sifted Flour
- ½ Tsp. Salt
- 1½ Cups Milk
- ¼ Cup Melted Butter
- 1 Cup Blueberries
- Preheat the appliance as directed.
- Beat egg whites until stiff and set aside. In a separate bowl, lightly beat the egg yolks.
- In a medium bowl, sift together dry ingredients. Slowly stir in beaten egg yolks, milk and melted butter.
- Carefully fold in blueberries and egg whites.
- Carefully pour batter into the preheated well of the lower cooking surface.
- Close the Lid and cook for 4-6 minutes.
- Open Lid with a pot holder or oven mitt.
- Remove waffles with a wooden or plastic kitchen utensil.
RETURNS and WARRANTY
SHOULD YOUR UNIT NOT WORK OR IF DAMAGED WHEN YOU FIRST TAKE IT OUT OF THE BOX, PLEASE RETURN IT TO THE PLACE OF PURCHASE IMMEDIATELY.
MyMINI™ WAFFLE MAKER / MWF5SERIES
Should you have any questions, please contact us via email or at the customer service number listed below between the hours of 8:00 AM and 5:00 PM, Monday through Friday, Central Standard Time.
Distributed by:
Nostalgia Products LLC
1471 Partnership Dr.
Green Bay, WI 54304-5685
Customer Service
Phone: (920) 347-9122
Web: www.nostalgiaproducts.com
Customer Service Inquiry
To submit a Customer Service inquiry, go to www.nostalgiaproducts.com and fill out the Customer Service Inquiry form and click the Submit button.
A representative will contact you as soon as possible.
Product Warranty Terms
Nostalgia Products LLC (the “Company”) hereby warrants that for a period of one (1) year from the date of original purchase, this product will be free of defects in material and workmanship under normal home use, provided that the product is operated and maintained in accordance with the operating instructions. As the sole and exclusive remedy under this warranty, the Company will at its discretion either repair or replace the product found to be defective, or issue a refund on the product during the warranty period. This warranty is only available to the original retail purchaser of the product from the date of initial retail purchase, and is only valid with the original sales receipt, as proof of purchase date is required to obtain warranty benefits. All warranty claims must be brought to the attention of the Company within the warranty period and no later than 30 days of the failure to perform. This warranty does not cover normal wear or damage caused by shipping, mishandling, misuse, accident, alteration, improper replacement parts, or other than ordinary household use. You may be required to return the product (with shipping prepaid by you) for inspection and evaluation. Return shipping costs are not refundable. The Company is not responsible for returns damaged or lost in transit. Unless otherwise specifically permitted by the operating instructions, this warranty applies to indoor household use only. In order to obtain service under this warranty, please contact the Company at the telephone number listed above or by filling out the Customer Service Inquiry Form located at www.nostalgiaproducts.com. Warranty valid only in USA and Canada.
This warranty is in lieu of all other warranties, expressed or implied, including warranties of merchantability and fitness for a particular purpose, which are hereby excluded to the extent permitted by law. In no event shall the Company be liable for any indirect, incidental, consequential, or special damages arising out of or in connection with this product or the use thereof. Some states, provinces or jurisdictions do not permit the exclusion or limitation of incidental or consequential damages, so the foregoing exclusion or limitation may not apply to you.
This warranty does not apply to re-manufactured merchandise.
Please read the operating instructions carefully. Failure to comply with the operating instructions will void this warranty.
For more information, visit us online at www.nostalgiaproducts.com.
Like us on Facebook at www.facebook.com/NostalgiaElectrics.
Follow our boards on Pinterest at www.pinterest.com/nostalgiaelctrx.
Tweet along with us on Twitter at www.twitter.com/NostalgiaElctrx.