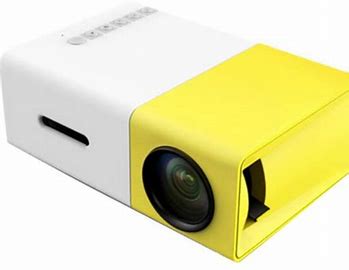
oem YG300 Mini Projector White
Safety notice
- Please read use manual carefully before you use projector.
- National standard power cable and power cord with grounding is suggested,so as to ensure stable power supply.
- Please use the same power Voltage with the projector marked.
- Please not open the projector,other.vise factory not afford warranty service.
- No peeking to the proJector lamp as the projector is working, other.vise easy to damage your eyes.
- In the projector ventilation holes.please don’t cover with the cloth,carpet and other materials.
- No waterproof function, please keep projector away the rain or moisture,and can’t put some liquid items such as vase cup those.
- In order prevent power shock,please keep away rain or water or moisture.
- Turn off,and cut off the power supply, if long time not useza projector.
- Use the originally foam or other unti-shock material to protect projector,lf you need transport this projector.
- Contact with the agency,don’t repair by yourself,lf you find the projector have problem.
- extend the projector life span and protect your eyesight, we suggest you may have a break after 3-4 hours using
Preparation before light on
- As following picture, connect the power adapter(DC 12V/1.5A)
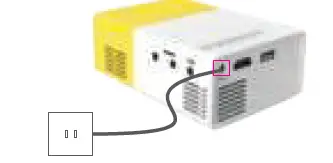
- following picture, indicator on projector will be on after power adapter connected.

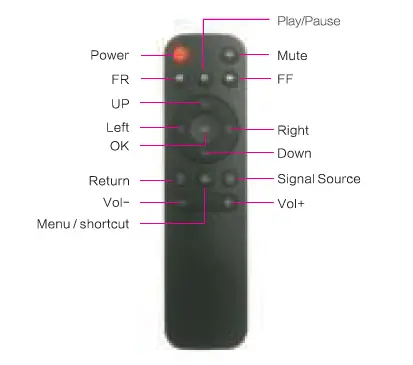
- Power on/Power off Press “C.>” button on projector or remote control to switch on the projector.

- Remote control introduction
 User Interface After the projector is switched on, the following UI wil appear after 2-5s starting pictures flash.
- Focus Locate projector vertical to the projection screen, adjust the keystone wheel till you get clear picture (square pixels appear). You can play some video or display the menu to check focus adjustment.

Connection Introduction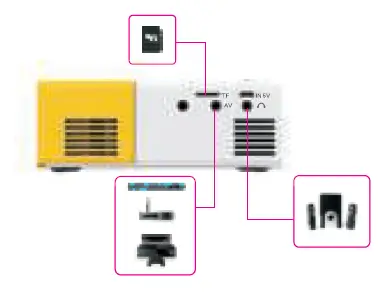
 Multi-media Connection
Insert USB/SD card with content to relevant ports.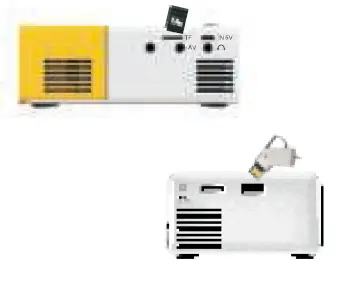
Choose a multi-media signal source. Press • )] ” on projector or remote control to choose relevant channel.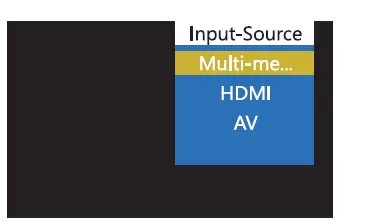
Multimedia supported format
Choose the content which you need display: Movie,Music,Photo Text.
Choose the file which you want to display, press display or stop
Video equipment connect
Use 3 in 1 cable video convert cable,connect projector AV slot,the connect method like the picture,as connected,choose the signal source Video.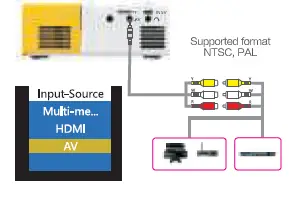
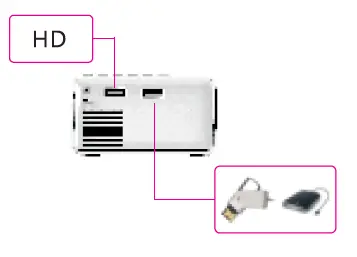
HDMI equipment connect
HDMI slot could connect computer and all the device with HDMI slot. As connected, choose the signal source HDMI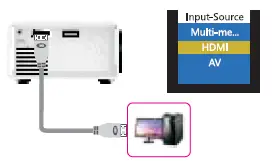
Supported file
576P, 480P, 720P, 1080P, 640×480, 800×600,1024×768, 1280×1024, 1280×720,1440×900,1920×1080, 1366×768, 1280×800,1440×960,1600×1200, 1680×1050
5mm Audio device connect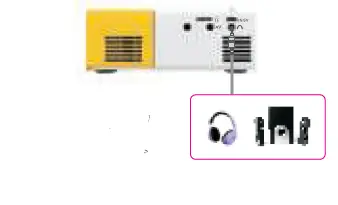
Menu guide
Menu set
image menu remote control use guide: press” =” key, then the main menu comes out, pres key, choose come into the image submenu, press key choose key the program which you want to adjust, then press ok key come into set.
‘!bu could choose the picture ma: J€, correlated color temperature, aspect ratio, noise reduction, a projection made, image scaling in the settings.
Audio submenu
Press key. and get the main menu. then press chooses audio submenu, press chooses the items which you need to adjust, then press the OK key to come into set.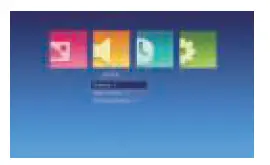
In the set, set the language in menu language set, back to factory set and software upgrade.
Set Sub-menu
Press “=” key on the remote control,then press key to set the submenu; Presskey choose the program which needs adjustment,and press the OK key comes to set. Set the projector language,back to factory set and software upgrade.
Display menu use guide
You could control the content by the display menu.
Power supply by a portable charger
YG300 support power supply by portable charger with 5V/2A output. Connect projector Mirco USB port with portable charger 5V/2A out port via USB cable to charge the projector.
Built in battery power supply (Available for models with built in battery only)
Switch the button under power supply port to “ON » , then projector will be charged by built-in battery. In this situation, projection brightness will be a little bit lower. Battery symbol will appear on projection screen to indicate the remained power volume. After turning off the power of the machine then recharging it.it will take about 3 hours for charging. 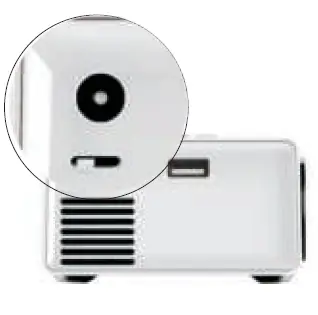
Technology features
| lmagingTechnology | TFT LCD | |
| Contrast | 800 1 | |
| Natrve Resct.rtia7 | 480’272 pixels | |
| SL.q:rrt Resct.rtia7 | 1920*1080Pxds | |
| Light | LED | |
| Prq,sdioo Dlstarn; | 1.5-2M | |
| Pn::j;d:00 Size | 24- | |
| Projector Ratio | 1.13:1 | |
| Aspect Ratio | 16:9 | |
| Cobc | 16.7M | |
| Power Supply | □
Standard |
Adapter:12V-15A |
| Mobile rower:5V-2A | ||
| □
Built in battery |
Adapter:12V-1.5A | |
| Mobi le rower:5V-2A | ||
| lithium battery:7.4V/1300mAh | ||
| UnrtSize | 1215.4·85.8″47.7 1T111 | |