![]()
No Bark Collar
User Manual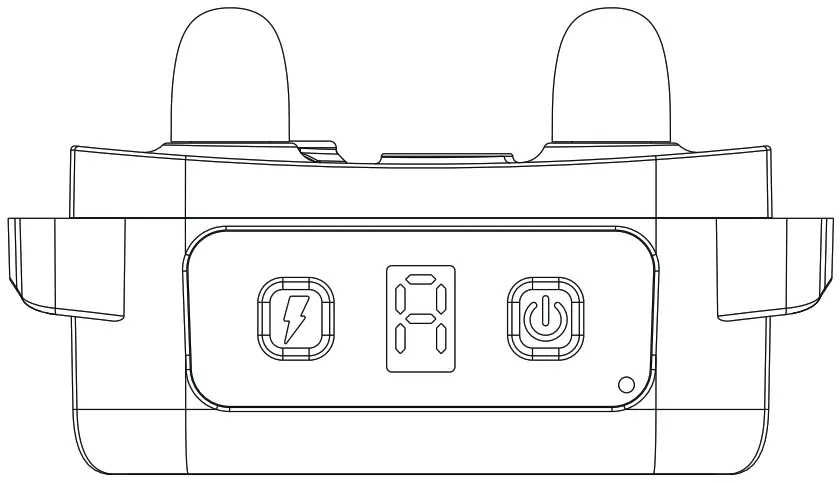
A12 No Bark Collar
Thanks for purchasing!
The Al2 No Bark Collar is designed to let dogs live safely, happily and get along with people more harmoniously.
![]() WARNING
WARNING
Do not use with aggressive dogs.
Aggressive dog’s can cause severe injury and even death to their owner and others. If you are unsure whether this product is appropriate for your dog, please consult your veterinarian or a certified trainer.
![]() CAUTION
CAUTION
Safety during on-leash training.
It is vitally important that you and your dog remain safe while learning during on-leash training. Your dog should be on a strong leash, long enough for him to attempt to chase an object, but short enough for him not to reach a road or other unsafe area. You must also be physically strong enough to restrain your dog when he tries to chase.
CAUTION
Risk of skin damage.
Please read and follow the instructions in this manual. Proper fit of the collar is important. A collar worn for too long or made too tight on the pet’s neck may cause skin damage ranging from redness to pressure ulcers.
This condition is commonly known as bed sores.
- Avoid leaving the collar on the dog for more than 12 hours per day. When possible reposition the collar on the pet’s neck every 1 to 2 hours.
- Never connect a lead to the electronic collar; it will cause excessive pressure on the contacts.
- If a rash or sore is found, discontinue use of the collar until the skin has healed.
- If the condition persists beyond 48 hours, see your veterinarian.
- This product is not a toy, please keep away from children.
- This product is only for use with healthy dog’s.
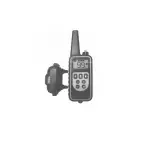
Overview
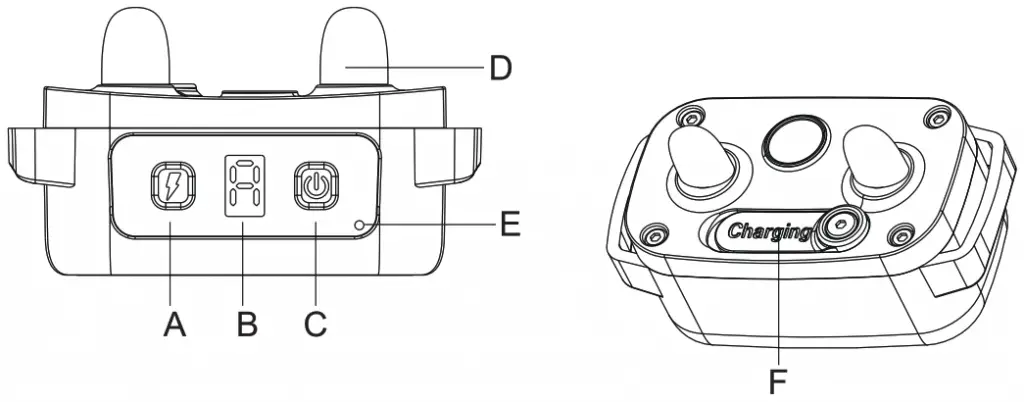
A . Shock setting button
B . Shock Level display screen
C . On/Off Button (Sensitive adjust)
D . Contact Points
E . Microphone
F . Charging Port (with rubber cover)
 |
In the shutdown mode, short press to power on. In standby mode, press and hold 3S to turn off the power. Short press to adjust the sensitivity of trigger. “1-5” means the sensitivity is from low to high. |
 |
In standby mode, Short press to adjust the shock intensity level. Long press for 3 seconds to enter the test mode. |
| Screen display | |
 |
”  “means no electric shock, and “ “means no electric shock, and “ ” means electric shock intensity from low to high. (In the sensitivity adjustment state, the screen displays “ ” means electric shock intensity from low to high. (In the sensitivity adjustment state, the screen displays “ ” indicating that the sensitivity level of the collar is from low to high.) ” indicating that the sensitivity level of the collar is from low to high.) |
 |
(A) It automatically adjusts the shock level/vibration/sound according to the pet’s voice and frequency. |
 |
(C) The collar is charging. |
 |
(F) The collar is fully charged. |
 |
(L) Low battery. |
 |
(t) In test mode. |
Setting Up the Product
Before you use the dog training collar, please set up the unit as below steps:
- Charging the Collar.
- Prepare the Collar.
- Function test, before wearing it on your dog.
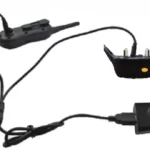
Charging the Collar
- For the initial charge, be sure to charge it for 4 hours. Subsequent charges only take 2-3 hours.
- The screen will display ”
 “while charging, and flash every 4 seconds. When fully charged, the screen will display”
  “.
“. - Please replace the rubber cover when the Collar is full
Tips:
- Excessive charging will shorten battery life. Only charge them when batteries are low.
- When you’re not using the collar, please turn it off to increase the battery life.
Note:
Please use the Output: DC 5V 500-800mA charger to charge the product.
Don’t use a charger that does not meet the specifications to charge the product.
Prepare the Collar
Turn on the Collar
- Press the
 Button the screen comes on.
 - The screen will display the last user-set level by default.
Turn off the Collar
Press and hold the  Button until the screen comes off. (This takes approximately 3 seconds).
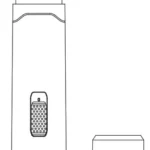
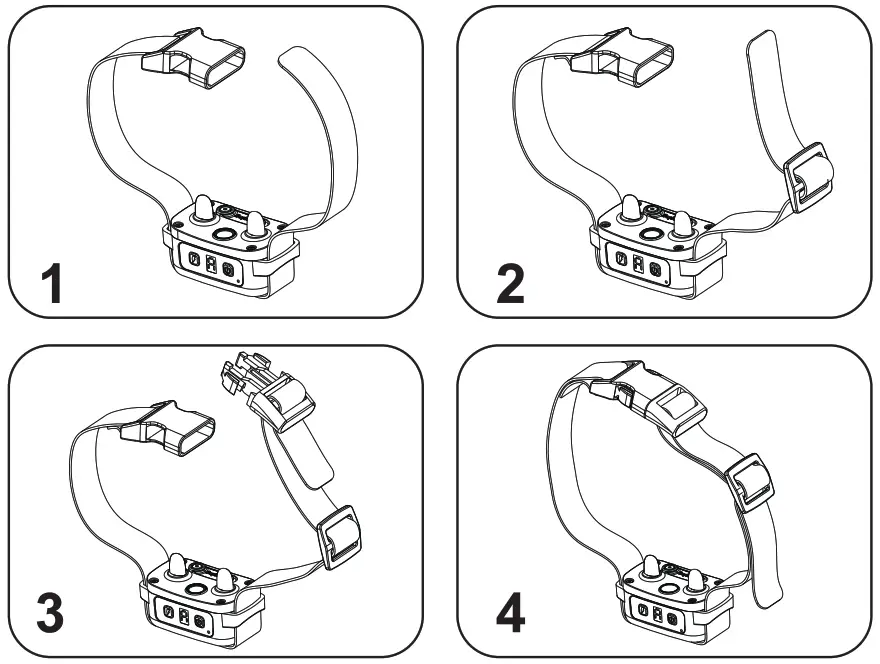
Assembly the Collar
Refer to the figure below to assemble the rope and collar
You can also watch the operation video directly in the following two ways .

- Visit the website directly, https://youtu.be/571GxgOV-jc
- Scan the QR code to get the video instructions.
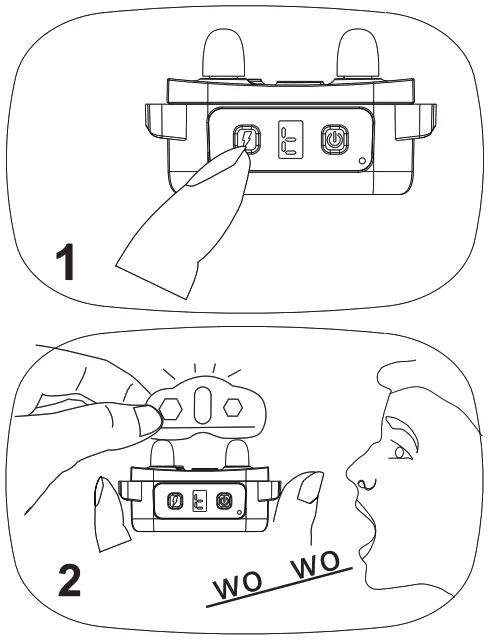
Function Test
We recommend that you perform a functional test before using the Al2 collar.
- long-press the shock setting button for 3 seconds to enter the test mode, the screen display “
 ” flashes.
- Place the test light on the contact points and shout “WO, WO” to the microphone. The collar will emit sound, vibration, and shock at the same time, and the test light will be on, indicating the function is normal. Press any key or 60 seconds without operation, the test mode will be exited.
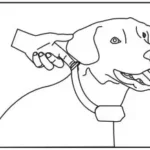
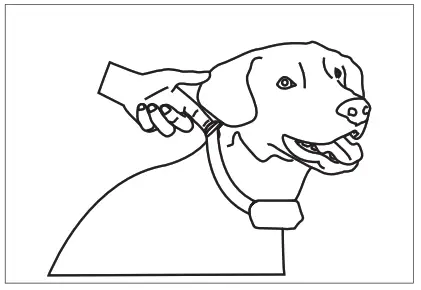
Collar Fitting
Please fit the collar properly so that the Contact Points press firmly against the dog’s skin. When properly fitted, you should be able to put a finger in between the Collar and dog’s neck.
Too loose:
The Collar will move around the dog’s neck, the Contact Points may hurt the dog’s skin.
Too tight:
It may cause dog’s to breathe hard.
Caution:
- Do not shave the pet’s neck as this may increase the risk of skin irritation.
- The collar should not be worn for more than 12 hours per day. Or it may cause skin irritation
Device Information
Product Specification
| Battery Type | Rechargeable, lithium-polymer battery |
| Battery Life(typical use) | 8 days |
| Waterproof | Yes. |
| Operating temperature | From 0-40°C(from 32-104°F) |
The unit needs to be charged under any of the below situations
- The screen of the collar shows “L”;
- The screen does not display anything.
Others
| Frequently Asked Questions | |
| Is the beep/Shock safe for my pet? | While the beep/Shock is unpleasant, it is harmless to your pet. Electronic training device requires interaction and training from the owner to achieve desired results. |
| How old does my pet have to be before using Collar? | Pets should be at least 6 months old before using the Collar. |
| Once my pet is trained and do not bark no long, will he have to continue to wear the Collar? | Probably not. You may need to reinforce training with the Collar from time to time. |
| Does the collar beep/ Shock to my pet all the time if he do not stop barking? | No, in the 80 seconds underwear collar work up to 10 times in a row. If the 80-second underwear collar can’t stop the barking, the collar will stop working for 1 minute, and the time will be re-timed after 1 minute. Prevent pets from getting hurt. |
| Is the Collar waterproof? | Can withstand rain, but can not be soaked in water. |
Troubleshooting Guide
| My dog keep barking, the collar seem to does not work | ·Make sure the Collar has been turned on. · The battery( s) may be low in Collar, recharge it. ·Collar’s Contact Points are too loose. Refer to “Collar Fitting” for more information. |
| The Collar will not turn on. | Make sure the Collar has been charged. For the initial charge, be sure to charge it for 4 hours. Subsequent charges only take 2-3 hours. |
| The collar is not holding a charge. | ·When the collar is charging, the screen will display “C”. If not, check the power and charging cables. |
Warranty and repair information
1-Year Limited Lifetime Warranty
The original purchaser for this unit is provided with 1-YEAR WARRANTY. The warranty begins from the date of purchase. For the first year, coverage is for both Parts and Labor on warranty repair services.
Accessories such as straps and batteries are covered for the first year only. After the first year, the Limited Lifetime Warranty covers Parts only and does not cover Labor Fees and Accessories. All shipping fees incurred, the cost of Accessories after the first year, and Labor fees associated with out-of-warranty repair work, are the customer’s responsibility. Labor fees will be variable depending on the extent of the work required. The Limited Lifetime Warranty expires 5 years after a model is discontinued from production.
To Qualify for the Warranty
All products must provided a proof of purchase is required to initiate repair work under warranty. We strongly recommend keeping the original receipt. If a proof of purchase is not available at the time of service, we will estimate the age of unit by the serial number. Serial number estimates can differ from the actual purchase date. Aserial number estimate is the only method of determining an approximate date of purchase without a proof of purchase.
Not Covered Under Warranty
We DO NOT offer warranty for products that have been bought secondhand or as a resold product. We DO NOT replace defective units or provide refunds for products purchased from us after 30 days from the date of purchase. Issues of replacement and refunds on units purchased less than 30 days from an authorized dealer must be addressed to the dealer directly. If the products purchased from an
authorized dealer are after 30 days from the date of purchase, please send the units to us for service and repair. We DO NOT cover the cost of repairs and replacements due to misuse by the owner or dog, improper maintenance, and/or lost units. Any water damage on the Water Resistant remote and the Water Resistant Receiver of our product series will not be covered. All replacement costs for either the remote or receiver will be the owner’s responsibility. The warranty is void if the unit has been altered or an unauthorized person has damaged the unit while attempting repair work.
We reserve the right to retain and discard any parts or accessories that have been found damaged upon replacement and repair.
Procedure for Repair Work
If the unit is malfunctioning, please refer to the “Troubleshooting Guide” in the quick start before sending it back for Service. The cost of shipping products under warranty back is the customer’s responsibility. We are not responsible for units damaged or lost in transition. We are not responsible for loss of training time or inconvenience while the unit is in for repair work. We do not provide loaner units or any form of compensation during the repair period. A copy of the sales receipt showing the purchase date may be required before warranty work is initiated. Please include a brief explanation outlining the problem and include your name, address, city/state/zip code, daytime phone number, evening phone number, and email address.
Compliance FCC-USA
This device complies with part 15 of the FCC Rules. Operation is subjectto the following two conditions:
- This device may not cause harmful interference.
- this device must accept any interference received, including interference that may cause undesired operation.
CAUTION:
Modification or dismantling to this equipment not expressly approved by Manufacture may void the user’s authority to operate the equipment.
Note: This equipment has been tested and found to comply with the limits for a Class B digital device, pursuant to part 15 of the FCC Rules. These limits are designed to provide reasonable protection against harmful interference in a residential installation. This equipment generates uses and can radiate radio frequency energy and, if not installed and used in accordance with the instructions, may cause harmful interference to radio communications. However, there is no guarantee that interference will not occur in a particular installation.lf this equipment does cause harmful interference to radio or television reception, which can be determined by turning the equipment off and on, the user is encouraged to try to correct the interference by one or more of the following measures:
-Reorient or relocate the receiving antenna.
-Increase the separation between the equipment and receiver.
-Connect the equipment into an outlet on a circuit different from that to which the receiver is connected.
-Consult the dealer or an experienced radio/TV technician for help.
![]()
Shenzhen Patpet Technology Co, Ltd
 https://patpet.com/
 Become a dealer: [email protected]
 After-service: [email protected]
 @PatpetDogCollar
 Youtube Video Guide