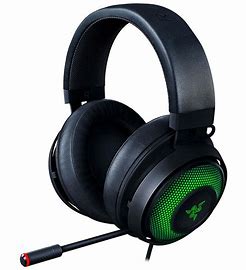

Hear the unfair advantage firsthand and be the last man standing with the
Razer Kraken Ultimate. Armed with THX Spatial Audio, custom-tuned
50mm drivers, and a crystal-clear active noise-canceling mic to provide the
ultimate competitive gaming audio experience
- WHAT’S INSIDE
RAZER KRAKEN ULTIMATE GAMING HEADSET
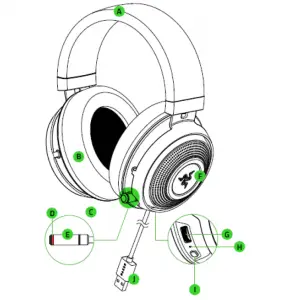
A. Adjustable padded headband
B. Cooling gel-infused ear cushions
C. Retractable mic
D. Mic mute indicator
E. Mic mute button
F. Backlit Razer logo
G. Volume wheel
H. THX Spatial Audio indicator
I. THX Spatial Audio button
J. USB connector
2. WHAT’S NEEDED
PRODUCT REQUIREMENTS
- PC with a free USB port
RAZER SYNAPSE REQUIREMENTS
- Windows®7 64-bit (or higher)
- Internet connection for software installation
3. LET’S GET YOU COVERED
You’ve got a great device in your hands complete with a 2-year limited warranty coverage. Now maximize its potential and score exclusi
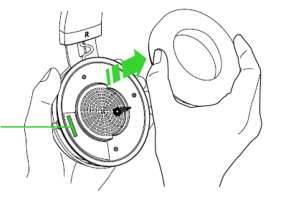
Your product’s serial number
can be found underneath the
ear cushion, as shown here
4. TECHNICAL SPECIFICATIONS
- HEADPHONES
- Frequency response: 20 Hz – 20 kHz
- Impedance: 32 n@ 1 kHz
- Sensitivity (@1 kHz): 109 dB
- Drivers: 50 mm, with Neodymium magnets
- Inner ear cup diameter: 65 x 44 mm
- Connection type: USB Digital
- Cable length: 1.3 m / 4.27 ft.
- Approx. weight: 275 g / 0.60 lbs
- Oval ear cushions: Designed for full-ear coverage with cooling gel, for sound isolation and comfort
MICROPHONE
- Frequency response: 100 Hz – 10 kHz
- Signal-to-noise ratio: > 60 dB
- Sensitivity (@1 kHz): -45 ± 3 dB
- Pick-up pattern: Unidirectional ECM boom
- Mute Function: Click-to-mute
ON-EARCUP CONTROLS
- Volume up and down
- THX Spatial on/off toggle
AUDIO USAGE
- Audio Usage: Devices with USB Connector
- Audio + Microphone Usage: Devices with USB Connector
5. GETTING STARTED
THE MIC
Bend the mic until it’s a few millimeters away from your mouth. Make sure the mic diaphragm is in
front of your mouth and the air vent is on the opposite side.
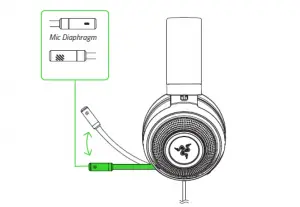
Press the mic mute button to turn the mic on or off.

THE VOLUME WHEEL
Rotate the volume wheel as shown to increase or decrease the volume.

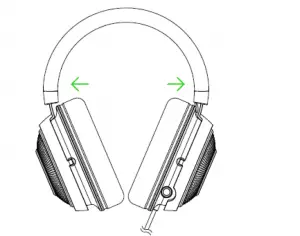
GET COMFY
It’s recommended to gently stretch the headset before placing it over your head to minimize
headband stress however, don’t stretch the headset beyond its Ii mits.
6. INSTALLING RAZER SYNAPSE 3 FOR YOUR RAZER KRAKEN ULTIMATE
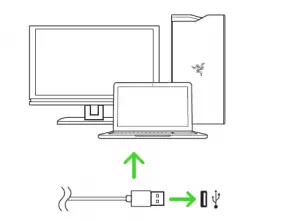
Step 1: Make sure your Razer device is connected to the USB port of your computer.
Step 2: Install Razer Synapse 3 when prompted* or download the installer from
razer.com/synapse.
Step 3: Create your Razer ID or log in using an existing account.
*Applicable for Windows 8 or later.
7. CONFIGURING YOUR RAZER KRAKEN ULTIMATE VIA RAZER SYNAPSE 3
Disclaimer: The features listed here require vou to log in to Razer Svnapse. These features are also
subject to change based on the current software version and your Operating System.
SYNAPSE TAB
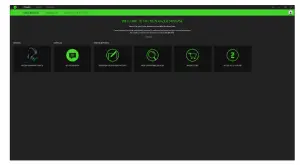
The Synapse tab is your default tab when you first launch Razer Synapse 3. This tab allows you to
navigate the Dashboard subtab.
DASHBOARD
The Dashboard subtab is an overview of your Razer Synapse 3 where you can access all your Razer
devices, modules, and online services.
AUDIO TAB
The Audio tab is the main tab for your Razer Kraken Ultimate. From here, you can customize your device’s settings to unleash its full potential. Changes made under this tab are automatically saved to your system and cloud storage.
SOUND
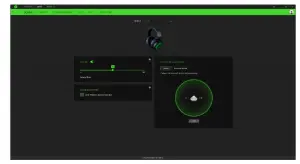
The Sound subtab is for modifying your device’s sound properties.
Profile
Profile is a data storage for keeping all your Razer peripheral’s settings. By default, the profile
name is based on your system’s name. To add, rename, duplicate, or delete a profile, simply press
the Miscellaneous button ( • • • ).
Volume
The volume slider allows you to adjust audio intensity of your device. Clicking the link will launch the Windows Volume Mixer window.
Sound Properties
Clicking the link will launch the Windows sound properties window.
THX Spatial Audio Demo
This feature allows you to test the effect of THX Spatial Audio on your headset.
MIXER
The Mixer subtab allows you to enable/disable the THX Spatial Audio, as well as calibrate the audio positioning.

ENHANCEMENT
The Enhancement subtab is for customizing the incoming audio settings.

FOR GAMERS. BY GAMERS.”‘ 12
Bass Boost
Enhances the low frequency response to improve the bass output of your headset
Sound Normalization
Reduces the loudest audio received to avoid sudden and unpleasant increase in volume from effects such as shouting or explosions.
Voice Clarity
Improves the quality of incoming voice conversations by filtering the sound to improve clarity and adjusts the volume.
EQ
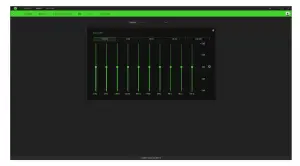
With the EQ subtab, you can alter the frequency response of your audio system.
MIC
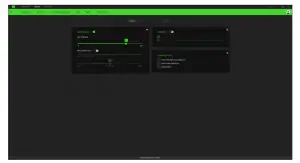
The Mic subtab enables you to change the settings for all outgoing mic audio.
Microphone
Microphone
Allows you to enable/disable the microphone on your headset using the toggle button.
Mic Volume
Adjusts the microphone input or mutes the mic when the function is disabled.
Mic Sensitivity
Changes the microphone’s sensitivity so that it cuts out background noises and isolate your voice.
Sidetone
Enable or disable monitoring the microphone’s raw audio input through the headset with an
additional option to increase or decrease the volume.
Enhancements
Improves the quality of the microphone input by:
- reducing the variation of loudness via Volume Normalization
- decreasing environmental noise through Ambient Noise Reduction
- emphasizing the voice frequency by means of Vocal Clarity
Lighting
The Lighting subtab enables you to modify your Razer device’s light settings.
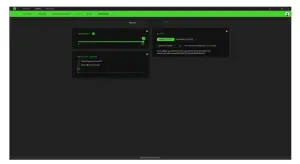
Brightness
You can turn off your Razer device’s lighting by toggling the Brightness option or increase/decrease the luminance using the slider.
Switch Off Lighting
This is a power saving tool which allows you to disable your device’s lighting in response to your system’s display turning off and/or automatically power down when your Razer Kraken Ultimate has been idle for a set amount of time.
Cosptay Mode
Choose an effect that you can enable even if you do not have access to Razer Synapse 3.
Stream-Reactive Lighting
This function allows your headset’s lighting to change dynamically based on integrated actions for different streaming services.
Advanced Effects
The Advanced Effects option allows you to choose a Chroma Effect you want to use on your Razer Chroma-enabled peripheral. To start making your own Chroma Effect, simply press the Chroma Studio button ( •K):• CHROMA STUDIO ). Click here to learn more about the Chroma Studio
Quick Effects
A number of quick effects can be selected and applied to your headset’s lighting, as listed here:
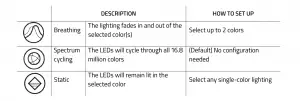
If you have other supported Razer Chroma-enabled devices, you can synchronize their quick effects with your Razer device by clicking the Chroma Sync button ( .. ).
PROFILES TAB
The Profiles tab is a convenient way of managing all your profiles and linking them to your games and applications.
DEVICES
View which Razer device is using a specific profile using the Devices subtab. To create a new profile within the selected device, simply click the add button ( + }.To rename, duplicate, or delete a profile, simply press the Miscellaneous button ( ••• ). Each profile can be set to automatically activate when you run an application using the Link Games option.

LINKED GAMES
The Linked Games subtab gives you the flexibility to add games, view peripherals that are linked to
games, or search for added games. You can also sort games based on alphabetical order, last played, or most played. Added games will still be listed here even if it is not linked to a Razer device.

SETTINGS WINDOW
The Settings window, accessible by clicking the ( -0 } button on Razer Synapse 3, enables you to configure the startup behavior, change language, view your Razer device’s master guide, or perform factory reset on any connected Razer device.
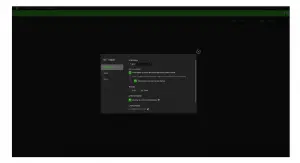
GENERAL
The default tab of the Settings window, The General tab enables you to change the software’s display language and start-up behavior or view the master guide of all connected Razer devices.
RESET
The Reset tab allows you to perform a factory reset on all connected Razer devices with on-board memory. All profiles stored on the selected device’s on-board memory will be erased.
Note: Performing a factory reset on devices without on-board memorv will ontv create a new profile for your device on Razer Synapse 3 using the default settings.
ABOUT
The About tab displays brief software information, its copyright statement, and also provides relevant links for its terms of use. You may also use this tab to check for software updates, or as a quick access to Razer’s social communities.
8. SAFETY AND MAINTENANCE
SAFETY GUIDELINES
In order to achieve maximum safety while using your Razer Kraken Ultimate, we suggest that you adopt the following guidelines:
Should you have trouble operating the device properly and troubleshooting does not work, unplug the device and contact the Razer hotline or go to support.razer.com for assistance.
Do not take apart the device (doing so will void your warranty) and do not attempt to operate it under abnormal current loads. Keep the device away from liquid, humidity or moisture. Operate the device only within the specific
temperature range of 0°( (32 ° F) to 40°( (104 ° F). Should the temperature exceed this range, unplug and/or switch off the device in order to let the temperature stabilize to an optimal level. The device isolates external ambient sounds even at low volumes, resulting in lowered awareness
of your external surroundings. Please remove the device when engaging in any activity that requires active awareness of your surroundings. Listening to excessively loud volume over an extended period of time can damage your hearing. Furthermore, legislation of certain countries permits only a maximum sound level of 86dB for 8 hours a day. We therefore recommend that you reduce the volume to a comfortable level when listening for prolonged periods of time. Please, take good care of your hearing.
MAINTENANCE AND USE
The Razer Kraken Ultimate requires minimum maintenance to keep it in optimum condition. Once a month we recommend you unplug the device and clean it using a soft cloth or cotton swab to
prevent dirt buildup. Do not use soap or harsh cleaning agents.
