Common reasons why keycaps are being replaced are to improve the aesthetics and typing feel of the keyboard, to opt for a more durable kind, or to replace faded or broken ones. To avoid any issues or damages in replacing the keycaps on your keyboard, it is important to follow proper removal and reinstallation procedure.
To replace the keycaps, you need the following:
- Keycap puller
- Flathead screwdriver
Below are the steps on how to replace keycaps on your Razer Keyboard:
For optical keyboards:
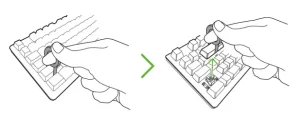
- Gently pull the keycap out from the keyboard using a keycap puller.
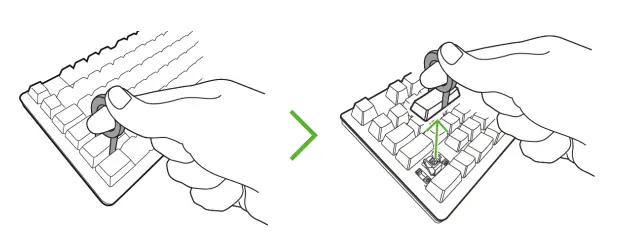
- Install a replacement keycap by firmly pushing the keycap in place on your keyboard.
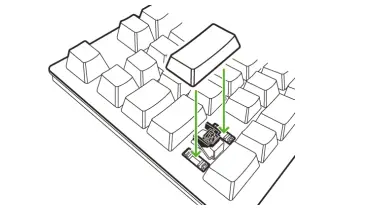
Note: Some larger keycaps, such as the Shift and Enter keys will require stabilizers for a steadier typing experience. Insert the appropriate keyboard stabilizers into the stems located on the backside of the keycaps before pushing it into place.
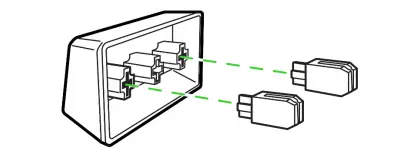
For mechanical keyboards:
- Gently pull the keycap out from the keyboard using a keycap puller.
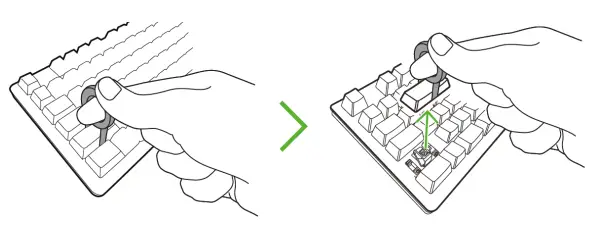
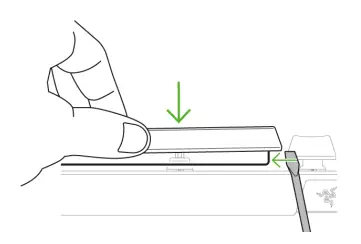
For larger keys of some mechanical keyboard models, use a flathead screwdriver to lift the keycap and nudge any of the curved ends of the attached stabilizer bar outwards.
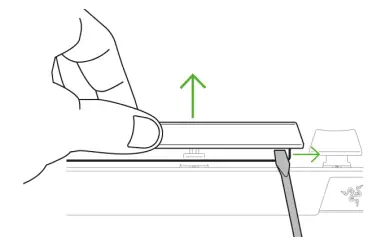
Note: For easier removal and installation, remove the surrounding keycaps.
If you want to replace an existing stabilizer bar, hold its curved ends and pull outwards until they detach from the stabilizers. To attach its replacement, hold and align the stabilizer bar to the keyboard’s stabilizers and push until it snaps into place.
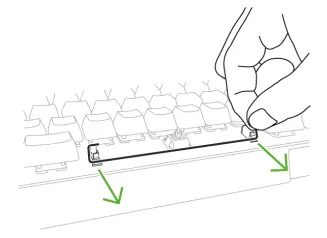
- Insert the appropriate mechanical keyboard stabilizers.
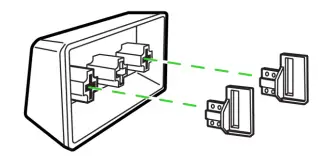
- To install the keycap into the stabilizer bar, insert one end of the bar into the stabilizer and use a flathead screwdriver to nudge and hook the other end into the stabilizer.
- Firmly push the replacement keycap into place.
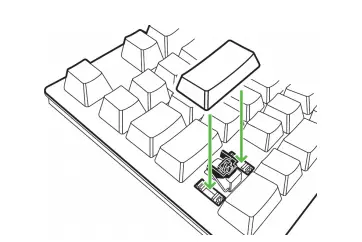
You should now have successfully replaced the keycaps on your Razer keyboard.
