reolink RLN16-410-3T PoE NVR

Technical Support
If you need any technical help, please visit our official support site and contact our support team before returning the products, [email protected]
REOLINK INNOVATION LIMITED
Room B, 4th Floor, Klngway Commercial Building, 171-173 Lockhart Road, Wan Chai, Hong Kong
I REP I Product ldent GmbH
Hof erstasse 9B, 71636 Ludwlgsburg,
Germany [email protected]
@ReolinkTech https://reolink.com
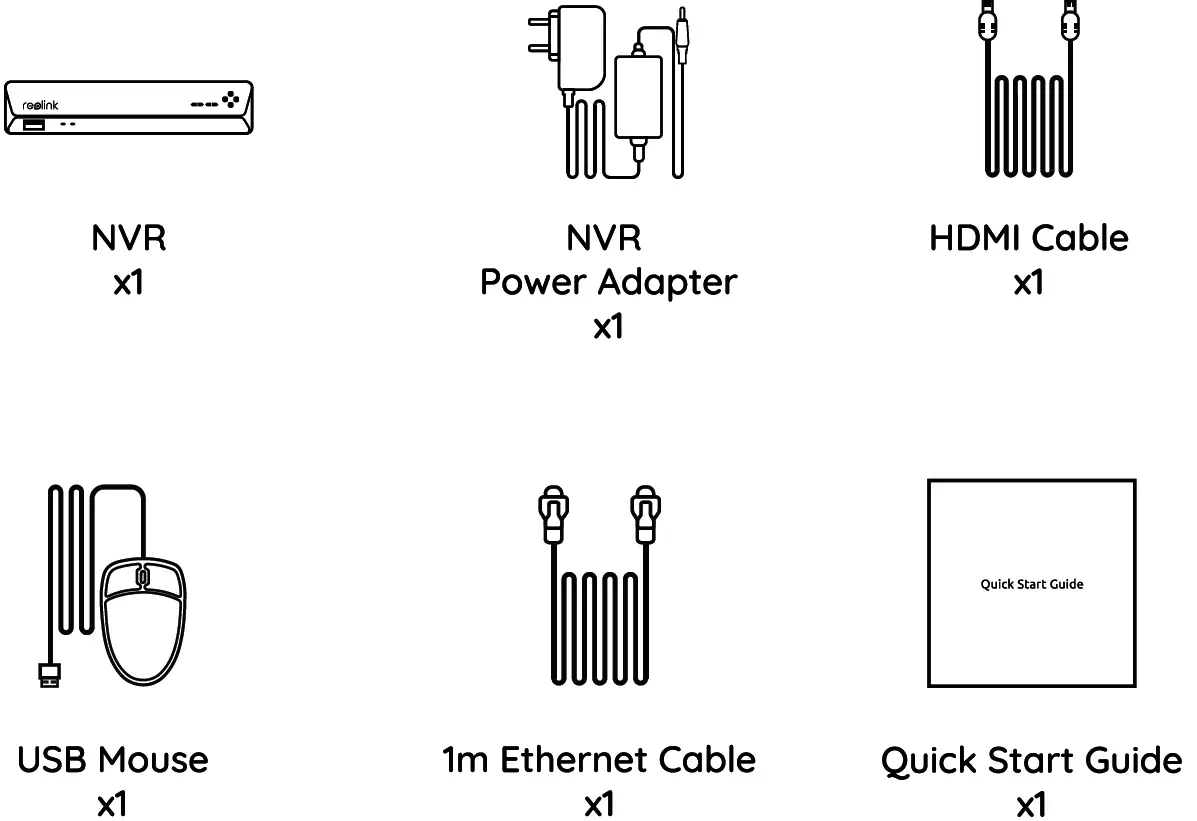
What’s in the Box
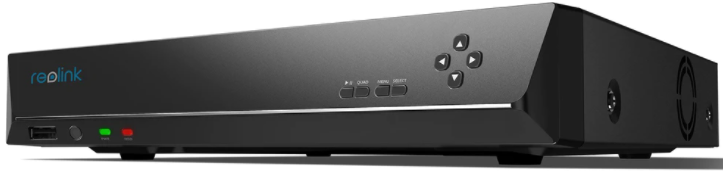
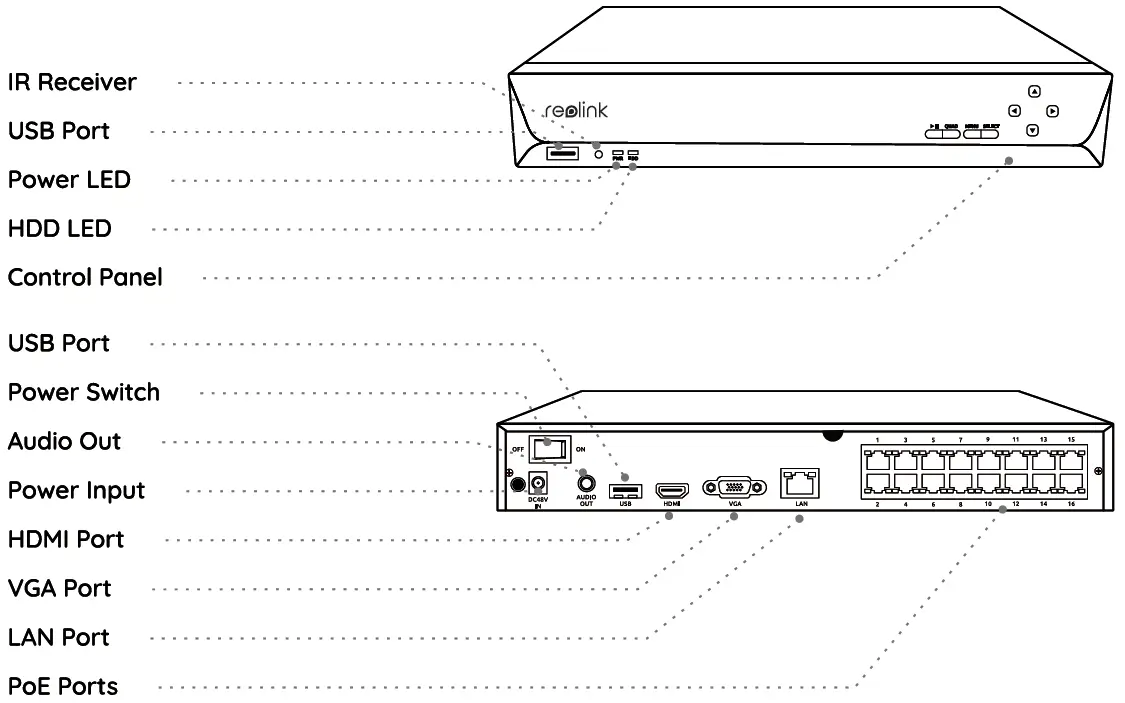
NVR Introduction
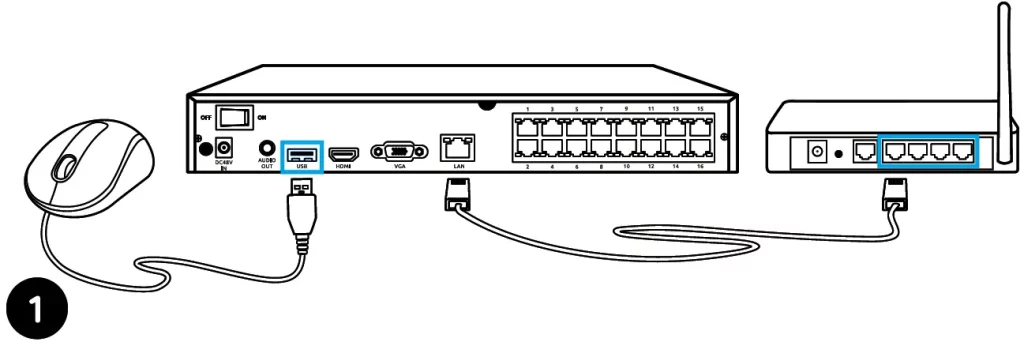
Connection Diagram
Connect the NVR (LAN port) to your router with an Ethernet cable. Next, connect the mouse to the USB port of the NVR.
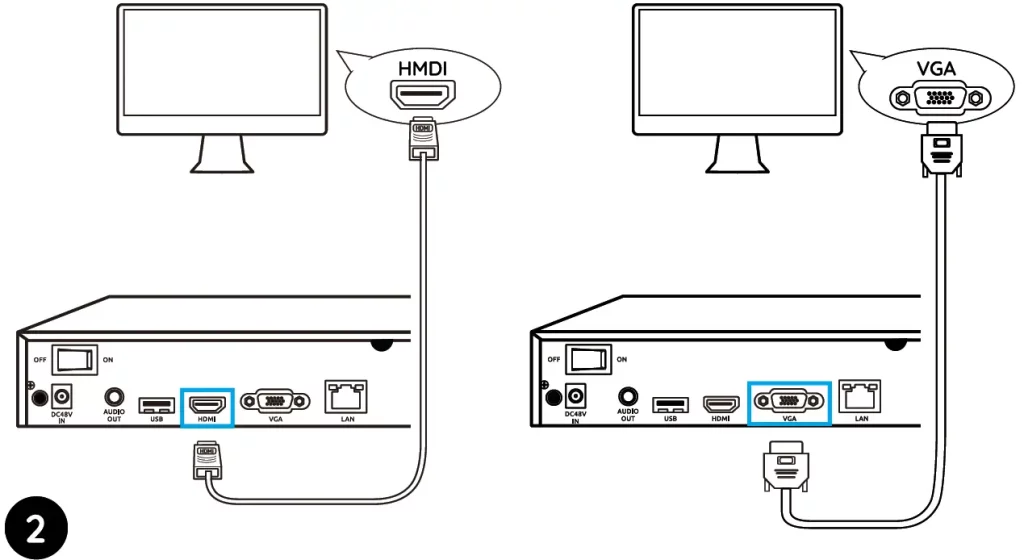
Connect the NVR to the monitor with a VGA or HDMI cable.
NOTE: There is no VGA cable Included In the package.
Connect cameras to PoE ports on the NVR.
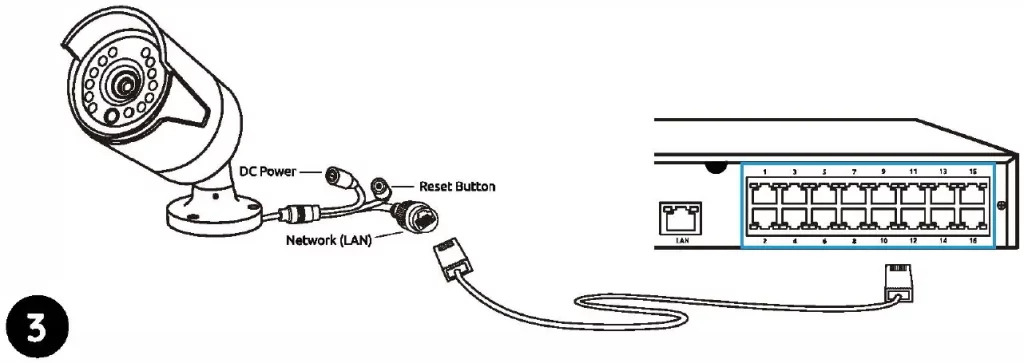
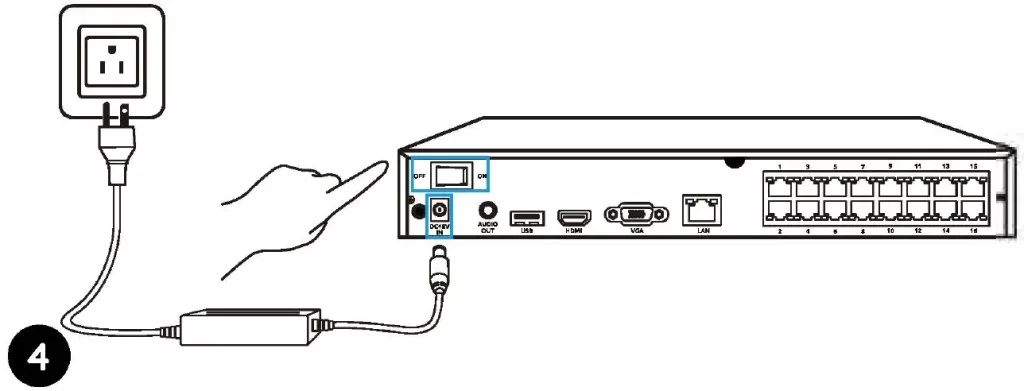
Connect the NVR to a power outlet and turn on power switch.
NOTE: Some Reolink WiFi cameras also work with Reolink PoE NVR. For more information, visit https://support.reolink.com and search Make Reolink WiFi Cameras Work with Reolink PoE-NVRs.
Set up PoE NVR System
A setup wizard will guide you through the NVR system configuration process. Please set a password for your NVR (for the initial access) and follow the wizard to configure the system.
NOTE: The password should be at least 6 characters. It is recommended that you note down the password and keep it in a secure place.
Access the NVR via Smartphone or PC
Download and launch the Reolink App or Client software and follow the instructions to access the NVR.
Download path: Go to https://reolink.com >Support> App & Client
Troubleshooting
No Video Output on the Monitor
If there’s no video output on the monitor from Reolink NVR, please try the following solutions:
- TV/monitor resolution should be at least 720p or above.
- Make sure your NVR is powered on.
- Double check the HDMI/VGA connection, or swap another cable or monitor to test.
If it still doesn’t work. please contact Reolink Support [email protected]
Failed to Access the PoE NVR Locally
If you failed to access the PoE NVR locally via mobile phone or PC, please try the following solutions:
- Connect the NVR (LAN port) to your router with a network cable.
- Swap another Ethernet cable or plug the NVR to other ports on the router.
- Go to Menu -> System -> Maintenance and restore all settings.
If it still doesn’t work, please contact Reolink Support [email protected]
Failed to Access the PoE NVR Remotely
If you failed to access the PoE NVR remotely via mobile phone or PC. please try the following:
- Make sure you can locally access this NVR system.
- Go to NVR Menu -> Network -> Network Advanced and make sure that UID Enable Is selected.
- Please connect your phone or PC under the same network (LAN) of your NVR and see If you can visit any website to verify whether there is Internet access available.
- Please reboot your NVR and home router and try again.
- If It still doesn’t work, please contact Reolink Support [email protected]
Specifications
Video/ Audio Output
HDMI Output: Up to 8MP
VGA Output: Up to 2MP
Audio output: 1CH RCA
Decoding
Decoding Resolution: 12MP/BMP/SMP/4MP/3MP/1080p/720p
Video Format: H.264,H.265
Synchronous Playback: Up to 4 Channels
General
Operating Temperature: -1o·c to 45″C (-10″C to 55″C for RLN16-410)
Size: 260 x 41 x 230mm, (330 x 45 x 285mm for RLN16-410)
Weight: 2.0kg, (3.0kg for RLN16-410)
Notification of Compliance
FCC Compliance Statement
This device complies with Part 15 of FCC Rules. Operation Is subject to the following two conditions: (1) this device may not cause harmful interference, and (2) this device must accept any Interference received, Including Interference that may cause undesired operation. For more information. visit: https://reolink.com/fcc-compliance-notice/.
Simplified EU Declaration of Conformity
Reolink declares that this device is in compliance with the essential requirements and other relevant provisions of Directive 2014/53/EU. )?’.
Correct Disposal of This Product
This marking Indicates that this product cannot be disposed with other household wastes throughout the EU. To prevent possible harm to the environment or human health from uncontrolled waste disposal and promote the sustainable reuse of material resources, please recycle It responsibly. To return your used device, please visit the Return and Collection System or contact the retailer from whom the product was purchased. They can take this product away for environmentally safe recycling.
Limited Warranty
This product comes with a 2-year limited warranty that Is valid only If purchased from Reolink Official Store or a Reolink authorized reseller. Learn more: https://reolrnk.com/warranty-and-return/.
NOTE: We hope that you enjoy your new purchase. But if you are not satisfied with the product and plan to return It, we strongly suggest that you format the Inserted HDD first.
Terms and Privacy
Use of the product is subject to your agreement to the Terms of Service and Privacy Policy at reolink.com. Keep it out of reach of children.
End User License Agreement
By using the Product Software that is embedded on the Reolink product, you agree to the terms of this End User License Agreement (“EULA) between you and Reolink. Learn more: https://reollnk.com/eula/.
![]()