ring Floodlight Cam Wired Pro
User Guide
 WARNING: Risk of electrical shock
Disconnect power at the fuse or circuit breaker before installing.
Verify that the supply voltage is correct. Connect fixture to a 100 VAC~240 VAC 50/60 Hz power source.
Properly ground fixture.
Always follow code standards when installing wired connections.
CAUTION: Risk of fire. Do not install near combustible or flammable surfaces.
NOTICE: Do not connect this light fixture to a dimmer switch or timer.
Your Floodlight Cam must be installed on a 4” round UL listed weatherproof electrical box.
This manual is for informational purposes only.
Working with electricity can be dangerous unless proper safety precautions are taken. If you are not comfortable or are inexperienced with the processes and tools described in this manual, we recommend that you hire a licensed electrician.
Quick Start
- Open the Ring app and select Set Up a Device.
Then follow the in-app instructions. - Scan this code
This identifies your Ring device to make setup fast and easy
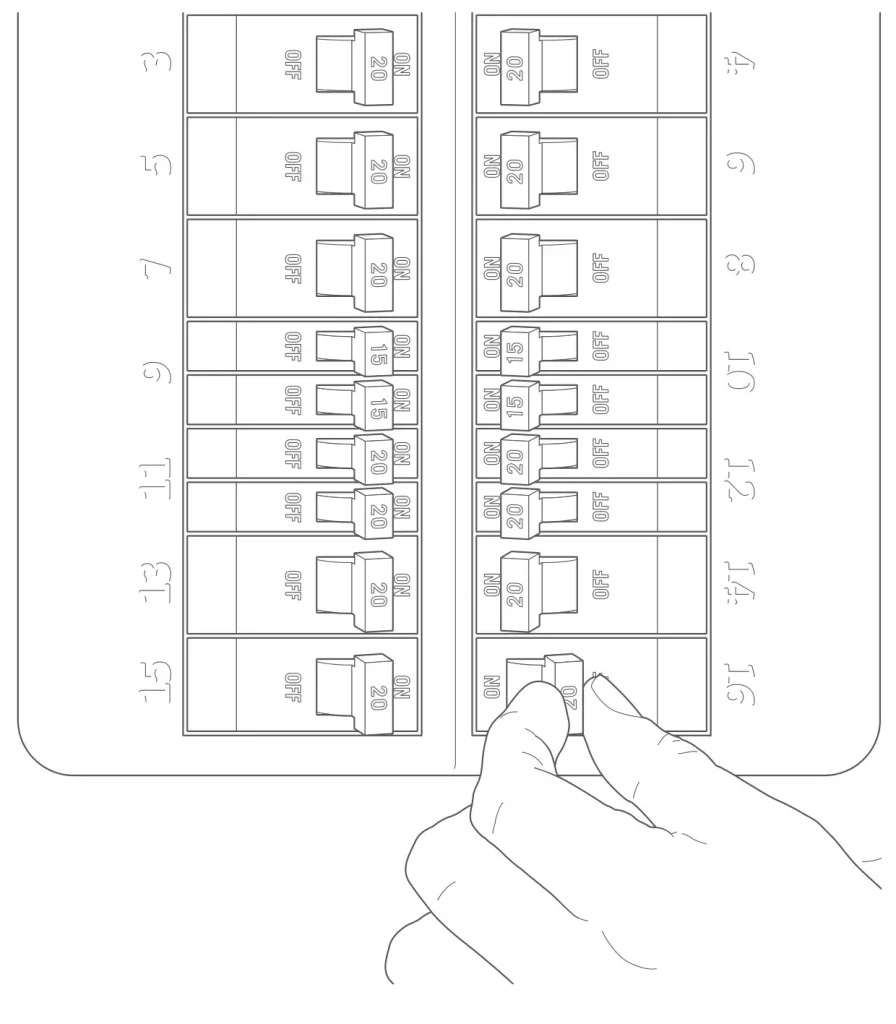
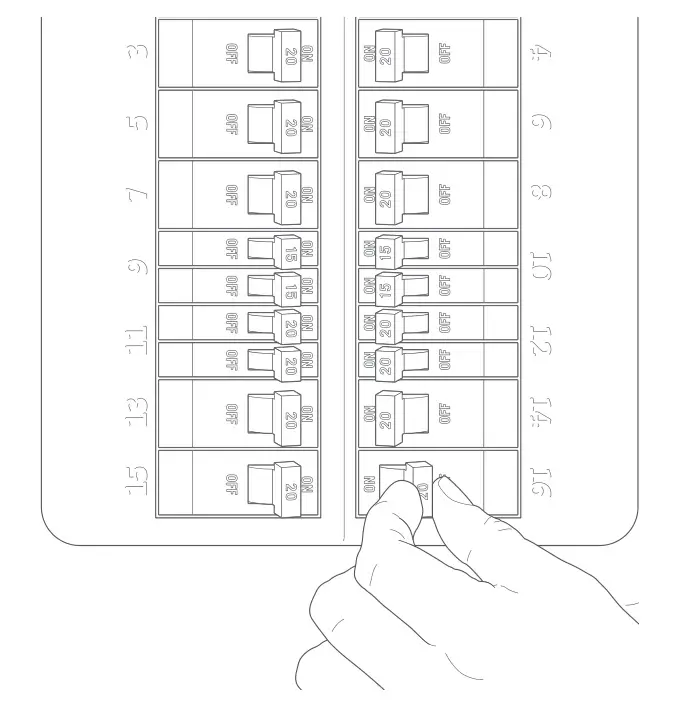
Shut off power at the breaker!
You’ll be working with electrical wires during the install process. If you don’t know where your breaker is or how to turn off power to your floodlight circuit, we recommend you hire a licensed electrician.
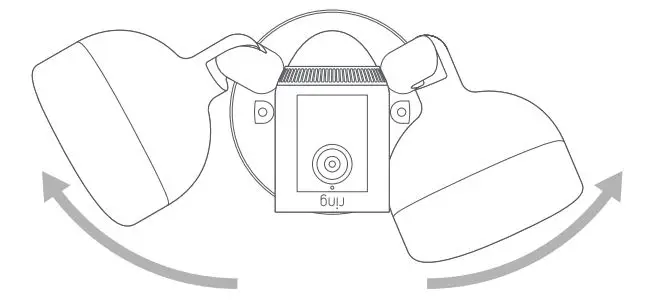
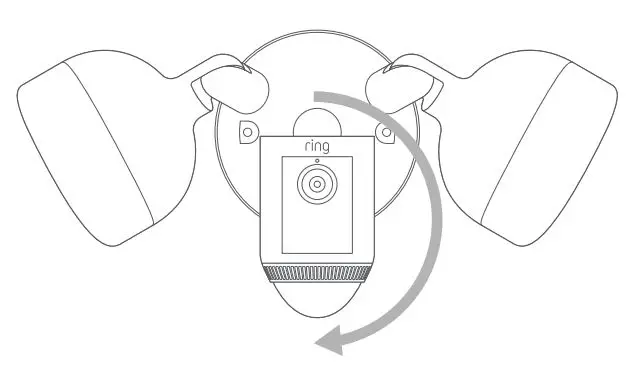
Prep your Floodlight Cam for installation
First, rotate the lights out of the way, like this…

If you’re mounting on an eave or overhang, your camera is already in position.
If you’re mounting to a wall, rotate the camera into position like this…
Remove your existing floodlight.
With power off at the breaker, remove your existing floodlight from the junction box it’s attached to and disconnect the wires.
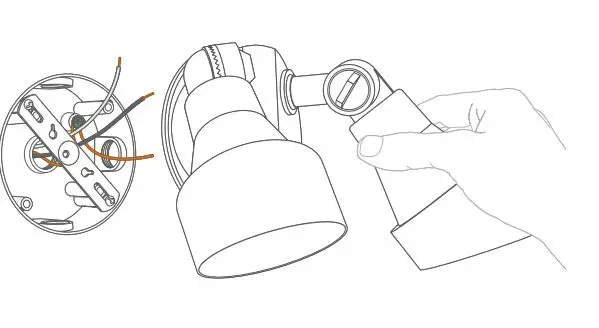
If there is a metal bracket attached to your junction box, remove that as well.
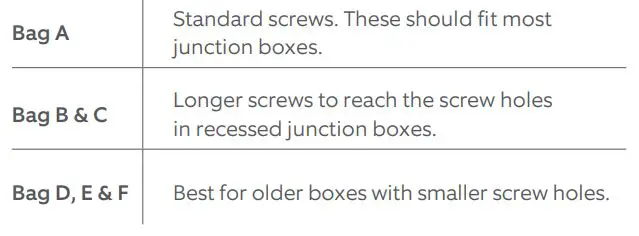
Choose your screws.
Select a set of screws from the bags marked “A” through “F” that fit your junction box to secure the metal mounting bracket. One size does not fit all here, so we sent several. Save a screw from either Bag B or C. You will use it on the next page.
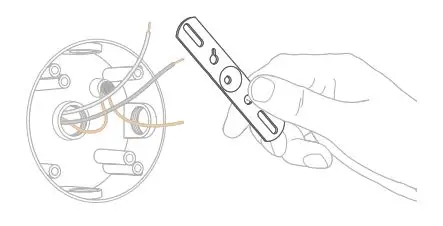
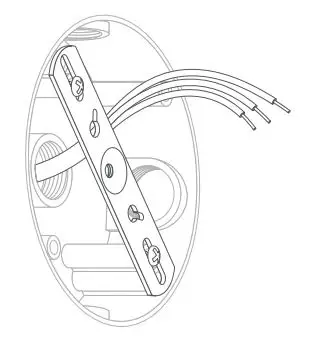
Attach the metal mounting bracket.
With the screws you selected in the previous step, secure the metal mounting bracket to your junction box using either pair of screw holes. Be sure to align the bracket so that the “FRONT” text faces outwards.
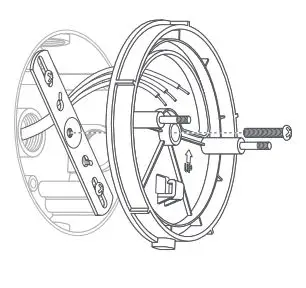
Install the plastic mounting plate.
Pull gently from the opening of the plastic plate to free it from the fixture, then feed your power wires though the opening.
With your power wires fed through the mounting plate, center it over the metal mounting bracket. If you’re installing on a wall, the “UP” arrow should point up.
If you’re installing under an eave, it should point towards the wall.
Then, insert one of the screws from Bag B or C into the center hole, and tighten to secure.
Hang it up.
Locate the nylon strap on the back of your Floodlight Cam light fixture, and loop the buckle at the end over the hook on the mounting plate. Make sure the buckle and hook are secure before releasing the light fixture.
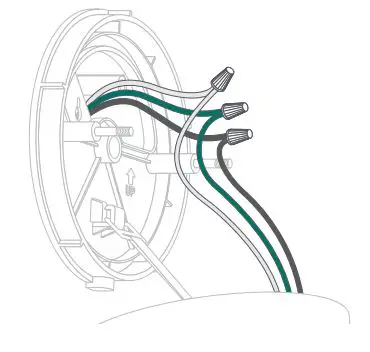
Connect the wires
The green wire on your Floodlight Cam is the ground wire. With power still off at the breaker, use a wire nut from the bag marked “G” to connect the green (or ground) wire from your Floodlight Cam to the green wire coming from your junction box.
The white wire on your Floodlight Cam is a neutral wire. Use another wire nut from the bag marked “G” to connect the white wire from your Floodlight Cam to the white (or neutral) wire coming from your junction box.
The black wire on your Floodlight Cam is a hot wire. Use another wire nut from the bag marked “G” to connect the black wire from your Floodlight Cam to the black (or hot) wire from your junction box.
Give all 3 wire connections and wire nuts a gentle tug to make sure they are secure.
![]() WARNING: If you can’t easily identify the wires coming out of your junction box, or have difficulty with or are uncomfortable connecting them, consult with a licensed electrician.
WARNING: If you can’t easily identify the wires coming out of your junction box, or have difficulty with or are uncomfortable connecting them, consult with a licensed electrician.
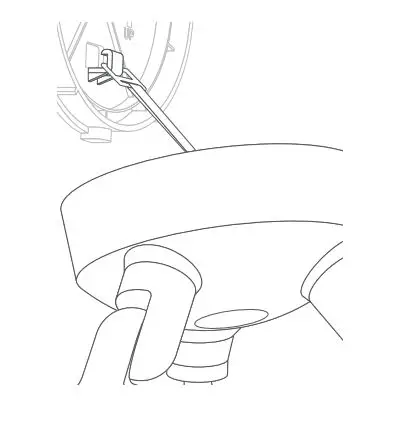
Mount the light fixture.
Tuck the power wires into the junction box, then align the two holes on the light fixture with the threaded posts on the plastic mounting plate. Slide the light fixture onto the posts and push it firmly into place.
Secure your fixture using two of the hex cap nuts from Bag G over the ends of the threaded posts. Remove the reversible bit from the included screwdriver and use the handle to tighten the hex cap nuts.

Restore power at the breaker
Now that your Floodlight Cam is installed, you can turn power back on at the breaker. The lamps on your Floodlight Cam will flash once it’s powered on.
Complete setup in the Ring App.
Once your Floodlight Cam powers on, follow the instructions to continue with setup in the app.
Review, share and download.
Your new device comes with a free 30-day trial of our Ring Protect video recording service.
To continue your subscription and save your videos, please visit ring.com/protect-plans

What is Ring Protect?
Ring Protect is a subscription service that stores videos from your Ring devices.
Why do I want it?
Ring lets you interact with visitors and monitor your property in real time, while Ring Protect allows you review and share those videos anytime.
How much does it cost?
Ring Protect starts at $3 USD/month or $30 USD/year per Ring doorbell or camera.*
How do I sign up?
Simply log into your Ring account at ring.com/protect-plans, and follow the on-screen instructions.
*$5 CAD per month or $50 CAD per year
![]()
For additional help, visit ring.com/help
Or give us a call
US 1 800 656 1918
Canada 1 855 300 7289
Worldwide +1 310 929 7085
For a list of all our customer support numbers, visit ring.com/callus
For information on our warranty, theft protection, and Ring Protect Plans, visit ring.com/legal
© 2021 Ring LLC or its affiliates.
Ring and all related marks are trademarks of Ring LLC or its affiliates.