User Manual
![]()

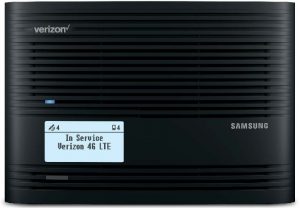
Samsung 4G LTE Network Extender 2
Verizon Wireless 4G LTE Network Extender
Thank you for purchasing a Network Extender to provide enhanced coverage for your Verizon Wireless mobile devices. Use this guide to help you set up your Network Extender, learn how to connect to it, and verify that you are under Network Extender coverage.
Get to Know Your Device

In the box

Setting Up Your Network Extender
1. Review these 4G LTE Network Extender Requirements
- Internet Access: High speed wired broadband with minimum download speed of 10 Mbps and upload speed of 5 Mbps, 20 Mbps down and 10 Mbps up or higher is recommended.
NOTE: Home satellite broadband access is not supported. - A Router/Modem: The Network Extender must be connected to an available LAN port on a router or modem with always-on internet access.
- GPS signal: The Network Extender requires a continuous GPS signal from the provided GPS antenna.
2. Position Your Network Extender
Consider these factors when choosing a location for your Network Extender:
- For best results, place your Network Extender near a window where a strong GPS signal can be acquired. You can use the enclosed extension cable, if needed, to position the antenna near a window. See the Troubleshooting section of this guide for instructions.
NOTE: A GPS signal is necessary for the Network Extender to work properly and to provide your location if you dial 911 in an emergency. - Place your Network Extender at least 10 feet away from products that generate electromagnetic radiation (e.g., a microwave oven).
- Your Network Extender needs to be plugged into a wall outlet.
- The 4G LTE Network Extender can be placed on a flat surface, such as a table or shelf, or mounted to the wall or ceiling.
NOTE: Optional wall mount and ceiling mount brackets sold separately on verizonwireless.com.
3. Connect Your 4G LTE Network Extender
- Plug one end of the provided Ethernet cable into an available LAN port on your router and the other end to the LAN port on your Network Extender.
- Plug the power supply connector into the 12V DC power port located at the rear of the Network Extender.
- Insert one end of the power cord into the power supply and then plug the other end into an available outlet.

4. The Network Extender will turn on automatically. When it does, startup and self-configuration will begin. This will typically take 30 – 60 minutes depending on GPS signal conditions. During that time, the Power/Status indicator will blink blue.
NOTE: If an error message appears on the LCD display, or if Startup takes longer than an hour, please refer to the Startup Troubleshooting table in this guide.
After successful startup, the indicator will return to solid blue and the display will show “In Service”. Press the display button to see additional information about your Network Extender.

Making Calls Using Your 4G LTE Network Extender
Once the Network Extender is in service, your phone must be within 50 feet, horizontally, of the unit.
To verify your Verizon Wireless phone is connected to the Network Extender:
- Make sure your phone has Advanced Calling or HD Voice activated.
- Dial #48 from your mobile phone and listen for the following confirmation: “You are under 4G LTE Network Extender coverage …”
- Some phones may show a home icon

NOTE: The range of the Network Extender is dependent on the strength of the existing Verizon Wireless network coverage. The use of this unit is recommended for areas where 1 bar or less is observed on your phone.
Startup Sequence with Troubleshooting Tips


NOTE: For more information on all display messages during startup, please refer to the Troubleshooting section of the User Guide.
Other Messages and Troubleshooting Tips

GPS Troubleshooting
If your display still shows “Searching for GPS” after one hour, or you get a GPS error message
- Make sure that your Network Extender is at least 10 feet away from any communication devices or appliances that generate electromagnetic radiation (e.g., Wi-Fi routers or microwave ovens).
- If you have another Network Extender, make sure their GPS antennas are at least 150mm apart.
- Make sure your Network Extender is close to a window. If necessary, use the included 23’ GPS extension cable to position the GPS antenna as close to a window as possible. Follow the steps below to attach the GPS extension cable:
a. Firmly slide the GPS antenna cover off, as shown, to expose the rectangular GPS antenna.
b. Disconnect the GPS antenna. Connect one end of the extension cable to the antenna and connect the other end to the Network Extender where the antenna was originally connected.
c. Replace the cover, being careful to position the cable through the notch provided. Then extend the cable, with the antenna on the end and place the antenna close to a window.
NOTE: If it has taken more than two hours to acquire a GPS signal, please check the GPS signal strength on the Admin website. If the signal is weak, please see the user guide for additional troubleshooting steps.

If your display still shows ‘Connecting to the Verizon Network’ after one hour
You may have to change the settings on your router. Please refer to the Troubleshooting section of the User Guide before calling Verizon customer support.
You can download the user guide from verizonwireless.com.
For more information, go to verizonwireless.com/support/network-extender-router-configuration/.
To contact Verizon Customer Service, call 800-922-0204.
Network Extender Coverage and Capacity
Once your Network Extender is successfully set up, the coverage and capacity will be as follows:
- Coverage: Approximately 7,500 square feet (about a 50-foot radius)*
- Capacity: Up to fourteen active users + one channel reserved for E911 calls
* Coverage radius may vary based on the floor plan and RF absorption of the materials in the building.
Accessing Your Network Extender’s Admin Website
You can manage your Network Extender’s settings from its Admin website:
- Open a web browser, using a computer connected to the same network (LAN) as the Network Extender.
- Enter “http://” followed by the Network Extender’s IP address (e.g., http://192.168.0.10).
NOTE: You will find the Network Extender’s IP address on the display. Use the Display button to navigate to it. - Sign in using the default admin password: LTEFemto + last 4 digits of the MAC ID (e.g., LTEFemto00A3).
NOTE: The password is case sensitive. Letters in the last four digits of the MAC ID should be UPPER case. The MAC ID can be found on the label on the bottom of the Network Extender.