SAMSUNG Automatic Ice Maker Instructions
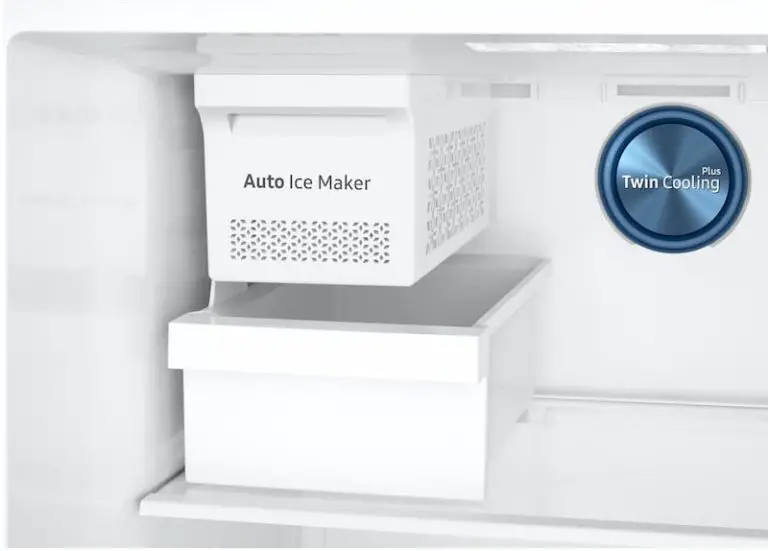
Automatic Ice Maker does not work
- Allow your refrigerator to operate and cool down for 24 hours (1 full day) before the ice maker starts producing ice.

- To fill the ice bucket to maximum capacity dispense a few cubes 8 and 16 hours after installation.
- If ICE OFF is lit, the ice maker will not make ice.

- To activate the ice maker, press the ICE OFF button on control panel so it is no longer gelit. (applicable models only).
Slow Ice cube freezing
- Check it the bucket is completely inserted. (on some)
- Freezer temp may not be enough; set it to -2ºF(-19ºC) or lower.
Small or bubbled ice cubes or Slow water dispensing
- If the water filter is clogged, small or bubbled ice cubes may be produced.
- Replace the water filter cartridge with a new one.
Water filter replacement
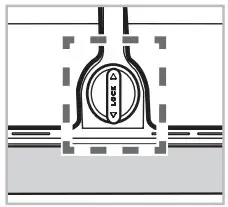
- Slowly turn the water filter 90° clockwise so it is aligned with the printing mark on the cover locking the filter in position.
Make sure to align the water filter label mark with center of cover filter printing as illustrated.
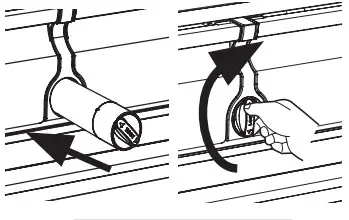
- if you are in trouble of inserting the water filter as high pressure of water shut off the water supply valve. For details, refer to “Changing the water filter” section of the User Manual.
After installation or when replacing the water filter, dispense at least 1 gallon 2~3minutes) of water to remove trapped air from the water line. Otherwise, water may drip after dispensing water. (On some models)
Water is not cool enough (On some models)
- The first glass of water may not be cold enough because the stored water in the water valve has not cooled completely. Dispense several glasses of water and then it would be cool.
Water dispenser dripping (On some models)
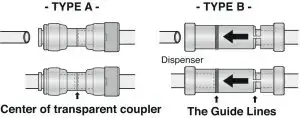
- If the water line is not inserted into the coupler properly., air could penetrate into the water line causing water dripping from the water dispenser.
- CAUTION : Insert the water line into the coupler completely and slide in the clip at the end of the coupler.
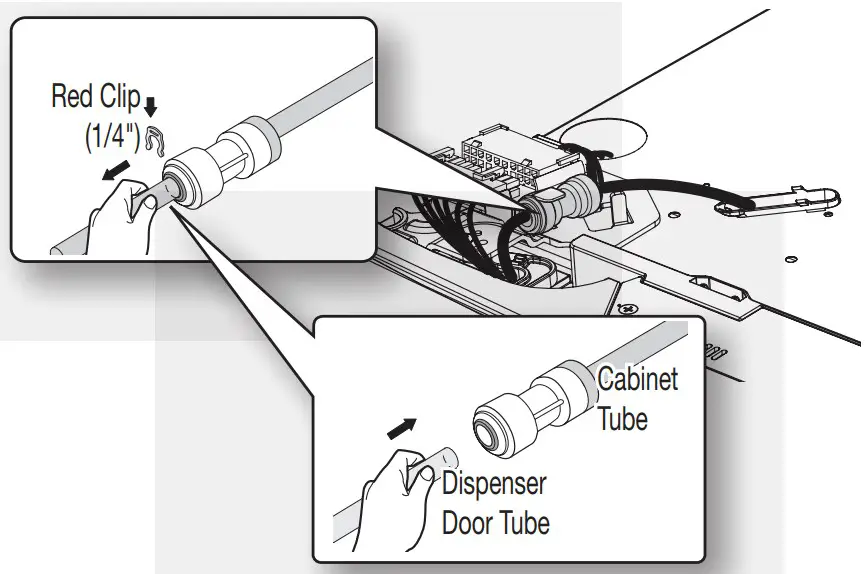
- The Water Line must be fully Inserted to the center of transparent coupler to prevent water leakage from the dispenser.
- Insert the clip in the install pack and check that it holds the line firmly.
Fridge or freezer Compartments are warm
- Allow your refrigerator to operate and cool down for 24 hours (1 full day) to reach to the set temperature.
- Also,when you put room temperature or warmer food into your refrigerator, it may need an additional 24 hours for the fridge to reach the set temperature.
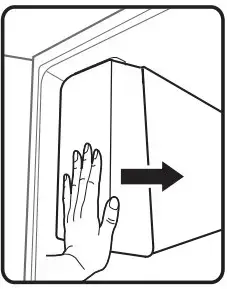
Moisture forms on outside/inside of refrigerator
- Wipe o the condensation with a dry towel (This may occur during hot and humid seasons.)
- If the condensation occurs on the doors, turn off the Energy Saving function.
- If you open the doors frequently or for too long, it may cause moisture inside the fridge.
Noise Clicks, Pops, Cracks, Snaps
- These noises may be heard occasionally inside the refrigerator. This is normal. This sound occurs when various items contract or expand while temperatures are changing; especially during defrosting. This may also occur when electronic devices including the ice maker are operating
Display (applicable models only)
The display may differ depending on models
For details, refer to the user manual “Using the control panel”
- Recommendaded Tem Setting: 0°F (-18°C) for freezer and 37°F (3°C) for refrigerator.
- Filter Indicator: The filter indicator will be Red If you use water about 300 galons (6month) Reset the indicator (it will be Blue) after replacing the filter by holding the “Ice Type/Water/Hold 3 sec for Filter Reset” button for 3seconds.
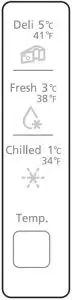
Cool Select Pantry (On some models)
- You can select your Pantry temperature from among the following.
Wine Party Dishes (38°F[3°C])
Fresh (38°F[3°C])
Chilled (34°F[1°C])
Deli (41°F[5°C])
Food stored in refrigerator is frozen
- If food with too much moisture is stored near the cooling vents, it may get frozen. Be sure to keep moist food away from the cooling vents.
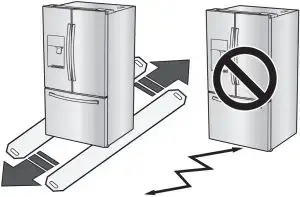
Moving and Installing
- When installing, servicing or cleaning behind the refrigerator, be sure of the following:
- To Protect your floor’s finish when moving the refrigerator, cut a large section of the cardboard carton and place under the refrigerator where you are working.
- Pull the unit straight out and push back in straight after finishing.
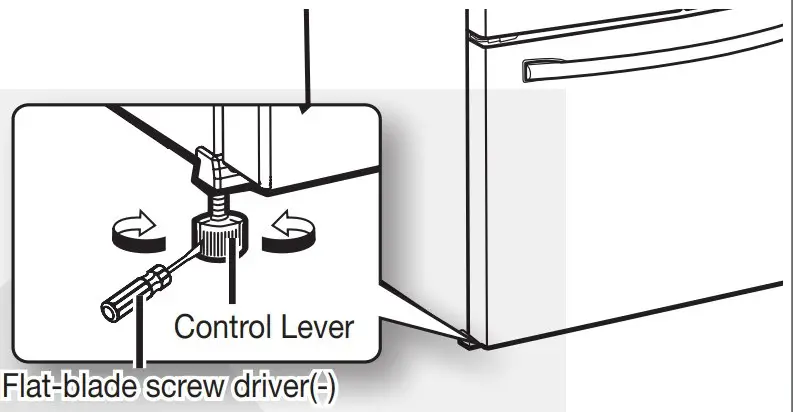
Leveling and Door Alignment
- Insert a flat-blade screwdriver into a slot on the control lever, turn it clockwise or counter-clock – wise to level the door.
- Pull out the freezer drawer 1, then you can see the lower hinge 2.
- Insert a philips screwdriver (+) 3 into the shaft 4 of the lower hinge.
- Adjust the height by turning a philips screwdriver (+) 3 clockwise (
 ) or counterclockwise (
 ).
). - For details,refer to the user manual “Adjusting the level”
DA99-04014A-06

Before calling service
If you have further questions or damaged accessory parts, contact us at 1-800-SAMSUNG (726-7864)