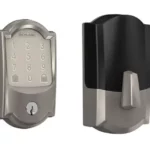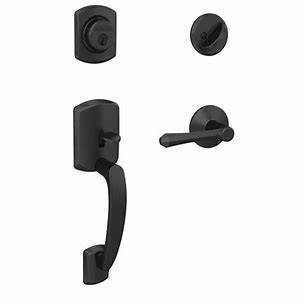
Model FC60, Handleset

a. Cylinder
b. Cylinder ring
c. Keys (2)
d. Bolt
e. Bolt strike
f. Reinforcement strike
g. Reinforcement screws
h. Thumbturn
i. Thumbturn screws
j. Handle
k. Latch
l. Latch strike
m. Latch/Bolt/Strike screws (8)
n. Chassis
o. Chassis screws
p. Trim
q. Knob/Lever
r. Washer
s. Handle bolt
t. Bolt cover
u. Drive-in faceplate
v. Hex wrench (Do not discard!)
1. Check door dimensions.
1a If dimensions do not match, you may need to modify your door.

* May vary from 8 1/4″ (210 mm) to 9 3/4″ (248 mm) for existing hole.
1b Check latch and bolt length.
Measure the backset as shown.
- 2 3/8″ (60 mm): no adjustment is necessary.
- 2 3/4″ (70 mm): see the Adjust latch and bolt section.
2. Install the latch and bolt.
2a Choose the faceplate.

2b Secure with screws.

or 2b Use wood block and hammer.

3. Install the strikes onto the door frame.
Use included strikes for best performance.

4. Install the handle into the bottom hole.


Push firmly! Then hold in place.
5. Install the interior chassis.
5a Chassis is spring-loaded. Push against door and hold in place.

5b Secure with two (2) screws. Make sure chassis is straight!

6. Install the handle bolt.

7. Install the interior trim.

8. Install the interior knob/lever.
8a Push knob/lever firmly into place.

8b Then tighten set screw.

9. Install the cylinder and ring into the top hole.

10. Install the thumbturn.
10a Align slot in thumbturn with tailpiece.

10b Secure with screws.

Change levers
1. Loosen set screw, but do not remove.

2. Pull lever off.

3. Reinstall appropriately. Then tighten set screw.
Adjust latch and bolt
For 2 3/4″ backset, rotate and pull latch/bolt out to long setting.

Change faceplate