Square Stand User Guide
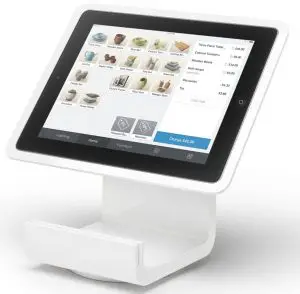
SET UP SQUARE STAND
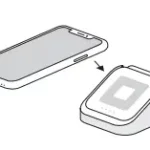
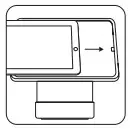
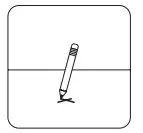
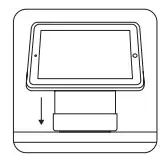
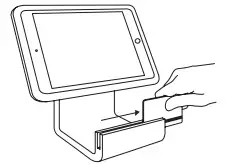
- Pull out the security pin on the left side of Square Stand. Place your iPad into Square Stand and connect your iPad to the Lightning connector.
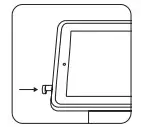
- Push the security pin into the headset jack of your iPad to secure it to Square Stand.
- Connect the hardware hub. It has two cables: one that connects to the bottom of Square Stand and one that connects to the power adapter.
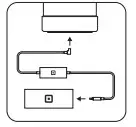
- Plug in the power adapter cable. One end goes into the power adapter, and the other end goes into a power outlet.
- Download the latest version of the Square app from the App Store. Create or log in to your Square account, follow the onscreen instructions, and you’re ready to start selling!
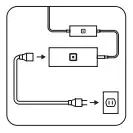
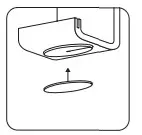
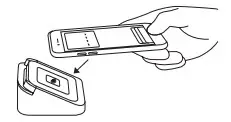
- Optional: If you have a Square Reader and Dock, remove the retainer clip from the the top of Dock. Slide Square Reader into the Dock’s micro USB connector. Replace the retainer clip.
- Plug the Dock’s USB cable into the hardware hub to start taking contactless and chip payments. If you don’t have a Dock, just plug Square Reader into the hardware hub or connect it to your iPad via Bluetooth.

SECURE SQUARE STAND TO YOUR COUNTER (OPTIONAL)
For extra security, you can mount Square Stand to your counter by using one of the following methods.
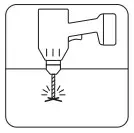
Option 1: Drill mount (recommended)
You need a drill and the following items from the included toolkit: drill bit, thumbscrew, and thumb nut.
- Mark the spot on your counter where you want to secure Square Stand. Note: Maximum counter thickness is 1.75 inches (45 mm).
- Use the included drill bit to make a hole in your counter.
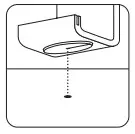
- Line up the hole in the base of Square Stand with the hole in the counter.
Option 2: Adhesive mount
You need the included adhesive plate. - With the thumb nut on the thumbscrew, carefully insert the screw and tighten from the bottom until the thumb nut is flush against your counter.
- Using a damp cloth, clean the area where you want to secure Square Stand. Wait for the surface to dry completely.
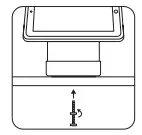
- Screw the adhesive plate into the base of the stand.
- With the base of Square Stand in the locked position, remove the paper backing from the adhesive plate. Note: The plate is extremely adhesive and difficult to remove once placed.
- Adhere the stand to your counter in the desired position and press down firmly for 30 seconds. Wait 30 minutes for the adhesive to set.
CONNECT MORE HARDWARE
The included USB hardware hub makes it easy to connect a cash drawer, receipt printer, and bar code scanner to Square Stand.
Cash drawer
- Plug your supported USB cash drawer into one of the hardware hub’s ports.
- When you accept a cash payment, tap Tender in the Square app and your cash drawer will open automatically.
Printer
- Plug your supported USB receipt or order printer into one of the hardware hub’s ports. Make sure the printer is on.
- To customize printer settings in the Square app, tap

 Settings Printers.
 - Select an available printer to view its settings, toggle whether it should print receipts or orders, and print a test receipt.
Bar code scanner

- Plug your supported USB bar code scanner into one of the hardware hub’s ports.
- From the Square app item library, tap Edit > + to create a new item.
- Scan the item’s bar code and add relevant details.
- After your item library is updated, simply scan an item’s bar code to ring it up for sale.
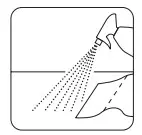
HOW TO TAKE A PAYMENT
Swipe cards with the magstripe reader built into Square Stand. To accept contactless payments and chip cards, you’ll need the optional Square Reader and Dock
Swipe
In the Square app, tap Charge. Run your customer’s magnetic-stripe card through the magstripe reader on Square Stand.
Tap
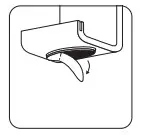
Dip
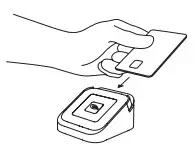
In the Square app, tap Charge and wait for a single green light to appear on Square Reader. Your customer can then hold a contactless device or card near the reader to trigger payment.
HELP AND SUPPORT
Read our FAQs, learn more about compatible hardware, and get troubleshooting support at square.com/hardware-setup.
HARDWARE PROTECTION
If something goes wrong with your Square hardware, you’re covered for up to one year. Simply go to square.com/returns so we can make things right.
FREE 30-DAY RETURNS
Square guarantees a 30-day, risk-free return policy for all purchases made from square.com/shop in the U.S. After a return is complete, a refund will be credited back to you.