This RangeXTD WiFi Range Extender Manual is a guide for people who want to extend their wireless network. It outlines the steps needed to install and configure your new range extender, as well as troubleshooting tips should you run into any problems.
Sections in this Manual
Introduction
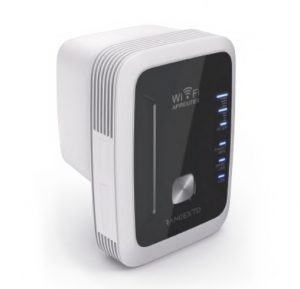
RangeXTD can be used for providing WiFi service in big areas for home and commercial use. It can take an existing 802.11n wireless signal of your wireless router to repeat and extend its range. RangeXTD supports 2.4G wireless network connection, and it can support 2.4G transmission speeds of up to 300Mbps. It has 2X built-in antennas and provides excellent wireless performance, transmission rates and stability technology that automatically avoids channel conflicts using its channel selection feature.
Package Contents
- 1 x RangeXTD Wi-Fi AP/Router (the Device)
- 1 x EU plug
- 1 x US Plug
- 1 x Quick Installation Guide
- 1 x RJ45 Cable
Hardware Overview
Default Parameters
- URL: 192.168.7.234
- Login Password: admin
- Wi-Fi SSID: RangeXTD
- Wi-Fi Key: no
- C) Power On/Off
- FPS Button
- Mode Selector
- Reset Button
- WAN/LAN Port
- LAN Port
- 3 x Wi-Fi Single
- Power/WPS LED
- WAN/LAN LED
- LAN LED
Led Indicators
POWER/WPS | ON: The Device is power on
OFF: The Device is not receiving electrical power. Slow Flashing: The Device WPS Waiting Client connection Fast Flashing: The Device Connecting to your AP/Router |
LAN
WAN/LAN |
ON: The Ethernet port is connected.
OFF: The Ethernet port is disconnected. Flashing: Data Transferring |
Wi-fi Signal
Mode | ![]() |
![]() |
![]() |
Description |
AP/Router | ON | ON | ON | Wi-Fi Single output power 100% |
Repeater | ON | ON | ON | Excellent reception signal strength 50% to 100% |
ON | ON | OFF | Weak reception | |
ON | ON | OFF | signal strength below 25% | |
Flashing | OFF | OFF | Disconnected |
Getting Started
Setting Up A Wireless Infrastructure Network
For a typical wireless setup at home (as shown below), please do the following:
The device is connected to a wired network then transforms the wired Internet access into wireless so that multiple devices can share the Internet.
This mode is fit for offices, homes and places where only a wired network is available.
The Device copies and reinforces the existing wireless signal to extend the coverage of the signal. This mode is especially useful for a large space to eliminate signal-blind corners. This mode is fit for a large house, office, warehouse or other spaces where the existing signal is weak.
The device is connected to a DSL or cable modem and works as a regular wireless router. This mode is fit for an environment where Internet access from DSL or cable modem is available for one user but more users need to share the Internet.
Configure The Wi-fi Repeater Mode
This is the easiest way to configure the device. First, check whether your wireless router supports WPS. For further details, please read the operating instructions for your wireless router.
Tips: If you want to keep the stable connection between your router and our repeater at REPEATER mode, Please install our Repeater at a suitable position.
You can check the suitable position as the followings:
Check the signal indicator on the repeater, if the LED is below 2 levels, please find new place.
OR You can check the Wi-Fi signal on your smartphone, if the signal is below 2 levels, we suggest to change the location of our repeater
- The mode selector must be set to the “Repeater” position for Repeater Mode.
- Plug the Device into a wall socket.
- Press the WPS button on the Device.
The WPS LED fast flashing for approx. 2 minutes. - Within these 2 minutes, please Press the WPS button of your Wireless Router.
directly for 2 – 3 seconds. (For further details, please read the operating instructions for your wireless router).
The Device then automatically connect to your wireless router and copies wireless key of the settings. The device Wi-Fi Password same your AP/Router. After the reboot has been completed, please go to your device WLAN setting, connect to new SSID.
You can configure the Wi-Fi Repeater Mode by connecting it with your computer/laptop with enclosed RJ45 cable or wirelessly.
A1. The mode selector must be set to the “Repeater” position for Repeater Mode. Plug the device into a wall socket.
A2. Click on the network icon (
A3. Open web browser and type 192.168.7.234 in the browser address box. This number is the default IP address for this device.
Resetting The Rangextd Repeater
Please check whether the Device accord with factory default setting once you can’t entered 192.168.7.234. Press and hold the Reset button for 10 seconds or until the indicator turns off. After you reset your RANGEXTD Repeater, unplug the RANGEXTD Repeater for 10 seconds. Plug it back in and wait about 30 seconds, then check your WiFi network for the network called ‘RANGEXTD’ on your computer or mobile device.
A4. The login screen below will appear. Enter the Password then click “Login” to login. The default Password is “admin”.
A5. After logging in, you will see the web page below, click on the “Router/ Repeater/AP”.
A6. From the list, select a Wi-Fi SSID. After having selected a Wi-Fi SSID, you must then specify the password of your wireless router.
Completing the entry, click on the “Apply” button.
After the reboot has been completed, please go to your device WLAN setting, connect to new Wi-Fi SSID.
B. Configure the Wi-Fi Repeater Mode with RJ45 Cable.
- Plug the Device into a wall socket. Connect your computer/laptop with the Device with RJ45 Cable.
- Follow process A3 to A6 to configure the Device.
Configure The Wi-fi Ap Mode
Use the AP Mode to obtain a “wireless access point”. The wireless end devices will connect to the Device in this mode. You can also use this mode, for example, to make a formerly non-wireless-enabled router wireless-enabled.
- The mode selector must be set to the “Access Point” position for AP Mode.
- Plug the Device into a wall socket.
- Follow process A2 to A5.
The following message will be displayed on your web browser:
SSID | Wireless SSID of the Device |
Security type | Setup the wireless security and encryption to prevent from unauthorized access and monitoring. Supports WPA, WPA2, WPNWPA2 encryption methods. |
Security key | The “Wi-Fi Password” of the Device |
Click on ‘Apply’ button, The device will restart.
After the reboot has been completed, please go to your device WLAN setting, connect to new Wi-Fi SSID.
Configure The Wi-fi Router Mode
The device is connected to a DSL or cable modem and works as a regular wireless router.
Internet access from DSL or cable modem is available for one user but more users need to share the Internet.
- The mode selector must be set to the “Route” position for Router Mode.
- Plug the Device into a wall socket
- Connect your DSL Modem with the Device with RJ45 Cable.
- Follow process A3 to AS.
- Click on the Router button
Choose Your Wan Connection Type.
If PPPoE (ADSL Dial-up) is selected, please enter the Account and Password from your ISP, These fields are case-sensitive.
Enter the Device wireless parameter. It’s recommended that you rename as SSID, choose an Authentication Mode and enter a Wi-Fi Password.
SSID | The “SSI D” of the Device |
Security type | Setup the wireless security and encryption to prevent from unauthorized access and monitoring. Supports WPA, WPA2, WPNWPA2 encryption methods. |
Security key | The “Wi–Fi Password” of the Device |
If Static IP is selected, please enter the IP Address, Subnet Mask, Default Gateway, DNS,etc.
Enter the Device wireless parameter. It’s recommended that you rename as SSID, choose a Authentication Mode and enter a Wi-Fi Password.
Click ‘Apply’ button, It will restart.
Wait for a few seconds the Device is ready for use.
If DHCP is selected, the device gets the IP address automatically from your Router or ISP DHCP serve. No configuration should be set and you can go on with the wireless configuration.
Enter the Device wireless parameter. It’s recommended that you rename as SSID, choose a Authentication Mode and enter a Wi-Fi Password.
Click ‘Apply’ button, It will restart.
Wait for a few seconds the Device is ready for use.
Management Via Web Browser
Please follow the following instructions: Click “Wireless” located at the web management interface, the following message will be displayed on your web browser:
You could configure the basic setting of Wireless settings for communication, such as Network Name (SSID) . The Access Point can be set simply with only the minimum setting items.
Wireless Status | Wireless On/Off |
SSID | Wireless SSID of the Device |
Security type | Setup the Wireless security and encryption to prevent from unauthorized access and monitoring.
Supports WPA, WPA2, WPNWPA2 encryption methods. |
Security key | The “Password” of the AP/Router |
Click ‘Apply’ button, The device will restart.
Default password of the device is “admin”, and it’s displayed on the login prompt when accessed from web browser. There’s a security risk if you don’t change the default password, since everyone can see it. This is very important when you have wireless function enabled.
To change password, please follow the following instructions:
Please click “Password” menu on the management setting interface, the following message will be displayed on your web browser:
Click ‘Apply’ button, The Device will log off.
If you forgot your existing password, you can reset the password by clicking the reset button on the side of the device.
The system software used by this router is called ‘firmware’, just like any applications on your computer, when you replace the old application with a new one, your computer will be equipped with new function. You can also use this firmware upgrade function to add new functions to your router, even fix the bugs of this router.
Please click “Upgrade Firmware” located at the management setting interface, and then the following message will be displayed on your web browser:
Click ‘Browse … ‘ or ‘Choose File’ button first; you’ll be prompted to provide the filename of firmware upgrade file. Please download the latest firmware file from our website, and use ii to upgrade your router.
After a firmware upgrade file is selected, click ‘Apply’ button, and the device will start firmware upgrade procedure automatically.
The procedure may take several minutes, please be patient.
NOTE: Never interrupt the upgrade procedure by closing the web browser or physically disconnect your computer from the device. If the firmware you uploaded is interrupt, the firmware upgrade will fail, and you may have to return the device to the dealer of purchase to ask for help.
Warranty voids if you interrupted the upgrade procedure.
How To Connect Your Computer/laptop With The Device
- Log on to the computer.
- Open Connect to a Network by right-clicking the network icon (
or ) in the notification area. - Choose the wireless network from the list that appears, and then click Connect.
- Type the network security key or passphrase if you are asked to do so, and then click OK. You’ll see a confirmation message when you are connected to the network..
- To confirm that you added the computer, do the following:
Open Network by clicking the Start button , and then clicking Control Panel. In the search box, type network, and then, under Network and Sharing Center, click View network computers and devices. You should see icons for the computer you added and for the other computers and devices that are part of the network.
Note: If you don’t see icons
This is the easiest way to establish a connection to the AP. First, check whether your end device supports WPS. For further details, please read the operating instructions for your end device.
- Log on to the computer.
- Press the WPS button on the device for 2 seconds. The WPS LED now flashes for approx. 2 minutes.
- Within these 2 minutes, please press the connection button (WPS) on your end device. (For further details, please read the operating instructions for your end device.)
Your end device then automatically connects to the Device and applies all of the settings. You should see icons for the computer you added and for the other computers and devices that are part of the network.
- Plug the device to a socket. Connect your computer / laptop with the device with enclosed RJ45 Cable.
- To Confirm that you added the computer, do the following:
Open Network by clicking the Start button , and then clicking Control Panel. In the search box, type network, and then, under Network and Sharing Center, click View network computers and devices. You should see icons for the computer you added and for the other computers and devices that are part of the network.
For More Information:
- http://windows.microsoft.com/en-US/windows7/Add-a-device-or-computer-to-anetwork
- http://windows.microsofl.com/en-US/windows7/Setting-up-a-wireless-network
- http://windows.microsoft.com/en-US/windows-vista/Setting-up-a-wireless-network
It should be handed over to the applicable collection point for the recycling of electrical and electronic equipment, or returned to the supplier for disposal.
Federal Communications Commission (fcc) Interference Statement
This equipment has been tested and found to comply with the limits for a Class B digital device, pursuant to Part15 of the FCC Rules.
These limits are designed to provide reasonable protection against harmful interference in a residential installation. This equipment generate, uses and can radiate radio frequency energy and, if not installed and used in accordance with the instructions, may cause harmful interference to radio communications.
However, there is no guarantee that interference will not occur in a particular installation. If this equipment does cause harmful interference to radio or television reception, which can be determined by turning the equipment off and on, the user is encouraged to try to correct the interference by one of the following measures:
- Reorient or relocate the receiving antenna.
- Increase the separation between the equipment and receiver.
- Connect the equipment into an outlet on a circuit different from that to which the receiver is connected.
- Consult the dealer or an experienced radio/TV technician for help.
This device complies with Part 15 of the FCC Rules. Operation is subject to the following two conditions:
(1) This device may not cause harmful interference, and (2) this device must accept any interference received, including interference that may cause undesired operation.
FCC Caution: Any changes or modifications not expressly approved by the party responsible for compliance could void the user’s authority to operate this equipment.
Rf Exposure Warning
This equipment complies with FCC radiation exposure limits set forth for an uncontrolled environment.
This product may not be collocated or operated in conjunction with any other antenna or transmitter. This equipment must be installed and operated in accordance with provided instructions and the antenna(s) used for this transmitter must be installed to provide a separation distance of at least 20 cm from all persons and must not be collocated or operating in conjunction with any other antenna or transmitter.