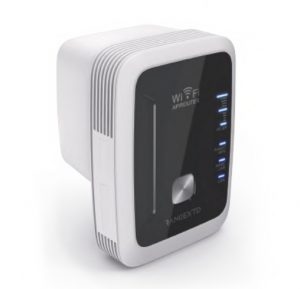
Sections in this Manual
Manufactured by Strong Current
Getting Started
Setting up a Wireless Infrastructure Network
For a typical wireless setup at home (as shown below), please do the following:
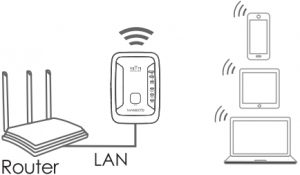
The device is connected to a wired network then transforms the wired Internet access into wireless so that multiple devices can share the Internet.
This mode is fit for offices, homes and places where only a wired network is available.
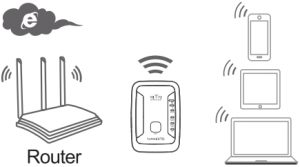
The Device copies and reinforces the existing wireless signal to extend the coverage of the signal. This mode is especially useful for a large space to eliminate signal-blind corners. This mode is fit for a large house, office, warehouse or other spaces where the existing signal is weak.
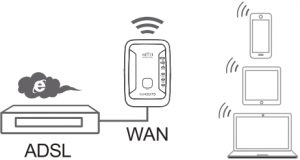
The device is connected to a DSL or cable modem and works as a regular wireless router. This mode is fit for an environment where Internet access from DSL or cable modem is available for one user but more users need to share the Internet.
Configure the Wi-Fi Repeater Mode
This is the easiest way to configure the device. First, check whether your wireless router supports WPS. For further details, please read the operating instructions for your wireless router.

Tips: If you want to keep the stable connection between your router and our repeater at REPEATER mode, Please install our Repeater at a suitable position.
You can check the suitable position as the followings:
Check the signal indicator on the repeater, if the LED is below 2 levels, please find new place.
OR You can check the Wi-Fi signal on your smartphone, if the signal is below 2 levels, we suggest to change the location of our repeater
- The mode selector must be set to the “Repeater” position for Repeater Mode.
- Plug the Device into a wall socket.
- Press the WPS button on the Device.
The WPS LED fast flashing for approx. 2 minutes. - Within these 2 minutes, please Press the WPS button of your Wireless Router.
directly for 2 – 3 seconds. (For further details, please read the operating instructions for your wireless router).
The Device then automatically connect to your wireless router and copies wireless key of the settings. The device Wi-Fi Password same your AP/Router. After the reboot has been completed, please go to your device WLAN setting, connect to new SSID.
You can configure the Wi-Fi Repeater Mode by connecting it with your computer/laptop with enclosed RJ45 cable or wirelessly.
A1. The mode selector must be set to the “Repeater” position for Repeater Mode. Plug the device into a wall socket.
A2. Click on the network icon ( 

A3. Open web browser and type 192.168.7.234 in the browser address box. This number is the default IP address for this device.
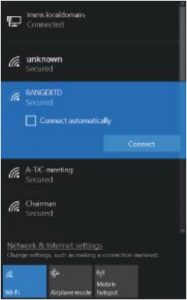
Resetting the RANGEXTD repeater
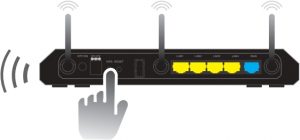
Please check whether the Device accord with factory default setting once you can’t entered 192.168.7.234. Press and hold the Reset button for 10 seconds or until the indicator turns off. After you reset your RANGEXTD Repeater, unplug the RANGEXTD Repeater for 10 seconds. Plug it back in and wait about 30 seconds, then check your WiFi network for the network called ‘RANGEXTD’ on your computer or mobile device.
A4. The login screen below will appear. Enter the Password then click “Login” to login. The default Password is “admin”.

A5. After logging in, you will see the web page below, click on the “Router/ Repeater/AP”.

A6. From the list, select a Wi-Fi SSID. After having selected a Wi-Fi SSID, you must then specify the password of your wireless router.
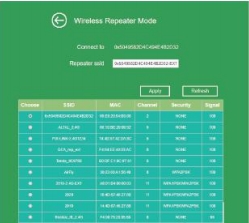
Completing the entry, click on the “Apply” button.
After the reboot has been completed, please go to your device WLAN setting, connect to new Wi-Fi SSID.
B. Configure the Wi-Fi Repeater Mode with RJ45 Cable.
- Plug the Device into a wall socket. Connect your computer/laptop with the Device with RJ45 Cable.
- Follow process A3 to A6 to configure the Device.
Configure the Wi-Fi AP Mode
Use the AP Mode to obtain a “wireless access point”. The wireless end devices will connect to the Device in this mode. You can also use this mode, for example, to make a formerly non-wireless-enabled router wireless-enabled.
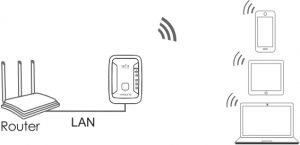
- The mode selector must be set to the “Access Point” position for AP Mode.
- Plug the Device into a wall socket.
- Follow process A2 to A5.
The following message will be displayed on your web browser:
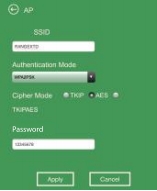
| SSID | Wireless SSID of the Device |
| Security type | Setup the wireless security and encryption to prevent from unauthorized access and monitoring. Supports WPA, WPA2, WPNWPA2 encryption methods. |
| Security key | The “Wi-Fi Password” of the Device |
Click on ‘Apply’ button, The device will restart.
After the reboot has been completed, please go to your device WLAN setting, connect to new Wi-Fi SSID.
Configure the Wi-Fi Router Mode
The device is connected to a DSL or cable modem and works as a regular wireless router.
Internet access from DSL or cable modem is available for one user but more users need to share the Internet.
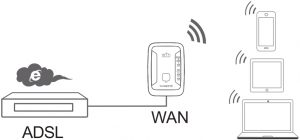
- The mode selector must be set to the “Route” position for Router Mode.
- Plug the Device into a wall socket
- Connect your DSL Modem with the Device with RJ45 Cable.
- Follow process A3 to AS.
- Click on the Router button
Choose your WAN Connection Type.
If PPPoE (ADSL Dial-up) is selected, please enter the Account and Password from your ISP, These fields are case-sensitive.

Enter the Device wireless parameter. It’s recommended that you rename as SSID, choose an Authentication Mode and enter a Wi-Fi Password.
| SSID | The “SSI D” of the Device |
| Security type | Setup the wireless security and encryption to prevent from unauthorized access and monitoring. Supports WPA, WPA2, WPNWPA2 encryption methods. |
| Security key | The “Wi–Fi Password” of the Device |
If Static IP is selected, please enter the IP Address, Subnet Mask, Default Gateway, DNS,etc.
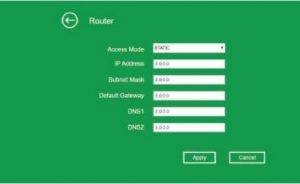
Enter the Device wireless parameter. It’s recommended that you rename as SSID, choose a Authentication Mode and enter a Wi-Fi Password.
Click ‘Apply’ button, It will restart.
Wait for a few seconds the Device is ready for use.
If DHCP is selected, the device gets the IP address automatically from your Router or ISP DHCP serve. No configuration should be set and you can go on with the wireless configuration.

Enter the Device wireless parameter. It’s recommended that you rename as SSID, choose a Authentication Mode and enter a Wi-Fi Password.
Click ‘Apply’ button, It will restart.
Wait for a few seconds the Device is ready for use.
