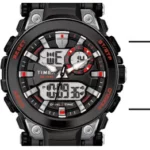
03J-095000 Watch
03J-095000 1.9.19 Register your product at https://www.timex.com/product-registration.html
EXTENDED WARRANTY
Available in U.S. only. Extend your warranty for an additional 4 years from date of purchase for $5. You can pay with AMEX, Discover, Visa or MasterCard by calling 1 800-448-4639 during normal business hours. Payment must be made within 30 days of purchase. Name, address, telephone number, purchase date, and 5-digit model number required. You can also mail a check for $5 to: Timex Extended Warranty, P.O. Box 1676, Dept. EF, Little Rock, AR 72203. Please read instructions carefully to understand how to operate your Timex® watch.
FEATURES AND BASIC OPERATION
- Date with MM-DD format (month/day)
- 24-Hour Stopwatch with Split time
- Daily Alarms and Hourly Chime
- 24-Hour Countdown Timer
- Dual Time (2nd Time Zone)
- INDIGLO® night-light

Button functions shown with setting functions in parentheses
TIME
To set time and date
- From Time of Day mode, press and hold RESET. The watch beeps and Seconds can be seen flashing.
- Press ST/STP to set Seconds to zero.
- Press MODE to set Hours, as indicated by its flashing. Press ST/STP to advance the Hours setting. Press and hold to increment quickly.
- Press MODE to set Minutes, as indicated by its flashing. Press ST/STP to advance the Minutes setting. Press and hold to increment quickly.
- Press MODE to set the Year number, as indicated by its flashing. Press ST/STP to advance the Year setting. Press and hold to increment quickly.
- Press MODE to set the Month number, as indicated by its flashing. Press ST/STP to advance the Month setting. Press and hold to increment quickly.
- Press MODE to set the Date, as indicated by its flashing. Press ST/STP to advance the Date setting. Press and hold to increment quickly. 8. Press RESET to exit Time Set. 9. To toggle between 12-Hour (A/P indicator) and 24-Hour time format, press ST/STP.
STOPWATCH
Use this function for timing events.
- Press MODE until “SP” appears.
- Press ST/STP to start timing.
- With the stopwatch running, press RESET to record the Split time. The display will show the Split time, but the stopwatch will continue timing in the background.
- Press RESET to release the display and show the current running stopwatch time.
- Press RESET to record another Split time.
- Press ST/STP to pause the timing.
- Either press ST/STP to resume timing, or press RESET to reset the Stopwatch to zero. Note: If the Stopwatch was paused when the display was showing a Split time, the press of ST/STP will pause the stopwatch and show the total elapsed time.
LAP 1 = 7.11
LAP 2 = 7.50
LAP 3 = 7.08
LAP 4 = 7.30
SPLIT 1 = 7.11
SPLIT 2 = 15.01
SPLIT 3 = 22.09
SPLIT 4 = 29.39
COUNTDOWN TIMER
Use this function for timing events or tasks that have a defined end.
- Press MODE until “TR” appears.
- To Set the Timer, press RESET. The Hour digit flashes.
- Press ST/STP to advance the Hours setting. Press and hold to increment quickly.
- Press MODE to set the Minutes as indicated by its flashing. Press ST/STP to advance the Minutes setting. Press and hold to increment quickly.
- Press MODE to set the Seconds as indicated by its flashing. Press ST/STP to advance the Seconds setting. Press and hold to increment quickly.
- Press RESET to exit Countdown Timer Set.
- To use the Countdown Timer, press ST/STP to start timing.
- With the timer running, press ST/STP to pause the timer.
- With the timer paused, press ST/STP to re-start it or press RESET to reset the timer to its originally set duration.
- When the alert sounds, press ANY button to silence it, or it will stop automatically in about 10 seconds. Note: When you press RESET at the end of the countdown or to reset a paused timer, the watch goes into Timer Set mode. Press RESET to exit that mode and to return the timer to its originally set countdown.
ALARM
To turn on/off or to set one of the 5 Daily alarms, or to turn on/off an hourly chime.
- Press MODE until “AL” appears.
Note: The alarm settings are tied to the primary time zone (T1). - Press ST/STP to turn on/off the Hourly Chime ( )
- Press INDIGLO® to select one of the 5 alarms.
- Press ST/STP to turn on/off each Alarm ( ).
- To Set the Alarm, press RESET. The Hour digit flashes and the Alarm ON
( ) lights. - Press ST/STP to advance the Hours setting. Press and hold to increment quickly.
Note: The Hours will be presented in the same format (12- or 24-hour time) as the time setting. - Press MODE to set the Minutes as indicated by its flashing. Press ST/STP to advance the Minutes setting. Press and hold to increment quickly.
- Press RESET to exit the Alarm Set.
- When the alarm sounds, press ANY button to silence the alert, or it will stop automatically in about 60 seconds.
DUAL TIME
To set the time for a second time zone
- Press MODE until “T2” appears.
- Press RESET. The Hours can be seen flashing. Press ST/STP to advance the Hours setting. Press and hold to increment quickly.
- Press MODE to set Minutes, as indicated by its flashing. Press ST/STP to toggle between the same Minutes setting as Time Mode (T1) or 30 Minutes difference.
- Press RESET to exit Dual Time Set. Note: The Hours will be presented in the same format (12- or 24-hour time) as the time setting.
INDIGLO® NIGHT-LIGHT
Press INDIGLO® button to illuminate watch display for 2-3 seconds. Electroluminescent technology used in the INDIGLO® night-light illuminates watch face at night and in low light conditions.
WATER AND SHOCK RESISTANCE
If your watch is water-resistant, meter marking or (O) is indicated
| Water-Resistance Depth | p.s.i.a. * Water Pressure Below Surface |
| 30m/98ft | 60 |
| 50m/164ft | 86 |
| 100m/328ft | 160 |
*pounds per square inch absolute
WARNING: TO MAINTAIN WATER-RESISTANCE, DO NOT PRESS ANY BUTTONS UNDER WATER.
- Watch is water-resistant only as long as lens, push buttons and case remain intact.
- Watch is not a diver watch and should not be used for diving.
- Rinse watch with fresh water after exposure to salt water.
- Shock-resistance will be indicated on watch face or cashback. Watches are designed to pass ISO test for shock-resistance. However, care should be taken to avoid damaging crystal/lens.
BATTERY
Timex strongly recommends that a retailer or jeweler replace battery. If applicable, push reset button when replacing battery. Battery type is indicated on caseback. Battery life estimates are based on certain assumptions regarding usage; battery life may vary depending on actual usage.
DO NOT DISPOSE OF BATTERY IN FIRE. DO NOT RECHARGE. KEEP LOOSE BATTERIES AWAY FROM CHILDREN.
TIMEX INTERNATIONAL WARRANTY
http://www.timex.com/productWarranty.html
©2019 Timex Group USA, Inc. TIMEX and INDIGLO are registered trademarks of Timex Group B.V. and its subsidiaries.