![]() Installation manual
Installation manual
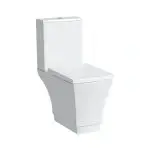
NEOREST (Toilet bowl)
Install the product properly according to this installation manual for best performance. When the installation work is complete, give a detailed explanation of how to use this product to the customer.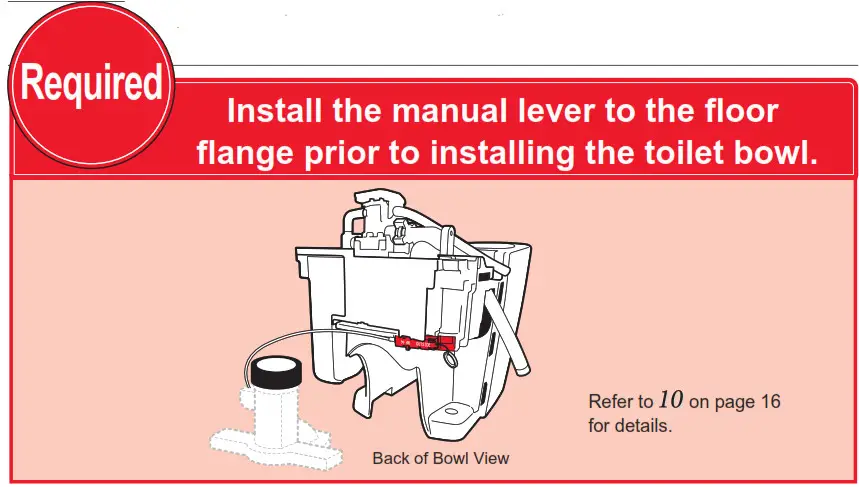
Do not remove the battery box as it is used during power outages.

Safety Cautions(Observe these cautions for safety’s sake.)
Read these “Safety Cautions” carefully before starting installation work. Install the product properly.
This manual uses various indications to ensure a proper, safe installation and to prevent injury to the customer, injury to other people and damage to property. The symbols should be interpreted as follows.
 |
Improper use or installation of this product may result in injury or property damage. |
 |
This symbol is used to indicate no tampering with this product. |
 |
This symbol is used to indicate a required step in the use of this product. |
|
|
| Prohibited |
Do not subject the toilet bowl to strong forces or impacts. Otherwise, the toilet bowl may break causing injury or leaks that may damage property |
| Do not excessively bend or twist the water supply hose. Otherwise, the flexible water supply hose may break causing leaks that may damage property. | |
| Do not remove the water supply filter with the water supply valve being open. If the water supply valve is not closed, water may gush out causing leaks that may damage property. | |
| Required |
Be sure to use the included or specified parts for installation work. Otherwise, the product may not be installed properly. |
| Carry out the installation work according to this installation manual. Otherwise, damage caused by water leaks may occur. | |
Precaution before installation
- Secure the space required for toilet installation and at the same time, check door opening/closing for possible interference.
- The remote control signal reception may be degraded and the NEOREST unit may not respond to the remote control if there are shelves or cabinets on the rear wall at a height of less than 55-1/8”(1400 mm) from the floor. (Shelves and storage cabinets should be more than 55-1/8”(1400 mm) from the floor.)
- Turn on electricity and water supply to the product after completing all installation work.
- Use care not to damage the end of the connection hose.
- The minimum required water pressure (flowing) is 7PSI at 2.64 Gal/min (0.05MPa at 10 L/min) while the maximum water pressure (static) is 108PSI(0.75MPa).
- Please wash away the dust or sand in the water supply pipe completely before installing the water supply valve.
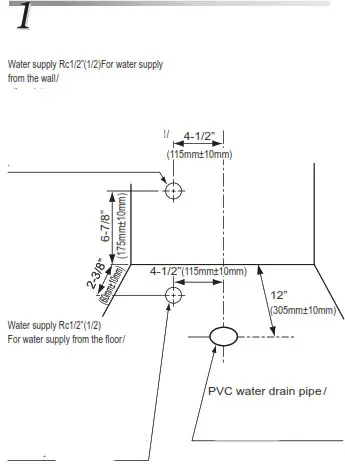
- Make sure before installation that the water supply source and water drain pipe are in the specified position according to the diagram.
If it is not positioned properly, the product may not be able to be installed correctly.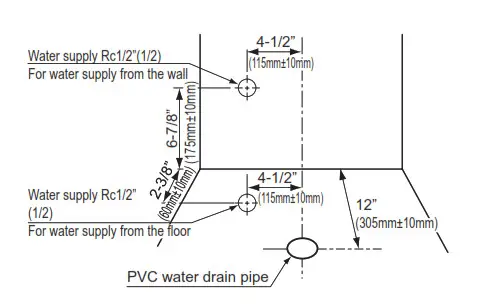
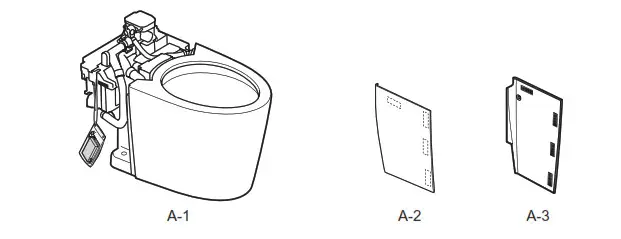
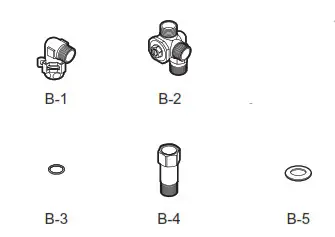
Included parts
 *Be sure to mount B-2./
 *Floor flange with rubber joint and manual lever
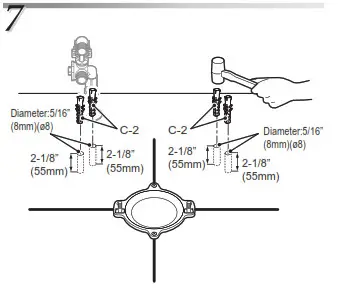
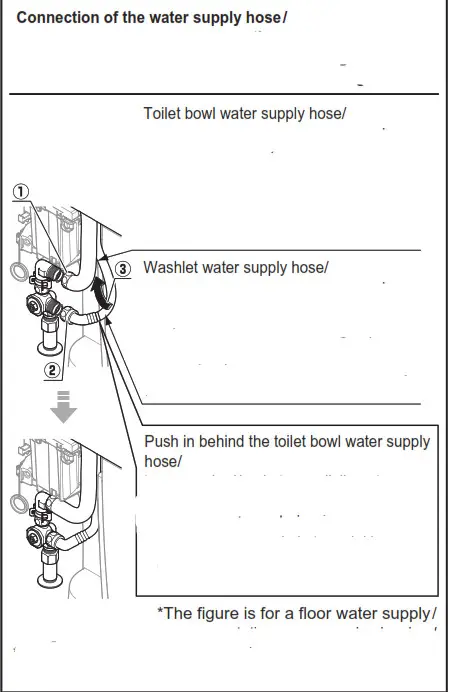
*Be sure to mount C-2.
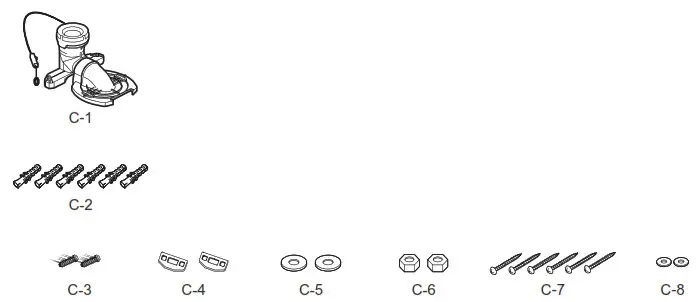
When using the floor flange, C-2 (2 pcs.), C-7 (2 pcs.), and C-8 (2 pcs.) are not used.
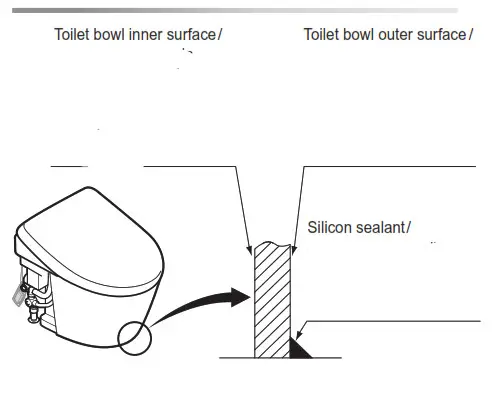
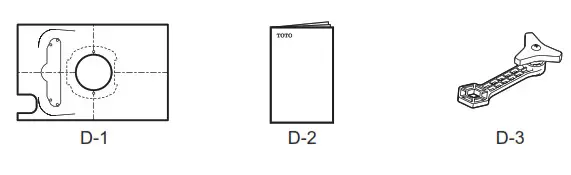 *D-3 is affixed on the backside of A-2.
*The product may be slightly different in shape than the product shown in the figure depending on the model.
Part diagram
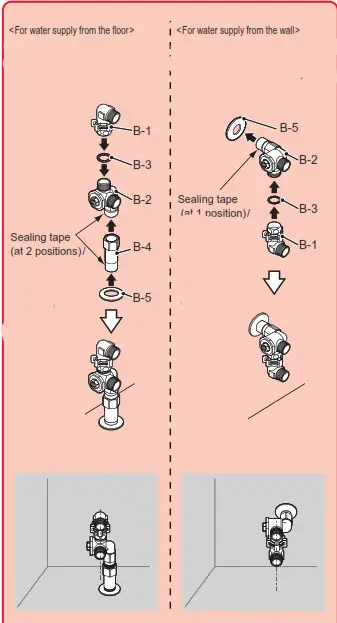
For water supply from the wall
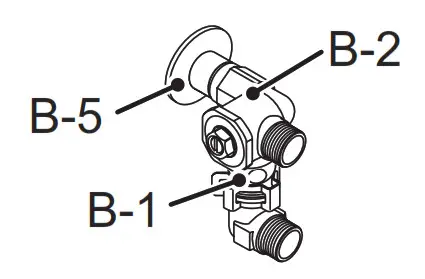

Be sure to install the shutoff valve (with filter) (B-2) included with the toilet. Dirt contamination could cause shutoff or discharge defects./
Do not remove the battery box./
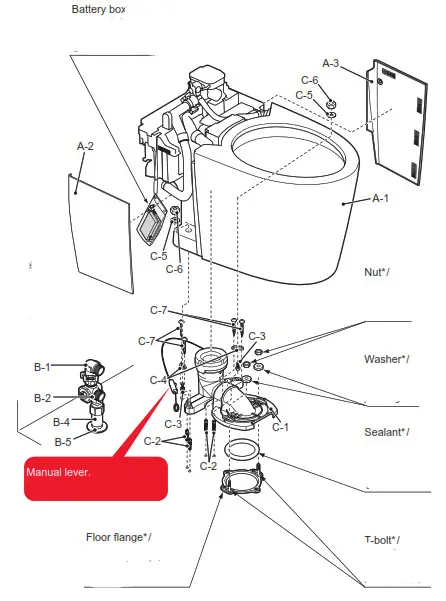
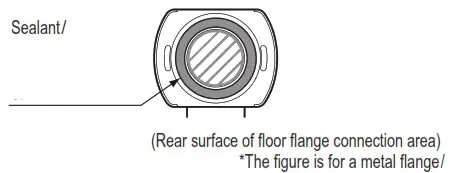
*The floor flange, T-bolt, and sealant are not included.
Installation procedure
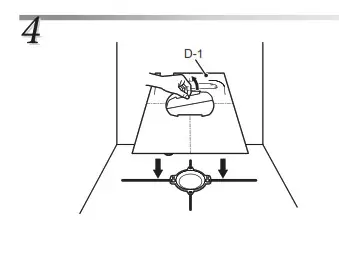
*If there is a gap between the discharge pipe and floor, fill it with mold-resistant silicone-based seal material (Mediseal).
2.
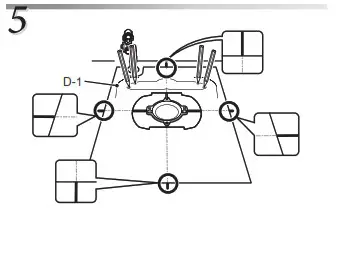
*If there is a gap between the straight pipe and the floor, fill it with the mold-resistant silicone-based seal material (Mediseal), and then attach a cover seal(B-5). Doing otherwise may cause water to leak downstairs.
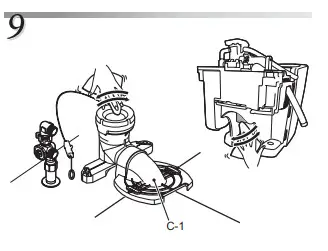
Be sure to install the shutoff valve (with filter) (B-2) included with the toilet. Dirt contamination could cause shutoff or discharge defects.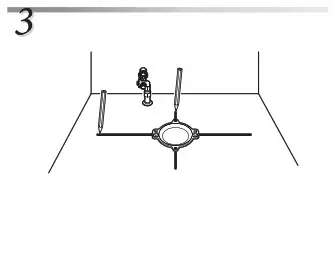
8.

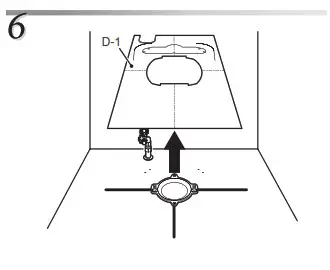
Ensure the wax ring does not interfere with the outlet hole. Interference could cause poor flushing performance.
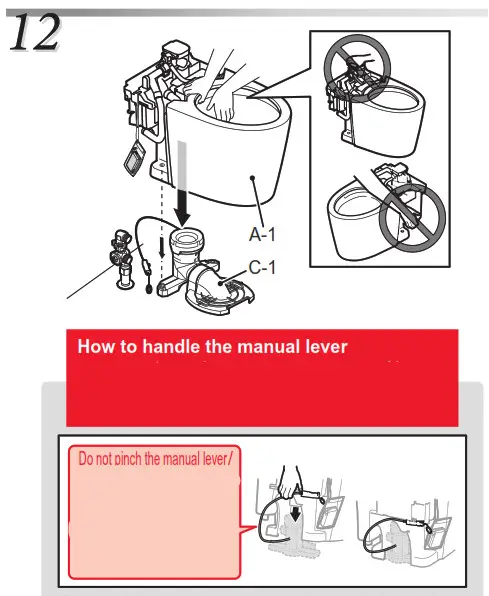
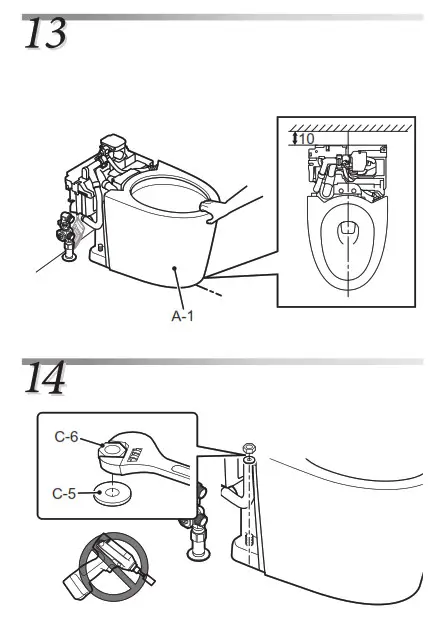
- Insert the head of the hexagonal bolt completely in the hexagonal hole of the water drain socket. If it is not inserted completely, the toilet bowl may be unstable.
- When installing, be careful that the wire does not get pinched between the floor and discharge socket.
10.
11.
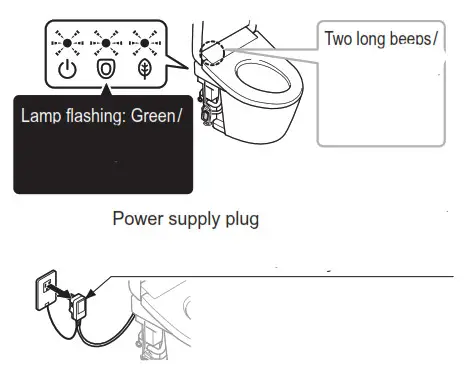
If the unit emits an electronic noise and all lamps are flashing.
Electronic noise emitted
All lamps flashing/
↓
① Remove the power supply plug/
↓
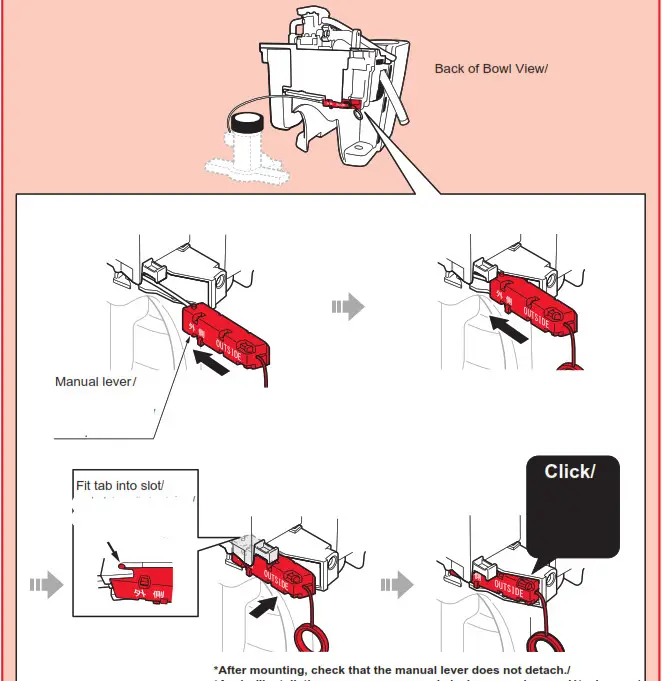
② Install the manual lever according to/
↓
③ Insert the power supply plug/
↓
Confirm that the electronic noise has stopped and that no lamps are flashing/
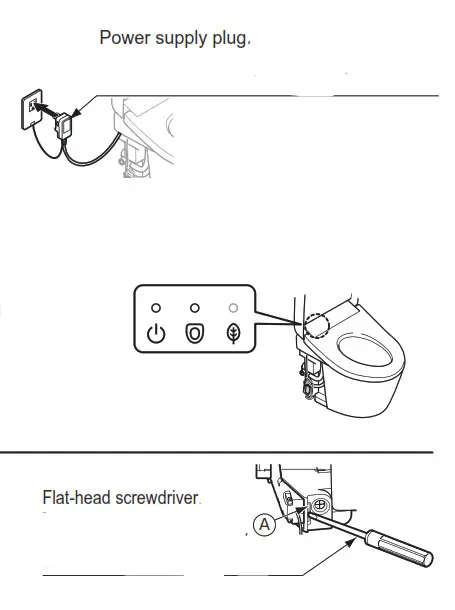 < Remove the manual lever >
Insert a flat-head screwdriver or other tools into A shown in the figure to unlock and then remove the manual lever./
Mount the top unit according to the installation manual.
- It is not malfunctioning even if water flows in the toilet bowl after the water shutoff valve is opened. If electrical power is available, insert the power plug in the outlet to stop the water flow. If electrical power is not available, close the shutoff valve to stop the water. When electrical power is available, turn the unit on and then open the shutoff valve. Refer to the enclosed installation manual of the top unit.
- Confirm the operation of the manual lever. After performing a test run of the main washlet unit, confirm the operation.
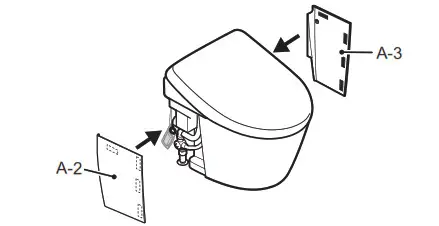
Connection of the water supply hose/
 Install the side panel aligned with A and B in the figure (the dotted lines), so that there are no noticeable gaps./

- After the trial-run (flush) of the toilet bowl, check the toilet bowl inside for foreign matter such as chips of cut pipe, etc. Foreign matters such as transmitted rust can stick to the sides.
- Be sure to close the water supply valve and clean the water supply filter after a trial run.
* Remove the water supply filter using the open/close tool included with the toilet bowl or a ratchet wrench to clean the filter.
* After cleaning the filter, open the water supply valve. - After conducting a test run, confirm that no connections are leaking water.
Not installing the product properly may cause water leaks that could result in flooding damage to property, such as household belongings.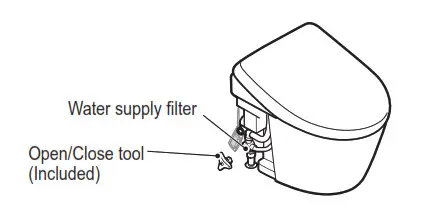
- Make sure that there are no scratches or other damage on the ceramic surface.If the ceramic surface is tightly pressed or rubbed against metals (watchbands, belt buckles, etc.), black or silver streak marks may be left on the surface.
- After installation, unseen dirt (oil or adhesive for piping) may remain in the toilet bowl. Be sure to wipe it off using a non-abrasive neutral detergent for toilets. Otherwise, the toilet bowl surface may not flush
completely clean. - Confirm that there is no noticeable gap between the porcelain and side panel and that neither part is lifted up. If the parts are not installed firmly, the side panel could detach.