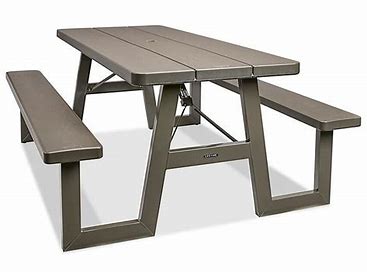
ULINE Folding Picnic Table – 6′ Instructions
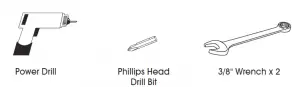
TOOLS NEEDED
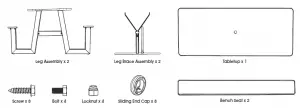
PARTS INCLUDED
ASSEMBLY
 NOTE: Two people are required to assemble this table. Assemble table on level ground
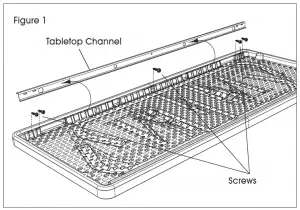
- Lay the tabletop upside down on the ground. Use the drill to remove the five screws connecting one of the tabletop channels to the tabletop, and remove the channel from the table (See Figure 1)
NOTE: Do not use a hand screwdriver for this step. Remove all screws connecting the tabletop channel tothet able top. Save screws for later use during assembly.
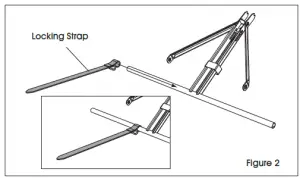
- If the locking strap is not already attached to the leg brace assembly, slide the locking strap over the tube of the leg brace assembly as shown. Ensure the locking strap is oriented with the metal ring facing downward as shown. (See Figure 2)
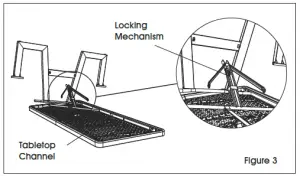
- Insert a leg assembly and a leg brace assembly into the two large holes along the tabletop channel that is still connected to the tabletop. (See Figure 3)
NOTE: Ensure you orient the leg brace in the direction illustrated with locking mechanism still visible - Repeat steps 2-3 for the second leg assembly and leg brace
- While one person helps hold leg assemblies in position, place the holes in the second tabletop channel over the tubes of the table legs and table leg braces. (See Figure 4)
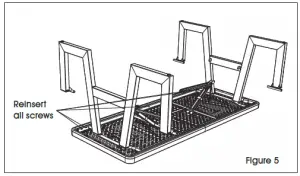
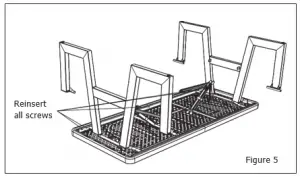
- Set the table channel back in place. While one person holds the legs, use the power drill to reinsert the five screws removed in step 1 into the holes of the tabletop channel to secure it in place (See Figure 5)
NOTE: Do not overtighten screws. Do not use a hand screwdriver in step 5.
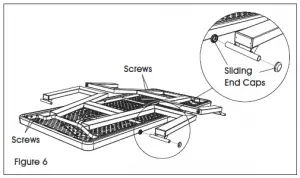
- Lay the table legs and table leg braces down flat on the table top. (See Figure 6)
- Place a sliding end cap on each end of one of the tubes on the table (See Figure 6)
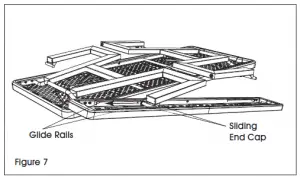
- Place a bench seat underneath one of the legs and slide the sliding end caps under the glide rails of the bench seat. (See Figure 7)
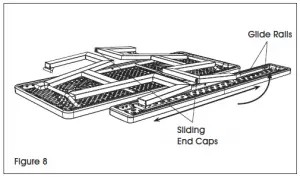
- Attach two sliding end caps to the tube on the other table leg, and lift the bench seat upward until the sliding end caps rest inside the underside of the bench. Position the bench so all four sliding end caps are under the glide rail. (See Figure 8)
- Repeat steps 8-10 for the second bench seat
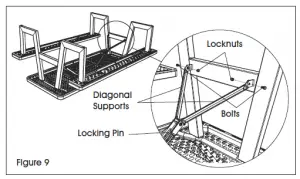
- Lift one leg assembly upright and hold it in place. A second person will rotate the diagonal supports of the leg brace assembly until the locking pin snaps into the notches located at the end of the diagonal supports. Connect the ends of the diagonal supports to the leg assembly using two bolts and two locknuts. (See Figure 9)
- Repeat step 12 for the second leg brace assembly.
- While one person holds the table legs upright, insert four screws through the holes in the bench channels and into the bench as shown to keep the sliding end caps under the glide rails. (See Figure 10)
NOTE: Do not overtighten. These screws help keep the legs in the glide rails - Repeat step 14 for the second bench seat
- . Turn the table upright
 CAUTION! When using an umbrella with this table, always anchor the umbrella to the umbrella base