ULINE Marsh Electric Kraft Tape Dispenser User Guide
SET-U
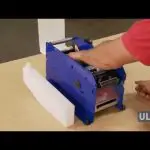
LOADING TAPE
- Open the top cover.
- Adjust tape guides with the tape guide turnbuckle to fit the width of the tape. Insert tape roll. Include a 1/8″ clearance on both sides of the tape roll. (See Figure 1)
- Remove the pressure plate. (See Figure 1)
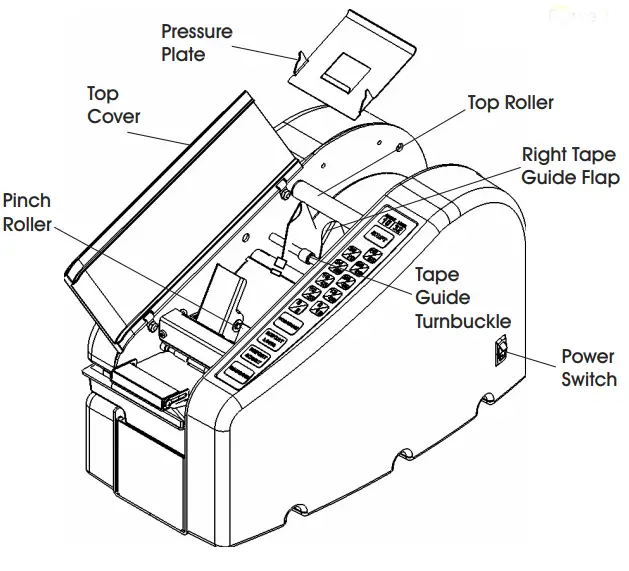 Fig. 1
- Feed the tape, gummed side down, over the top roller, under the tape guide flaps, and under the pinch roller. (See Figure 2)
- Place the pressure plate over the tape and release the pinch roller. (See Figure 2)
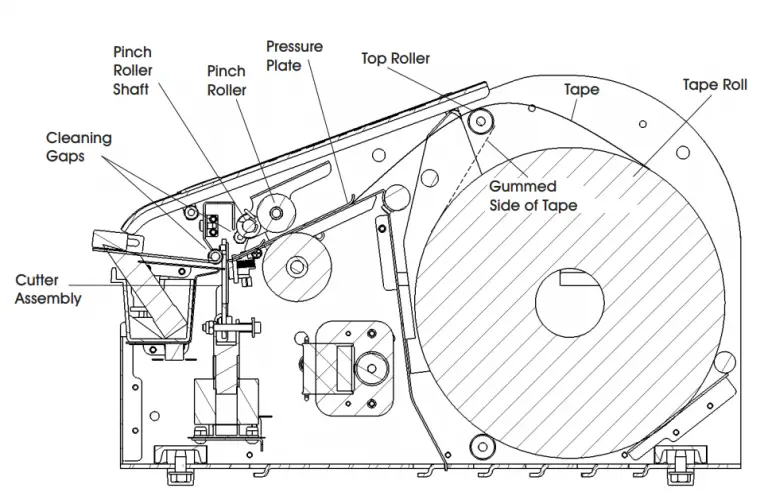 Fig. 2
 - Close the top cover.
FILLING WATER BOTTLE
- Remove the water bottle from the dispenser. (See Figure 3)
- Remove the duckbill valve from the water bottle. Fill the water bottle with water. (See Figure 3)
 Fig. 3
 - Place the duckbill valve back into the water bottle.
- Place the water bottle back onto the dispenser.
- Verify that the post in the brush tank is inserted through the duckbill valve.
ADJUSTING BRUSH TANK WATER LEVEL
- Loosen the screws on the water bottle brackets.
- Move the water bottle brackets to a position that will obtain the desired water level in the brush tank. Both brackets should be in the same position. (See Figure 4)
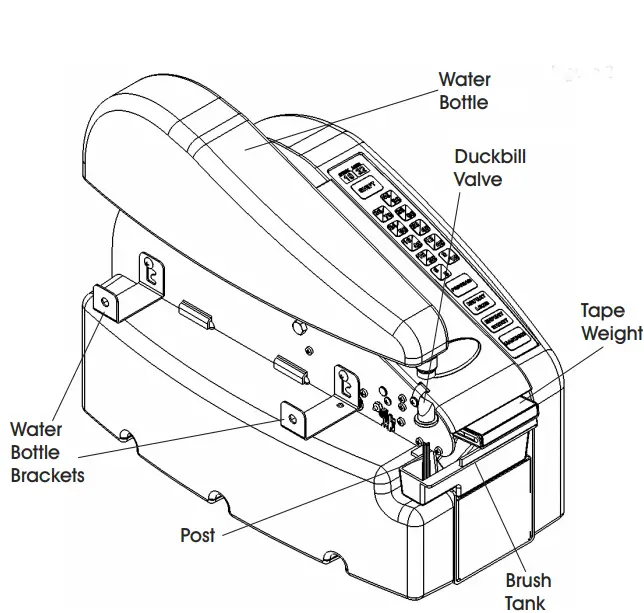 Fig. 4
 NOTE: Lightweight tapes should be adjusted to the low position, heavyweight tapes should be adjusted to the high position.
 - Tighten the retaining screws on the water bottle bracket
ADJUSTING TAPE WEIGHT
- Loosen the retaining screw.
- Slide the tape weight forward to apply greater pressure. Slide the tape weight backwards to apply less pressure.
NOTE: Lightweight tapes will apply less water on the tape. Heavyweight tapes will apply more water on the tape. - Tighten retaining screw
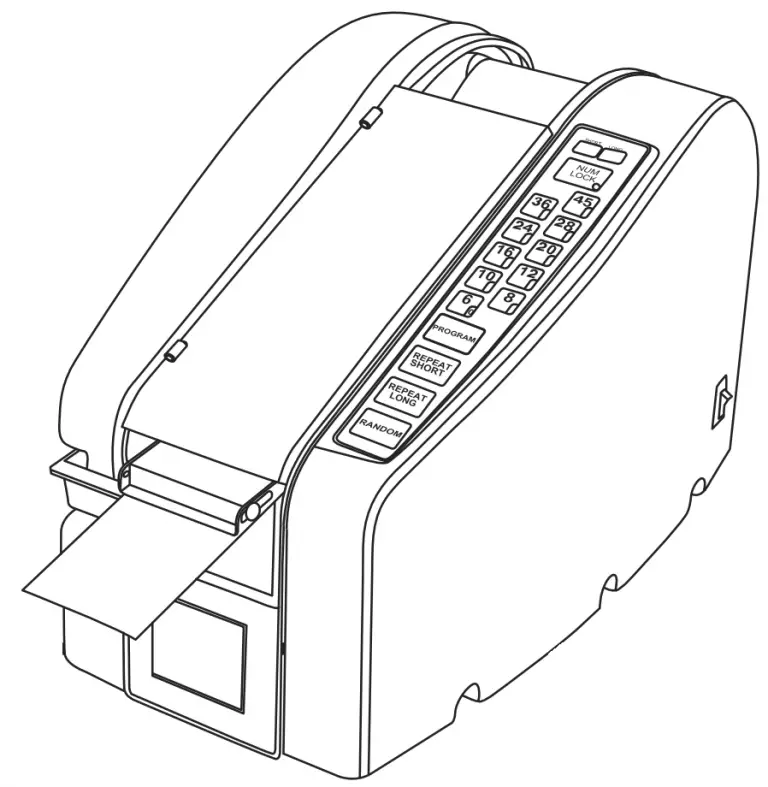
OPERATING INSTRUCTIONS
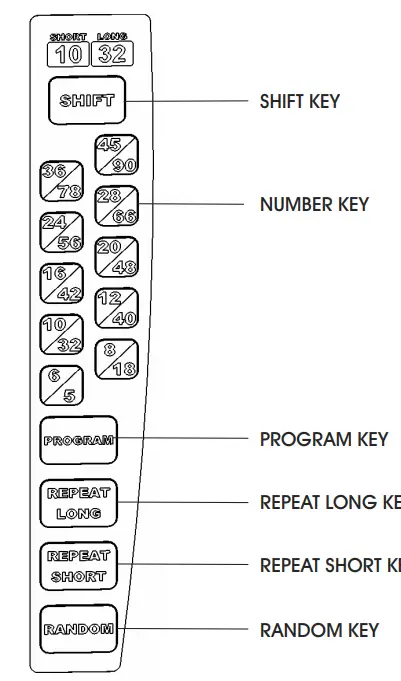
PRE-PROGRAMMED LENGTHS AND SHIFT
NOTE: There are 20 lengths pre-programmed into the memory of the dispenser.
- Press one of the ten length keys and the length in black is dispensed.
- To dispense the lengths in red, press the SHIFT key and the corresponding length key.
REPEAT SHORT AND REPEAT LONG
The pre-programmed lengths can be stored in the REPEAT SHORT and REPEAT LONG keys.
- Press PROGRAM, the preferred length key and REPEAT SHORT or REPEAT LONG. Display will flash. Flashing stops when programming is complete or PROGRAM is pressed to cancel mode.
NOTE: Tape cannot be dispensed in PROGRAM MODE.
RANDOM
The RANDOM key allows users to dispense tape until the key is released.
MAINTENANCE
NOTE: Little maintenance is required, but regular cleaning of the brush, brush tank, cutter mechanism and tape path are important. Clean the tape dispenser when the water bottle needs refilling.
 CAUTION! Before performing any maintenance or repair procedures, turn off power switch and disconnect from power source.
CLEANING WATER FEED SYSTEM
- Clean the brush by soaking in warm, soapy water.
Rinse with warm water. - Clean the brush tank by rinsing in warm water.
- Rinse out the water bottle and duckbill valve with warm water.
CLEANING CUTTER ASSEMBLY
- Open top cover and remove pressure plate.
- Remove tape from tape path.
- Using a small amount of non-flammable lubricant, spray the cutter assembly behind the cutter guard through the gaps in front and behind the cutter guard.
- Place tape back in tape path and place pressure plate back into the machine.
CLEANING TAPE PATH
- Open top cover and remove pressure plate.
- Remove tape from tape path.
- Using compressed air, remove all debris from the tape path.
- To remove gum adhesive buildup, use a moist cloth to wipe down all sheet metal parts within tape path. This includes the tape channel, pressure plate, weighted brush tank cover and water tank holder.
- Place the tape back into the tape path and place the pressure plate back in the machine.
- Close the top cover.
TROUBLESHOOTING
Before performing any maintenance or repair procedures, turn off power switch and disconnect from power source.
| PROBLEM | CAUSE | SOLUTION |
| Machine will not dispense tape. | Dispenser is not plugged in. | Plug power cord into outlet. |
| Power switch is in the OFF position. | Turn power switch to ON position. | |
| Display is flashing in program mode. | Press program key to turn off program mode or finish program cycle or turn power OFF and ON. | |
| Tape is jamming, rearing or won’t feed. | Debris is in the tape path. | Clean the tape path. |
| Tape guides are too tight. | Adjust the tape guides with the tape guide turnbuckle. | |
| Tape is routed incorrectly. | Reroute the tape. | |
| Pressure plate is out of place. | Verify the pressure plate is in place. | |
| Too much weight on the brush. | Adjust the amount of weight on the brush. | |
| Cutter is not cutting tape. | Clean the cutter assembly. If problem persists, contact Uline Customer Service at 1-800-295-5510. |
SPECIFICATIONS
| SHIPPING WEIGHT | 36 LBS. (16.4 KG) |
| Water Bottle Capacity | 70 oz. (2,070 mL) |
| Tape | Dry, gummed tape—paper or reinforced 1 to 3 inches wide (25.4 to 76.2 mm)
Up to 1,000 ft. long (304.8 m) Up to 9 in. roll diameter (22.86 cm) |
| Electrical Requirements (For Units with Heater) | 115 volts AC or 220 volts AC 50/60 Hz 4 amps at 115 volts or 2 amps at 220 volts NOTE: A properly grounded wall outlet must be provided near the equipment and the outlet must be accessible. |
| Power Cord Length (For Units with Heater) | 7 ft. (2.3 m) |
1-800-295-5510
uline.com