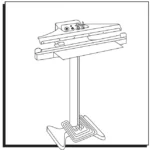
H-1993 KIHLBERG MANUAL CARTON STAPLER
1-800-295-5510
uline.com


LODING
ADJUSTING THE STAPLE LEG LENGTH ADJUSTING STAPLE CLINCH
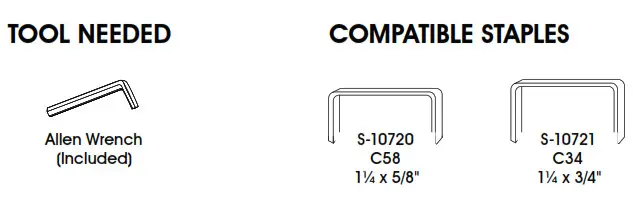
The stapler is adjustable for 5/8″-3/4″ staples. The stapler setting for a different staple leg length is altered as follows. Start by adjusting the depth of stapling for deep clinching (=). (See Figure 2)
- With the alien wrench, unscrew locking screw (A) two turns. (See Figure 1)
- With a screwdriver, adjust screw (B) to 5/8′ or 314° leg length. (See Figure 1)
- Tighten the locking screw (A). (See Figure 1) Figure 1
ADJUSTING THE PENETRATION DEPTH
The depth of stapling is easily adjusted by using the setting knob (1). Press the knob in and turn it to the desired position. (See Figure 2)
- Use “-° for shallow stapling penetration.
- Use “=” for deep stapling penetration. Figure 2
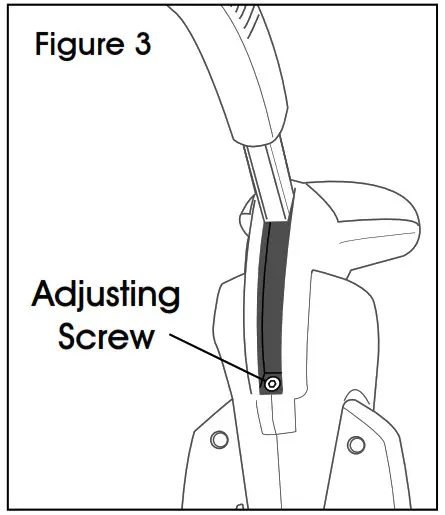
ADJUSTING STAPLE CLINCH
It Is possible to adjust how tightly the staples are closing:
- With the alien wrench, turn the adjusting screw clockwise for a stronger clinch. (See Figure 3)
- Turn the adjusting screw counterclockwise to open the clinch more.

CONTROLLING THE CLINCH (See Figure 4)
a. Good clinch.
b.Leg length of the staple too long or bent too much.
c. Leg length of staple too short or not bent enough. If necessary, adjust the staple clinch. Figure 4
LOADING CONTINUED
LOADING THE STAPLER
 NOTE: Always use Josef Kohlberg’s original staples – S-10720 (5/8′) or 5-10721 (3/4″).
The correct type of staple Is marked on the left-hand side of the magazine. Be sure to use the correct staple length for your application and that ensure the stapler is adjusted for this length.
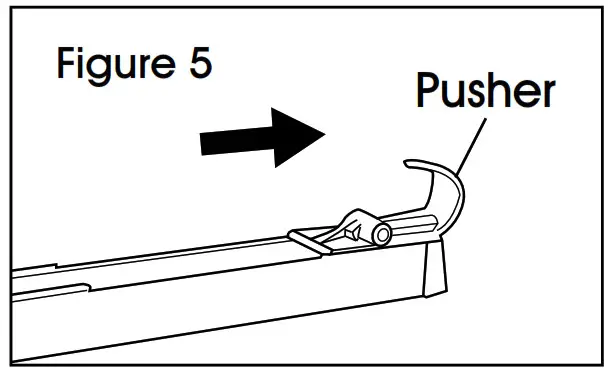
- Pull the pusher all the way out. (See Figure 5)

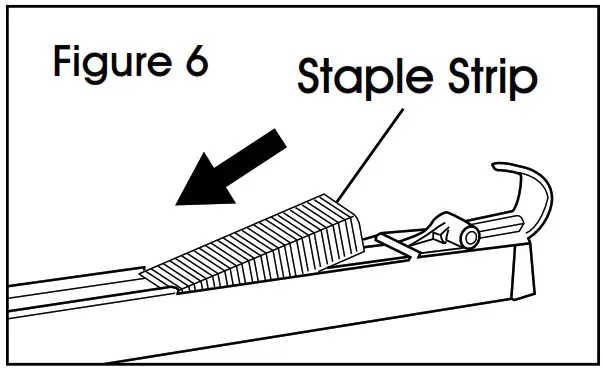
- Place three staple strips Into the magazine from the top. (See Figure 6)
- Lift the pusher to release. Carefully move the pusher forward until it reaches the staples. (See Figure 7)
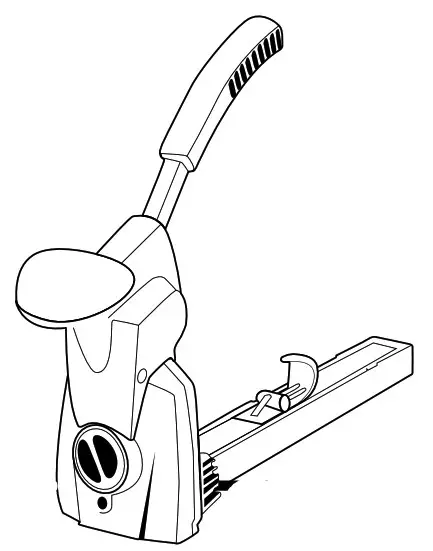
OPERATION
OPERATING THE STAPLER
 WARNING! Always place yourself In a firmly balanced position when using or handling the stapler.
- Press the stapler against the cardboard.
- Pull the handle firmly.
- Move the stapler and repeat until you have finished stapling.
- Control the clinch regularly. Adjust when necessary.
WARNING! Before stapling, ensure that your hand or any other part of your body Is not underneath the staple discharge area.
MAINTENANCE
CLEANING THE STAPLER
This stapler does not require special servicing. It only needs regular cleaning with a non-aggressive (non-corrosive) cleaning agent.
NOTE: Do not remove any parts for cleaning purposes.
NOTE: Check the proper functioning of all safety devices daily. Make sure that all screws and nuts are securely tightened.
REMOVING JAMMED STAPLES
To remove a Jammed staple:
- Unscrew 6 screws at the rear body. (See Figure 8)
- Remove the rear body and the defective staple. (See Figure 9)
- Assemble by reattaching the rear body with 6 screws. (See Figure 8)
MAINTENANCE CONTINUED
REPLACING THE DRIVER BLADE/ANVILS
TO REPLACE THE DRIVER BLADE:
- Remove six screws holding the rear body to the front section. (See Figure 10)
- Remove the rear body with the magazine.
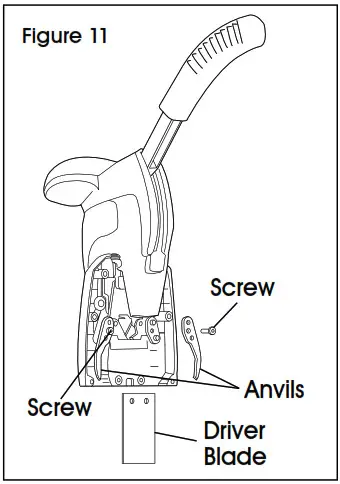
- Replace the driver blade. (See Figure 11)
- Assemble parts in reverse order.

NOTE: It changing the anvils, always change both at the same time.
TO REPLACE THE ANVILS:
- Remove the driver blade. (See Figure 11)
- Remove the screws.
- Replace the anvils.
- Assemble parts In reverse order.
![]() 1-800-295-5510
1-800-295-5510
uline.com