![]()

In order to receive more complete assistance, please register your product on www.indesit.eu/register
![]() Before using the appliance carefully read the Safety Instructions.
Before using the appliance carefully read the Safety Instructions.
CONTROL PANEL
- ON/OFF Button (hold to Reset)
- Program Selection Knob
- Start/Pause
Options Buttons* - Push & GO
- Dryness Level
- Start Delay
- Timed Drying
- Cycle End Signal
- Light Dry (hold for Key Lock)
- Crease Care (hold to Mute)

INDICATORS


Program Status:


Refer to the troubleshooting section:
FIRST TIME USE
Remove all the tapes used to hold items on the machine.
Before you use it, clean the inside of the drum to remove any dust that could have accumulated during transport. A slight odor or vapor may be found if you open the door during its first use this is normal and should only last a few minutes. Make sure that the water tank is correctly inserted. Make sure that the drain hose on the back of the dryer is properly connected, either to the dryers’ water tank or to your domestic drainage system.
The dryer must be installed in a room with a temperature ranging between 5°C and 35°C to ensure proper operation.
PUSH and GO
This function allows you to start an automatic drying cycle with just a few simple gestures.
It is always necessary to follow points 1, 2, 3, and 4 of the “Daily Use” section.
Press and hold the “Push & Go” button after turning on the machine, regardless of the position of the knob. The light on indicates that the cycle has started. This program does not allow setting other options. This cycle is suitable for cotton and synthetic items, max load 4 kg(cycle duration 100’).
DAILY USE
Doing this will keep your machine working at its BEST:
– remember to empty your water tank after each drying cycle. – remember to clean your condenser unit regularly (monthly).
– remember to clean your filter after each drying cycle.
Refer to the Care & Maintenance section.
- Plug the dryer into the power supply socket.
- Open the door and load garments; always refer to instructions on clothing labels and the max loads indicated in the program section. Empty pockets. Make sure garments do not get caught between the door and/or the door filter. Do not load items that are dripping wet. Do not tumble dry large, very bulky items.
- Close the door.
- Press the “On/Off” button.
- Select the most suitable program for the type of fabric in that load.
- Select the options, if necessary.
- Press the “Start/Pause” button to begin drying.
- At the end of the drying cycle, a buzzer will beep. An indicator on the control panel signals the end of the cycle. Pull the load out immediately to prevent the formation of creases on the laundry.
- Turn the machine off by pressing the “On/Off” button, open the door and pull the clothing out. If the machine is not switched off manually, after about a quarter of an hour from the end of the cycle, the appliance turns off automatically to save energy. Note that some programs/options accords with the “Crease Care” system. This means that for some hours, after the end of the drying cycle, the drum rotates at regular intervals to prevent the formation of creases. In case of power failure, it is necessary to press the “Start/Pause” button to restart the cycle.
PUSH and GO
This function allows you to start an automatic drying cycle with just a few simple gestures.
It is always necessary to follow points 1, 2, 3, and 4 of the “Daily Use” section.
Press and hold the “Push & Go” button after turning on the machine, regardless of the position of the knob. The light on indicates that the cycle has started. This program does do not allow setting other options.
This cycle is suitable for cotton and synthetic items, max load 4 kg (cycle duration 100’).
OPENING THE DOOR DURING THE CYCLE
Laundry can be checked while the drying cycle runs and any garments already dry can be removed, while drying continues for the remaining items. After closing the door, press the “Start/Pause” button to resume machine operation.
TRANSPORT AND HANDLING
Never lift the dryer by holding on to its top side.
- Unplug the dryer
- Remove the water from the water tank completely.
- Make sure that the door and water tank are properly closed.
- If the drain hose is connected to your drainage system, re-connect it to the back of the dryer (see “Installation” section in the Safety Instructions).
CARE LABEL
Always check the care labels, especially when placing garments in the tumble dryer for the first time. Below are the most commonly used symbols:
 |
Maybe tumble-dried. Do not tumble dry.Tumble dry – high heat. Tumble dry – low heat. |

PROGRAMS
The duration of these programs will depend on the size of the load, types of textiles, the spin speed used in your washer, and any extra options selected. In machines equipped with a display, the duration of the cycles is shown on the control panel. The remaining time is constantly checked and adjusted during the drying cycle to show the best possible estimate. Option to use – If all your loads on Automatic Cycles are consistently less dry or drier than you would like, you may increase or decrease the dryness level using the specific option.

This is the most efficient program in terms of energy consumption and is suitable for drying normal wet cotton laundry. The values on the Energy Label are based on this
programme.
NOTE: For optimal energy efficiency, select “Cupboard Dry” using the dryness level option. To increase the dryness level, select “Extra D r y ”.

For drying synthetic garments.

This program is ideal for drying cotton and synthetic fabrics together.

For drying delicate laundry requiring a gentle treatment.

Program for drying wool clothes. It is advisable to turn the garments inside out before drying. If heavy edges remain damp, leave them to dry naturally.

A program intended to dry garments and linen of newborn babies (cotton and chenille), as well as delicate garments. Do not dry garments having plastic covering.

Program intended to dry bulky garments, such as a single duvet.

For drying sports garments made of synthetics or cotton blends.

For drying sturdy cotton jeans-wear and garments, like denim, such as trousers and jackets.

Program ideal for cotton or cotton/synthetic blend shirts.

This cycle allows to stretch the fibers of garments thus making ironing and folding easier. Do not use with garments that are still wet. Suitable for small loads of cotton textiles or cotton blends.

This is a quick timed program, ideal for drying garments spun at high speed in the washing machine, e.g. the shirts used in a working week.

A short program suitable for refreshing fibers and garments through the emission of fresh air. Do not use with garments that are still wet. It can be used on any load size but is more effective with small loads. It lasts about 20 minutes.

Eco-drying of small laundry loads.

Eco-drying of small laundry loads.
OPTIONS
These buttons allow you to personalize the selected program according to personal requirements.
Not all options are available for all programs. Some options may be incompatible with ones you have previously set; if so, you will be alerted by the buzzer and/or blinking indicators.
If the option is available, the option indicator will stay on. The program may retain some options selected in previous drying cycles.
Press the related button several times to obtain a different level of residual moisture on garments. An indicator signals the level being selected.

This option allows you to delay the start of the cycle. Press the corresponding button several times to obtain the required delay. After having reached the max settable time, the option is reset by pressing the button again. An indicator on the control panel signals the time being selected. After having pressed the “Start/Pause” button, the machine signals the time remaining to the start of the cycle. In case of the door opening, press the “Start/ Pause” button once the door has been closed.

This option allows setting the drying time. Press the corresponding button to set the required time for drying. An indicator on the control panel signals the time being selected.

This option activates a prolonged buzzer at the end of the cycle. Enable it if you do not think you will hear the normal sound at the end of the cycle. This option remains in memory if selected in the previous drying.

Enables a more gentle treatment of the laundry by reducing the drying temperature.

This option makes all machine controls inaccessible, except the “On/Off” button. When the machine is on:
• to activate the option, keep the button pressed until the indicator goes on.
• to disable the option, keep the button pressed until the indicator goes off.
This option remains in memory if selected in the previous drying.

This option adds a crease treatment at the end of the cycle by means of a periodic rotation of the drum (duration up to 10 hours). It is particularly suitable when it is not possible to remove the laundry as soon as the drying ends. If this option is used together with the “Start Delay”, the crease treatment is also added to the “Start Delay” phase. This option remains in memory if selected in the previous drying.

This option turns off all sounds of the control panel. Only warnings remain active. When the machine is on:
• to activate the option, keep the button pressed until the indicator goes on.
• to disable the option, keep the button pressed until the indicator goes off.
CARE AND MAINTENANCE
WARNING: Unplug the dryer during the cleaning and maintenance procedures.

Pull the container out of the dryer and empty it into a sink or other suitable drain, then place it back properly. Do not use the dryer without having inserted the container back in place.

Pull the filter out and clean it by removing the lint from the filter surface under running water or using a vacuum cleaner. For optimal performance, dry up the filter before inserting it back in place. Do not use the dryer without having reinserted the filter in place.
Remove the door filter as described below:
- Open the door and pull upwards.
- Open the filter and remove lint from all its parts. Replace the filter correctly making sure it is fully seated.
The filter is an essential part of drying. It is intended to collect the lint formed during the drying process. If the filter is clogged, the airflow inside the dryer can become seriously affected: this will increase the drying time and energy consumption and could damage the dryer. If this procedure is not carried out properly, the dryer may not start.

Remove the condenser unit regularly (monthly) and clean off any fluff deposits from the plates by running cold water along its rear end. The light on after several cycles is just a reminder to carry on this activity periodically.
Removing the condenser:
- Open the condenser cover, unlock the three catches by turning them 90° anticlockwise.
- Pull-on the grip to remove the condenser.
- Clean the surface of the seals.
- Replace the unit with the arrows pointing upwards, while making sure that the catches are securely fixed.
Cleaning the tumble dryer
- The external metal, plastic, and rubber parts can be cleaned with a damp cloth.
- Clean the front air intake grille regularly (every 6 months) with a vacuum cleaner to remove any lint, fluff or dust deposits. Furthermore, remove any lint deposits from the front part of the condenser and from the filter area, using a vacuum cleaner every so often.
- Do not use solvents or abrasives.
*MAX LOAD 8 kg (Dry load)
| Power consumption | |||
| off-mode (Po) – Watts | 0.15 | ||
| left-on mode (PI) – Watts | 0.15 | ||
| Programs | kg | kWh | Minutes |
Eco Cotton * |
8 | 4.75 | 156 |
| Eco Cotton |
4 | 2.55 | 87 |
| Synthetics | 4 | 2.26 | 110 |
| *This is the most efficient program in terms of energy consumption and is suitable for drying normal wet cotton laundry. The values on the Energy Label are based on this program. | |||
*MAX LOAD 9 kg (Dry load)
| Power consumption | |||
| off-mode (Po) – Watts | 0.15 | ||
| left-on mode (P1) – Watts | 0.15 | ||
| Programs | kg | kWh | Minutes |
| Eco Cotton * |
9 | 5.23 | 162 |
| Eco Cotton |
4.5 | 2.79 | 92 |
| Synthetics | 4 | 2.26 | 110 |
| *This is the most efficient program in terms of energy consumption and is suitable for drying normal wet cotton laundry. The values on the Energy Label are based on this program. The values reported in the table are obtained with the condensed water drained externally through the drain hose. | |||
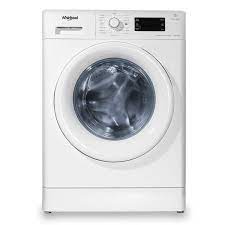
PRODUCT DESCRIPTION
- Water tank
- Air intake
- Door filter
- Condenser unit
- Condenser cover

TROUBLESHOOTING
Before contacting the After-sales Service, refer to the table below. Often the malfunctions are minor and can be solved in a few minutes.
| I Malfunction | Possible cause | Solution |
| The tumble
The dryer does not turn on. |
The plug Is not inserted Into the socket. | Insert the plug Into the socket. |
| The plug Is faulty. | Try to plug another appliance in the same socket Do not use connecting electrical devices to the socket, such as adapters or extensions. | |
| A power failure occurred. | Wait for the power supply to be restored and switch the fuse on again If necessary. | |
| The tumble dryer does not start. | The door has not been closed properly. | Close the door. |
| A time delay was set to the start of the cycle. | For machines equipped with this function: wait for the set delay to end or switch the machine off to reset it. Refer to the Options section. | |
| The “Start/Pause” button was not pressed in order to start the program. | Press the “Start/Pause” button. | |
| The Key Lock function was enabled (for machines equipped with this option). | Refer to the Options section and If Key Lock was selected, disable it. Switching the machine off is not enough to disable this option. | |
| Garments are wet at cycle completion. | Small load. | The automatic program has not sensed the required final moisture so that the dryer completes the program and stops. If this happens simply select an additional short period of drying or select an extra dry option if available. |
| Large loads or heavier fabrics | Dryness levels can be modified to the specific dryness desired. Extra Dry is recommended for ready-to-wear items. | |
| The drying
times are very long. |
Appropriate maintenance was not carried out. | Refer to the Care & Maintenace section and perform the operations described. |
| The program, the time, and/or the drying level set are not suitable for the type and the amount of load inserted into the dryer. | Refer to the Programmes and Options sections to find the program and options most suitable for the type of load | |
| The garments are too wet | Carry out a washing cycle with a higher spin speed to remove as much water as possible. | |
| The dryer may be overloaded. | Refer to the Programmes section to check the max load for each program. | |
| The program did not end | A power failure might haw occurred. | in case of power failure, it is necessary to press the”Start/Pause” button to restart the cycle. |
| Drum – slight odor or vapor. | A slight odor or vapor may be found if you open the door during its first use. | This is normal and should only last a few minutes. |
| Lights on or flashing | ||
| Water tank The water tank is full. | Empty the water tank. Refer to the Care & Maintenance section. | |
| Door filter | Failure of the airflow necessary for machine operation. | Clean the door filter and check whether the air intake is free. Carrying out these operations improperly may cause damages. Refer to Care & Maintenance section. |
| condenser unit | The condenser unit requires cleaning.
The light on is not a malfunction but just a reminder to carry on this activity periodically (monthly). |
Clean the condenser unit. Refer to Care & Maintenance section. |
| The presence
of the wrench symbol signals a malfunction. |
The machine sensors detected a failure. | Switch the dryer off and unplug It. Open the door immediately and pull the laundry out to allow the heat to dissipate. Wait for about 15 minutes. Reconnect the dryer to the power supply, load the laundry and restart the drying cycle. If the problem still occurs, contact the After-Sales Service Centre and communicate the letters and digks flashing on the display.
For instance: F3 and E2 |

Policies, standard documentation, ordering of spare parts, and additional product information can be found by:
- Visiting our website docs.Indesit.EU and parts-selfservice.whirlpool.com
- Using QR Code
- Alternatively, contact our After-sales Service (See phone number in the warranty booklet). When contacting our After-sales Service, please state the codes provided on your product’s identification plate model information can be retrieved using the QR Code indicated on the energy label. The label also includes the model identifier that can be used to consult the https://eprel.ec.europa.eu database portal.