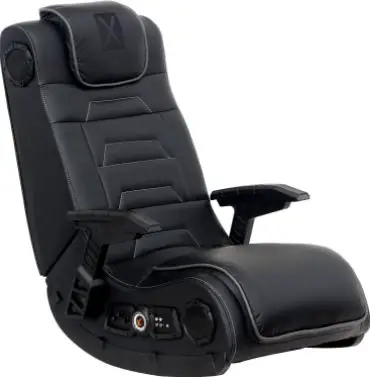
XRocker Gaming Chair
Welcome to X Rocker!
Thank you for purchasing this X Rocker gaming chair. You are now close to enhancing your favourite games with glorious audio! To get started, please assemble the chair using the assembly instructions on the separate leaflet and then follow the instructions in this manual to get rocking!
Overview
- B1 – 3m 3.5mm to 3.5mm Audio cable
- B2 – 15cm RCA to female 3.5mm audio cable
- B3 – RCA female to female adapters
- B4 – Power supply Cable
- B5 – Wireless DAC Transmitter
- B6 – 1m Optical Toslink Audio Cable
- B7 – Micro USB Cable
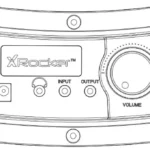
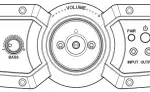
Control panel overview
Wireless connection guide: PS4
Step 1: Make sure that the PS4™ system is switched OFF. Insert the micro USB cable into the X Rocker DAC converter and the other end into one of the front USB ports on the PS4™ system. Remove the clear plastic covers from both ends of the optical cable. Input one end of the optical cable into the X Rocker Wireless DAC (Slot titled SPDIF) and the other into the Optical SPDIF connector on the PS4™ system.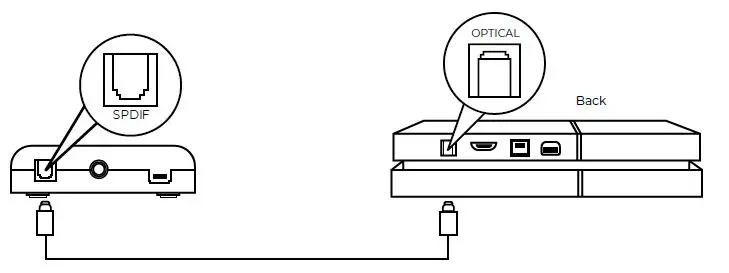 Step 2: Turn the PS4™ system back on. Select one of the wireless bands (1,2,3) on the wireless DAC and then switch to the corresponding band on the chair.
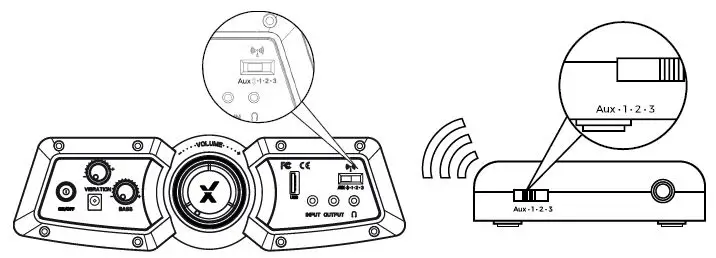 Step 3: On the main PS4™ menu screen Select (Settings) > [Sound and Screen] > [Audio Output Settings] > [Primary Output Port] Change this to [Digitial Optical] > choose AAC.
Wireless connection guide: Xbox One
Step 1: Make sure that the Xbox One™ system is switched OFF. Insert the micro USB cable into the X Rocker DAC converter and the other end into one of the back USB ports on the Xbox One™ system. Remove the clear plastic covers from both ends of the optical cable. Input one end of the optical cable into the X Rocker Wireless DAC Slot (labelled SPDIF) and another into the Optical SPDIF connector on the Xbox One™ system.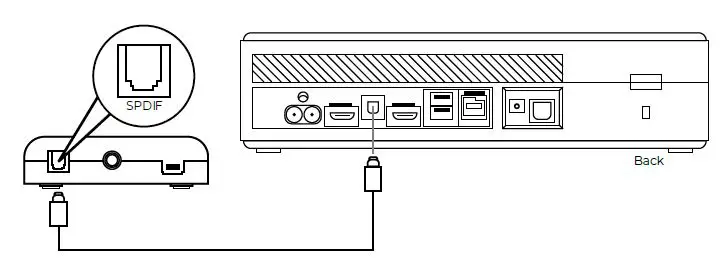 Step 2: Turn the Xbox One™ system back on. Select one of the wireless bands (1,2,3) on the wireless DAC and then switch to the corresponding band on the chair.
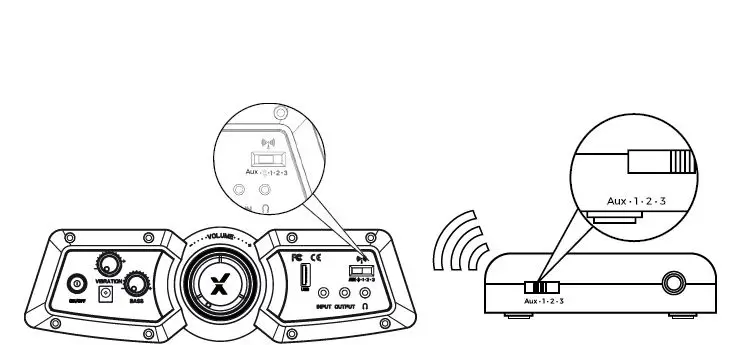 Step 3: On the Xbox One™ menu screen, Select (Settings) > [All Settings] >[Display and Sound] > [Audio Output] > under [Digital Audio], select[Optical Audio] and set it to [Stero Uncompressed]
Wireless connection guide: TV (All systems)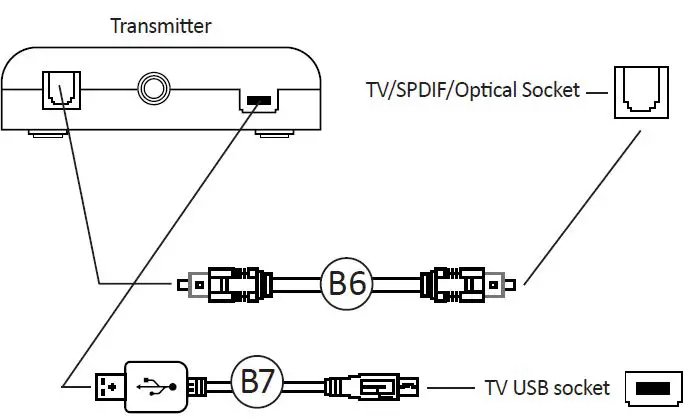
- Connect B6 Optical Cable to the B3 Wirelesss DAC transmitter’s SPDIF Port.
- Connect other end of B6 Optical Cable to the TV Optical socket.
- Connect Micro USB Cable to the transmitter and other end to an available USB socket on the TV.
- Once connected to your TV, increase volume to 50% of the maxiumum for the best sound level.**
* N.B: If your TV does not feature an SPDIF or OPTICAL OUT Socket then you can instead use the 3.5mm audio connection to connect to a headphone socket.
** Depending on your TV you may need to enable the Optical output seperately.
Wired connection guide: TV (All consoles)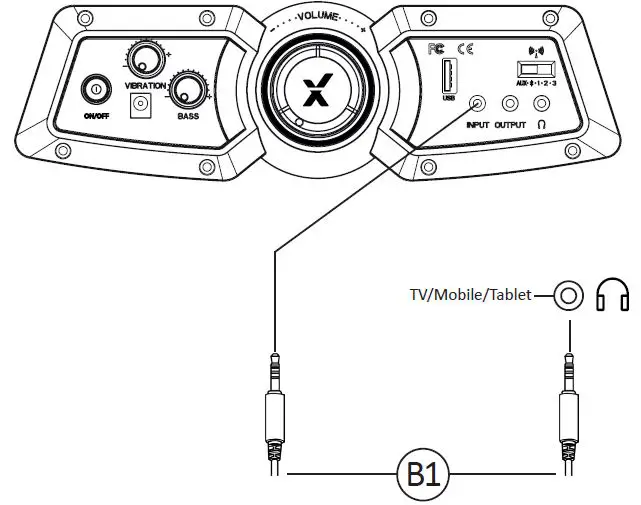
- Connect B1 Cable to X Rocker control panel MP3 INPUT sockets.
- Connect other end of B1 3.5mm end into the headphone socket of your television.
- Once connected to your TV, increase volume to 50% of the maximum for the best sound level. **
** Depending on your TV you may need to increase the headphone volume separately in the TV sound settings.
Wired connection guide: PS4 Controller only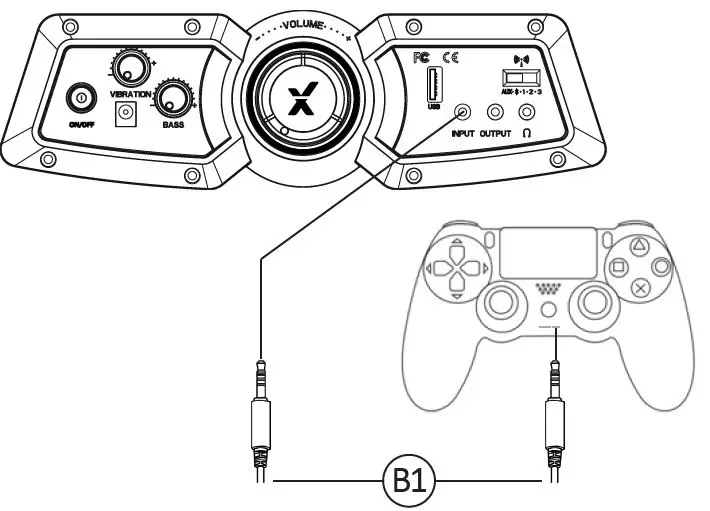
- Connect the B1 cable to the bottom of the PS4 controller via the headset socket.
- Connect the other end of the B1 cable to the chair via the green port.
- With the PS4 turned on, go to the main menu (or locate the main menu screen). Press and hold the PS button on the PS4 controller until the quick menu appears on screen.
- In this menu select [Adjust sound and devices]
- Then select [output to headphones]
- Change the setting from [Chat Only] to [All audio]
- Make sure the volume in the previous menu is set to the maximum.
- Set the control panel Wireless switch to the ‘OFF’ position.
Bluetooth connection guide
Step 1: Switch the X Rocker’s wireless switch to the Bluetooth position.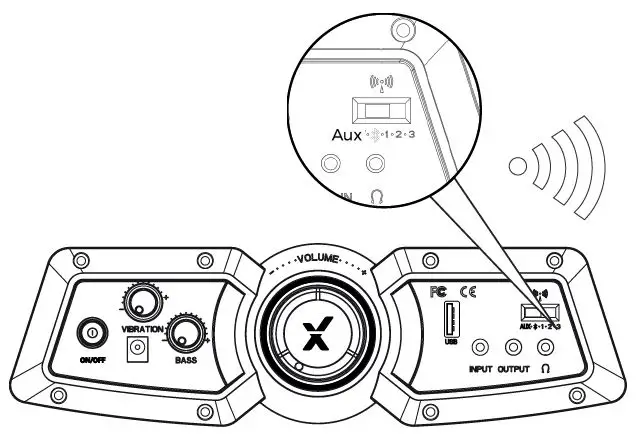
Step 2: On the Audio output device go into its Bluetooth settings, turn Bluetooth on if it is not on already and search for XROCKER. Upon finding this, select the XROCKER option.
If a passcode is required the four digit code will be ‘0000’.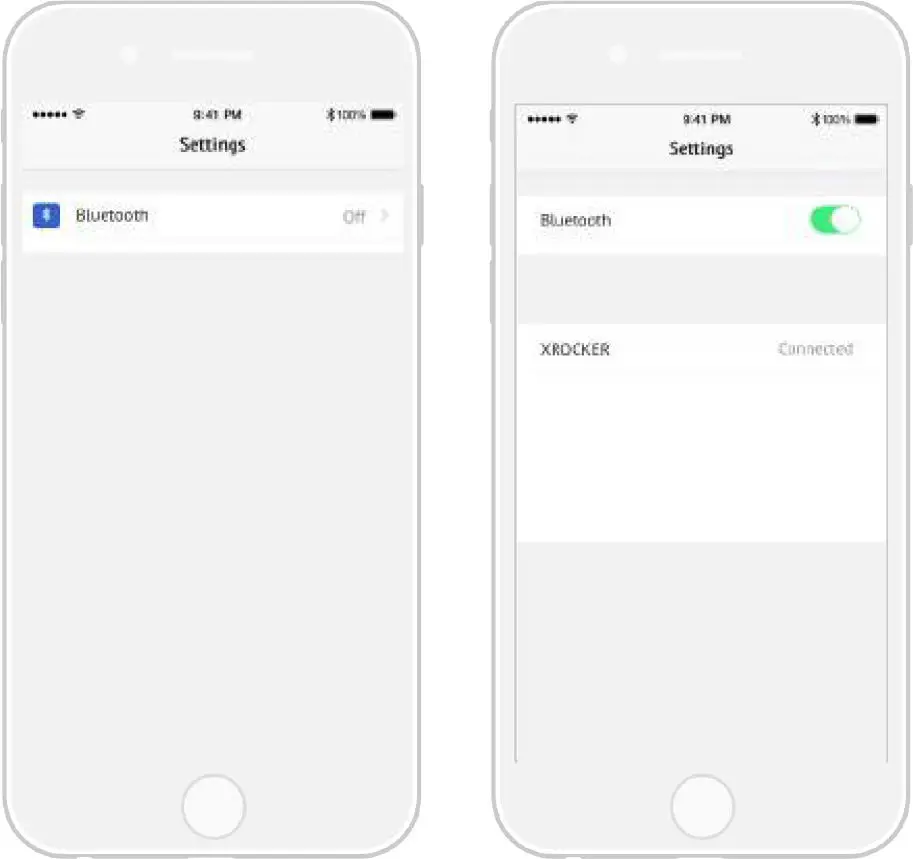
Troubleshooting tips
Health and safety information
- Avoid immersing or allowing the X Rocker to come into contact with liquids.
- Please consult X Rocker Support before unscrewing any of the electrical components on the chair.
- Please be mindful of any cabling laid out between the X Rocker and power source/audio device.
- Please be mindful of cabling attached when moving/swivelling the X Rocker.
- If the cables or electrical equipment are broken then this may present a choking risk, please contact Support for replacements and dispose of these parts safely.
- Do not stand on the X Rocker or exceed the 120kg weight limit via other means.
- Do not lean back on the chair to the point in which the pedestal would lift off the ground.
- X Rocker armrests are designed for support and comfort during gameplay, please do not use these as support for getting in/out of the chair.
- Playing audio for long periods at loud volumes may contribute to difficulties in hearing.
- Please be considerate to others when playing audio through the X Rocker speakers at higher volumes.
Power supply safety information
ATTENTION:
A. For Power Adapter, the apparatus shall not be exposed to dripping or splashing and that no objects filled with liquids, such as vases, shall be placed on the apparatus;
B. For Power Adapter, the MAINS plug is used as the disconnect device, the disconnect device shall remain readily operable;
C.Only use the a achments/accessories specified by manufacturer.
- Power Supply unit trademark: BI;
- Model name: B18-090200-I/B18-090200-AdB
- Input: 100-240V~, 50/60 Hz, 0.8A;
- Output:9 VDC, 2 A;