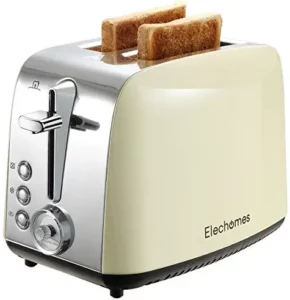
Elechomes Metal Class 2-Slice Toaster User Manual
Thanks for choosing Elechomes !
Please read this user manual carefully and keep it for future reference.
THANK YOU FOR PURCHASING THE 2-SLICE TOASTER BY ELECHOMES
Should you have any questions or concerns about your new product, feel free to contact us on Monday-Sunday at 9:00 am-5:00 pm PST via [email protected]. We hope you enjoy your new product!
GET LATEST INFO & INSPIRATION
Find @Elechomes on social media for healthy diet tips, chef’s choice recipes, share your life with us.
WARNING
To reduce the risk of fire:
- Do not operate while unattended.
- Do not use with food that has been spread with butter, jelly, frosting, etc.
- Do not use with rice cakes, fried foods, frozen-prepared foods, or non-bread items.
- Do not use with toaster pastries. Always cook toaster pastries in a toaster oven.
- Do not cover the toaster or use it near curtains, walls, cabinets, paper or plastic products, cloth towels, etc.
- Closely supervise when used by or near children.
- Do not operate toaster in an enclosed space, such as an appliance cabinet, caddy, garage, or other storage area.
- To reduce the risk of fire, clean crumb trays regularly.
- Always unplug the toaster when not in use.
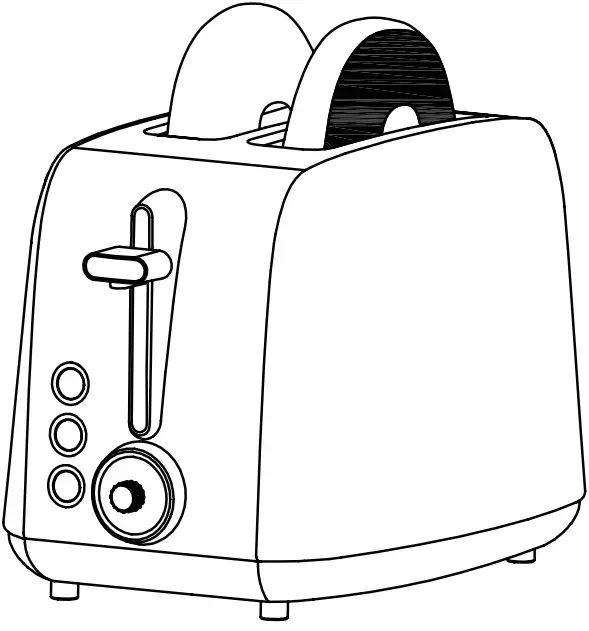 Failure to follow these instructions may result in death or fire.
Important Safeguards
WHEN USING ELECTRICAL APPLIANCES, BASIC SAFETY PRECAUTIONS SHOULD ALWAYS BE FOLLOWED, INCLUDING THE FOLLOWING:
- Read all instructions carefully.
- This appliance is not intended for use by persons (including children) with reduced physical, sensory, or mental capabilities, or lack of experience and knowledge, unless they are closely supervised and instructed concerning use of the appliance by a person responsible for their safety
- Do not touch the hot surfaces directly. Use the handles or knobs.
- Do not attempt to dislodge food when toaster is plugged in.
- To protect against electrical shock, do not place any part of the toaster in water or other liquid.
See instructions for cleaning. - Always unplug the toaster when not in use and before cleaning. Lay it cool before cleaning or handling.
- Do not operate any appliance with a damaged cord or plug, or after the appliance has malfunctioned or has been dropped or damaged in any way, or if it is not operating properly.
- Using the accessory attachments that are not recommended by Elechomes may cause injury.
- Do not use this toaster for unintended use.
- Oversize foods, metal foil packages or utensils must not be inserted in the toaster, as they may involve a risk of fire or electric shock.
- A fire may occur if the toaster is covered or touching flammable materials, such as curtains, draperies or walls when in operation. Do not operate under wall cabinets.
- Do not attempt to dislodge food when the toaster is plugged into electrical outlet.
- To avoid the risk of fire, do not leave toaster unattended during use.
- Always attach the plug to appliance first, and then plug the power cord into the wall outlet.
To disconnect, push the cancel button, then remove plug from wall. - Do not place toaster on or near a hot gas or electric burner or in a heated oven.
- Never use the extension cord with this product.
- Never allow young children to operate or use it as a toy. Close supervision is necessary when any appliance is used near children.
- Keep the appliance and the power cord away liquids.
- Do not let the power cord hang over the edge of the table or countertop or touch hot surfaces
- Don’t operate the appliance with a damaged cord or plug to ensure the device functions properly.
- A fire may occur if toaster is covered or touching flammable material, including curtains, draperies, walls, overhead cabinets, paper or plastic products, cloth towels, and the like, when in operation.
- Remove the power cord from the electrical outlet when not in use.
- Just grasp the plug to pull the power cord from electrical outlet for disconnection instead of yanking it.
- To avoid an electrical circuit overload, do not use another high wattage appliance on the same circuit with this appliance.
- This product is only for household use.
Special Cord Set Instructions:
The length of the cord used on this appliance was selected to reduce the hazards of becoming tangled in or tripping over a longer cord.
If a longer cord is necessary, an approved extension cord may be used. The electrical rating of the extension cord must be equal to or greater than the rating of the appliance. Care must be taken to arrange the extension cord so that it will not drape over the counter top or tabletop where it can be pulled on by children or accidentally tripped over.
Note: This appliance has a polarized plug (one blade is wider than the other). As a safety feature, this plug will fit in a polarized outlet only one way. If the plug does not fit fully in the outlet, reverse the plug. If it still does not fit, contact a qualified electrician. Do not attempt to fix it on your own.
This device complies with Part 15 of the FCC Rules. Operation is subject to the following two conditions:
- This device may not cause harmful interference, and
- this device must accept any interference received, including interference that may cause undesired operation.
SAVE THIS INSTRUCTIONS
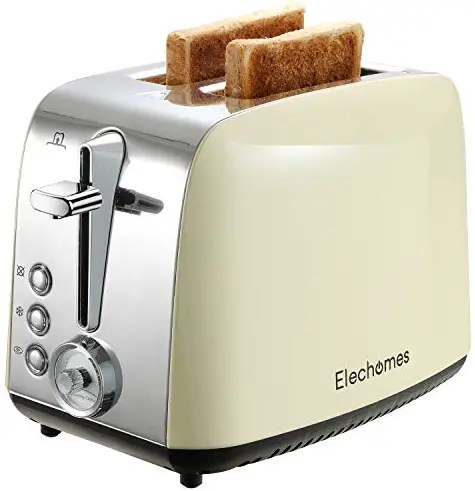
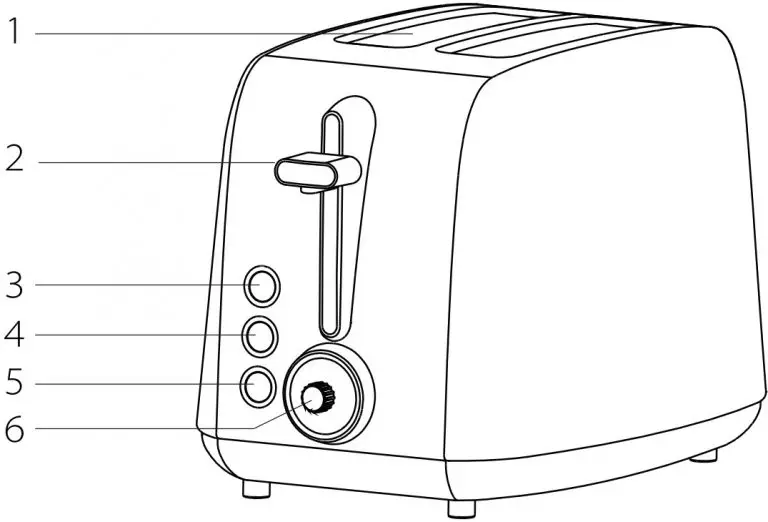
Product Illustration

- Dual Toasting Slots
1 ½-inchs slot toasts a wide variety of breads. - Extra-Lift Carriage Control Lever
Bring the toast close to the top of the toaster, making it easy to remove the smallest items. - Cancel Button
Interrupt toasting process. - Defrost Button
Defrosts and toasts frozen bread. The LED light will be on when selected. - Bagel Button
Add extra time to toasting cycle. The LED light will be on when selected. - Browning Control
Set desired toast color from light to dark, with seven browning levels. - Slide-out Crumb Tray (not shown)
Pull out to clean crumbs that collect in bottom of toaster.
Cord Storage (not shown)
Take up excess cord and keeps countertop neat.
BPA-Free (not shown)
All the parts that contact with food are BPA-Free
How to Use Your Toaster
- Plug Power cord into outlet.
- Insert Slice(s) of Bread.
Note: Be sure that multiple slices do not overlap and that the carriage is in the up position. - Set the Browning Control.
Turn rotary dial to the desired position:
Dial Setting Color
1-2 Llight
3-4 Medium
5-7 Dark
NOTES:- The water content of bread varies, which will lead to different baking time.
- For slightly dry bread, use a lower setting than usual.
- For fresh bread or whole-meal bread, use a higher setting than usual.
- For bread with uneven surface (such as English muffins) needs higher baking temperature.
- It takes a long time for sliced bread (including bagels) to finish baking, sometimes even much longer, because more water of the bread need to be evaporated before baking. For thicker bread, it needs baking twice.
- When baking raisins or other bread with fruit on its top, please remove them before putting them into the toaster, which will help prevent fruit chips from falling into the toaster or sticking to the guide wires in the slot.
- To Begin Toasting.
Press the carriage lever until it locks into the down position.
Note: The carriage lever will not latch down unless the toaster is plugged in. - To Stop Toasting.
When the toasting cycle is finished, the toast will be raised. If you wish to stop the cycle before it is finished, press the “Cancel” button.
Defrost Button
- The “Defrost” button is designed to first defrost and then toast the bread, which would extend the toasting cycle slightly
- Insert slice(s) of bread.
Be sure that multiple slices do not overlap and the carriage is in the up position. - Set the Browning Control.
Setting 1-2:
For refrigerated breads and thinner frozen items such as frozen pancakes.
Setting 3-4:
For toaster pastries, frozen waffles and (thin) French toast, and refrigerated bagels.
Setting 5-6:
For thicker frozen items such as bagels, hand-cut bread and thick French toast. - Press the Carriage control lever until it locks into position.
- Press the “Defrost” button. The LED indicator light will be on.
To stop cycle:
When the defrost cycle is complete, the toaster will raise the bread. If you wish to stop the cycle before finishing, press the “Cancel” button to interrupt. After use, unplug the toaster from the lectrical outlet
Bagel Button
The bagel function adds extra time to the toasting cycle to allow for thicker breads. Before baking, cut each bagel in half.
- Insert slice(s) of bread.
Be sure that multiple slices do not overlap and the carriage is in the up position. - Press the carriage control lever until it locks into position.
- Press the “Bagel” button. The LED indicator light will be on.
When the bagel cycle is complete, the toaster will raise the bread.
If you wish to stop the cycle before finishing, press the cancel button to interrupt.
Toasting Tips
- Never put the food into the toasting slot by force. Food should fit freely between the guide wires.
- Do not place buttered breads or pastries with fillings or frostings in the toaster, for this could create a fire hazard.
- Uneven toasting is usually due to bread slices of uneven thickness.
- After use, unplug your toaster from the electrical outlet.
Cleaning and Maintenance
 CAUTION: Be sure to unplug the power plug. Lay it cool before cleaning or handling.
- Wipe the exterior of the toaster with a damp cloth and wipe it dry. Do not use abrasive cleaners that may scratch the surface of the toaster.
- To remove the crumbs, slide out the crumb tray and discard the crumbs. Wipe the tray clean and replace it. Do not operate the toaster without a crumb tray.
- To remove the remaining bread slices in the toaster, turn the toaster upside down and shake it gently. Do not insert any hard or sharp tools into the groove, otherwise it will damage the toaster and cause safety hazards.
- Do not wind the power cord around the exterior of the toaster. Use the cord storage cleats at the bottom of the toaster to store the power cord.
Troubleshooting
| PROBLEMS | POSSIBLE REASONS | SOLUTIONS |
| The carriage control lever cannot be locked into position. |
|
|
| There is smoking, scorching and fire when baking. | There is butter, jelly, frosting etc. on the bread | Clean the machine; do not use bread or other food coated with butter, jelly, frosting, etc. |
| Uneven baking | The bread is not cut in even thickness. | Use bread slices of even thickness |
| Bread or other food cannot be raised automatically after baking. | The food is too thick or the bread slices overlap, which is stuffed into the touring slot by force. |
|
Warranty Information
| Product Name | Toaster |
| Model Name | KST035F |
| Default Warranty Period | 18-months |
| For your own reference, we strongly recommend that you record your order number and date of purchase. | |
| Date of Purchase | |
| Order Number | |
TERMS and POLICY
The Elechomes products are premium in material, craftsmanship and service. They are effective from the date of purchase.
Elechomes will replace defective products based on eligibility. Refunds are available to the original purchasers of our products within the first 30 days of purchase. This warranty extends only to personal use instead of commercial, rental, or any other uses in which the product is not intended for.
Each product has no other warranties other than the already provided warranties.
This warranty is non-transferable. Elechomes is not responsible for any damages, losses or inconveniences caused by equipment’s failure, user’s negligence, user’s abuse, or improper operation that does not follow the included user manual.
This warranty does not apply to the following situations:
- Damage due to abuse, accident, alteration or vandalism.
- Improper or inadequate maintenance.
- Damage in return transit.
- Unsupervised use by children under 18 years old.
Elechomes and its subsidiaries are only responsible for damages caused by the intended use or as instructed in the user manual. Some states do not allow this exclusion or limitation of incidental or consequential losses so the above disclaimer may not apply to you. This warranty gives you specific legal rights and you may also have other rights which may vary from state to state.
All expressed and implied warranties, including the warranty of merchantability, are limited to the period of the limited warranty.
Additional 6-month Warranty
You can enjoy additional 6-month warranty. Just log onto www.elechomes.com/support/warranty and enter your order number (i.e. Amazon ) within the first 14 days of purchase to register your new product for the extended warranty.
If you are unable to provide the order number for your product, please type a short note in the order number field along with the date you received your product.
Defective Products & Returns:
Should your product prove defective within the specified warranty period, please contact the Customer Support via [email protected] with your invoice and order number. Once our Customer Support team has approved your request, please return the product with a copy of your invoice and order number.
Customer Support
- Your satisfaction is our goal! Should you encounter any issues or have any questions about your new product, feel free to contact our Customer Support Team on Monday Sunday at 9:00am-5:00pm PST via [email protected].
- Please have your order invoice and order number ready before contacting Customer Support.


Connect with @Elechomes

US Importer: Thousandshores Inc., 37707 Cherry St, Newark, CA 94560, USA
EU Importer: Thousandshores Deutschland GmbH, Bredowstraße 17, Hamburg 22113,DE
Website : https://www.elechomes.com
Customer Service : [email protected]
