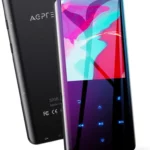
![]() Digital Music Player -B03
Digital Music Player -B03
Getting Started
Quick Guide
- Turn the switch button to “ON” to power on the device and then choose your language.
- Each time you tap the button+/-/
 /
/ , it will bring you to its 9 different functions, including Music, Video, Recording, FM Radio, Folder view, EBook, Pictures, Setting, and Tools. Tap the central button to access to its function.
 - When it’s on music playing interface, tap the button
 to back to previous level, and continually tapping to back to main interface.
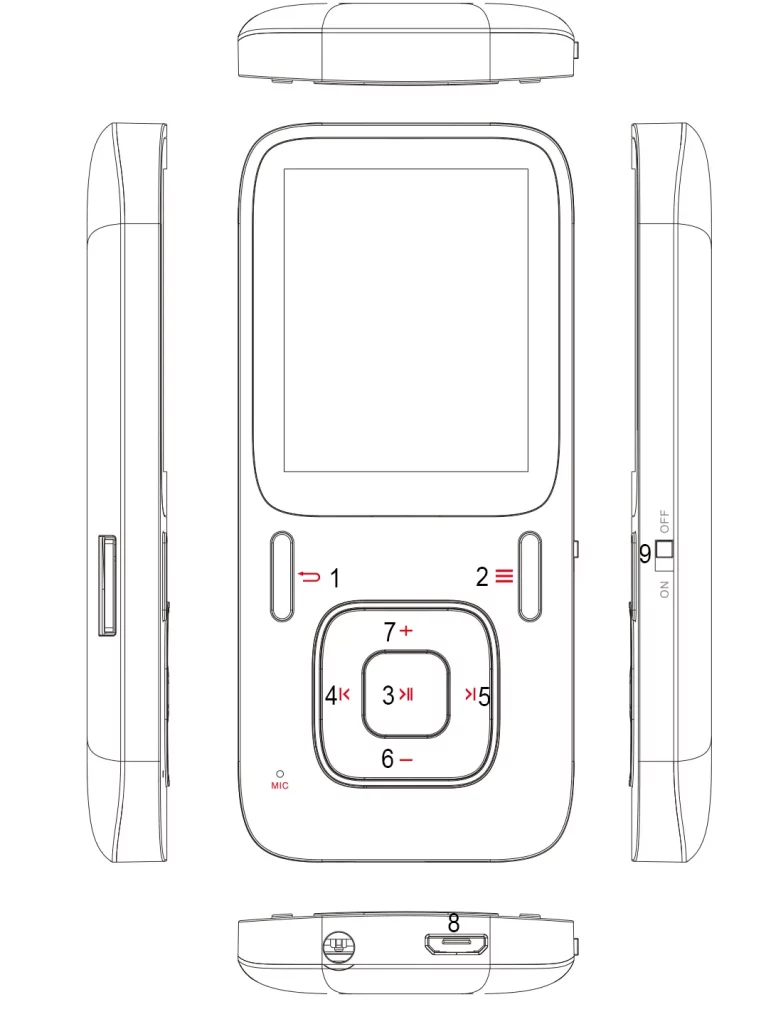
Buttons and Controls
- Return to previous menu.
 When on music/FM playing screen, tap to access to the submenu; Hold it to lock the player, and again to unlock it.
 Enter key/ play/pause/ hold for 3 seconds to switch off/ on.
 Tap for previous track/hold to rewind.
- Tap for next track/ hold to fast forward.
 Decrease the volume.
 Increase the volume.
 Micro USB port.
 Switch to power it “ON”/”OFF”.
Note: when it’s on main playing interface, tap the button +/- to choose different functions.
Charging the Battery
- Plug one end of the micro USB cable into the USB port of a computer or into the mains plug, plug the other end into the device.
- Please kindly note that the device can’t be charged while the switch button is “OFF”.
Power On/Off
- Turn the switch button to “ON”, the player will power up.
- When the switch button is turned to “ON”, it will be turned on/off by pressing the center button for three seconds.
- You can set sleep time under “Setting” according to your need, and then it will switch off as you set.
- When there is no operation on this player, it will switch off by itself.
Note: If you cannot power on the player, please check if you turn the switch on (the switch button is on right side of the player).
Listen Your Music
Tap the icon “Music” on main screen with central button, a related list will appear as “All songs”, “Artists”, “Albums” etc. While on main menu, tap the button ![]() to back to music playing interface.(Make sure music is playing on backstage)
to back to music playing interface.(Make sure music is playing on backstage)
- Rewind/Forward: Hold the button / for fast reward/ Rewind. Tap it to the next/previous song.
- Play/Pause: tap the central button to play/pause the track.
When it is on main audio playing interface, tap the button ![]() to access to the submenu. Then a related list will show, including “Play mode”, “Bookmark”, “Sound settings” etc.
to access to the submenu. Then a related list will show, including “Play mode”, “Bookmark”, “Sound settings” etc.
- Play mode
- Shuffle /Repeat Tap as Play mode> Shuffle /Repeat, and then choose according to your need.
- Repeat mode Replay settings
– Choose “Replay settings” > “Replay Mode” to access to its function, and the icon for A-B indication will appear on playing screen.
– Starting time for replay is confirmed while tapping the icon (B is flashing).
– Tap the icon again and then it will start replaying (adjust the replay paragraph according to your need).
– Tap the iconagain to back to normal playing. Replay times
-Choose “Replay settings” > “Replay Times” from 1 to 10 Replay Interval
– Choose “Replay settings” >”Replay Interval” from 1 to 10 seconds
- Sound settings
– Equalizer: Choose and set accrding to your need, including “Rock” “Funk”, “Hip hop” etc.
You can also customer the effct (such as the bass) according to your need.
-Variable speed playing
Choose different play speed according to your need. - Bookmark (choose “Bookmarks” with the option “Add bookmark”)
- It is marked by the stopping time as “hh:mm:ss”. So you can set the stopping time before you add it for continues playing next time conveniently.
- Maximum number of bookmarks supported by each audio file is10. You can also cover the previous bookmark with new bookmark, and then the old one will be replaced by the new.
- You can find the bookmarks you saved with the option “Go to bookmark” under item “Bookmarks”, and you can delete them with the option “Delete bookmark”.
Transfer Files to Your Player
Connect your player with the computer to start transferring files.
- Power on your computer and connect it with the device via micro USB cable. And then choose with the option “Charge & Transfer”.
- The device will show as a removable disk (AGPTEK-B03) as soon as your computer recognize it. Then you can drag or copy files onto your player.
Note: when you choose “Charge & Transfer” while the switch button is off, it won’t be charged but you can still transfer your files (The “Charge & Player” can be used normally).
FM Radio
Tap the icon “FM Radio” on main screen with central button, a related list will appear as “Presets”, “Manual tune” etc. Choose according to your need.
- Manual tune and Auto tune You can adjust the radio through “Manual tune” or “Auto tune”. When it’s on main radio playing interface, tap the left/right arrow button to rewind and forward search one by one, hold for searching automatically, then press the central button to stop on the channel you like.
- Recording and Presets
-When it’s on main playing interface, tap the button with to access to the submenu, choose with the option “Start FM radio recording” to start recording, and you can find it in “Recordings library”. -when it’s on main playing interface, tap the button with to access to the submenu, choose with the option “Save to preset”. Note: Please plug the earphones into the player when you want to use the FM radio.
Folder View
Tap the icon “Folder View” on main interface, and then a related list will show as “Local folder” and “Card folder” with SD card (SD card is not included in the package) in. When there is no SD card, you will only see folders and files in local folder, choose according to your need.
Settings
Tap the icon “Settings” on main interface to access to its function, and then a related list will show, including “Sleep Timer”, “Display Settings”, and “Ear Protect” etc. Choose and adjust according to your need. For example:
- Date and time Choose the format for your date and time, and then set it. Tap the button with icon to adjust different items, tap the left and right arrow button to adjust its value.
Recording
Tap the icon “Recording” on main interface to access to its function, then a related list will appear showing the following: “Start voice recording”, “Recording library”, “Record format”, and “Record settings”.
- Select option “Start voice recording” and tap the center button on it, the player will indicate `please wait’ and the recording starts.
- Push the center button to pause the recording.
- Push the back button and the player will show “Save recording?” select “yes” to save it. Choose the item “Recording library” and you will find the recordings you saved.
Tools
Tap the icon “Tools” with central button on main interface to access to its function then a related list will appear showing the following: “Calendar”, “Stopwatch”, and “Alarm”. For example, you can tap the button ![]() to choose among the year/month/date, and tap the left/right button to choose its different value. Alarm Choose it and you can adjust its 5 different items, including “Alarm ON/OFF”, “Alarm time”, “Alarm cycle”, “Alarm music” and “Alarm volume”. Adjust according to your need.
to choose among the year/month/date, and tap the left/right button to choose its different value. Alarm Choose it and you can adjust its 5 different items, including “Alarm ON/OFF”, “Alarm time”, “Alarm cycle”, “Alarm music” and “Alarm volume”. Adjust according to your need.
Pictures
Tap the icon “Pictures” with central button on main interface, tap the button with icon ![]() to access to its submenu. Adjust according to your need.
to access to its submenu. Adjust according to your need.
EBook
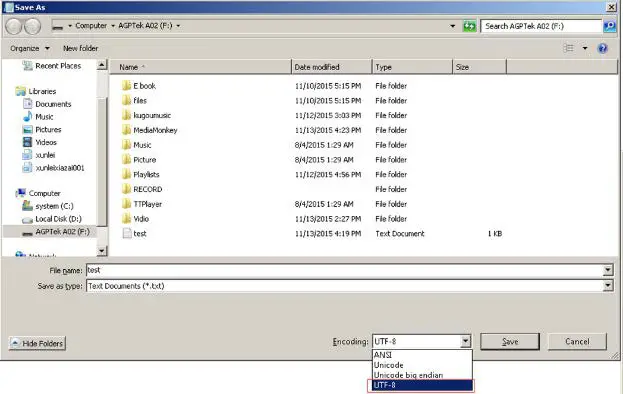
Tap the icon “EBook” with central button on main interface, when it’s on text playing interface, tap the central button to switch between the Manual play and Auto play, tap the button with icon to access to its submenu. Adjust according to your need. Note: max number of bookmarks supported by each file is 16. Please note: if you can’t read your txt document through E book, connect your player to the computer, and then choose the file for the item “save as”, select the code as “UTF-8” and save. Copy the txt file to E-Book folder and it will back to normal condition for your reading.
 Video
Video
Tap the icon “Video” with central button on main interface, and then the video list will show, choose what you want and start playing.
- Tap the left/right arrow button to back to previous/next file, hold them to rewind/forward.
- Tap +/- button to adjust the volume.
- Tap the central button to play / pause the track.
- Create the playlist by yourself
Note: The product only supports 160*128 video, you may convert video files to this format by APP “amvtransform”. (Download it at http://images.agptek.us/Download/VideoTools.zip).
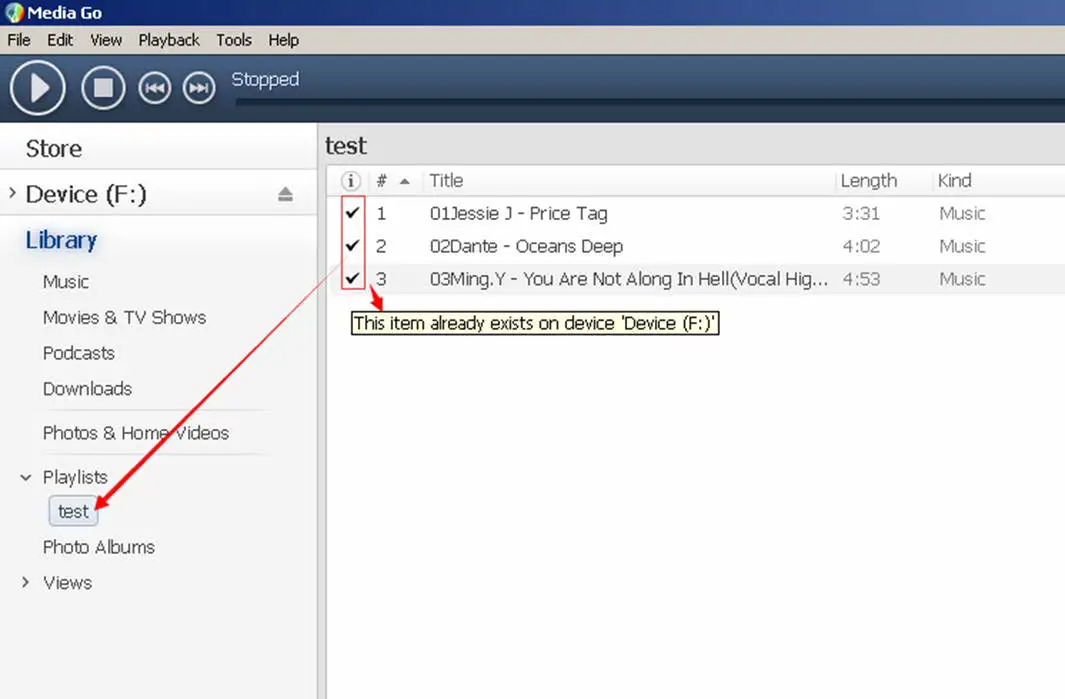
How to create your own playlist
You can add your songs to the 3 preset playlists, and to create your own playlist, we recommend the free program called Media Go (http://mediago.sony.com/chs/download) Just create your playlists in Mediago and then right-click its name and select ‘Synch to X 🙁 Which is your mp3 player’s disk) ‘. (You can download it at http://mediago.sony.com/chs/download) After sending your playlist and music to the player, you may find it in “Music”, and then select playlists.
 How to make you music or audio books sort by number
- Play from “Music” on main interface, the order is sorted by alphabet (or exactly called ASCII).
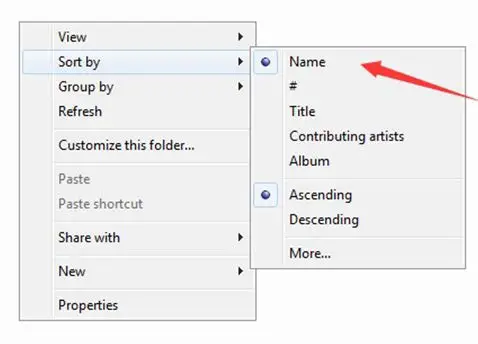
- Play from “Folder viewer” on main interface, the order is sorted by the order you copy them. Before you copying them into the player, arrange the files to a right sequence in computer (by name, like the picture below. Not by #).
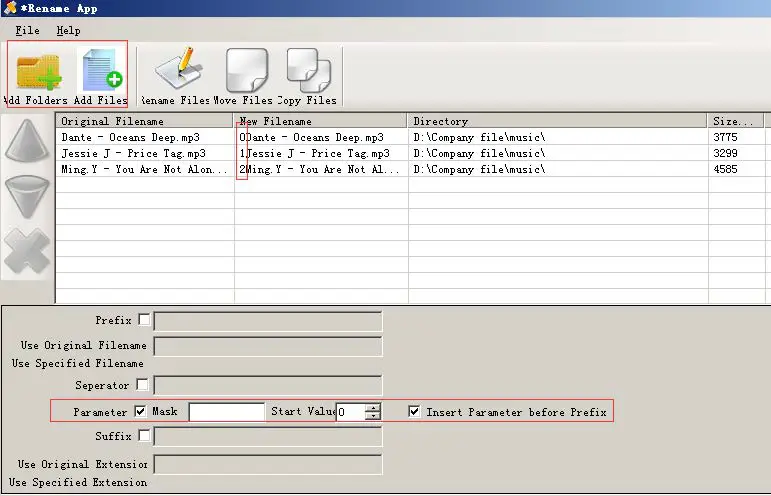
- If your music is not sort by the right number, use the app application”Renamer” to sort your music by number. Download it at http://renamer.en.softonic.com/, and then choose the item “Add folders” or “Add files” to add your music into list. For more details, please kindly check the link)
Specifications
| MP3 | MP1 | Bit rate:32kbps—448kbps |
| Sampling rate:8KHz—48KHz | ||
| MP2 | Bit rate:8kbps—384kbps | |
| Sampling rate:8KHz—48KHz | ||
| MP3 | Bit rate:8kbps—320kbps | |
| Sampling rate:8KHz—48KHz | ||
| WMA | Bit rate:5kbps—384kbps | |
| sampling rate:8KHz—48KHz | ||
| OGG | Bit rate:Q0–Q10(20kbps—499kbps) | |
| sampling rate:8KHz—48KHz | ||
| APE | Bit rate: FastNormal Compression(800kbps1000kbps) | |
| sampling rate:8KHz—48KHz | ||
| FLAC | Bit rate:L0–L8(1000kbps-1200kbps) | |
| sampling rate:8KHz—48KHz | ||
| WAV | IMA-ADPCM | Bit rate:32kbps—384kbps |
| sampling rate:8KHz—48KHz | ||
| MS-ADPCM | Bit rate:32kbps—384kbps | |
| sampling rate:8KHz—48KHz | ||
| PCM | Bit rate:128kbps—1536kbps | |
| sampling rate:8KHz—48KHz | ||
| AAC-LC | Bit rate:(8kbps—320kbps) | |
| Sampling rate:8KHz—48KHz | ||