
ATandT Smart Wi-Fi Extender
A simple setup guide
You need to have AT&T Internet service for your new Wi-Fi Extender to work. Check the compatibility with your Gateway at att.com/wifiextender
Easy setup method
- Download the Smart Home Manager app at att.com/smarthomemanager
For quick setup, scan the QR code with the camera on your smartphone.

- Sign in with your User ID and Password.
- Select “Tools” or “Assistant.”
- Select or say “Install Smart Wi-Fi Extenders.”


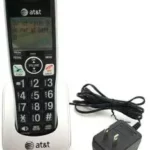
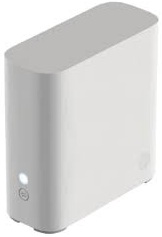
Wifi Extender

Power cord

Ethernet cable (optional)
Smart Home Manager helps you manage your home network from pretty much anywhere. In addition to setting up your Extenders, you can check your Wi-Fi® connection strength, see what devices work on your network, set up parental controls, and more.
Note: AT&T Smart Home Manager is available to AT&T Internet service customers with a compatible AT&T Wi-Fi Gateway. Features may depend upon Gateway models. Data rates may apply for download and usag.
How to know your Wi-Fi Extender is working


Troubleshooting


Alternate setup method
- POWER UP Plug in power cord to Extender and then plug into outlet near Gateway. Push button on back and watch for light to
blink GREEN.
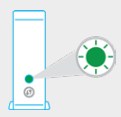
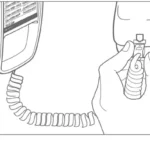
- PAIR Press and release WPS button on Gateway, then press and release WPS button on Extender. Wait three minutes for solid GREEN light.
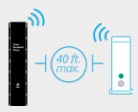
Your Ethernet cable may be connected directly to the Gateway in place of the WPS method for pairing. - PLACE Unplug Extender from outlet. Move it (40 ft., two walls max., and, for best results place it up off the floor) between Gateway and area you want a stronger signal. Plug Extender into outlet and wait for GREEN light


Tip: Make sure both the 2.4GHz and 5GHz radio bands are enabled on the Gateway and with the same SSID. For help, use the Smart Home Manager app or go to att.com/enhancedwif
Additional information