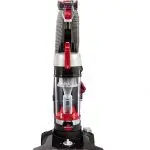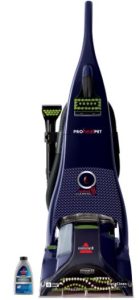

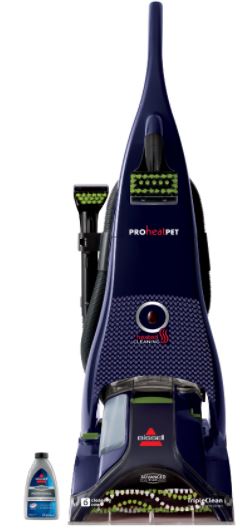
BISSELL 1799V Proheat Pet Turbo Deep Cleaner
IMPORTANT SAFETY INSTRUCTIONS
READ ALL INSTRUCTIONS BEFORE USING YOUR APPLIANCE. When using an electrical appliance, basic precautions should be observed, including the following:
WARNING
TO REDUCE THE RISK OF FIRE, ELECTRIC SHOCK OR INJURY:
- Connect to a properly grounded outlet only. See grounding instructions. Do not modify the 3-prong grounded plug.
- Do not leave appliance when it is plugged in. Unplug from outlet when not in use and before servicing.
- Use indoors only.
- Do not allow to be used as a toy. Close attention is necessary when used by or near children.
- Do not use for any purpose other than described in this user guide. Use only manufacturer’s recommended attachments. Do not use with damaged cord or plug. If appliance is not working as it should, or has been dropped, damaged, left outdoors, or dropped into water, have it repaired at an authorized service center.
- Do not pull or carry by cord, use cord as a handle, close a door on cord, or pull cord around sharp edges or corners.
- Do not run appliance over cord. Keep cord away from heated surfaces.
- Do not unplug by pulling on cord. To unplug, grasp the plug, not the cord.
- Do not handle plug or appliance with wet hands.
- Do not put any object into openings. Do not use with any opening blocked; keep openings free of dust, lint, hair, and anything that may reduce air flow.
- Keep hair, loose clothing, fingers, and all parts of body away from openings and moving parts of the appliance and its accessories.
- Turn OFF all controls before plugging or unplugging appliance.
- Use extra care when cleaning on stairs.
- Do not use to pick up flammable or combustible materials (lighter fluid, gasoline, kerosene, etc.) or use in areas where they may be present.
- Do not use appliance in an enclosed space filled with vapors given off by oil-based paint, paint thinner, some moth-proofing substances, flammable dust, or other explosive or toxic vapors.
- Do not use to pick up toxic material (chlorine bleach, ammonia, drain cleaner, etc.).
- Do not pick up anything that is burning or smoking, such as cigarettes, matches or hot ashes.
- Do not pick up hard or sharp objects such as glass, nails, screws, coins, etc.
- Do not use without filters in place.
- Use only BISSELL® cleaning formulas intended for use with this appliance to prevent internal component damage. See the “Cleaning Formulas” section of this guide.
- Do not immerse. Use only on surfaces moistened by the cleaning process.
- Keep appliance on a level surface.
- Do not carry the appliance while in use.
- Always install float before any wet pick-up operation.
- Unplug before connecting TurboBrush® Tool.
- Plastic film can be dangerous. To avoid danger of suffocation, keep away from children.
- Liquid must not be directed towards equipment containing electrical components.
- Use only the type and amount of liquids specified under the operations section of this guide.
WARNING
Improper connection of the equipment-grounding conductor can result in a risk of electrical shock. Check with a qualified electrician or service person if you aren’t sure if the outlet is properly grounded. DO NOT MODIFY THE PLUG. If it will not fit the outlet, have a proper outlet installed by a qualified electrician. This appliance is designed for use on a nominal 120-volt circuit, and has a grounding attachment plug that looks like the plug in the illustration. Make certain that the appliance is connected to an outlet having the same configuration as the plug. No plug adapter should be used with this appliance.
GROUNDING INSTRUCTIONS
This appliance must be connected to a grounded wiring system. If it should malfunction or break down, grounding provides a safe path of least resistance for electrical current, reducing the risk of electrical shock. The cord for this appliance has an equipment-grounding conductor and a grounding plug. It must only be plugged into an outlet that is properly installed and grounded in accordance with all local codes and ordinances.
SAVE THESE INSTRUCTIONS
THIS MODEL IS FOR HOUSEHOLD USE ONLY. COMMERCIAL USE OF THIS UNIT VOIDS THE MANUFACTURER’S WARRANTY
IMPORTANT INFORMATION
- If your appliance has a motorized Brush Roll, do not leave machine running in the same spot without the handle fully upright
What’s in the Box?
Standard accessories may vary by model. To identify what should be included with your purchase, please refer to the “Carton Contents” list located on the carton top flap.
Cleaning Formulas
View our family of carpet cleaning formulas for your family of mess-makers at BISSELL.com.
Keep plenty of BISSELL® formulas on hand so you can clean whenever it fits your schedule. Always use genuine BISSELL formulas in your machine. Other formulas may harm the machine and void the warranty. Do not use Hard Floor Formula on area rugs or carpet.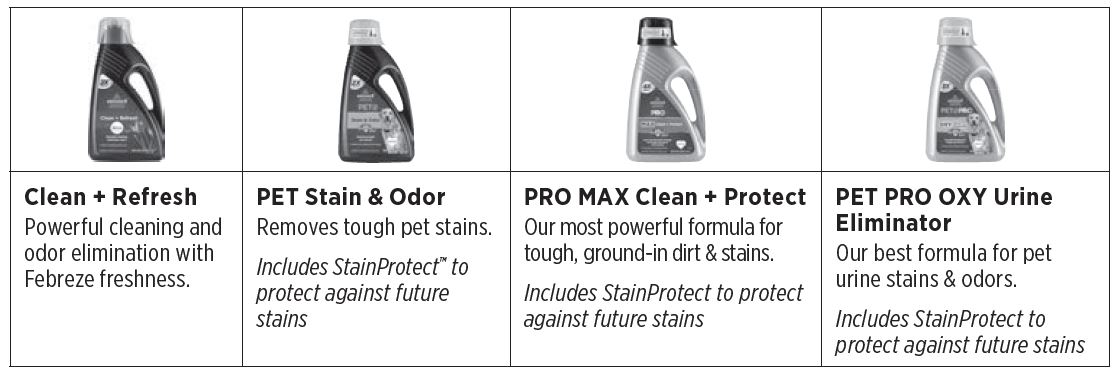
Certain trademarks used under license from The Procter & Gamble Company or its affiliates.
Pretreat
Pretreat spots and stains to improve carpet cleaning performance.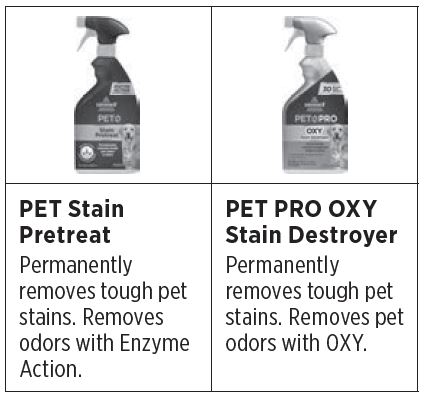
Boost
Add Boost carpet cleaning formula enhancers to any formula to increase its effectiveness.
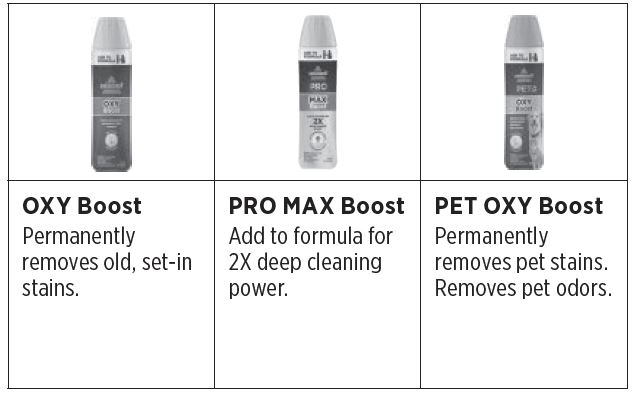
WARNING: To reduce the risk of fi re and electric shock due to internal component damage, use only BISSELL cleaning formula intended for use with this machine.
Assembly
The only tool you will need to assemble your deep cleaner is a Phillips-head screwdriver.
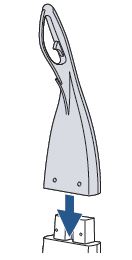
- First, slide the Upper Handle onto the base.
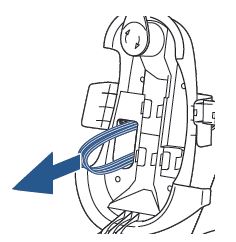
- From the flat side of the Hose & Tool Holder, feed the power cord through the rounded-rectangle opening.
- Align the Hose & Tool Holder with the Upper Handle holes.
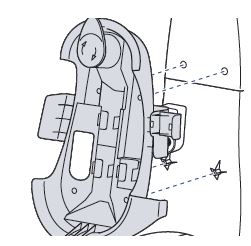
- Place Hex Nut into back of Hose & Tool Holder and hold in place. Insert bolt from the front to the back, turning the bolt into the Hex Nut until snug. Do not overtighten. Repeat for the second bolt and Hex Nut.
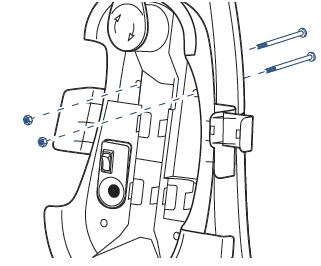
- Insert 2 screws into lower 2 holes located just above the lower hose rack. Turn the screws until tightened.
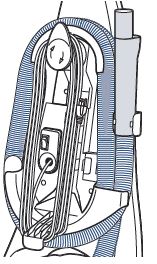
- Attach tools to the end of the hose and front of the Upper Handle. Wrap the power cord and hose.
Before You Clean
Maximum Results with your ProHeat® Pet Deep Cleaner
- Move furniture to another area if cleaning an entire room (optional).
- Thoroughly vacuum area with a dry vacuum cleaner before deep cleaning.
- Plan your cleaning route to leave an exit path. It is best to begin cleaning in the corner farthest from your exit.
- Pretreating your carpet is recommended to improve cleaning effectiveness for spots and stains and heavily soiled carpets.
- Spray a BISSELL® Stain Pretreat formula onto high-traffic areas, soiled areas or stains.
- Allow to penetrate for at least 3 minutes.
- Deep clean carpet with machine set to Heavy Traffic cleaning mode..
- Opening windows or running a fan increases air flow in a room and expedites dry time.
WARNING: Do not plug in your machine until you are familiar with all instructions and operating procedures.
Filling the 2-in-1 Tank
Our innovative 2-in-1 Tank system is designed with a heavy-duty flexible bladder inside for clean water. As you clean, the clean water in the bladder will empty and mix with the cleaning formula. Dirty water will be pulled out of your carpets and collect around the outside of the bladder so that clean and dirty water are always kept separate. This allows you to maximize tank space, yet only carry one tank to and from the sink for filling and emptying.
- Press the Recline Pedal to lay down the machine handle. Lift the 2-in-1 Tank from the base of the machine using the carry handle on the tank.

- Carry the tank to the sink. Set the tank on a flat surface and rotate the handle forward to unlatch and remove the lid. Fill up the bladder with warm water (140⁰F/60⁰C MAX). Do not boil or microwave the water as it can destroy the bladder.
Optional: Add 2 ounces of BISSELL Boost formula to the bladder for even more cleaning power.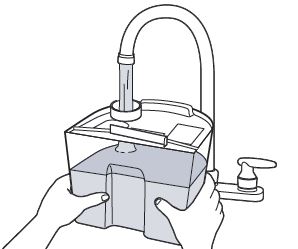
- Return the tank lid by matching it to the tank edges. The tank handle must be in the forward position in order to set the lid in place. Rotate the handle back to secure the latch.
Note: Remember to secure the lid before picking up the tank.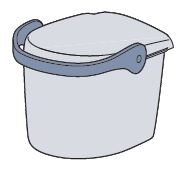
Filling the SmartMix® Tank
The SmartMix feature automatically mixes clean water with the BISSELL® Advanced cleaning formula.
- Lift the SmartMix tank up and out of the machine base.
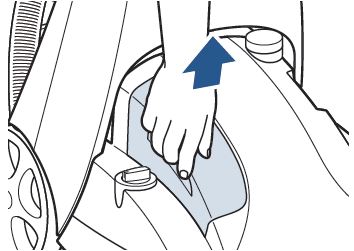
- Fill the tank by first unscrewing the cap and insert. Fill with water to the WATER line. Fill with formula to the FORMULA line. Turn the cap and screw on tightly to secure. Return the tank to the machine for a snug fit.
Note: Make sure the cap is properly seated to avoid leaking.
WARNING: To reduce the risk of electric shock due to internal component damage, use only BISSELL cleaning formulas intended for use with the deep cleaner.
Cleaning Your Floors
- Set the ReadyTools™ Dial to Floor Cleaning.
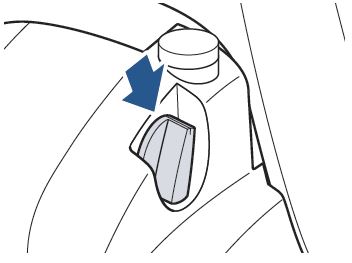
- Choose a SmartMix® Setting. Each setting is designed to adjust proper amounts of water and cleaning formula for your carpet. Heavy Traffic: For your dirtiest carpeted areas.
Normal: For lightly soiled carpet.
Water Rinse: Will not put cleaning formula on carpet.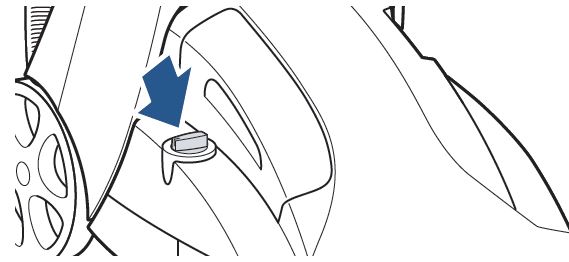
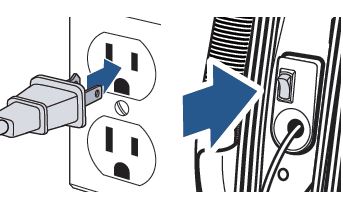
- Plug the power cord into a properly grounded outlet. Press the Power Switch to turn the machine ON.
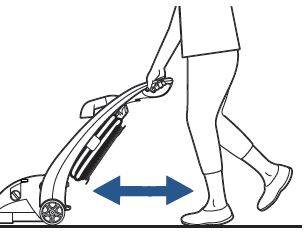
- While pressing the trigger, make one slow pass forward and back to put water and formula down.
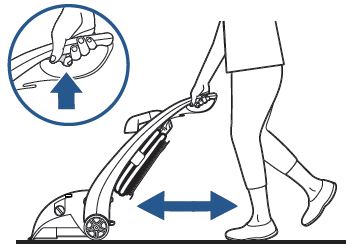
- Release the trigger and make one slow pass forward and back over the same area to pick up the water and formula that was just put down. Repeat cleaning passes until the liquid coming up appears clean. Continue passes without pressing the trigger until you can’t see any more water being pulled up.
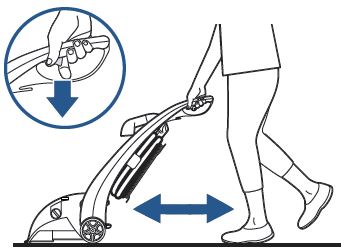
- To prevent damage to Berber carpets, avoid repeated strokes in the same area.
- Do not overwet carpet. Be careful not to run over loose objects or edges of area rugs. Stalling the brush may result in premature belt failure.
WARNING To reduce the risk of injury, be extra careful when cleaning stairs. Make sure the machine is secure and level.
Rinsing the Carpet (optional)
- Rinse out your tank if you added Boost formula. The tank should only be filled with water for rinsing.
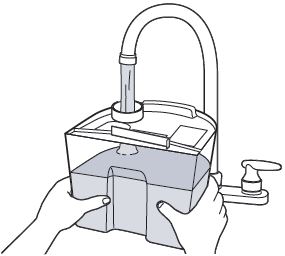
- Choose the Water Rinse setting on the SmartMix® Dial.
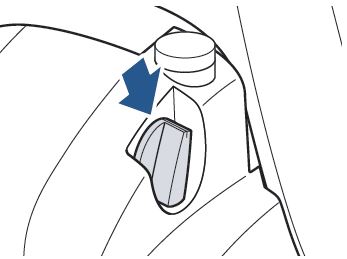
- Make wet and dry passes. Continue passes without pressing the trigger until you can’t see any more water being pulled up.
ATTENTION
- To prevent damage to Berber carpets, avoid repeated strokes in the same area.
Do not overwet carpet. Be careful not to run over loose objects or edges of area rugs. Stalling the brush may result in premature belt failure.
WARNING: To reduce the risk of injury, be extra careful when cleaning stairs. Make sure the machine is secure and level.
Cleaning with the Hose and Attachments
- Set the ReadyTools™ Dial to the Tools setting. This will allow the machine to divert the spray and suction to the hose.
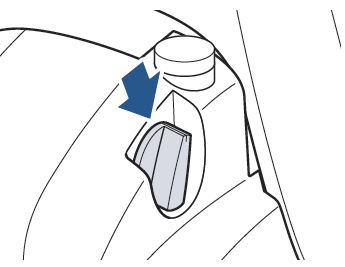
- Set the SmartMix® Dial to the Normal setting.
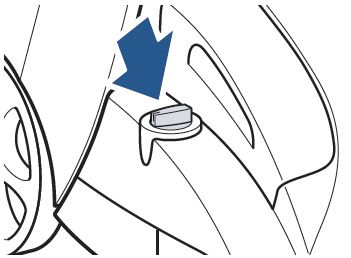
- Attach the cleaning tool to the end of the hose.
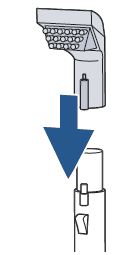
- Plug the power cord into a properly grounded outlet. Press the Power Switch to turn the machine ON.

- Press the trigger to spray solution on the area you are cleaning. Slowly move the tool back and forth over the soiled surface. Release the trigger to suction up the soiled area. Work in small sections. When finished, rinse the hose and tool by suctioning warm water from a bowl. Allow the hose and tool to dry and re-wrap the hose & tool on the machine before storing.
ATTENTION
- Check upholstery tags for any special care instructions. If possible, check for colored stuffing as it is possible the color could bleed through. Check for colorfastness in a hidden area, like the back or underside of the furniture.
- Do not overwet carpet.
WARNING To reduce the risk of injury, be extra careful when cleaning stairs. Make sure the machine is secure and level.
Emptying the 2-in-1 Tank
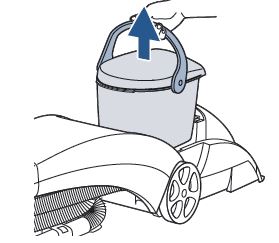
- Press the Power Switch OFF. Remove the 2-in-1 Tank from the base by lifting up on the tank’s handle.
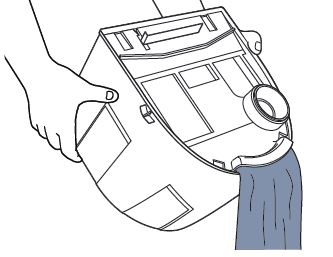
- Rotate the carry handle to unlatch the lid and empty the tank.
After-Cleaning Care
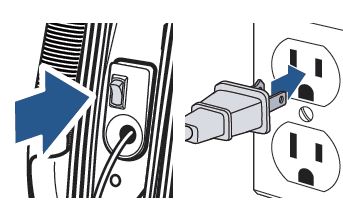
- Turn power OFF and unplug the machine. Always wrap the power cord and make sure the hose is securely wrapped.
- Make sure you rinse the 2-in-1 Tank an extra time on the last rinse. Rinse under and around the bladder.

- Remove and rinse the red lint screen
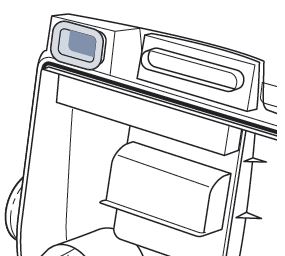
- Clean the flow indicator filter after each use. Unscrew the cap to lift the red rotor and white filter. Rinse all parts with water and return them to the machine. Twist the cap back on, but do not overtighten
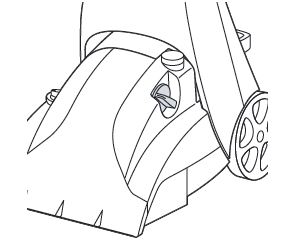
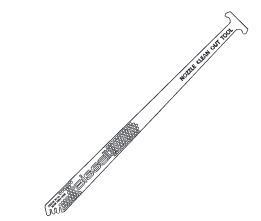
- Insert the Nozzle Clean Out Tool into the thin slot on the end of the Floor Nozzle. Clean until free of pet hair or debris. Use the opposite side of the tool to clean the Brush Rolls by combing the bristles to help loosen hair or debris.
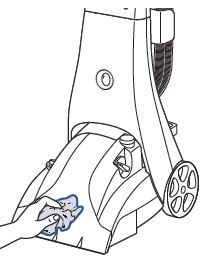
- Wipe the machine’s exterior with a soft cloth. Once your carpet is dry, vacuum again to remove any excess hair or fuzz on your carpet.
WARNING To reduce the risk of fi re, electric shock, or injury, turn power OFF and disconnect plug from electrical outlet before performing maintenance or troubleshooting.
Storing Your Machine
Once your cleaning is complete, make sure the the 2-in-1 tank and SmartMix® Tank is emptied and rinsed out. Store in a closet or basement for the next use.
Troubleshooting
Below are some of the issues you may run into. If you don’t see the issue you’re experiencing below, visit support.BISSELL.com.
| Problem | Possible Cause | Remedies |
| Reduced spray or no spray | Bladder may be empty. | Refill bladder with hot tap water. |
| Filter may be clogged. | Clean out the flow indicator following steps on page 8. | |
| Tanks may not be seated properly. | Turn power OFF (O); remove & reseat tanks. | |
| Pump may have lost prime. | Turn power OFF (O); after 1 minute turn ON and press trigger. | |
| Pump belt may be broken. | Turn ON the machine and check to see that the DirtLifter PowerBrush turns. | |
| The 2-in-1 and SmartMix® Tanks are empty. | Refill tanks according to page 4. | |
| Cleaning mode switch is not fully on a mode. | Ensure the dial is in the correct position. | |
| DirtLifter® PowerBrush does not turn | Brush belt or pump belt is off or broken. | Turn the machine OFF (O) and unplug from the outlet. To check if the brush belt or pump belt has broken, you will need a flathead
screwdriver. Insert the blade end into the lower slot of the Belt Access Door to release the lower snap. If necessary, insert the blade end into the upper slot to release the upper snap. Examine the belt for breakage. If broken, visit BISSELL.com for replacement part information. |
| Reduced suction or no suction | ReadyTools™ Dial may be
on the wrong setting for the cleaning job. |
Set ReadyTools™ Dial to the proper setting, depending on how you are using your machine. |
| 2-in-1 Tank lid is not properly installed. | Reinstall lid following steps on page 4. | |
| 2-in-1 Tank is not properly seated. | 2-in-1 Tank must be firmly seated to function; remove and reseat tank. | |
| Poor tool position. (Handheld attachments only.) | Adjust angle; apply more downward pressure. | |
| 2-in-1 Tank has picked up maximum dirty water. | Empty tank following steps on page 8. |
WARNING: To reduce the risk of fire, electric shock, or injury, turn power OFF and disconnect plug from electrical outlet before performing maintenance or troubleshooting.
NOTICE: To reduce the risk of a leaking condition, do not store machine where freezing may occur. Damage to internal components may result.
We’re Waggin’ Our Tails!
BISSELL® proudly supports BISSELL Pet Foundation® and its mission to help save homeless pets. When you buy a BISSELL product, you help save pets, too. We’re proud to design products that help make pet messes, odors and pet homelessness disappear. Visit BISSELLsavespets.com to learn more.
But wait, there’s more!
Join us online for a complete guide to your new product, including troubleshooting, product registration, parts, and more. Go to support.BISSELL.com.
