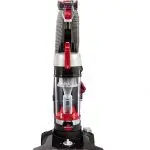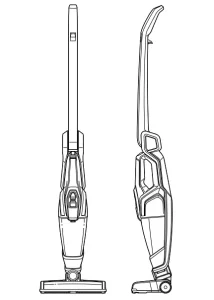
Bissell PowerLifter
USER GUIDE
2482 SERIES

- Do not use outdoors or on wet surfaces.
- Do not allow to be used as a toy. Close attention is necessary when used by or near children.
- Do not use for any purpose other than described in this User’s Guide. Use only manufacturer’s recommended attachments.
- Do not use with damaged cord or plug. If appliance is not working as it should, has been dropped, damaged, left outdoors, or dropped into water, have it repaired at an authorized service center.
- Do not put any object into opening.
- Do not use with any opening blocked.
- Do not unplug by pulling on cord. To unplug, grasp the plug, not the cord.
- Do not handle charger, including charger plug and charger terminal with wet hands.
- Do not charge the unit outdoors.
- Use only the charger supplied by the manufacturer to recharge.
- Do not incinerate the appliance even if it is severely damaged. The batteries can explode in a fire.
- Keep openings free of dust, lint, hair, and anything that may reduce airflow.
- Keep hair, loose clothing, fingers, and all parts of body away from openings and moving parts.
- Use extra care when cleaning stairs.
- Do not use to pick up flammable or combustible materials (lighter fluid, gasoline, kerosene, etc.) or use in areas where they may be present.
- Do not pick up toxic material (chlorine bleach, ammonia, drain cleaner, etc.).
- Do not use vacuum cleaner in an enclosed space filled with vapors given off by oil base paint, paint thinner, some moth-proofing substances, flammable dust, or other explosive or toxic vapors.
- Do not pick up hard or sharp objects such as glass, nails, screws, coins, etc.
- Do not pick up anything that is burning or smoking, such as cigarettes, matches, or hot ashes.
- Do not use without Dirt Tank or filters in place.
- Use only on dry, indoor surfaces.
- Always turn off this appliance before connecting or disconnecting the motorized nozzle.
- Do not pull or carry charger by the cord, use cord as a handle, close a door on cord, or pull cord around sharp edges or corners. Do not run appliance over cord.
- Prevent unintentional starting. Ensure the switch is in the OFF-position before picking up or carrying the appliance. Carrying the appliance with your finger on the switch or energizing appliance that have the switch on invites accidents.
- Under abusive conditions, liquid may be ejected from the battery; avoid contact. If contact accidentally occurs, flush with water. If liquid contacts eyes, additionally seek medical help. Liquid ejected from the battery may cause irritation or burns.
- Do not use appliance that is damaged or modified. Damaged or modified batteries may exhibit unpredictable behavior resulting in fire, explosion or risk of injury.
- Do not expose appliance to fire or excessive temperature. Exposure to fire or temperature above 130°C/265°F may cause explosion.
- Follow all charging instructions and do not charge the appliance outside of the temperature range specified in the instructions. Charging improperly or at temperatures outside of the specified range may damage the battery and increase the risk of fire.
- Have servicing performed by a qualified repair person using only identical replacement parts. This will ensure that the safety of the product is maintained.
- Do not modify or attempt to repair the appliance except as indicated in the instructions for use and care.
- Keep the temperature range of between 40-104°F when charging battery, storing unit or during use.
- Use only with charger SIL, Model ZD5F230030US.
- Recharge only with the charger specified by the manufacturer. A charger that is suitable for one type of battery pack may create a risk of fire when used with another battery pack.
SAVE THESE INSTRUCTIONS FOR FUTURE USE
This model is for household use only.
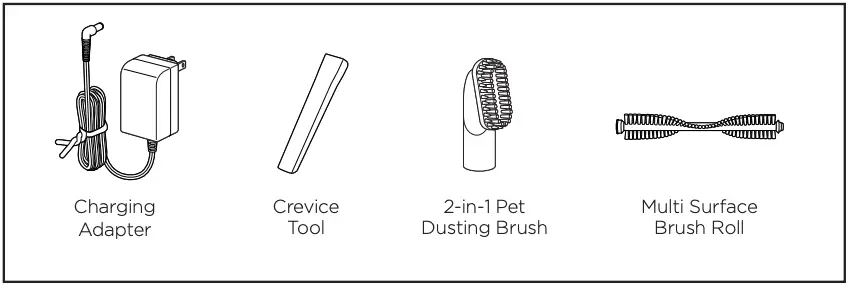
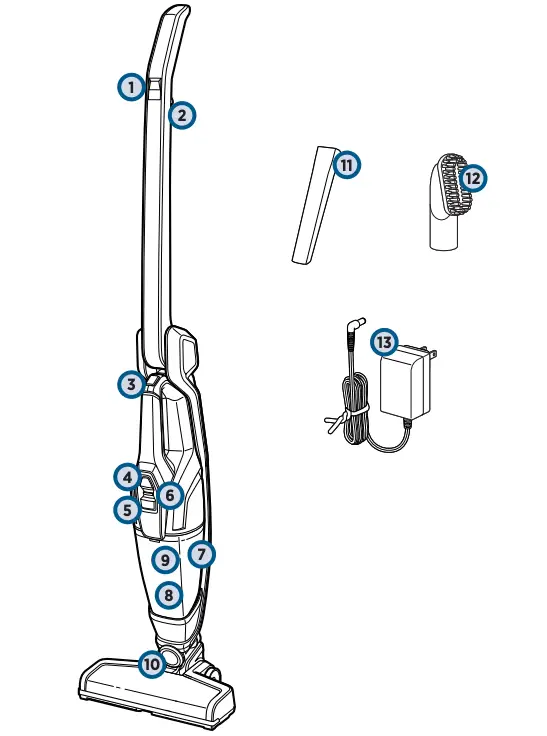
- 2-in-1 Pet Dusting Brush
- Charging Adapter Plug
Assembly
 WARNING
Do not plug in your PowerLifter® Ion Pet until you are familiar with all instructions and operating procedures.
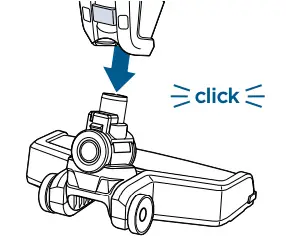
Your BISSELL PowerLifter® Ion Pet vacuum comes in two easy-to-assemble components and does not require any tools to assemble.
- Insert foot into body of the vacuum until you hear a “click”.
Charging
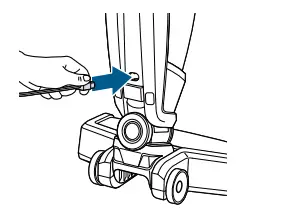
- Insert Charging Adapter Plug into the charging port on the back of the unit.
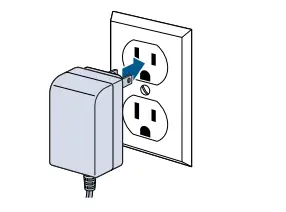
- Plug the adapter into the wall outlet.
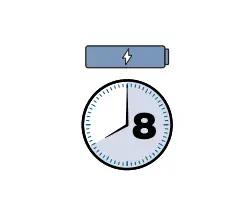
- Charge the unit completely for 8 hours prior to first use.
|
|
|
|
|
|
|
|
|
|
|
|
|
|
|
|
|
|
|
|
|
|
|
|
|
|
|
|
|
|
|
|
|

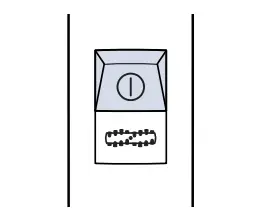
- To start cleaning select the power button to turn the unit ON.
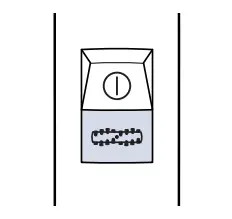
- Select the brush button to turn the motorized Brush Roll OFF and ON.
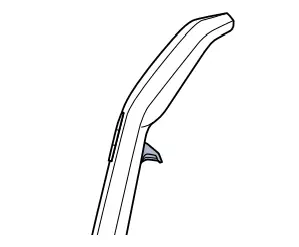
- Find the 2-Way Folding Handle Release Trigger located under the handle.
- Pull the trigger to fold the handle.
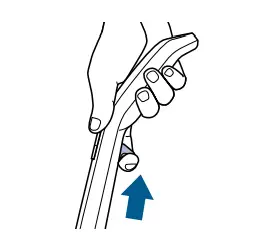
- Fold the handle forward to easily clean underneath low places.
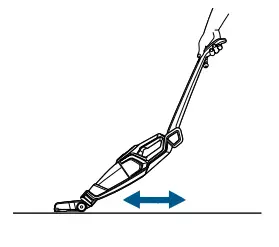
- Fold the handle back for easy storage.
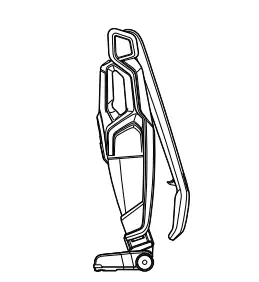
Removable Hand Vacuum
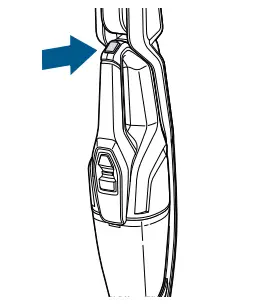
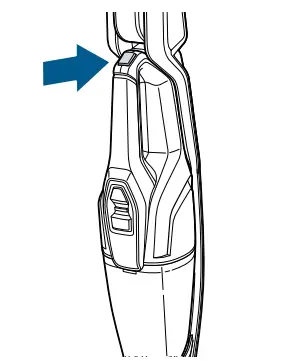
- Press the button located on top of the Hand Vacuum handle and lightly pull out to remove it from the machine.
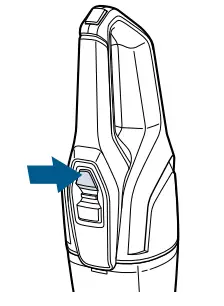
- Press the Power Button to begin cleaning.
Hand Vacuum Tools
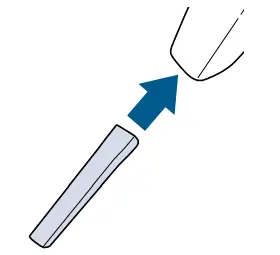
Your purchase comes with specially design tools to make pet cleanup easier. To attach any of the included tools, remove the Hand Vacuum from the base of the machine and insert the desired tool firmly into the Hand Vacuum Nozzle.
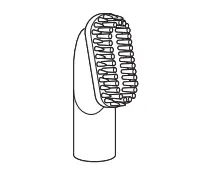
The 2-in-1 Pet Dusting Brush removes pet hair from upholstery while also sweeping up dust and debris from hard surfaces.
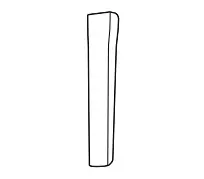
The Crevice Tool reaches narrow spaces.
 WARNING
To reduce the risk of fire, electric shock, or injury, turn the power OFF and disconnect the plug from the electrical outlet before performing maintenance or troubleshooting.
 WARNING
Do not operate your PowerLifter® Ion Pet with damp or wet filters or without filters in place.
- Make sure the vacuum is OFF. Remove the Hand Vacuum by pressing the release button on its top handle.
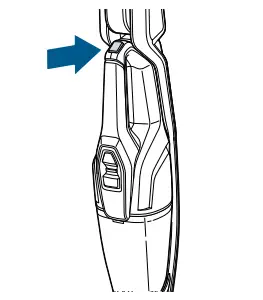
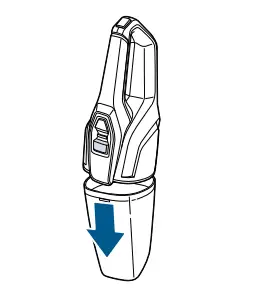
- Hold the Hand Vacuum vertically and depress release button on the front to release the Dirt Tank.
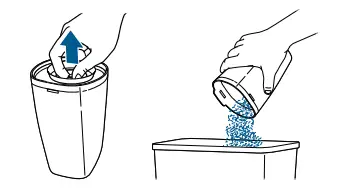
- Grasp filter tabs and pull vertically to remove Filter Assembly and empty dirt into waste container.
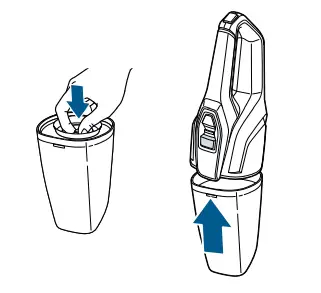
- Replace Filter back into the Dirt Tank and attach Dirt Tank to Hand Vacuum until it snaps securely into place.
- Turn power OFF and remove the Dirt Tank as directed in “Empty the Dirt Tank” section.
- Grasp filter tabs and lift up to remove the washable Filter Assembly from the Dirt Cup. Grip the Filter and turn counter-clockwise and lift down to remove Filter from Filter Screen.
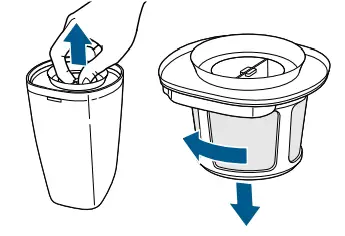
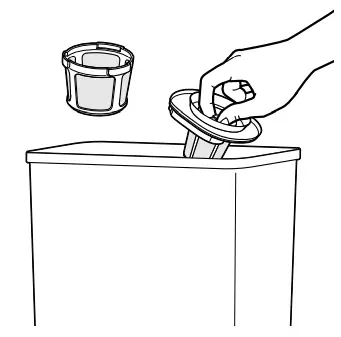
- Tap firmly against the inside of a waste container, removing any visible dirt.
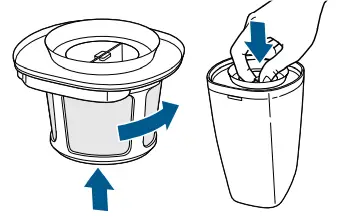
- Replace Filter back into the Filter Screen then turn clockwise to lock into place. Attach Filter Assembly back into the Dirt Tank and attach to Hand Vacuum until it snaps securely in place.
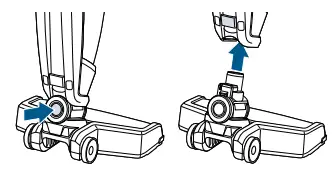
- Make sure the vacuum is OFF. Press the vacuum foot release button to disconnect it from the vacuum.
- Turn the foot over and locate the Brush Roll Cover Tab. Use a coin to remove the Brush Roll, turning counterclockwise to unlock.
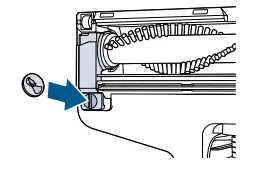
- Slide the tab down to un-lock and lift the corner cover piece.
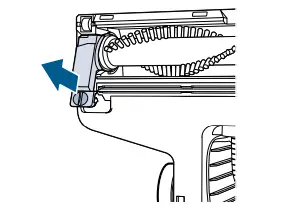
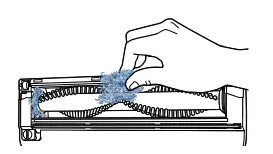
- Grasp the Brush Roll and remove from the foot window area. Clean off hair or debris from brush. Place the cleaned Brush Roll back into the foot of unit and use coin to turn lock clockwise to lock into place.
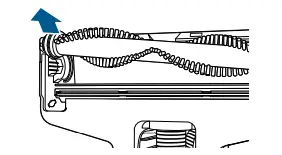
- If the Brush Roll stops spinning due to debris, the LED light will turn solid red.
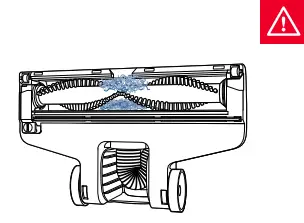
- BRUSH ROLL RESET:
Turn unit OFF and remove debris from Brush Roll and Brush Roll End Cap area, following the steps above. Replace Brush Roll and turn unit ON to reset the brush.

NOTICE
Disconnecting the battery will destroy the appliance and invalidate the warranty.
- Ensure the unit is disconnected from the charger and powered OFF. Remove the Dirt Tank from the unit.
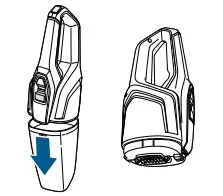
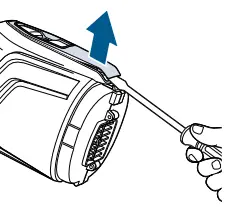
- Using a flat-head screwdriver, pry off top cover of handle and remove it.
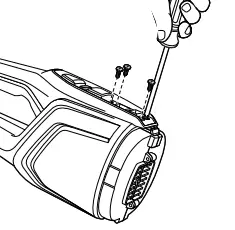
- Using a Phillips-head screwdriver, remove the four screws below.
- Using a flat-head screwdriver, pry off the cover and remove it.
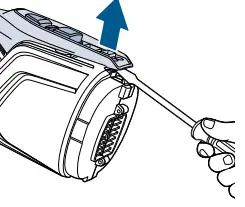
- Using a Phllips-head screwdriver, remove 7 screws
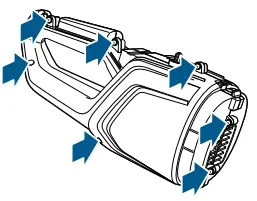
- Pull two halves of vacuum apart.
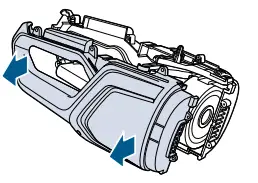
- Disconnect and remove entire battery assembly by unplugging the two sockets (one red, one white) from the vacuum.

- Discard remainder of product.
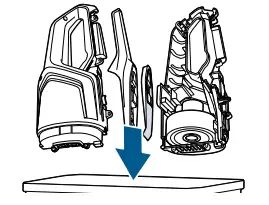
|
|
|
|
|
|
|
|
|
|
|
|
|
|
|
|
|
|
|
|
|
|
|
|
|
|
|
|
|
|
|
|
|
|
|
|
|
|
|
|
|
|
|
|
|
|
|
|
|
|
|
|
|
|
|
|
|
|
|
|
|
|
|
|
|
|
|
|
|
|
|
|
If your BISSELL product should require service:
Contact BISSELL Consumer Care to locate a BISSELL Authorized Service Center in your area.
If you need information about repairs or replacement parts, or if you have questions about your warranty, contact BISSELL Consumer Care.
Website:
www.BISSELL.com/service-centers
E-mail:
www.BISSELL.com/email-us
Call:
BISSELL Consumer Care
1-800-237-7691
Monday – Friday 8am – 10pm ET
Saturday 9am – 8pm ET
Sunday 10am – 7pm ET
Please do not return this product to the store.
Other maintenance or service not included in the manual should be performed by an authorized service representative.
For any questions or concerns, BISSELL is happy to be of service. contact us directly at 1-800-237-7691.
