YTH6320R1001/U
Operating Manual [pdf]: Wireless Remote Control For RedLINK
System Installation Guide pdf]: RedLINK Wireless System
How do I connect my RTH6500WF Smart Series Programmable Thermostat to WiFi and register it?
Connecting your thermostat to Wi-Fi can be performed during the initial setup and configuration, or later at a time you choose.
Connecting to Wi-Fi – Initial Setup:
After the Configuration step during the initial install, you will be prompted to connect your FocusPRO Wi-Fi 6000 to your Home Wi-Fi.
The FocusPRO Wi-Fi 6000 uses a 3-step connection and registration process
Step 1 – Connect your mobile device to the thermostat’s Wi-Fi network (NewThermostatxxxxxx)
Step 2 – Connect the thermostat to your home Wi-Fi (via an internet browser on your mobile device)
Step 3 – Register your thermostat in the My Total Connect Comfort web portal.
*Registration cannot be performed with the mobile app, currently only supported via the web portal*
Step 1 – Connecting your mobile device to the thermostat’s Wi-Fi network (NewThermostatxxxxxx)
Once installed and configured, the thermostat will display “Wi-Fi Setup”. Open the Settings – Wi-Fi on your mobile device and connect to the Wi-Fi network named “NewThermostatxxxxxx”.
*If your thermostat does not display Wi-Fi Setup, remove the thermostat faceplate from the wall plate for 30 seconds and then reattach it. If Wi-Fi setup does not display, enter the Installer Setup (press and hold the fan and up arrow simultaneously for 5-10 seconds until the screen changes) and use the RTH6580WF1 User Guide here (or TH6320WF1 Install Guide here) to navigate the settings to function 38. Make sure function 38 is set to 1, then proceed to function 39. Use the up or down arrow to change function 39 function to 0 then press done. WiFi setup will then be displayed on the screen. Return to step 1.*
Step 2 – Connect the thermostat to your home Wi-Fi (via an internet browser on your mobile device)
After connecting to the thermostat Wi-Fi (NewThermostatxxxxxx), open a web browser (Safari, Chrome, etc.) You should be automatically guided to a page titled “Thermostat Wi-Fi Setup. If you are not automatically guided there, enter the IP address: 192.168.1.1 into the address bar on your browser to navigate there manually.
I connect to the NewThermostatxxxxxx network, but can’t get to the “Thermostat Wi-Fi Setup” page:
The best indicator that your phone will not stay connected directly to the thermostat is when you open the web browser, you see your default browser page or the last site you visited instead of being directed to the Thermostat WiFi Setup page. Or, when entering 192.168.1.1 you see search results instead of being brought to the correct page.
*Smart phones will typically switch to another network or mobile data if the current Wi-Fi network cannot access the internet. For this step, since the thermostat network (NewThermostatxxxxxx) cannot access the internet, it is common to receive a pop-up notification that states, “Your phone is not connected to the internet.” This is normal and can be disregarded. To ensure your mobile device remains connected to the thermostat until the connection process is complete, it may be necessary to “forget” other available Wi-Fi networks, and/or to turn on Airplane Mode, until the thermostat is successfully connected. You can also temporarily disable this feature (sometimes referred to as Auto Network Switch, or Smart Switch) from the Menu- Settings on your mobile device.
You should see your Home Wi-Fi network listed. Select it and enter your Wi-Fi password. After a brief connection period, your thermostat will display a “Connection Success” message. Reconnect your phone to your home wi-Fi network if your device does not reconnect automatically
*If you do not see your home Wi-Fi network, refresh the list. Even though Wi-Fi networks are typically listed by the strongest signal, you may need to scroll through the entire list to locate yours.
Step 3 – Register at https://www.mytotalconnectcomfort.com/portal
Registration is completed at mytotalconnectcomfort.com/portal. Navigate to the page and create an account / login. You will be prompted to create a “Location” to associate your thermostat with, if you do not have a location already in your account.
Select the “Add Device” icon and Input the MAC ID / CRC for your device. (MAC ID / CRC are located on your thermostat information card, on the back of the thermostat.
Complete the security check (if prompted) and follow the directions within the web portal to complete the registration.
Unable to Register:
If your device connects to Wi-Fi, but fails to register, it may already be registered to another user. If known, contact the previous owner and ask that they delete the device from their account. If the previous owner is not known, contact Resideo Customer Care to unregister your device. You will require the MAC ID (located on the back of your product) to complete the un-registration process.
Wi-Fi Reset:
A basic Wi-Fi Reset can be performed by removing the thermostat face plate from the wall plate and reattaching it after 30 seconds. The thermostat will attempt to connect to the Wi-Fi signal is was previously paired with. To connect to a new Wi-Fi signal, follow step 1 outlined above to disconnect or “forget” the old Wi-Fi network and connect to the new network.
Why is my thermostat’s Wi-Fi not working?
If your thermostat’s Wi-Fi isn’t working, the solution depends on what you’re experiencing.
What are you experiencing?
- NEW THERMOSTAT, NEW INSTALLATION – This is for people who recently bought a new thermostat and are installing it for the first time. Continue to the New Thermostat, New Installation section.
- OLD THERMOSTAT, NEW INSTALLATION – This is for people who have an existing thermostat but are moving it to a new location. Continue to the Old Thermostat, New Installation section.
- LOST WI-FI ON APP/ THERMOSTAT – This is for people who have an existing thermostat that was working but has lost connection. Continue to the Lost Wi-Fi on App/Thermostat section.
New Thermostat, New Installation
1. Which app does your thermostat work with?
- HONEYWELL HOME APP – Compatible thermostats include T-Series and Round Smart Thermostats. Continue to the Honeywell Home subsection.
- TOTAL CONNECT COMFORT APP – Compatible thermostats include Wi-Fi FocusPRO, VisionPRO, Prestige and Wi-Fi programmable thermostats. Continue to the TCC subsection.
Honeywell Home
2. When did your Wi-Fi connection fail?
- APP-THERMOSTAT PAIRING (connecting to the Lyric xxxxxx network, after clicking the “+” or “Add new device” button in the Honeywell Home mobile app) – To troubleshoot issues with pairing your app to your thermostat, continue to the App-Thermostat Pairing Issues subsection.
- THERMOSTAT-NETWORKING PAIRING (after setting up the thermostat in the Honeywell Home app, and selecting my home network and entering my home wi-fi password) – To troubleshoot issues with pairing your Wi-Fi network to your thermostat, continue to the Thermostat-Network Pairing Issues subsection.
- THERMOSTAT REGISTRATION – See the Registration Issues FAQ.
App-Thermostat Pairing Issues
3. Make sure your app is up to date, and your mobile phone is within 3-5 feet of your thermostat.
4. Make sure thermostat is broadcasting to your app.
In your app, you should see “Lyric XXXXXX” as an option to connect to.
5. Go to your phone’s settings and forget other networks. (This ensures the phone does not automatically “jump” back to a known wi-fi network, which can disrupt the connection process)
6. Is your app pairing with your thermostat now?
- YES – Congratulations! You’ve fixed your Wi-Fi issue!
- NO – Contact Support at 1-800-633-3991 or find a pro-installer in your area.
Thermostat-Network Pairing Issues
7. Turn off your mobile phone’s cellular/mobile data. (This ensures that the connection and registration app data goes to Honeywell / Resideo via the same route as thermostat data)
8. Turn on your mobile phone’s Wi-Fi.
Connect your phone to the same network that you’re connecting your thermostat to. (Typically, your home wi-fi network. If you are attempting to connect /register the thermostat via a mobile hotspot, your mobile phone and thermostat should connect to the same hotspot network)
9. Make sure the device you are connecting is on the same Wi-Fi network as the mobile device.
- “Forget” all other networks, and turn off mobile data.
OR - Turn on “Airplane Mode” and then turn on Wi-Fi and connect to the same Wi-Fi network the thermostat will be connected to.
10. Make sure the network is a standard home network and does not require logging in from a web page, such as a guest network or business network.
11. Make sure you’re connecting to a 2.4 gigahertz (GHz) network with its own network name. (Only the T9/T10 thermostats, C2 Camera, and Smart Home Security base station are compatible with 5GHz networks at this time)
- This specifically speaks to “Dual Band” routers which support both 2.4 GHz and 5 GHz networks.
- Many of these routers will allow you to configure separate Networks to connect to on your phone or computer.
- These networks must be named discretely (HomeWiFi – 2.4 and HomeWiFi – 5) in order for Honeywell Home products to connect.
12. Make sure you’re connecting directly to a router, and not a router accessory.
Examples of router accessories include repeaters and signal boosters.
13. Make sure your router hasn’t reached its max number of devices.
Routers typically can only handle a specific number of devices. Refer to your router support or Internet Service Provider for assistance.
14. Make sure your router is using Dynamic Host Configuration Protocol (DHCP).
When a router is using DHCP, it automatically assigns internet protocol (IP) addresses to each device. Honeywell connected devices work best with DHCP.
15. Make sure your router isn’t using any advanced security settings such as after-market firewalls, or connected to any network device, such as a switch or gateway which may have its own security.
Make sure Wi-Fi network is using one of the following security protocols. Other security protocols are not recommended. • OPEN • WEP PSK • WPA TKIP PSK • WPA2 AES PSK • WPA2 MIXED PSK.
16. Reset your thermostat.
Power cycle the device for 30 seconds or perform a hard reset by pressing and holding the reset button for 30 seconds. This clears short term memory. Power cycle the router for 30 seconds. This clears short term memory and resets router tasks.
Is your network pairing with your thermostat now?
- YES – Congratulations! You’ve fixed your Wi-Fi issue!
- NO – Contact Support at 1-800-633-3991 or find a pro-installer in your area.
TCC
17. When did your Wi-Fi connection fail?
- THERMOSTAT SET UP (Attempting to connect to my home wi-fi network) – Continue to the Thermostat Set Up subsection.
- ONLINE REGISTRATION (Attempting to register the thermostat via the mytotalconnectcomfort.com web portal) – See the Registration Issues FAQ.
Thermostat Set Up
18. Go to your phone’s settings and forget other networks. (This ensures the phone does not automatically “jump” back to a known wi-fi network, which can disrupt the connection process)
19. Continue to the Thermostat-Network Pairing Issues subsection.
Old Thermostat, New Installation
20. Which app does your thermostat work with?
HONEYWELL HOME APP – Examples include the Lyric thermostats.
- Continue to the Honeywell Homes subsection.
TOTAL CONNECT COMFORT APP – Compatible thermostats include Wi-Fi FocusPRO, VisionPRO, Prestige, and Wi-Fi programmable thermostats.
- Continue to the TCC subsection.
Lost Wi-Fi on App/Thermostat
21. Have you recently changed your router or internet provider?
- YES – Continue to the Thermostat-Network Pairing Issues subsection.
- NO – Continue to the next step.
Go to your thermostat.
22. Is the thermostat showing offline?
- YES – Reset your Wi-Fi on your router.
- Continue to the next step.
- NO – Continue to Step 26.
23. Is your thermostat still offline?
- YES – The thermostat is still offline.
- Contact Support at 1-855-733-5465 to find a pro-installer in your area.
- NO – The thermostat is now online.
- Continue to the next step.
24. Check your app: is the thermostat showing offline in your app?
- YES – Your thermostat is online, but your app is showing that the thermostat is offline.
- Contact Support at 1-855-733-5465 to find a pro-installer in your area.
- NO – Continue to the next step.
25. Can you do anything in your app?
Try changing the temperature or anything.
- YES – Congratulations! You’ve fixed your Wi-Fi issue!
- NO – Restart the app, and then try again.
- If that fails, update or reinstall your app, and then Continue to the next step.
26. Can you do anything in your app now?
Try changing the temperature or anything.
- YES – Congratulations! You’ve fixed your Wi-Fi issue!
- NO – Contact Support at 1-855-733-5465 to find a pro-installer in your area.
How do I wire my RTH6500WF Smart Series Programmable Thermostat?
The thermostat uses 1 wire to control each of your HVAC system’s primary functions, such as heating, cooling, fan, etc. See the diagram below for what each wire controls on your system:
Y – Compressor Stage 1 (Cooling)
Y2 – Compressor Stage 2 (Cooling)
G – Fan
C – Common
L/A – A – Input for heat pump fault
W -O/B – Heat Stage 1 (Heating) / Reversing valve for Heat Pump systems
W2 -Aux/E – Heat Stage 2 (Heating) / Backup Heat
R – 24vac (Heating transformer)
Rc – 24vac (Cooling transformer)
at its most basic, your thermostat connects terminals via internal relays to send power to these different wires to control your HVAC system. For instance, for a gas furnace to turn on the heat, the thermostat internally connects the R terminal (power) to the W terminal (heat stage 1) to turn on the furnace.
Look at the list of wiring configurations by system type below. Your wiring will match one of the options below. If you do not see your wiring listed, we recommend using our on-line compatibility checker.
1H/1C Conventional Gas/Oil/Electric Forced Air System (1 transformer):
R wire – Power [R+Rc joined by jumper]
Y wire – Compressor contactor
C wire – 24VAC common
W wire – Heat relay
G wire – Fan relay
1H/1C Conventional Gas/Oil/Electric Forced Air System (2 transformers):
R wire – Power (heating transformer)
Rc wire – Power (cooling transformer)
Y wire – Compressor contactor
C wire – 24 VAC common from cooling transformer
W wire – Heat relay
G wire – Fan relay
2H/2C Conventional Gas/Oil/Electric Forced Air System (1 transformer):
R wire – Power [R+Rc joined by jumper]
Y wire – Compressor contactor (stage 1)
C wire – 24VAC common W Heat relay (stage 1)
G wire – Fan relay
W2 wire – Heat relay (stage 2)
Y2 wire – Compressor contactor (stage 2)
Hot Water / Steam / or Radiant in-floor Heat:
R wire – Power [R+Rc joined by jumper]
W wire – Heat Relay
C wire – 24VAC common
Heat-only System with Fan:
R wire – Power [R+Rc joined by jumper]
C wire – 24VAC common
W wire – Heat relay
G wire – Fan relay
Cool-only System with Fan:
R wire – Power [R+Rc joined by jumper]
Y wire – Compressor contactor
C wire – 24VAC common
G wire – Fan relay
1H/1C Heat Pump System:
R wire – Power [R+Rc joined by jumper]
Y wire – Compressor contactor
C wire – 24VAC common
O/B wire – Changeover valve
G wire – Fan relay
2H/1C Heat Pump System: NOTE: If dual fuel, TH6320WF (Trade FocusPRO WiFi 6000 only)
R wire – Power [R+Rc joined by jumper]
Y wire – Compressor contactor
C wire – 24VAC common
O/B wire – Changeover valve
G wire – Fan relay Aux Auxiliary heat*
E wire – Emergency heat relay
L wire – Heat pump fault input
2H/2C Heat Pump System:
R wire – Power [R+Rc joined by jumper]
Y wire – Compressor contactor (stage 1)
C wire – 24VAC common
O/B wire – Changeover valve
G wire – Fan relay
Y2 wire – Compressor contactor (stage 2)
L wire – Heat pump fault input
3H/2C Heat Pump System: NOTE: If dual fuel, TH6320WF (Trade FocusPRO WiFi 6000 only)
R wire – Power [R+Rc joined by jumper]
Y wire – Compressor contactor (stage 1)
C wire – 24VAC common
O/B wire – Changeover valve
G wire – Fan relay
Aux wire – Auxiliary heat*
E wire – Emergency heat relay*
Y2 wire – Compressor contactor (stage 2)
L wire – Heat pump fault input
How do I connect / reconnect my TH6320WF / RTH6580WF thermostat to the Wi-Fi network?
If you’re getting a Connection Failure message on your FocusPRO (TH6320WF, RTH6580WF, or TH6210WF) thermostat, it probably lost internet connection. Please follow the steps below to remedy the issue.
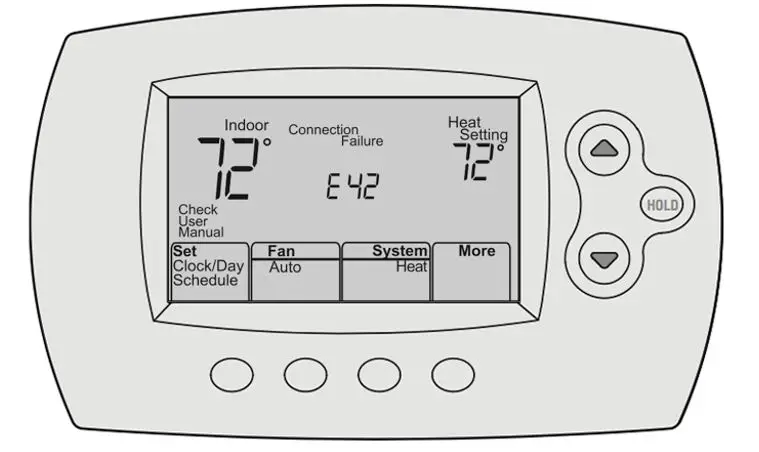
*If your thermostat has lost wi-fi connection, you will be required to be on-location with the thermostat to reconnect it manually. For some users, a reconnection may be possible by remotely re-starting your wi-fi router. Check with your internet service provider for possible options.*
To reconnect your device to Wi-Fi:
- Make sure your router is online.
- Go to your thermostat on the wall and remove it from its base.
- Wait for 1 minute.
- Add the thermostat back to its base on the wall.
If that doesn’t work, try the steps below:
Resetting Thermostat’s Wi-Fi Settings
- Press and hold the Fan Button and Up Arrow for about 5 seconds to change the screen.
- Press Back Button or Next Button until 39 appears on the left.
- Press the Up or Down Arrows to change the number on the right to 0.
- Press Done Button.
Reconnecting Thermostat to Wi-Fi
- Make sure Wi-Fi Setup is displayed at the top of the screen.
- On a mobile device, view the list of available Wi-Fi networks.
- Connect to NewThermsotat_[series of numbers/letters]. *This is a wifi connection between your phone and your thermostat – it is normal to receive a message that states “this connection has no access to the internet” – please dismiss the alert and continue. Do not allow the phone to change to another wi-fi connection until you have completed step 10.* If you do not see the “NewThermsotat_[series of numbers/letters]” network, remove the thermostat faceplate from the wall for 30 seconds and then reattach it and reattempt.
- Wait for your browser to automatically open a setup screen. If this doesn’t happen, go open a new browser and go to the web address 192.168.1.1.
- Find the name of your home network and press Red Button below it.
- Enter your home network’s password and press Connect.
If you’re still having issues, please call Honeywell Customer Care at 1-800-633-3991.
How do I connect / reconnect my TH6320WF / RTH6580WF thermostat to the Wi-Fi network?
If you’re getting a Connection Failure message on your FocusPRO (TH6320WF, RTH6580WF, or TH6210WF) thermostat, it probably lost internet connection. Please follow the steps below to remedy the issue.
*If your thermostat has lost wi-fi connection, you will be required to be on-location with the thermostat to reconnect it manually. For some users, a reconnection may be possible by remotely re-starting your wi-fi router. Check with your internet service provider for possible options.*
To reconnect your device to Wi-Fi:
- Make sure your router is online.
- Go to your thermostat on the wall and remove it from its base.
- Wait for 1 minute.
- Add the thermostat back to its base on the wall.
If that doesn’t work, try the steps below:
Resetting Thermostat’s Wi-Fi Settings
- Press and hold the Fan Button and Up Arrow for about 5 seconds to change the screen.
- Press Back Button or Next Button until 39 appears on the left.
- Press the Up or Down Arrows to change the number on the right to 0.
- Press Done Button.
Reconnecting Thermostat to Wi-Fi
- Make sure Wi-Fi Setup is displayed at the top of the screen.
- On a mobile device, view the list of available Wi-Fi networks.
- Connect to NewThermsotat_[series of numbers/letters]. *This is a wifi connection between your phone and your thermostat – it is normal to receive a message that states “this connection has no access to the internet” – please dismiss the alert and continue. Do not allow the phone to change to another wi-fi connection until you have completed step 10.* If you do not see the “NewThermsotat_[series of numbers/letters]” network, remove the thermostat faceplate from the wall for 30 seconds and then reattach it and reattempt.
- Wait for your browser to automatically open a setup screen. If this doesn’t happen, go open a new browser and go to the web address 192.168.1.1.
- Find the name of your home network and press Red Button below it.
- Enter your home network’s password and press Connect.
If you’re still having issues, please call Honeywell Customer Care at 1-800-633-3991.
What extra features do I get by connecting to WiFi and registering my RTH6500WF Smart Series Programmable Thermostat?
When connected to the My Total Connect Comfort web portal and mobile app, the FocusPRO WiFi 6000 gains access to a variety of features and functionality. In addition to the thermostat controls, internal settings are available, as well as settings unique to the thermostat “location” and mobile app itself.
To use your thermostat remotely, registration must first be completed at www.mytotalconnectcomfort.com. Once registered, the My Total Connect Comfort mobile app can be used to control the thermostat, as well as the web portal. You can also download the Honeywell Home app and import this device, so that all of your home devices are in one easy app. (Registration can only be completed at the web portal currently)
*Integrations with 3rd party applications / devices (such as Google Home, Samsung Smart Things, etc.) can only be completed once the thermostat is registered at My Total Connect Comfort.
Smart features include:
- Remote control of your thermostat from your mobile device
- Managing users and schedules on the go
- Voice control through Amazon Alexa, Google Assistant, and more
- Rewards from your utility
Account Settings:
Edit My Profile – Modify your name, address, and email or delete your account
Change my password – enter a new permanent password
+Grant Customer Support Access – allows Customer Care to access your account for troubleshooting / maintenance
+Add Location – create a new location to register devices
+Grant User Access – add / remove other account holders access to your locations / devices
Location Settings:
Modify / delete the location name, type, and address. Add / remove notification contacts. Add/remove devices.
Thermostat Settings:
High temperature Notification – 32°-104° : Notify Me (Immediately, 15 min, 30 min, 45 min, 1-6 hrs)
Low temperature notification – 32°-104° : Notify Me (Immediately, 15 min, 30 min, 45 min, 1-6 hrs)
High humidity notification – 5%-95% : Notify Me (Immediately, 15 min, 30 min, 45 min, 1-6 hrs)
Low humidity notification – 5%-95% : Notify Me (Immediately, 15 min, 30 min, 45 min, 1-6 hrs)
Wi-Fi connection lost notification – Notify Me (1-6 hrs offline)
Failed to make changes notification – Notify Me (Immediately, 15 min, 30 min, 45 min, 1-6 hrs)
Repeat Notification reminder – Notify Me (1-6 hrs offline)
All Clear notification – Notify Me Immediately
Heat/Cool system notifications – Notify Me Once
Thermostat Functions:
Setpoint: Adjust the desired temperature of your home
Mode: Change the system mode (Settings include: Heat, Cool, Off, Auto, and Em Heat [Emergency Heat] depending on the configuration of your thermostat. Auto mode is only available if your thermostat is configured to use Auto-Changeover. Emergency Heat is only available if your thermostat is configured for a heat pump with emergency heat.
Fan: Change the Fan setting. (Settings include On, Circulate and Auto). On turns the fan on permanently, Auto only turns on the fan when Heating or Cooling is being provided. Circulate runs the fan 33% of every hour. Schedule: View / Modify the current schedule or enable Geofencing
Outdoor Weather / Forecast: Display current outdoor weather (based on zip code related to accuweather) and display 5-day forecast
Specifications
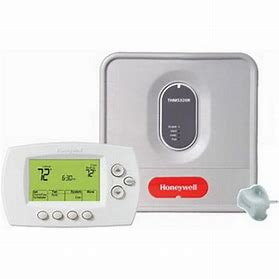
Focuspro 6000 Programmable Wireless Thermostat
| Thermostat Type | Programmable, Low Voltage, Digital, Communicating, RedLINK |
| WiFi Specifications | Internet Gateway THM6000R7001/U Provides WiFi Capabilities |
| Program Modes | 5-1-1 Programmable, 5-2 Programmable |
| Utility Rewards | No |
| Power Supply | Battery Powered |
| Warranty | 5 Years |
| Energy Star Certified | No |
| Stages | Up to 3 Heat / 2 Cool Heat Pump, Up to 2 Heat / 2 Cool Conventional |


